This manual will explain the method to move commits to any branch in Git.
How to Move Commit to Another Branch in Git?
To move commits to another branch in Git, first, check the reference log history of the Git repository using the “$ git log –oneline” command. Then, check out a new branch. Next, update the last commit file and track it to the Git repository using the “$ git add .” command. Lastly, execute the “$ git reset –keep HEAD” command and switch the branch.
Let’s move ahead to implement the above-stated scenario!
Step 1: Move to Directory
Navigate to the Git local repository using the “cd” command:

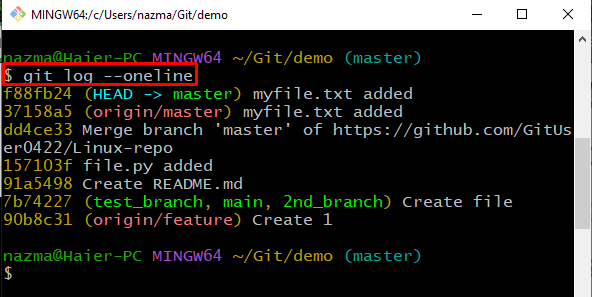
Step 2: Check Log History
Next, list the log history of the Git repository and check the commit or multiple commits which need to be moved:
Here, all commits of the current branch are listed. We will move the first commit to a new branch:
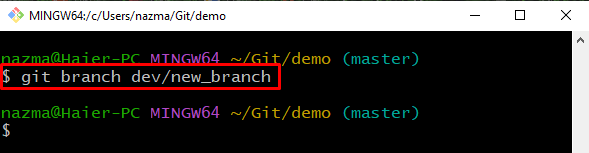
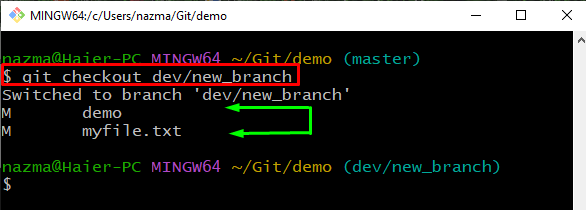
Step 3: Create Branch
Run the “git checkout” to create a new branch in the Git local repository:
It can be seen that we have created a new branch named “dev/new_branch” and all commits of the current branch will be added to the new branch:
Step 4: Update File
Now, open the file which was recently committed to Git repository:

Enter some text to the file and press “CTRL + S” to save it:

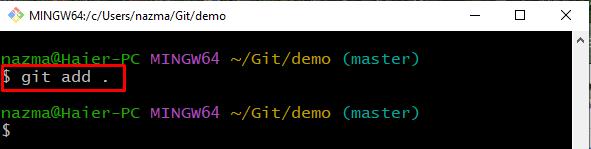
Step 5: Track File
Next, execute the “git add .” command to track all modifications to the Git repository:
Step 6: Check Status
After that, check the status of the Git local directory utilizing the provided command:
According to the below output, our file is updated successfully and ready to commit:

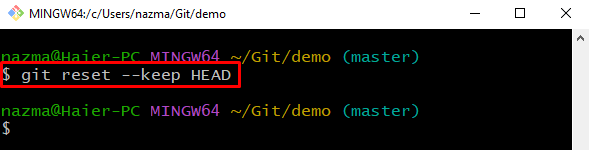
Step 7: Revert Current Branch to Commit
Now, execute the “git reset” command with the “–keep” option and specify the position as “HEAD”:
This command will move the current branch back to commit which you want to move:
Step 8: Switch to New Branch
Execute the “git checkout” command with the branch name to switch the current branch to another branch:
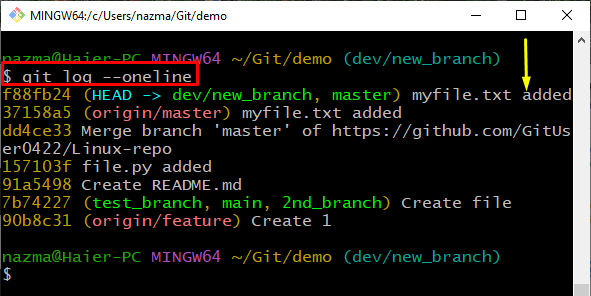
Step 9: Check Log History
Lastly, check the log history to verify the commit transfer operation:
The below image indicates that our “master” branch commit is successfully moved to the “dev/new_branch” branch:
We have provided the method of moving the commit from one branch to another branch in Git.
Conclusion
To move the commit to another branch in Git, first, navigate to the Git local repository and check the log history. Next, create a new branch with the “$ git checkout <branch>” command, then open and update the file which was most recently committed. After that, execute the “$ git status .” command and move back to the previous commit using “$ git reset –keep HEAD”. Lastly, move to the newly created branch. In this manual, we have demonstrated the method to move commits to another branch in Git.