
Autofs is a program that is used to mount local filesystems and network shares automatically on-demand. What that means is when you navigate to the autofs configured mount point or directory, the required filesystem or network share is automatically mounted. So, as long as you don’t need to access the local filesystems or network shares, autofs will not mount them.
This article will show you how to install autofs on Ubuntu/Debian and CentOS/RHEL 8. I will also show you how to mount local filesystems, Samba/Windows shares, and NFS shares automatically on-demand with autofs. I will show you how to troubleshoot autofs mount issues as well. So, let’s get started.
Table of Contents:
- Installing autofs on Ubuntu/Debian
- Installing autofs on CentOS/RHEL 8
- Mounting Local Filesystems with autofs
- Mounting Samba/Windows Shares with autofs
- Mounting NFS Shares with autofs
- Troubleshooting autofs Mount Issues
- Conclusion
- References
Installing autofs on Ubuntu/Debian:
autofs is available in the official package repository of Ubuntu/Debian. So, you can easily install autofs on Ubuntu/Debian from the official package repository of Ubuntu/Debian.
First, update the APT package repository cache with the following command:

To install autofs, run the following command:

To confirm the installation, press Y and then press <Enter>.

autofs should be installed.

Installing autofs on CentOS/RHEL 8:
On CentOS/RHEL 8, you can install autofs easily from the official package repository.
To install autofs, run the following command:

To confirm the installation, press Y and then press <Enter>.

You may have to accept the GPG key of the official package repository of CentOS/RHEL 8.
To do that, press Y and then press <Enter>.

autofs should be installed.

Mounting Local Filesystems with autofs:
In this section, I will show you how to use autofs to mount local filesystems automatically on demand.
For the demonstration, I have created 3 partitions /dev/sdb1, /dev/sdb2, and /dev/sdb3 and formatted them in the EXT4 filesystem format.
The /dev/sdb1 filesystem has the UUID 8c3cc143-9aa7-4be0-8a67-ba2cc9758f2c.
The /dev/sdb2 filesystem has the UUID 3a0cc358-dc39-401e-91aa-c24712490257.
The /dev/sdb3 filesystem has the UUID dccb348c-7f25-4b1e-8f1b-d254aeaec78b.
Let’s see how to mount them automatically on-demand using autofs.

The main autofs configuration file is /etc/auto.master. To automatically mount filesystems with autofs, you have to add an entry on the /etc/auto.master file.
Open the /etc/auto.master file with the nano text editor as follows:

Add the marked line at the end of the auto.master file. This line tells autofs to look for filesystems to automount in the /etc/auto.sdb file.
Once you’re done, press <Ctrl> + X followed by Y and <Enter> to save the auto.master file.

Now, create a new file /etc/auto.sdb as follows:

Type in the following lines in the /etc/auto.sdb file.
/data/fs2 -fstype=auto UUID=3a0cc358-dc39-401e-91aa-c24712490257
/data/fs3 -fstype=ext4,noatime UUID=dccb348c-7f25-4b1e-8f1b-d254aeaec78b
Once you’re done, press <Ctrl> + X followed by Y and <Enter> to save the /etc/auto.sdb file.
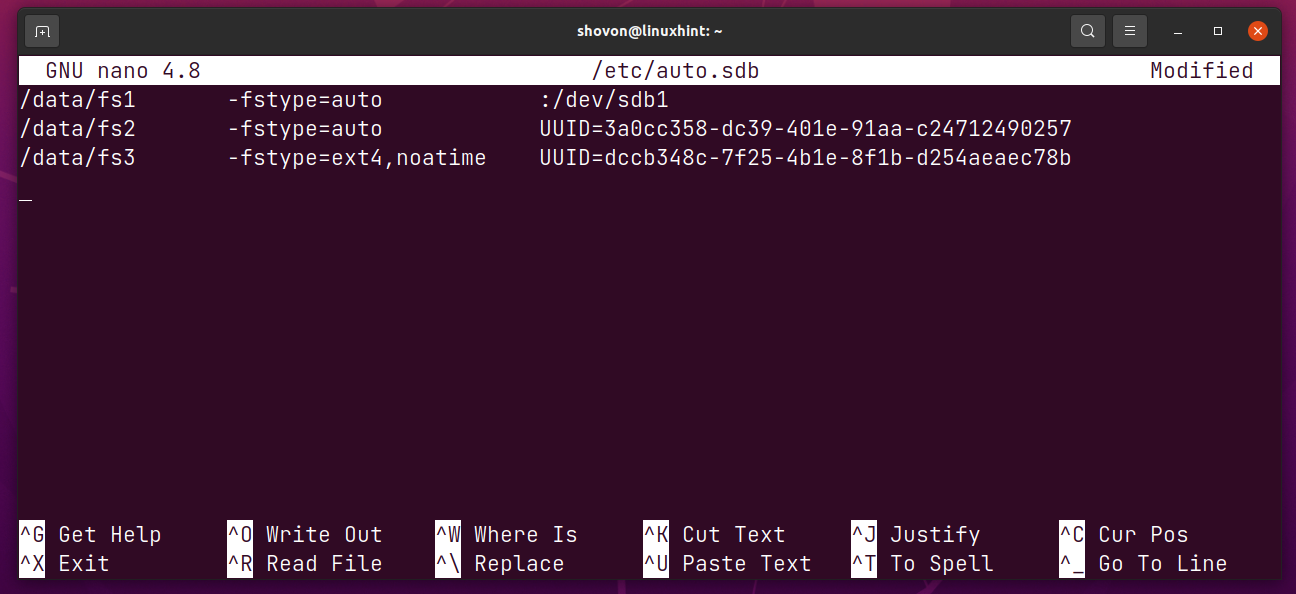
The following line mounts the /dev/sdb1 partition in the directory /data/fs1.
![]()
The following line mounts the /dev/sdb2 partition by its UUID 3a0cc358-dc39-401e-91aa-c24712490257 in the directory /data/fs2.
![]()
The following line mounts the /dev/sdb3 partition by its UUID dccb348c-7f25-4b1e-8f1b-d254aeaec78b in the directory /data/fs2. The filesystem type (ext4 in this case) is explicitly defined and also the noatime mount option is used.
![]()
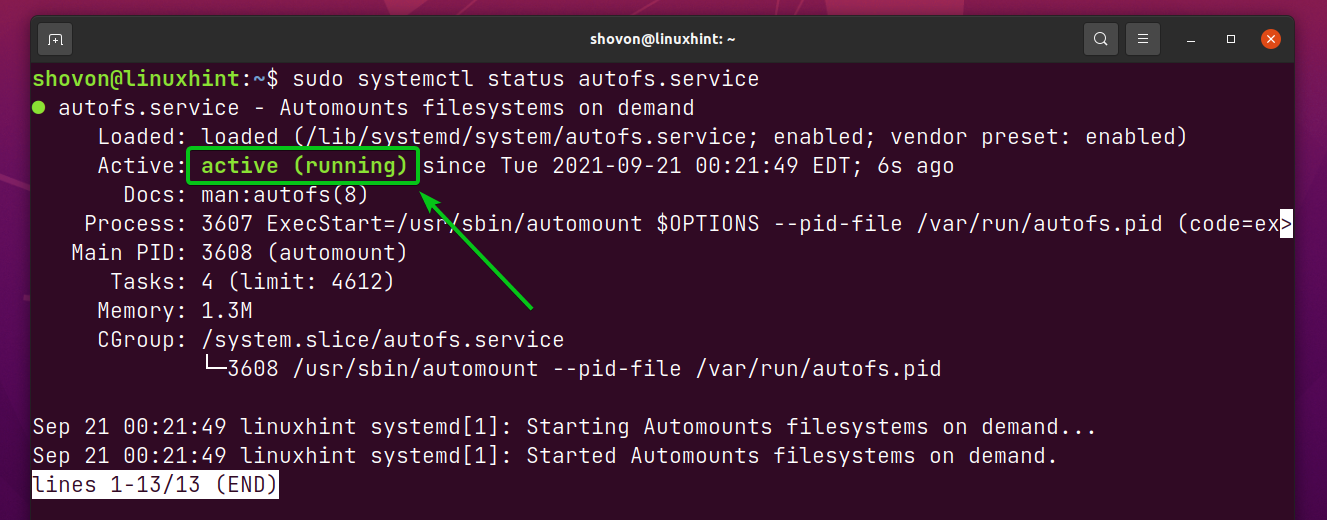
For the autofs changes to take effect, restart the autofs service with the following command:

The autofs service should be running after it’s restarted, as you can see in the screenshot below.
The/data directory and the subdirectories fs1/, fs2/, and fs3/ should be automatically created, as you can see in the screenshot below.
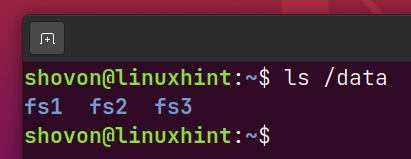
Also notice that none of the configured partitions (/dev/sdb1, /dev/sdb2, and /dev/sdb3) are mounted yet.

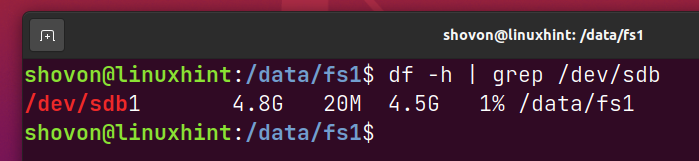
Navigate to the /data/fs1 directory as follows:

As you can see, the partition /dev/sdb1 is automatically mounted on the directory /data/fs1 as soon as you’ve navigated to the directory /data/fs1.
In the same way, if you navigate to the /data/fs2 directory, the /dev/sdb2 partition should be mounted on the /data/fs2 directory automatically, as you can see in the screenshot below.
$ df -h | grep /dev/sdb

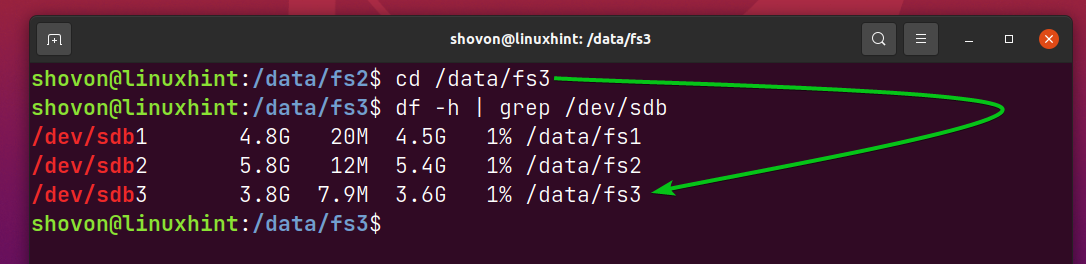
In the same way, if you navigate to the /data/fs3 directory, the /dev/sdb3 partition should be mounted on the /data/fs3 directory automatically, as you can see in the screenshot below.
$ df -h | grep /dev/sdb
Mounting Samba/Windows Shares with autofs:
You can also mount Samba or Windows shares automatically on-demand with autofs.
First, open the /etc/auto.master file with the nano text editor as follows:

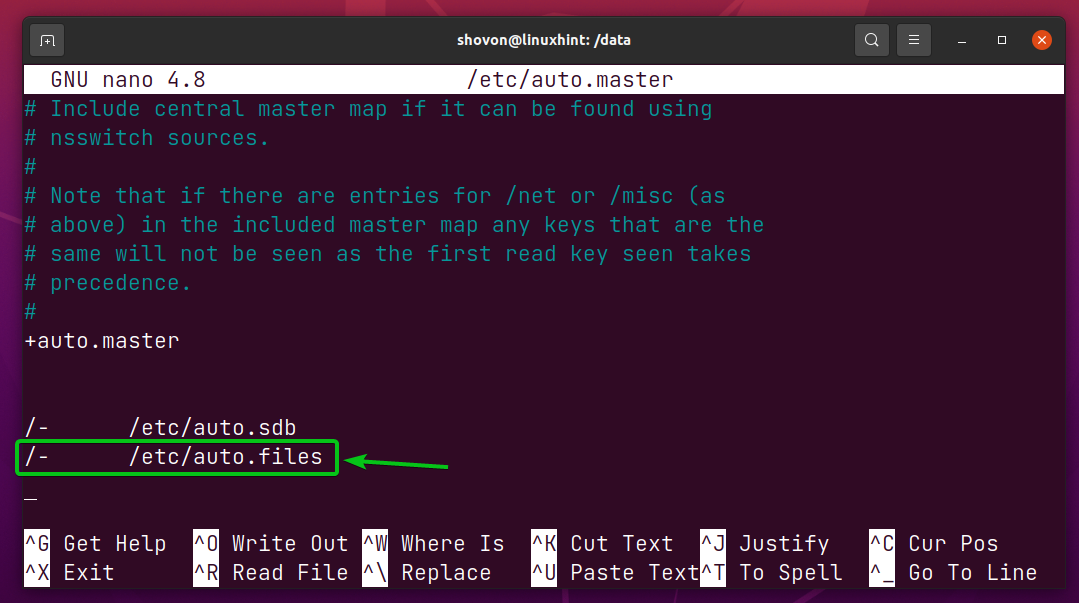
Type in the line as marked in the screenshot below. This line tells autofs to look for filesystems to automount in the configuration file /etc/auto.files.
Once you’re done, press <Ctrl> + X followed by Y and <Enter> to save the /etc/auto.master file.
Now, create a new file /etc/auto.files as follows:

Type in the following line in the /etc/auto.files file.
Once you’re done, press <Ctrl> + X followed by Y and <Enter> to save the /etc/auto.files file.
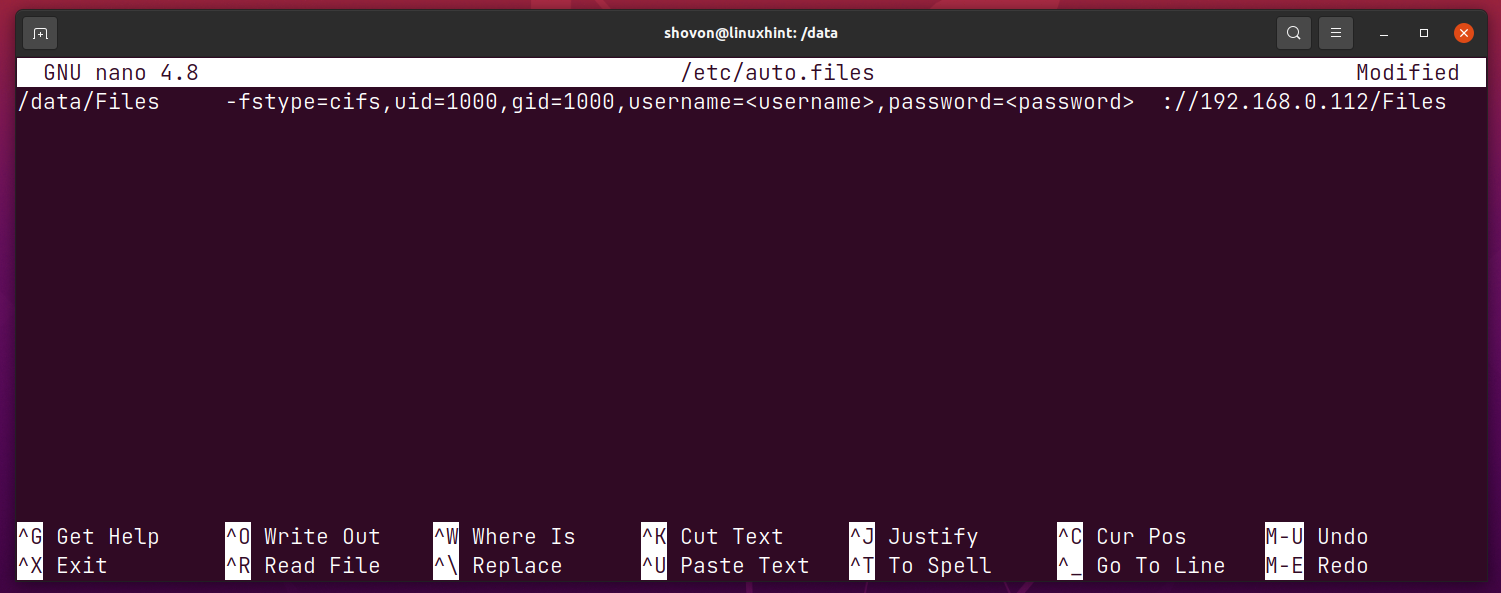
Here, autofs is instructed to mount the Samba or Windows share //192.168.0.112/Files in the directory /data/Files.

The login username of the Samba/Windows share is <username> and password is <password>. Make sure to replace them with the username and password of your Samba/Windows share.

The uid and gid mount options are used to set your login user as the owner and the primary group of the login user as the/data/Files directory group so that you can write to the Samba/Windows share. The uid and gid of the first non-root user created during the installation of most of the Linux distributions are 1000. So, you may not have to change this.

If you do want to allow another user (let’s say, www-data) access to the Samba/Windows share, you can find the uid and gid of that user as follows:

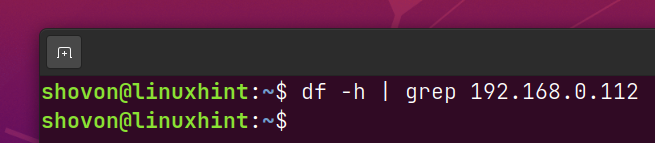
Once you’re done, restart the autofs service as follows:

As you can see, the Samba/Windows share //192.168.0.112/Files is not mounted yet.
But a new directory /data/Files should be created automatically, as you can see in the screenshot below.
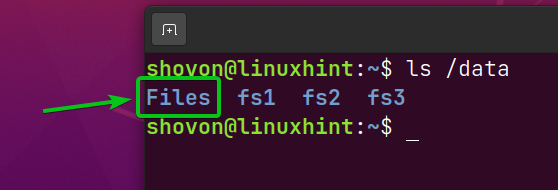
Navigate to the /data/Files directory as follows:

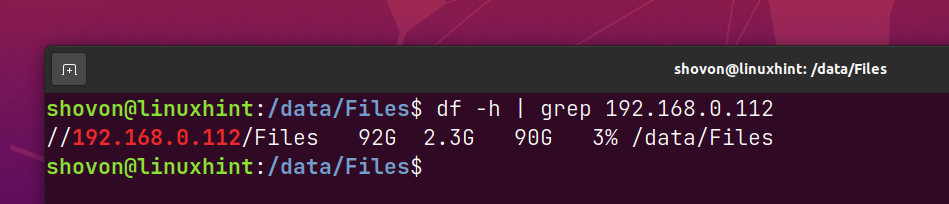
As you can see, the Samba/Windows share //192.168.0.112/Files is mounted in the /data/Files directory automatically.
Mounting NFS Shares with autofs:
You can mount NFS shares automatically on-demand with autofs as well.
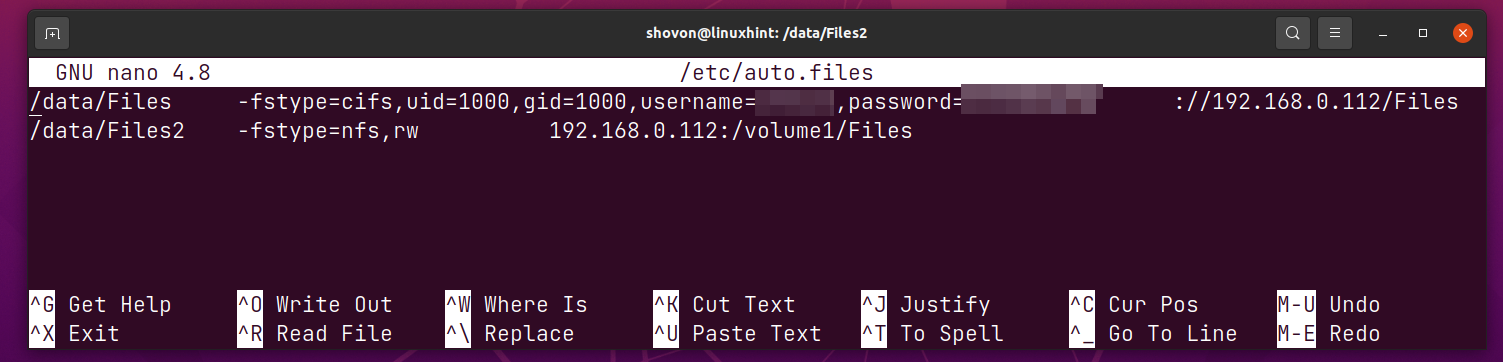
Open the /etc/auto.files with the nano text editor as follows:

To mount the NFS share 192.168.0.112:/volume1/Files in the directory /data/Files2, type in the following line at the end of the /etc/auto.files file.
Once you’re done, press <Ctrl> + X followed by Y and <Enter> to save the /etc/auto.files file.
For the changes to take effect, restart the autofs service with the following command:

As you can see, the NFS share 192.168.0.112:/volume1/Files is not mounted yet.

But a new directory /data/Files2 should be created automatically, as you can see in the screenshot below.
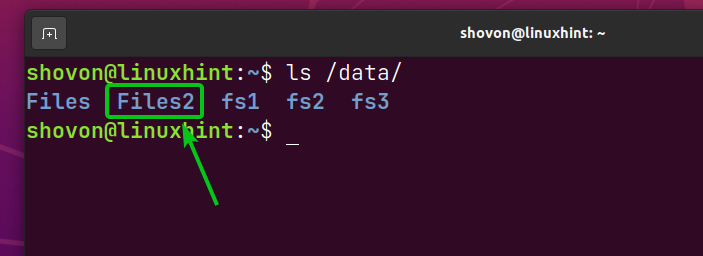
Navigate to the /data/Files2 directory as follows:

As you can see, the NFS share 192.168.0.112:/volume1/Files is mounted in the /data/Files2 directory automatically.

Troubleshooting autofs Mount Issues:
At times, when you change autofs configuration files, restarting the autofs service may not apply the changes. You may have to reboot your computer for the changes to take effect.

At times, you may have mount issues with autofs. Some filesystems may not mount as expected.
To troubleshoot mount issues with autofs, stop the autofs service with the following command:

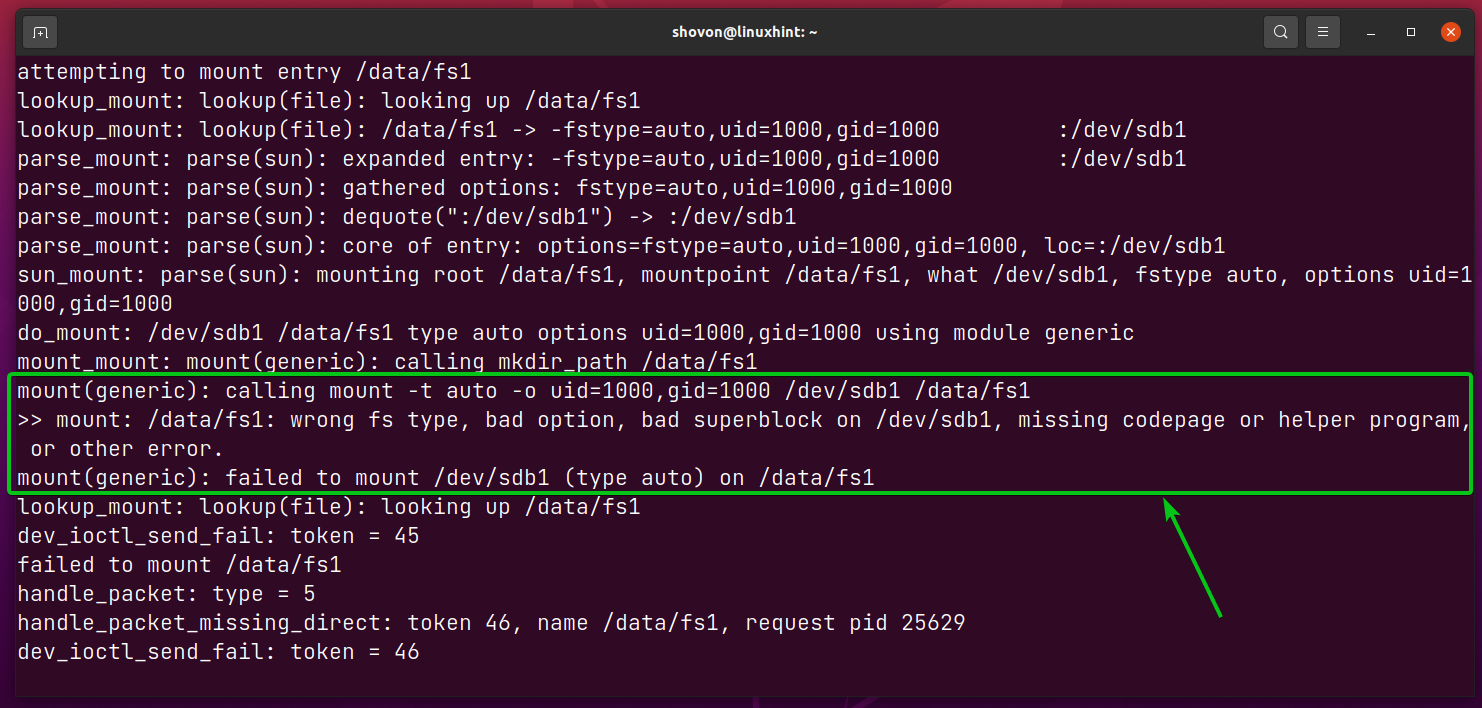
Run the automount program with the -f and –debug command-line options as follows:

Now, try to navigate to the directory where autofs fail to mount the filesystem/network share.
You should be able to find why autofs fails to mount the filesystem/network share in the output of the automount command.
Conclusion:
This article shows you how to install autofs on Ubuntu/Debian and CentOS/RHEL 8. I have also shown you how to automatically mount local filesystems, samba/windows shares, and NFS shares on-demand with autofs. I have shown you how to troubleshoot autofs mount issues as well.
References:
[1] AutoFs – Debian Wiki
[2] Autofs – Ubuntu Community Help Wiki
[3] Autofs – ArchWiki
[4] 8.3. autofs Red Hat Enterprise Linux 7 | Red Hat Customer Portal