Installing FontForge in Linux
To install FontForge in Ubuntu, run the command below:
FontForge standalone AppImage executable and packages for other Linux distributions are available here.
There are two methods that you can use to merge any two fonts using FontForge. You can merge fonts either using FontForge GUI or you can use a custom script that can be run in a terminal. Both these methods are explained below.
Some Tips for Selecting Fonts
To ensure maximum compatibility and readability while merging two fonts, it is important that you select two fonts with similar design style. You should also avoid merging serif and sans-serif fonts unless necessary. Make sure that two fonts have the same weights. If you are using paid proprietary fonts, double check the license. Some proprietary fonts are restrictive and may not allow commercial usage of merged fonts. Open source fonts are quite permissive, but even then, make sure to check their licenses to avoid issues.
Merge Fonts Using a FontForge Script
Create a new file named “mergefonts.sh” and paste the following code in it:
Open($1)
SelectAll()
ScaleToEm(1024)
Generate("1.ttf")
Close()
Open($2)
SelectAll()
ScaleToEm(1024)
Generate("2.ttf")
Close()
Open("1.ttf")
MergeFonts("2.ttf")
Generate("my_custom_font.ttf")
Close()
The code is pretty straight forward. The “$1” argument is for your primary font while the “$2” argument is for your secondary font. Fonts are first scaled to a uniform size and then merged to generate a new font. If you do not scale them to a common size, you may get uneven text rendering from the final merged font.
To check the size of a font in “em” units, run the command below (replace “font.ttf” with name of your own font file):
You will get some output like this:
But its name indicates it should be mapped to U+FB01.
2048
Change “ScaleToEm(1024)” lines in the script above with your desired value. You can also edit the script and put an extra “$3” argument to specify the size value from the command line.
Now to merge the two fonts, specify fonts as arguments while running “mergefonts.sh” script. The order of these arguments is important as the font specified as the second argument ($2) will be merged into the font specified as first argument ($1). The first argument should be of your main font that you intend to use in your project. Put the “mergefonts.sh” script and two fonts in a folder, launch a new terminal window from the folder and run the following command to merge the fonts:
After running the script, you will find the new merged font as “my_custom_font.ttf” in the working directory. You may see some warnings and errors in the terminal after running the command above. These errors won’t stop the merging process of the fonts. If they are simple warnings, you can ignore them. However, if there are conflicts and errors during the merging process, you may need to review them and fix them individually by manually modifying the glyphs in FontForge GUI app. It totally depends on the kind of fonts you choose for merging and you may not get any errors at all.
Note that the very first line in the script is the location of the FontForge binary as shebang. This allows you to directly run the script in the terminal without having to manually specify the FontForge command in the terminal. To check the location of FontForge binary in your system, run the command below:
Alternatively, you can run any FontForge script using the “-script” argument.
GUI Method
Launch FontForge app from application launcher and select your primary font from the file picker. Click on “Element” > “Font Info…” menu on top.
Go to the “General” tab and scale the font as per your requirement. The two fonts should be scaled to the same size to avoid issues (as explained earlier).
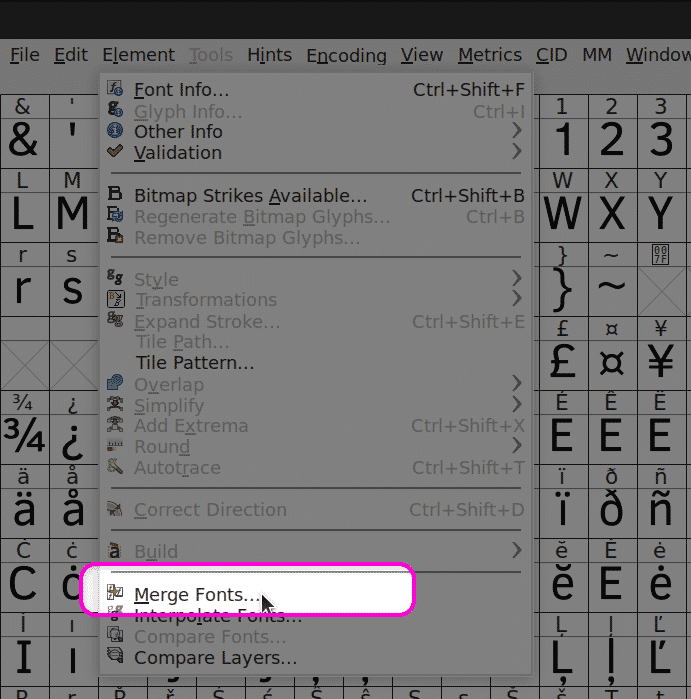
Next, click on “Element” > “Merge Fonts…” dropdown menu and pick your secondary font from the file picker. This font will be merged into the base font file that you opened first while launching the FontForge app. If you are presented with a dialog to choose kerning (spacing), select “No” to keep kerning from the base font file.
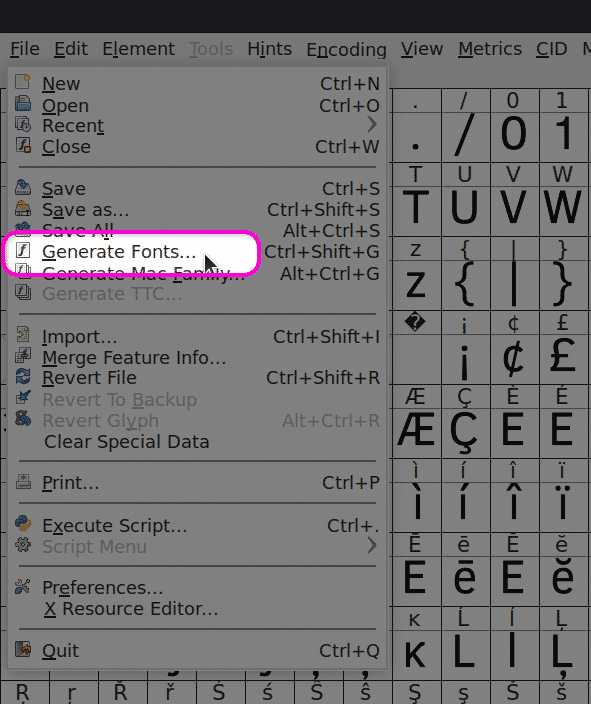
Finally, click on “File” > “Generate Fonts..” menu option to export your merged font.
Conclusion
FontForge is one of the most widely used, free, and open source font editing software. It includes hundreds of options to edit fonts and comes with a powerful scripting system. It is recommended that you manually review characters in the merged font after completing the merge process to ensure that the end result is according to your requirements.


