Git Merge Options
| Option | Purpose |
|---|---|
| –commit | It is used to commit the result after the merge, and it can be used to override –no-commit. |
| –edit, -e | It is used to open an editor before committing the merge to edit the auto-generated merge message. |
| –ff | It is used to resolve the merge quickly, which means the branch pointer is used to match the merged branch but doesn’t create any merge commit. |
| –no-ff | It is used to create a merge commit in all cases of the merge. |
| –ff-only | It is used to resolve the merge as a fast-forward if possible otherwise, refuse the merge and exit with a non-zero status. |
| –signoff | It is used to add the signed-off-by-line by the committer at the end of the commit message. |
| –no-signoff | It is used to don’t add the signed-off-by-line. |
| –stat | It is used to display a diffstat at the end of the merge. |
| -n, –no-stat | It is used to don’t display the diffstat at the end of the merge. |
| –overwrite-ignore | It is used to overwrite the ignored files from the merge result. This is the default behavior. |
| –help | It is used to get detailed information on all merge options. |
Prerequisites
1. Install GitHub Desktop
GitHub Desktop helps the git user to perform the git-related tasks graphically. You can easily download the latest installer of this application for Ubuntu from github.com. You have to install and configure this application after download for using it. You can also check the tutorial for installing GitHub Desktop on Ubuntu to know the installation process properly.
2. Create a GitHub account
You will require to create a GitHub account to check the commands used in this tutorial.
3. Create a local and remote repository
You have to use a local repository with multiple branches that are published in the remote server to check the commands used for merging two branches of the local repository.
Merge two branches of a local repository
Run the following command to check the branch list of the local repository named upload-file.
The following output shows that the repository contains three branches, and the main branch is active now.

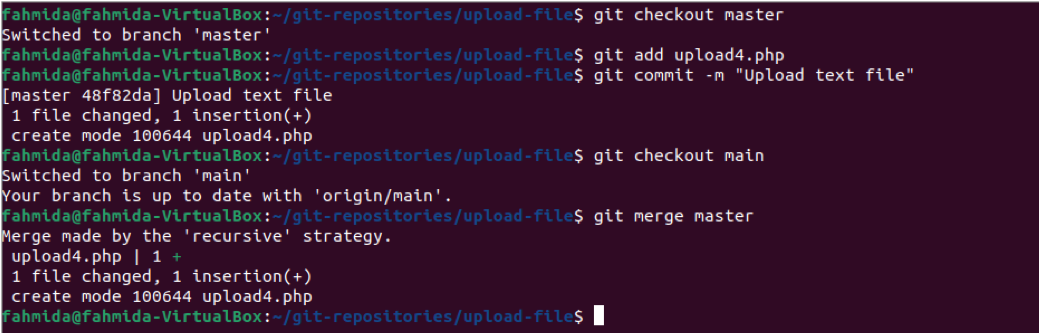
Run the following command to merge the content from one branch to another. The first checkout command will switch to the master branch. The add command will add the upload4.php file in the repository. The commit command will add the commit message. Next, the second checkout command will switch to the main branch. The merge command will combine the content of the master branch with the main branch.
$ git add upload4.php
$ git commit -m "Upload text file."
$ git checkout main
$ git merge master
The following output will appear after executing the above commands if the upload4.php file exists in the current location.
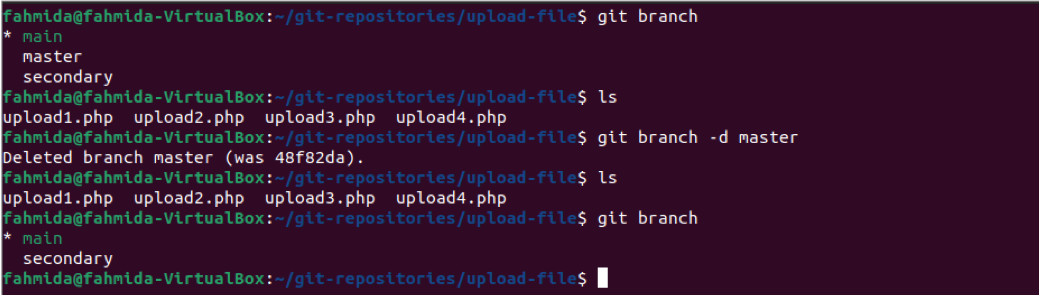
If the master branch doesn’t require to exist in the repository after merging the content to the main branch, then you can delete the master branch. The first branch command will display the existing branch list before delete. The branch command with the -d option will delete the master branch. The last branch command will display the existing branch list after delete.
$ ls
$ git branch -d master
$ ls
$ git branch
The following output will appear after deleting the branch.
Run the following commands to create a new branch named temp, add a file named upload5.php and commit the task with a commit message. The checkout command with the -b option will create the new branch. The add command will add the new file to the repository. The commit command will commit the task with the commit message.
$ git add upload5.php
$ git commit -m “Upload image file”
The following output will appear after executing the above commands if the upload5.php file exists in the current location.

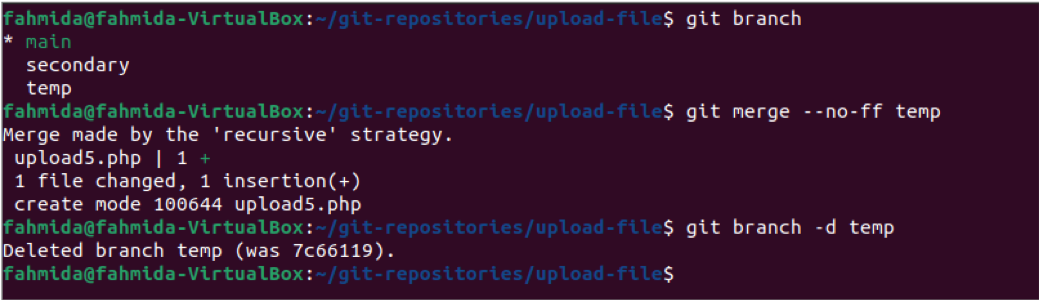
Run the following commands to check the current branch list, merge the temp branch with –no-off option, and delete the temp branch if it does not require anymore.
$ git merge --no-ff temp
$ git branch -d temp
The following output will appear after executing the above commands.
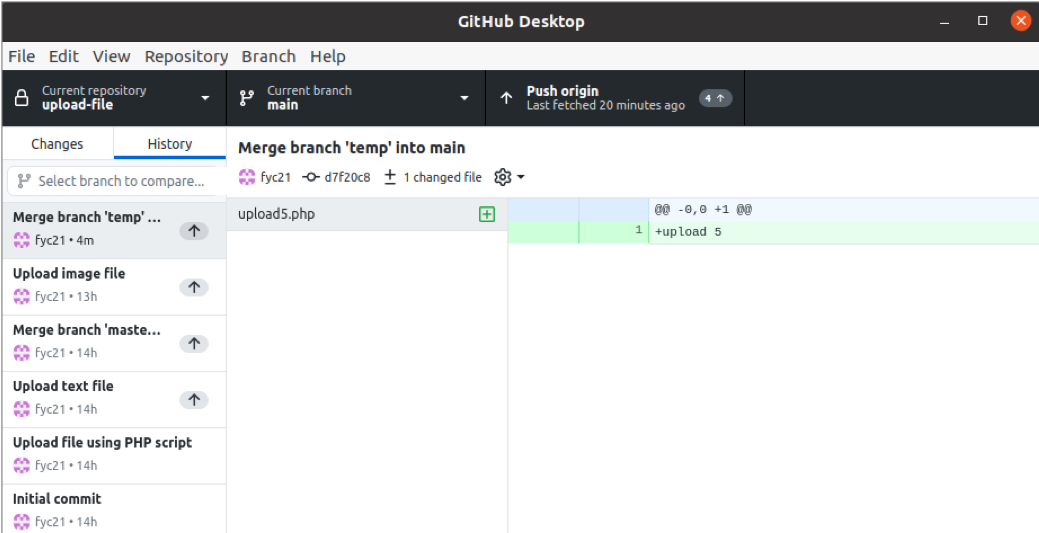
If the repository is opened from the GitHub Desktop, then the following information will appear. The history of the repository shows all the tasks that have been done by executing the git commands from the terminal in the previous part of this tutorial. Two commit messages and two merge operations are showing in the history list. All these tasks have been done in the local repository only. If you want to update the content of the remote repository with the new change of the local repository, click on the Pull origin button of the GitHub Desktop.
Conclusion
Merging branches is a useful feature of the branch when the git users want to combine the content of two branches. The way of merging two existing branches and merging branches by creating a new branch has shown in this tutorial. If you don’t like to type commands in the terminal, you can use the GitHub Desktop application to merge two branches of the repository.