
This write-up will elaborate on the method for managing the versioning number in Git.
How to Manage the Version Number in Git?
Managing version numbers in Git is a crucial aspect of software development. It helps developers to keep track of changes made to the codebase and identify which version of the software is currently deployed.
To manage the version number in Git, follow the provided steps:
- Go to the Git root directory.
- Make a new branch and switch to it.
- Launch the nano package to update.
- Track changes using the “git add” command and commit them.
- Navigate to the “main” branch and merge changes.
- Lastly, push all changes to the remote branch.
Step 1: Redirect to Git Local Directory
Initially, run the “cd” command along with the path of the Git local repository and navigate to it:
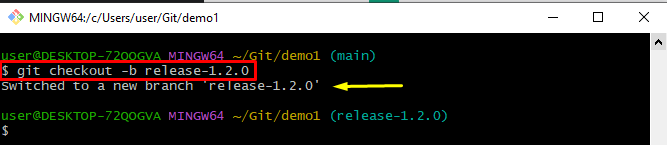
Step 2: Make a New Branch and Switch
Execute the provided command to create and switch simultaneously to a new branch:
The below-stated output indicates that the new branch has been created and switched successfully:
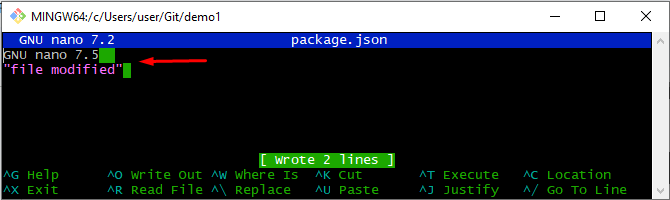
Step 3: Update Version Number
Run the “nano package.json” command to update the version number:

The resultant image shows that the package.json file has been opened in the nano editor. Here, we have updated the version number in the file to reflect the new version:
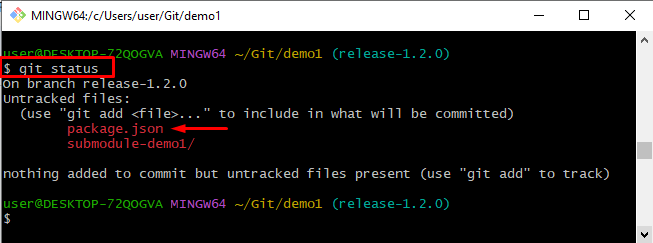
Step 4: View the Current Status
View the status of Git with the help of the “git status” command:
It can be observed that the untracked file exists in the Git working area:
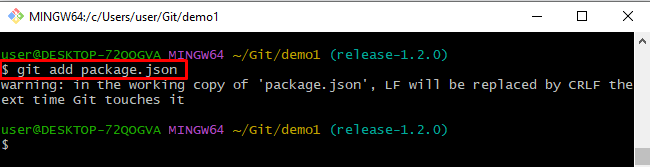
Step 5: Track package.json File
Track the file using the “git add” command along with the created file name:
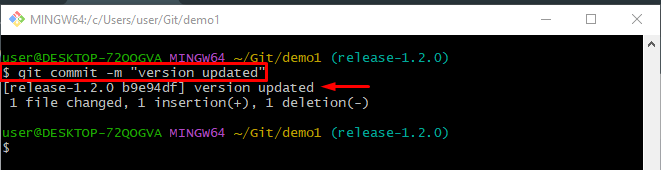
Step 6: Commit Changes
Next, commit all changes by running the “git commit” command and add a message with the help of the “-m” option:
The below output indicates that all the changes have been committed successfully:
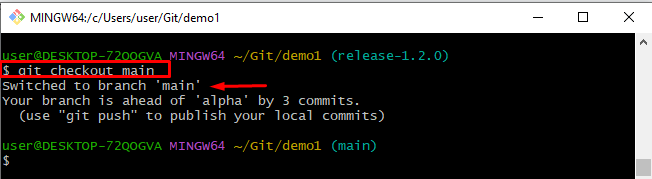
Step 7: Switch to the “main” Branch
Utilize the “git checkout” command and set the branch name for switching on it:
It can be noticed that the branch has been switched on the “main” successfully:
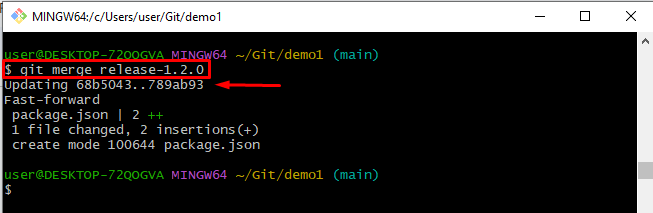
Step 8: Merge Branches
Now, merge the branch with the other by executing the “git merge” branch:
The below-stated output indicates that the specified branches have been merged with the current working branch:
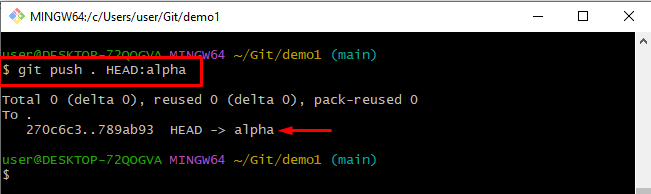
Step 9: Push Changes
To push changes to the remote branch, run the “git push” command and adjust the HEAD position to set stream on the remote branch:
All the changes have been pushed successfully:
That’s all about managing the version number in Git.
Conclusion
To manage the version number in Git, first, go to the Git root directory. Next, make a new branch and switch to it. After that, launch the nano package to update, track changes using the “git add” command, and commit them. Then, move to the “main” branch and merge changes. Lastly, push all changes to the remote branch. This guide stated about managing the version number in Git.