In this tutorial, the management of the certificates will be illustrated.
How to Manage Certificates(Certs) with Windows PowerShell?
PowerShell is an administrative tool that lets the user manage all the administration tasks including the management of certificates also.
Let’s see how PowerShell triumphs in managing the certificates.
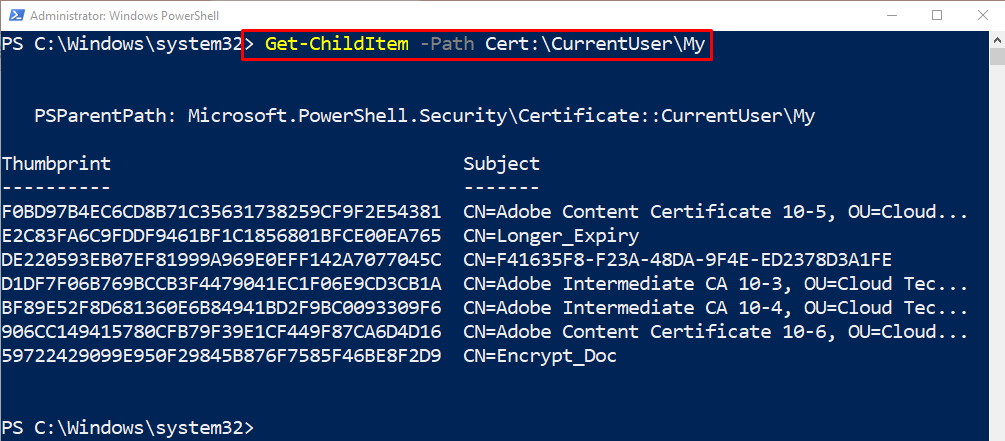
Example 1: List Down the Available Certificates on the Computer
In order to get the available certificates, specify the “Get-ChildItem” cmdlet along with the “-Path” parameter having the stated path assigned to it:
Example 2: Create a Certificate With Six Months of Expiry
Execute the provided command to create a certificate with six months of expiry:
According to the above-stated code:
- Specify the “New-SelfSignedCertificate” cmdlet and the “-Subject” parameter then assign it a subject name.
- Next, mention the “-CertStoreLocation” parameter and provide it with the location of the certificates.
- Lastly, add the “-NotAfter” parameter having the certificate expiry date assigned to it:
Example 3: Create a Self-Signed Certificate in PowerShell
To create a self-signed certificate, execute the provided command:
$Test_Cert
In the above-mentioned code:
- First, initialize a variable and assign it the stated code.
- In the assigned code, first, add the “New-SelfSignedCertificate” cmdlet along with the parameter “-Type” having the “DocumentEncryptionCert” value specified to it.
- Next, mention the subject and target location.
- Lastly, invoke the variable to see the created certificate:
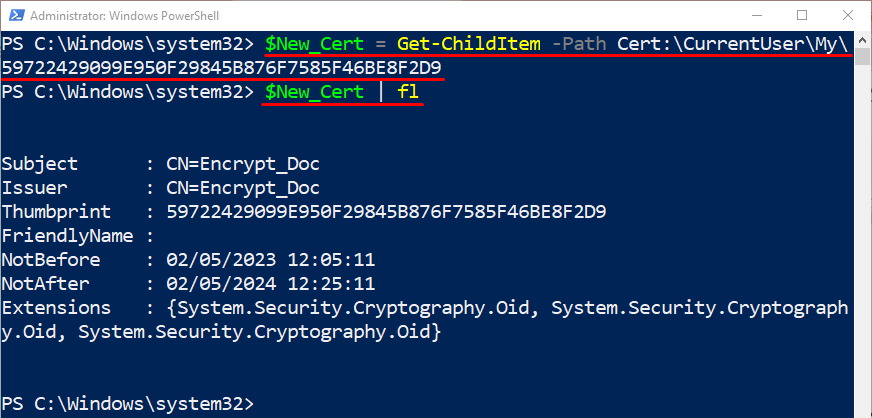
Example 4: Get the Details of a Certificate
Execute the given code to retrieve the detailed information of a certificate:
$New_Cert | fl
In the stated code above:
- First, initialize a variable and assign it the “Get-ChildItem” cmdlet.
- Next, type the “-Path” parameter and provide it with the individual certificate address.
- Finally, execute the stated variable alongside the pipeline “|” and “fl” (Format-List) cmdlet:
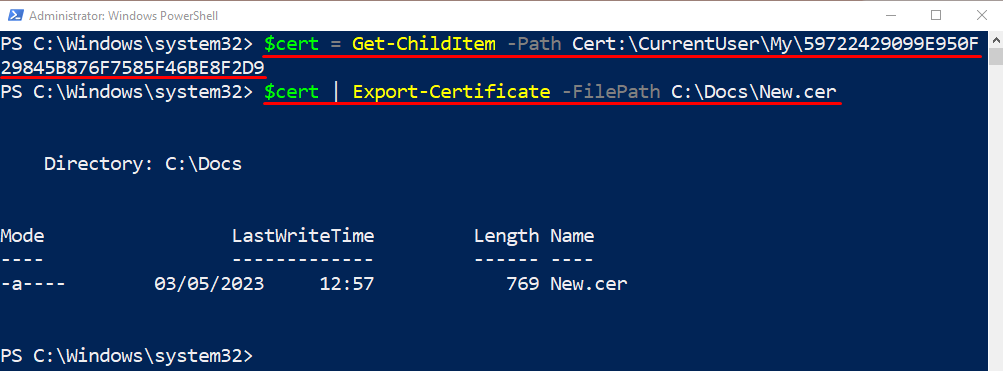
Example 5: Export a Single Certificate
To export a single certificate, simply run the provided command:
$cert | Export-Certificate -FilePath C:\Docs\New.cer
According to the above-stated code:
- Specify the certificate, assigned variable, and the “|” pipeline.
- Then, mention the “Export-Certificate” cmdlet.
- Lastly, type the “-FilePath” parameter and provide it with the target file name and path:
That’s all! We have explained the management of Windows PowerShell certificates.
Conclusion
PowerShell has a certificate provider or manager that helps to manage certificates. Its management includes adding, deleting, exporting, or altering the certificates. This article has overviewed a detailed procedure to manage certificates in PowerShell.


