What Is the Macof Command in Linux?
MAC addresses are flooded onto a local network switch using the macof Linux command. The network switch maintains a MAC table in which it keeps all the MAC addresses. The macof command sends various MAC addresses to flood the switch, resulting in the switch entering a failure open mode. The switch does not really know where to send the data, so it sends the data everywhere. It is commonly used to perform the MAC flooding attack. It is provided under the Dsniff suit toolset as a MAC address table overflow utility.
How Does the Macof Command in Linux Works?
The macof command in Linux floods the switch with various MAC addresses causing it to enter a fail open mode. It sends various MAC addresses to the switched LAN and fills the MAC table with random MAC addresses. This results in some switches to fail open in repeating mode. This happens because the switches send the data to the ports specified by the MAC address. And when it does not find the targeted MAC address to send the data, it acts like a hub and starts sending the data everywhere. The hub does not work with target mapping, and they broadcast the data to each port available on the device. No port accepts the data except the one that the data is intended for. The hubbed network allows an easy tracking and monitoring of the network traffic.
The switch does the same and acts like a hub when the MAC table is filled with random invalid MAC addresses. As most of the devices use switches to distribute the data and work on MAC address mapping, it becomes difficult for the hacker to track the network traffic. Hence, they use the macof command to flood the switch and fill in the MAC table with invalid addresses, and make it a hub so that they can easily track all the network traffic and perform a MAC flooding attack. In this article, we will learn how to use the macof command in Linux with the help of some examples.
We will explore some examples to see how the macof command in Linux works. Let’s begin!
Syntax of Macof Command in Linux
Before exploring the examples, let us understand the syntax of the macof command and understand each of its components. Here is the syntax of the macof command in Linux:
The “macof” is the main command that performs the function. The “-i interface” flag is used to define the interface to send the MAC address on. The “-s source” is used to specify the IP address of the source. The “-d destination” flag is used to provide the IP address of the destination. The “-e target-address” is used to provide the target hardware address. The “-x TCP-source-port” flag is used to define the TCP source port. The “-y TCP-dest-port” is used to present the TCP destination port. And finally, the “-n packets” is used to define the number of packets. These packets are sent over the network. The value for each flag must be provided. If any option is left unspecified, a random value will be generated for it automatically.
Now, let us use the macof command as an example. As macof is a part of dsniff toolbox, we need to install it first.
Install Macof in Linux
In order to use the macof command in Linux, you must install the dsniff toolbox. The dsniff toolbox can easily be installed with the apt-get install. If you run the macof command without installing the dsniff, you will encounter some errors. Check the following command and try to run it in the terminal:
![]()
You will get the following result after executing this command:
![]()
Since you did not have a macof installed, the system returned a “no such file or directory” error. Hence, you need to install the dsniff toolbox first to use the macof command without encountering any error. Here is the complete command that allows you to install the dsniff and use the macof utility through it. See the following command:
![]()
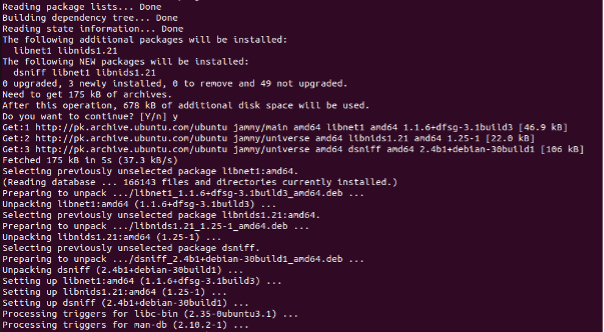
Press enter on your keyboard to run this command and install the dsniff toolbox in your Ubuntu 22.04 operating system. The “sudo apt-get install dsniff” command allows you to install the dsniff toolbox. See the following result,:
Now, your Ubuntu 22.04 system is ready to run the macof command and flood the switch with random MAC addresses. Let us examine some examples to learn how to use the macof command.

Perform Simple MAC Flooding with the Macof Command
The simple MAC flooding can be performed without specifying any MAC address. It allows us to monitor all the traffic over the network by flooding the switch with several random addresses. Type in the command (attached in the following screenshot) in the terminal. This performs the simple MAC flooding operation.
The macof is the main command of the function. The “-i eth1” specifies the interface which is “eth1” to send the MAC addresses on. And the “-n 10” specifies that the 10 packets should be sent over the network. Note that there is no source or destination IP address provided, so these will be selected randomly. Similarly, there is no source or destination TCP port specified so these will also be selected randomly. Also, no target hardware address is specified and that also will be selected automatically. This is how you can perform the MAC flooding. See the following result:
Perform Targeted MAC Flooding with the Macof Command
The target MAC flooding is performed by providing the target MAC address. As you can notice, there is no target MAC address provided in the previous example resulting in the simple MAC flooding. Here, we will provide a specific MAC address to target for the MAC flooding. See the following code with the attached output.
This results in target MAC flooding. See the following result:

Conclusion
This article is a walkthrough of the macof command in the Linux operating system. The macof command is used to flood the switch with random MAC addresses, causing the switch to get in the fail open mode. The macof command is included in the dsniff toolbox. To use the macof command, it is essential to install the dsniff in the Ubuntu system. In this article, we learned to install the dsniff and we have seen two examples of macof commands.