
In this article, we will show you how to manage the disks and partition them using LVM from the Debian 12 installer so that you can install Debian 12 on the LVM-managed disk partitions (LVM logical volumes – LVs).
Topic of Contents:
- The Basics of LVM (Logical Volume Manager)
- Manually Partition the Disks from the Debian 12 Installer
- Create New Partition Tables on the Disks from the Debian 12 Installer
- Configure the Logical Volume Manager (LVM) from the Debian 12 Installer
- Create an LVM Volume Group (VG) from the Debian 12 Installer
- Create the LVM Logical Volumes (LVs) from the Debian 12 Installer
- Display the LVM Configuration Details from the Debian 12 Installer
- Remove an LVM Logical Volume (LV) from the Debian 12 Installer
- Add New Disks to the LVM Volume Group (VG) from the Debian 12 Installer
- Remove a Disk from the LVM Volume Group (VG)
- Save the LVM Configuration from the Debian 12 Installer
- Configure the Filesystems for LVM Logical Volumes (LVs) from the Debian 12 Installer
- Create an EFI Boot Partition from the Debian 12 Installer
- Save the Changes and Continue the Debian 12 Installation
- Conclusion
The Basics of LVM (Logical Volume Manager)
To learn the basic working principles of the LVM (Logical Volume Manager) disk management on Linux and the terms used by LVM, read the article on How Does Logical Volume Manager (LVM) Works on Linux. This will help you have a clear understanding of the LVM disk partitioning and make the disk partitioning using LVM easier for you.
Manually Partition the Disks from the Debian 12 Installer
To manually partition the disks from the Debian 12 installer, select “Manual” and press <Enter>.
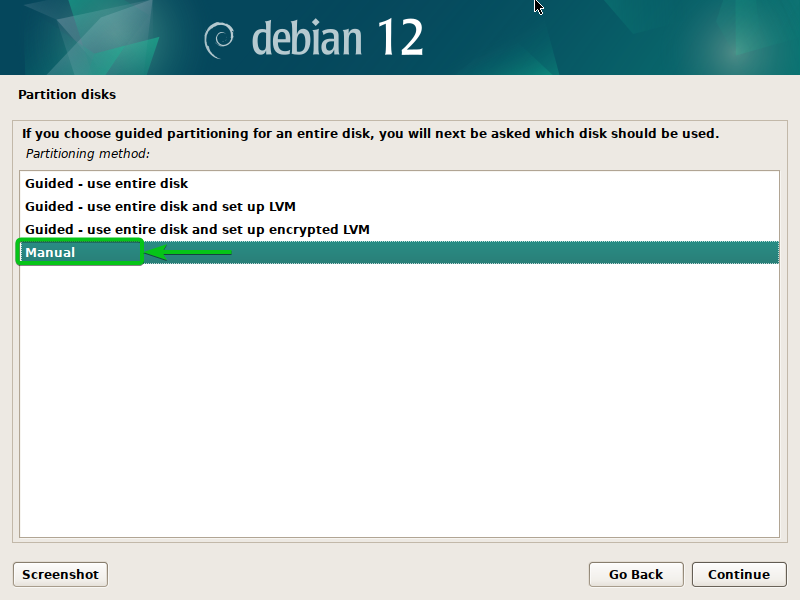
The available disks on your computer should be displayed. You can configure the LVM (Logical Volume Manager) partitions for your Debian 12 installation from here.
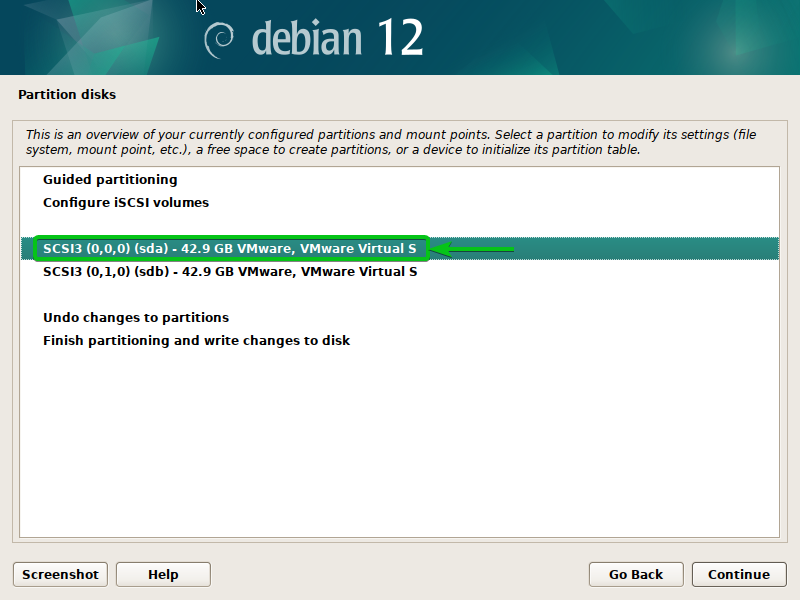
Create New Partition Tables on the Disks from the Debian 12 Installer
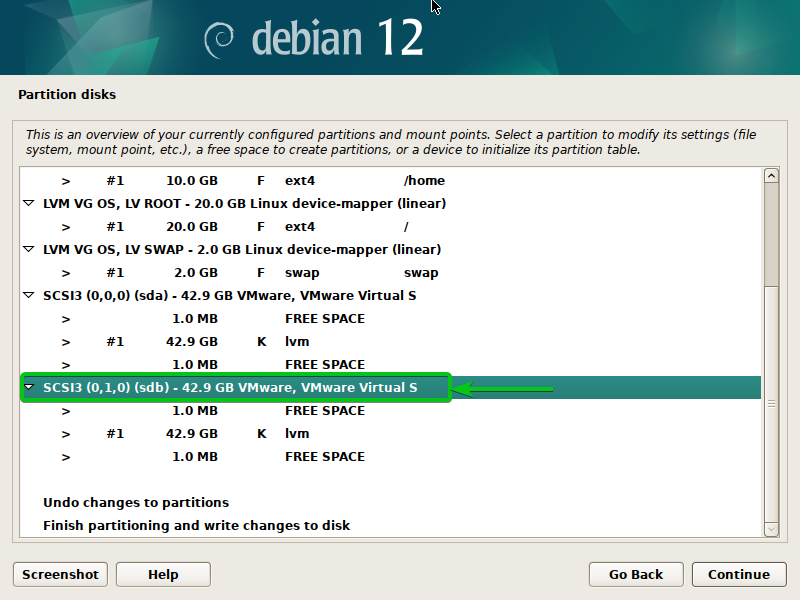
To manage a disk with LVM, you have to create a new partition table on the disk.
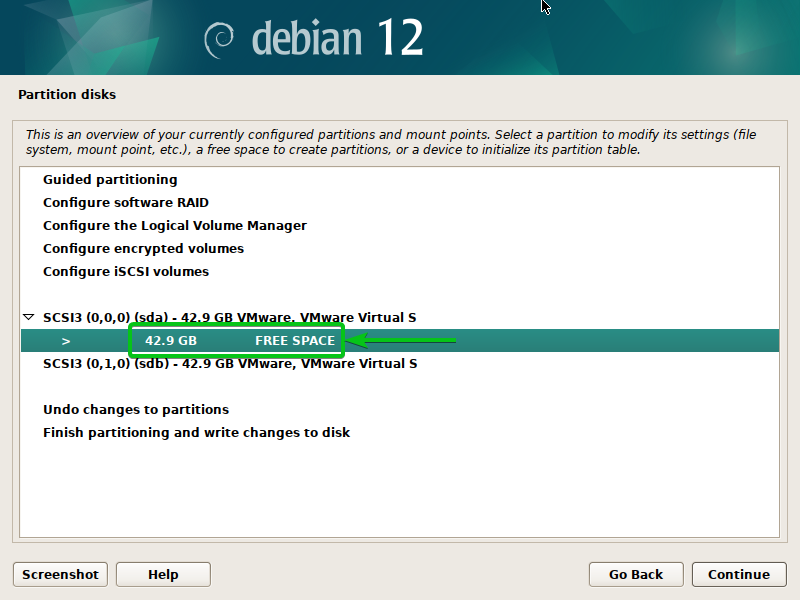
To create a new partition table on a disk (sda), select it and press <Enter>.
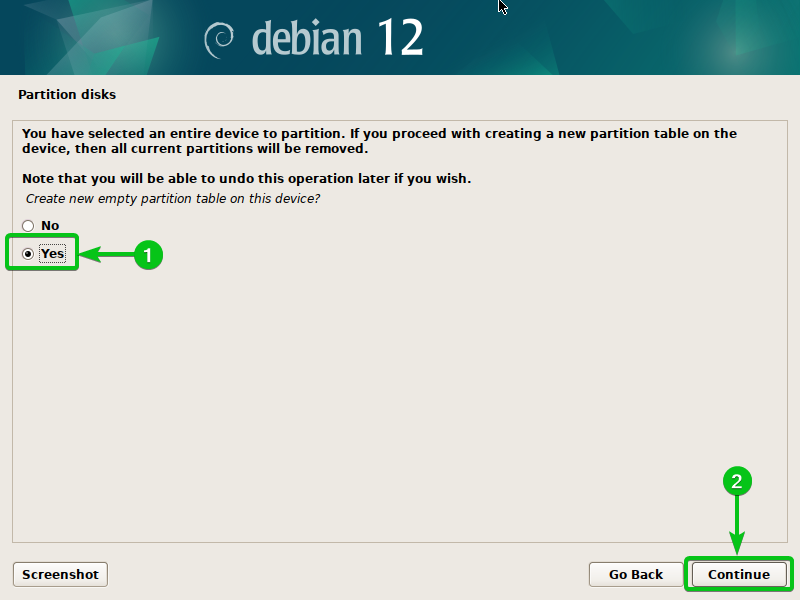
Select “Yes”[1] and click on “Continue”[2].
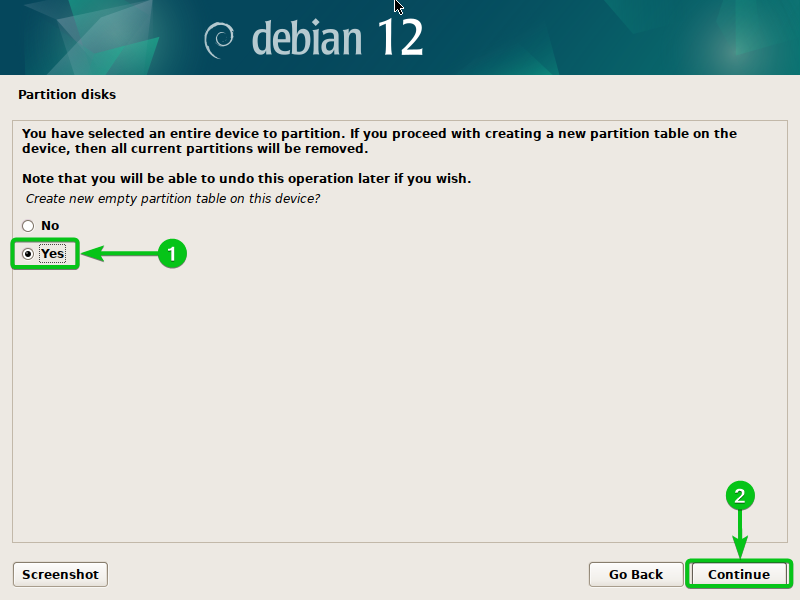
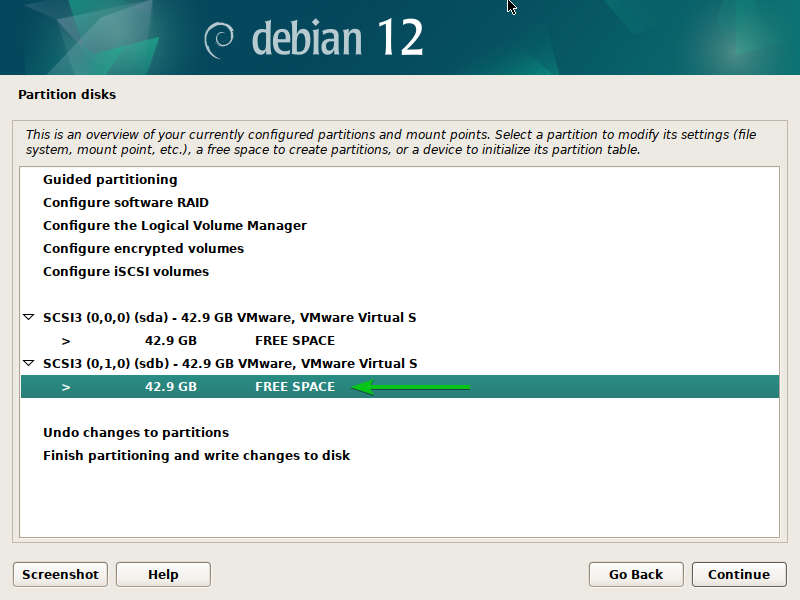
A new partition table should be created on the disk.
We also created a new partition table on the other disk (sdb) in the same way.
Configure the Logical Volume Manager (LVM) from the Debian 12 Installer
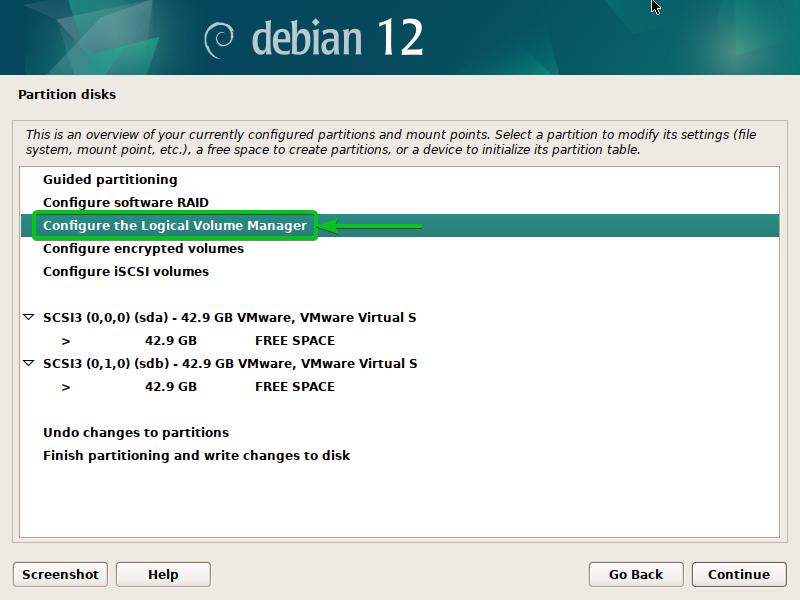
To configure the Logical Volume Manager (LVM) from the Debian 12 installer, select “Configure the Logical Volume Manager” and press <Enter>.
Select “Yes”[1] and click on “Continue”[2].
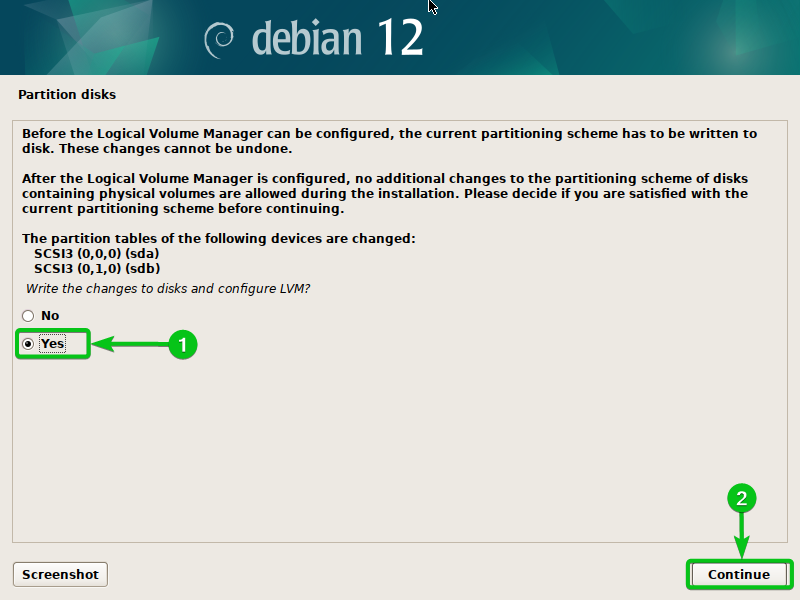
The LVM configuration window should be displayed. You will find all the options to configure LVM from here.
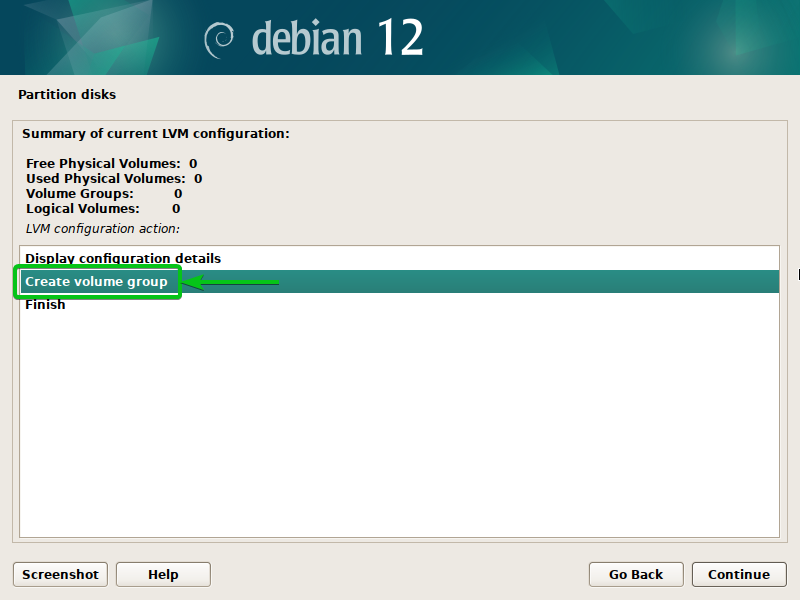
Create an LVM Volume Group (VG) from the Debian 12 Installer
To create an LVM Volume Group (VG), select “Create volume group” and press <Enter>.
Type in a name for the LVM Volume Group (VG)[1] and click on “Continue”[2].

Select one or more disks that you want to add to the LVM volume group (VG)[1] and click on “Continue”[2].
We add only the /dev/sda disk to the “OS” LVM volume group for now. You can add more disks to the LVM volume group later.
Select “Yes”[1] and click on “Continue”[2].

A new LVM volume group (VG) should be created.

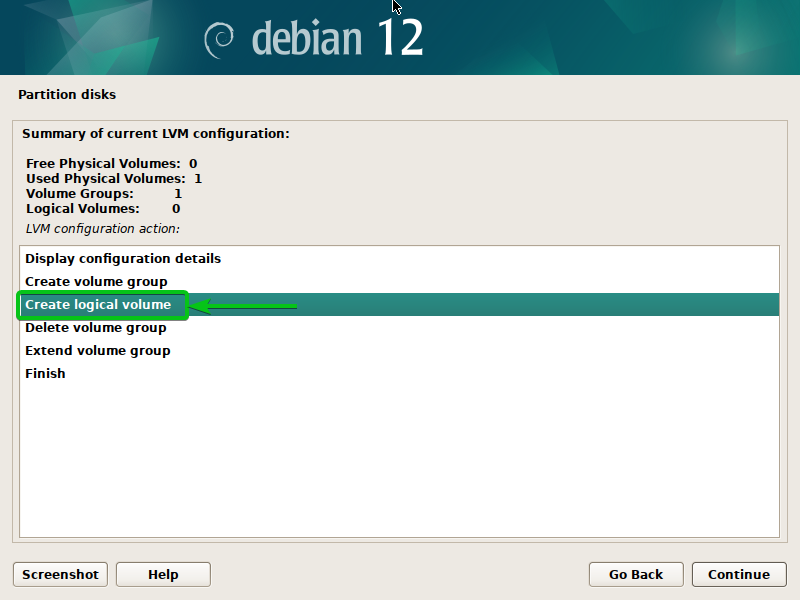
Create the LVM Logical Volumes (LVs) from the Debian 12 Installer
LVM logical volumes (LVs) are like disk partitions. You can create as many as 256 logical volumes (LVs) on each of the LVM volume groups (VGs).
To create a new LVM logical volume (LV), select “Create logical volume” and press <Enter>.
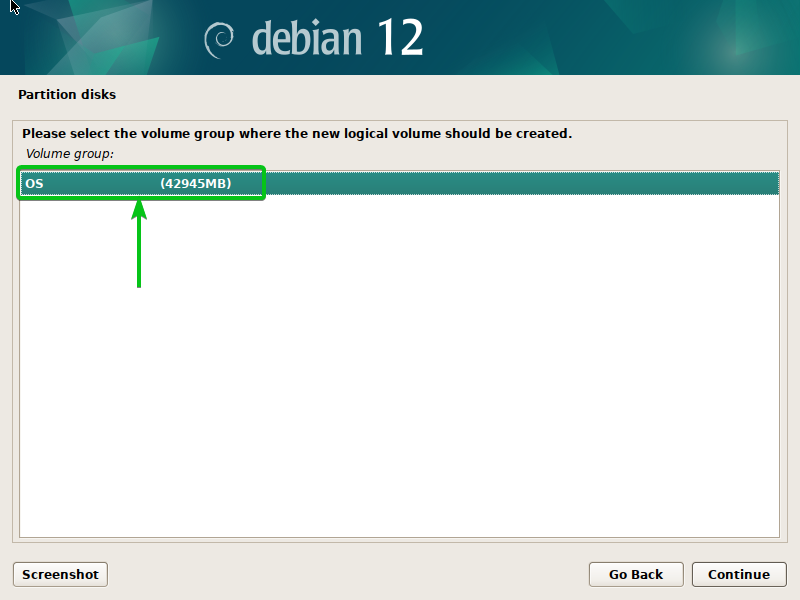
Select the LVM volume group (VG) where you want to create the logical volume (LV) and press <Enter>.
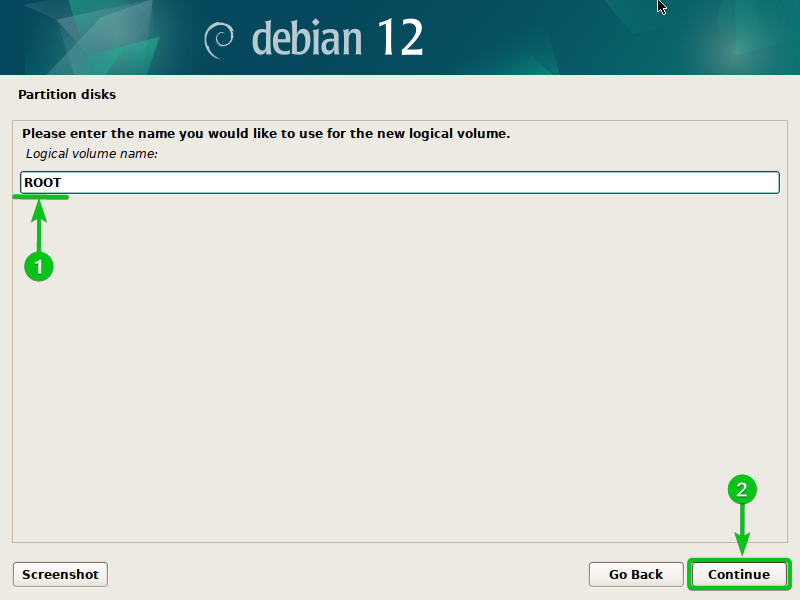
Type in a name for the new LVM logical volume (LV)[1] and click on “Continue”[2].
Type in the size of the new LVM logical volume (LV)[1] and click on “Continue”[2].
You can use the following formats to define the size of the LVM logical volumes (LVs):
- 512K or 512KB – This is used to define the disk size of 512 Kilobytes.
- 512M or 512MB – This is used to define the disk size of 512 Megabytes.
- 20G or 20GB – This is used to define the disk size of 20 Gigabytes.
- 2T or 2TB – This is used to define the disk size of 2 Terabytes.
- 100 – This is used to define the disk size of 100 Megabytes.

A new LVM logical volume (LV) should be created.
You can create more LVM logical volumes (LVs) in the same way.
Display the LVM Configuration Details from the Debian 12 Installer
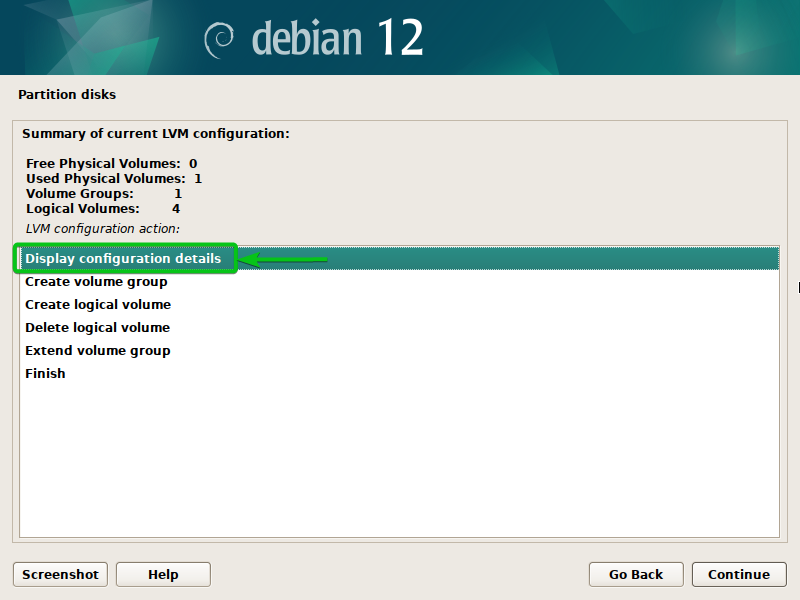
To check the current LVM configuration details, select “Display configuration details” and press <Enter>.
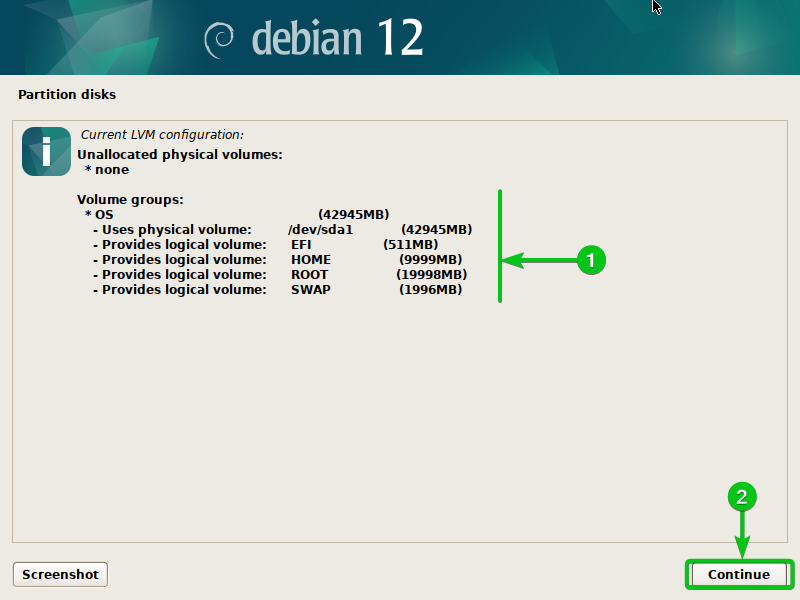
The current LVM configuration should be displayed[1].
To go back to the LVM configuration window, click on “Continue”[2].
Remove an LVM Logical Volume (LV) from the Debian 12 Installer
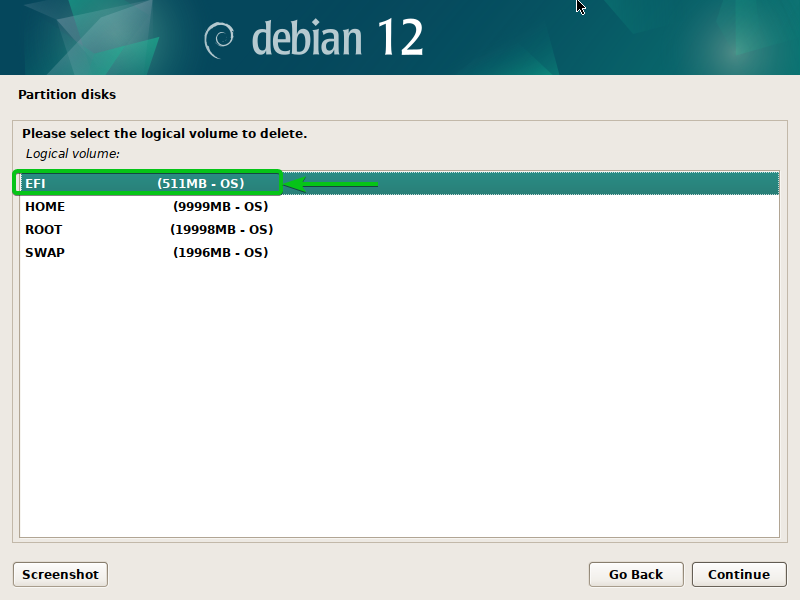
To remove an LVM logical volume (LV), select “Delete logical volume” and press <Enter>.
All the LVM logical volumes (LVs) that you created should be listed.
Select the LVM logical volume that you want to delete from the list and press <Enter>. The logical volume should be removed.
Add New Disks to the LVM Volume Group (VG) from the Debian 12 Installer
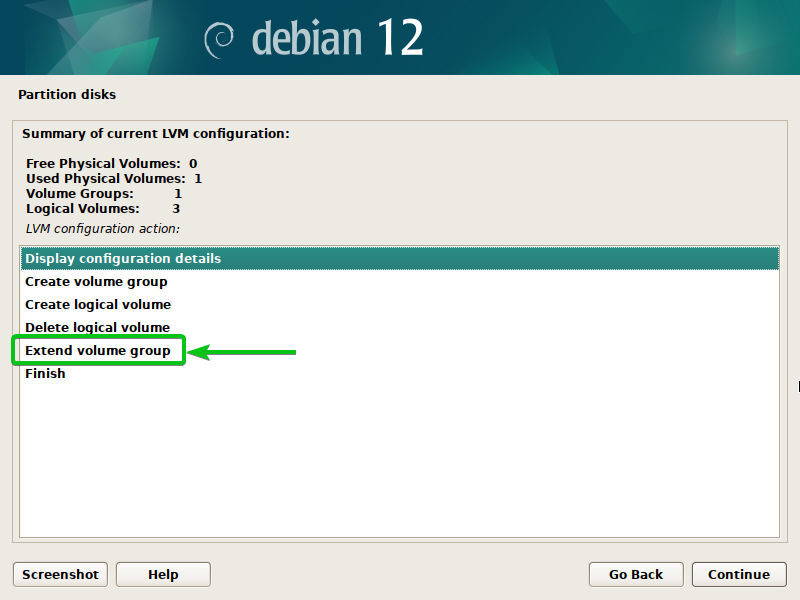
If you’re running out of disk space on your LVM volume group (VG), you can add more disks to the LVM volume group to extend the size of the LVM volume group.
To add a new disk to the LVM volume group (VG), select “Extend volume group” and press <Enter>.
Select the LVM volume group (VG) that you want to extend and press <Enter>.
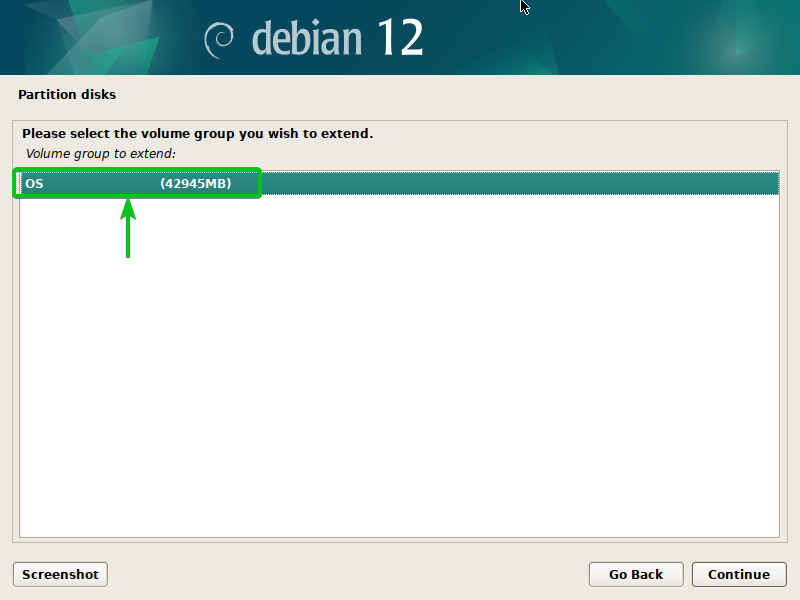
All the disks that you can add to the LVM volume group (VG) should be listed.
Select the disk/disks that you want to add to the LVM volume group (VG)[1] and click on “Continue”[2].
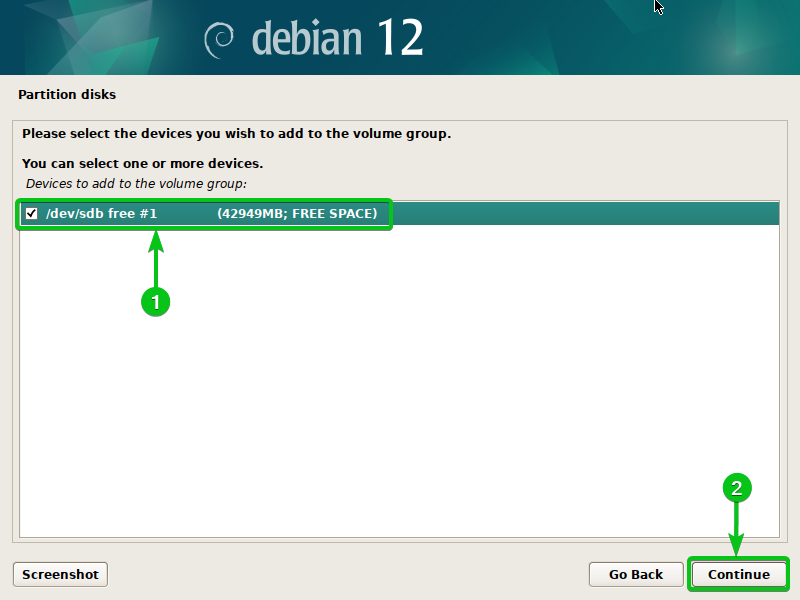
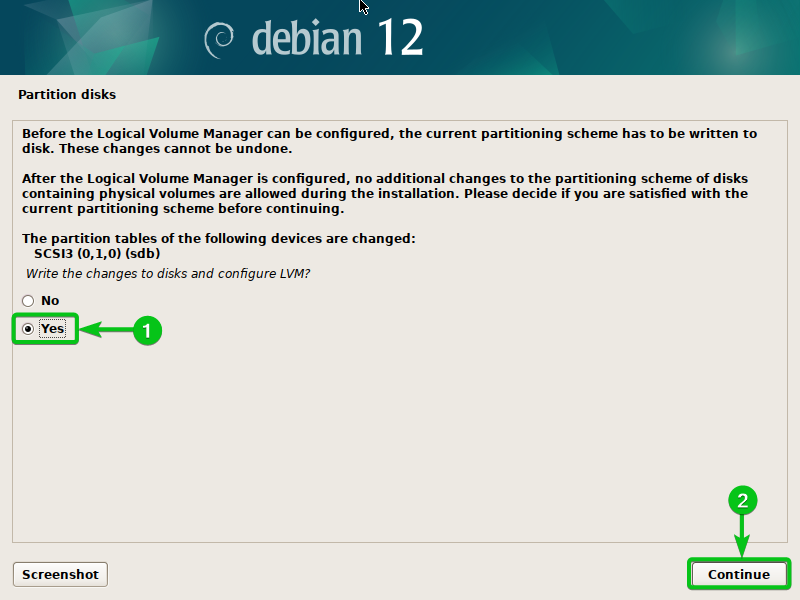
Select “Yes”[1] and click on “Continue”[2].
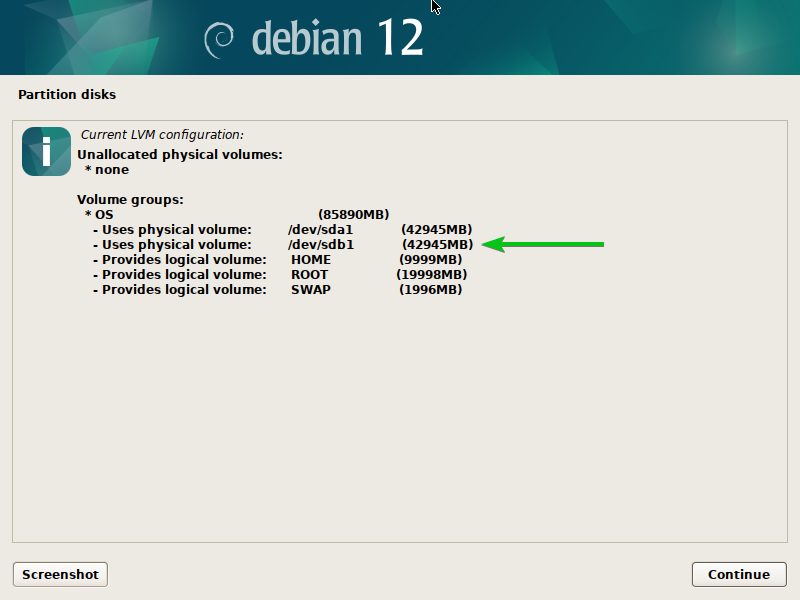
To check whether the disk/disks is added to the LVM volume group (VG), select “Display configuration details” and press <Enter>.

As you can see, the new “sdb” disk is added to the “OS” LVM volume group (VG).
Remove a Disk from the LVM Volume Group (VG)
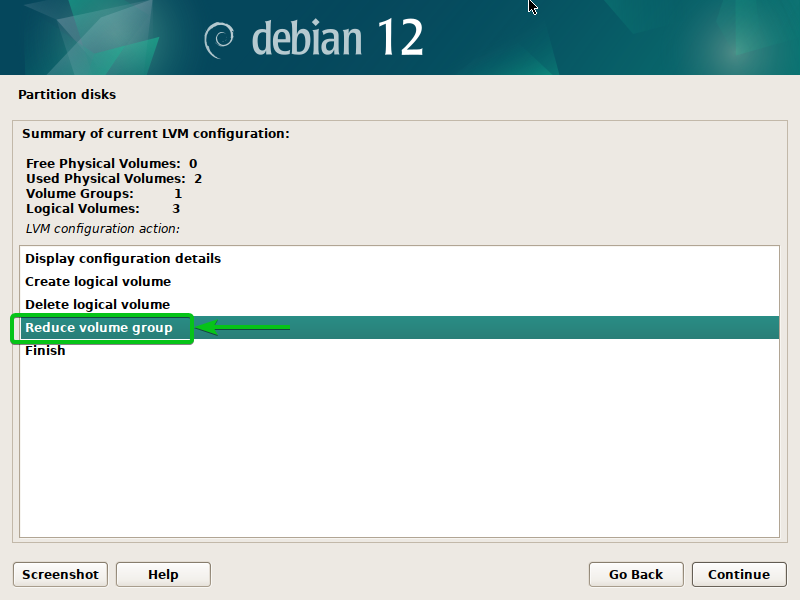
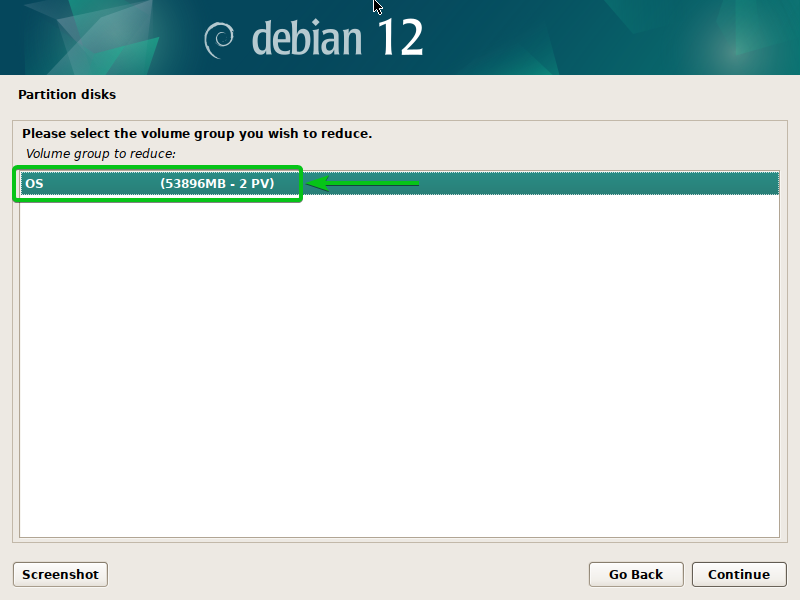
To remove a disk from an LVM volume group (VG), select “Reduce volume group” and press <Enter>.
Select the LVM volume group (VG) that you want to remove a disk from and press <Enter>.
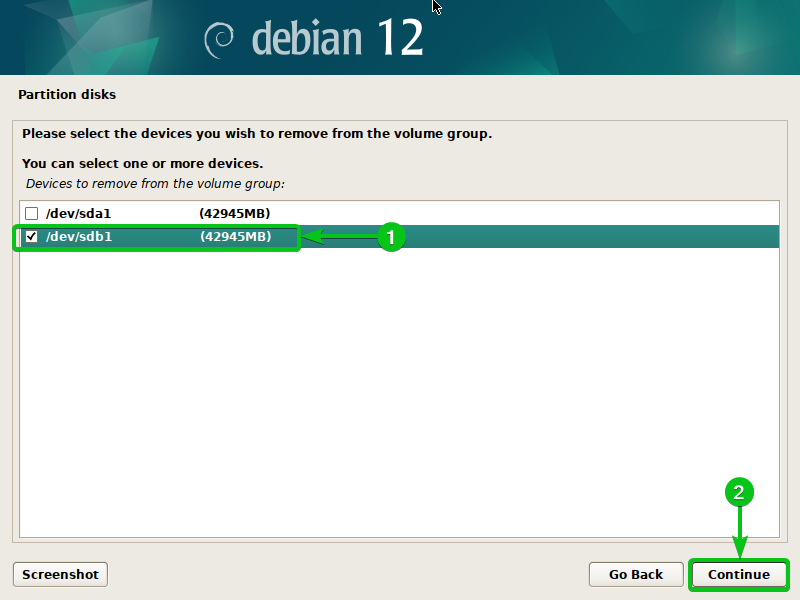
Select the disk/disks that you want to remove from the LVM volume group (VG)[1] and click on “Continue”[2].
Save the LVM Configuration from the Debian 12 Installer
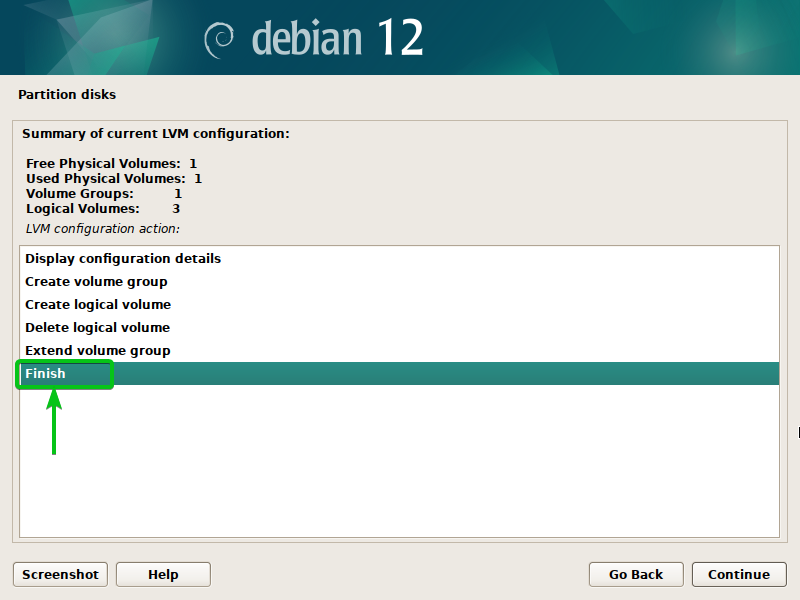
Once you’re done configuring LVM for the Debian 12 installation, select “Finish” and press <Enter>.
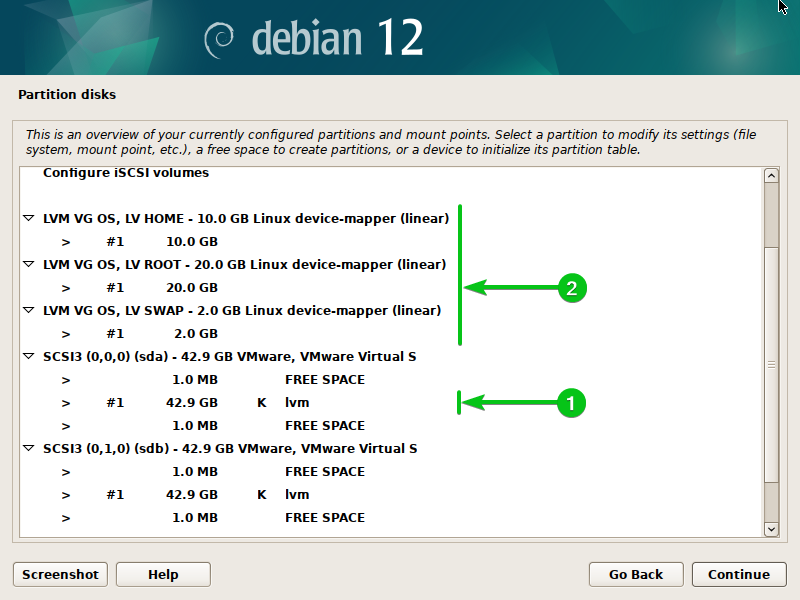
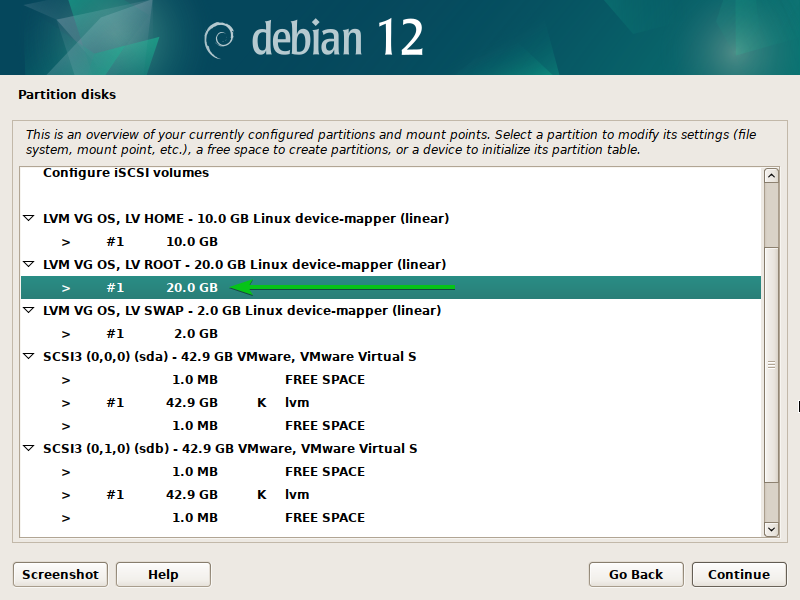
An lvm partition should be created on the FREE SPACE of the disk (sda) which is managed by LVM[1].
Now, a filesystem can be configured for each of the LVM logical volumes (LVs)[2].
Configure the Filesystems for LVM Logical Volumes (LVs) from the Debian 12 Installer
To configure a filesystem and mount point on an LVM logical volume (LV), select it and press <Enter>.
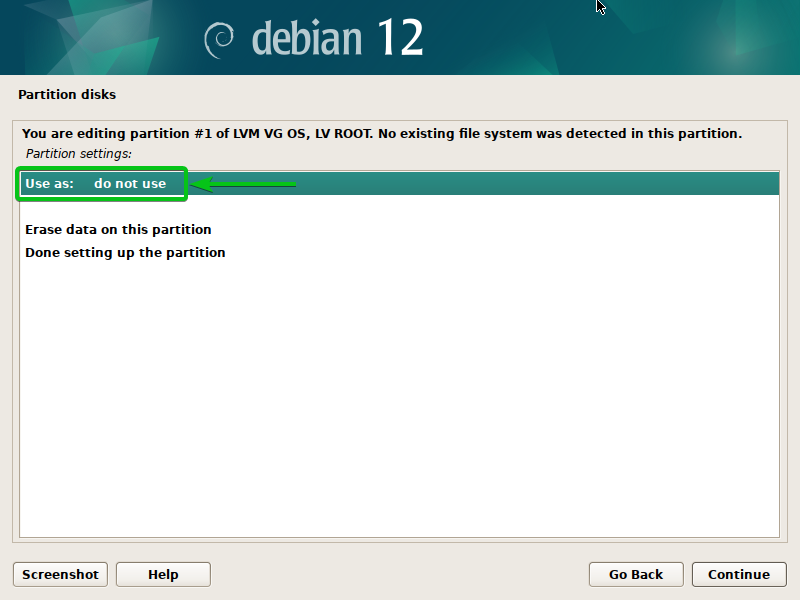
To configure a filesystem that you want to use for this LVM logical volume (LV), select “Use as” and press <Enter>.
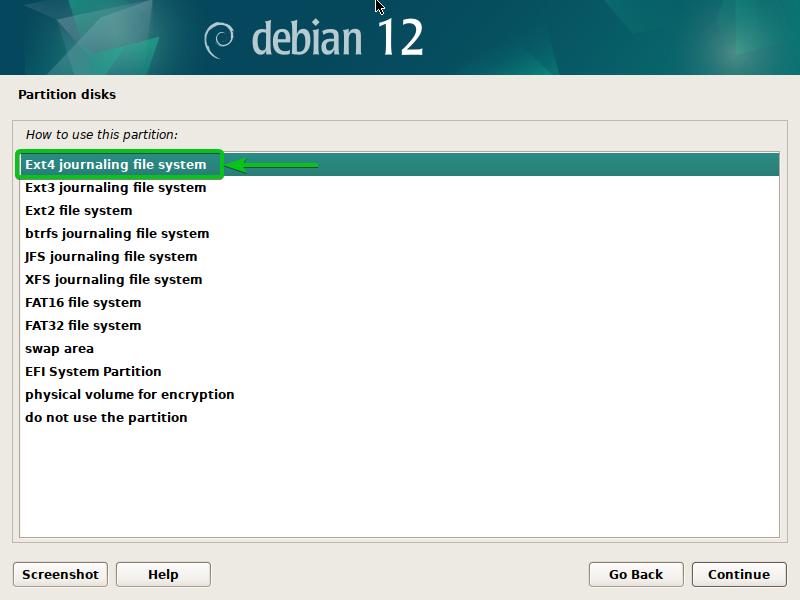
Select the filesystem that you want to use and press <Enter>. Since this is our ROOT partition, we selected the “Ext4 journaling file system” for this LVM logical volume.
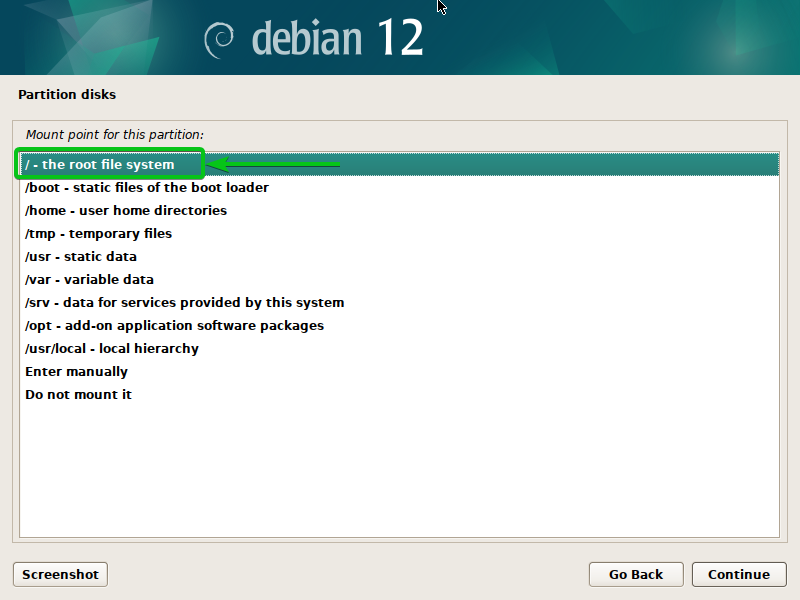
To set a mount point for this LVM logical volume, select “Mount point” and press <Enter>.
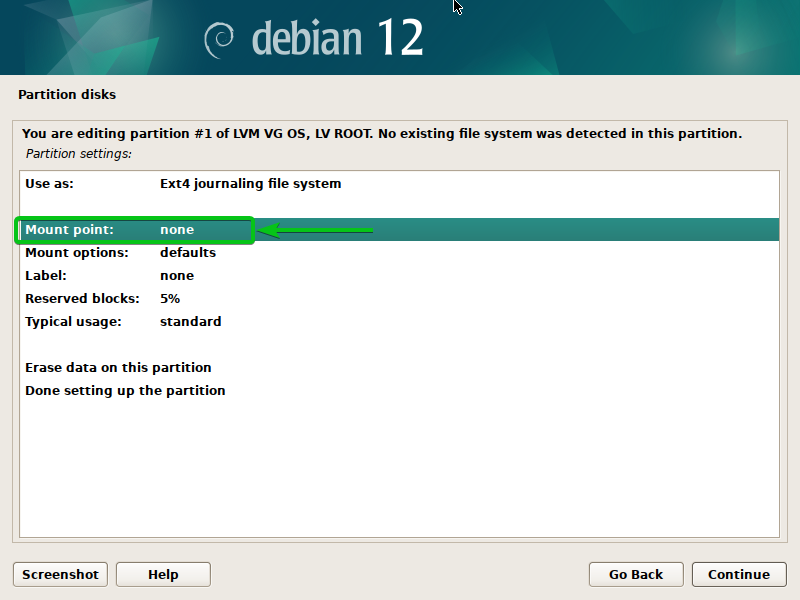
Select one of the predefined mount points for the partition and press <Enter>. If you want to enter the mount point manually, select “Enter manually”, press <Enter>, and type in your desired mount point.
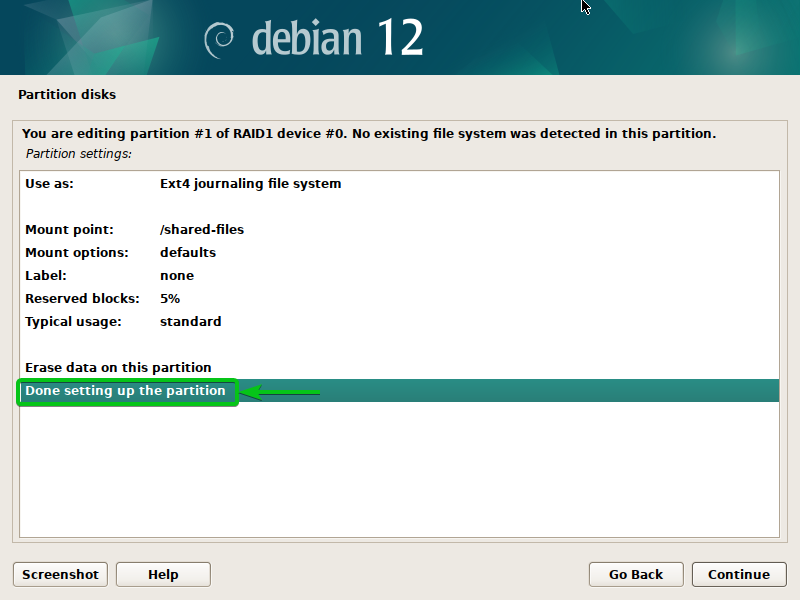
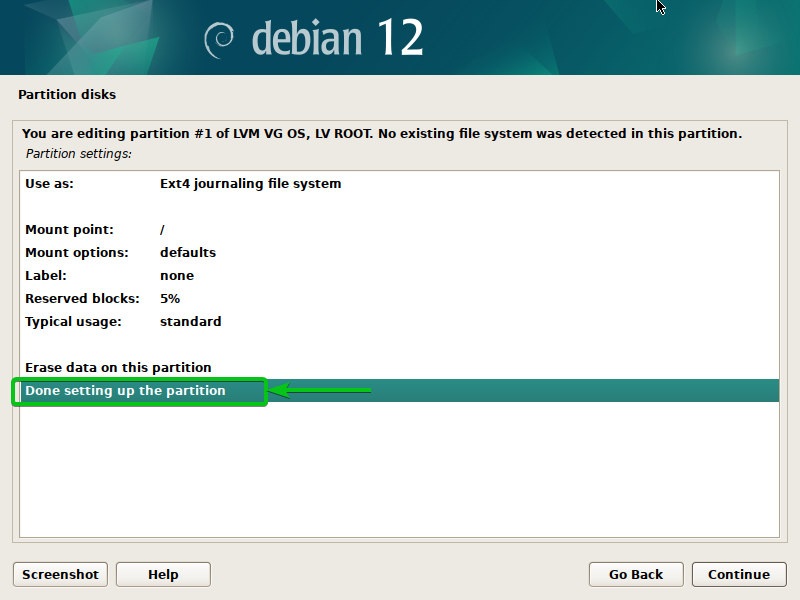
Once you’re done setting up a filesystem and a mount point for the partition, select “Done setting up the partition” and press <Enter>.
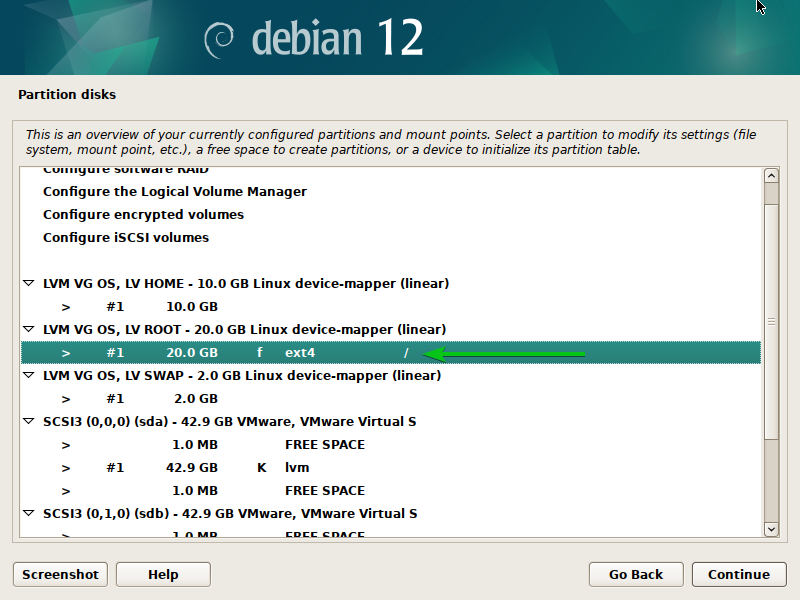
A filesystem (Ext4) and mount point (/) should be set for the LVM ROOT logical volume (LV).
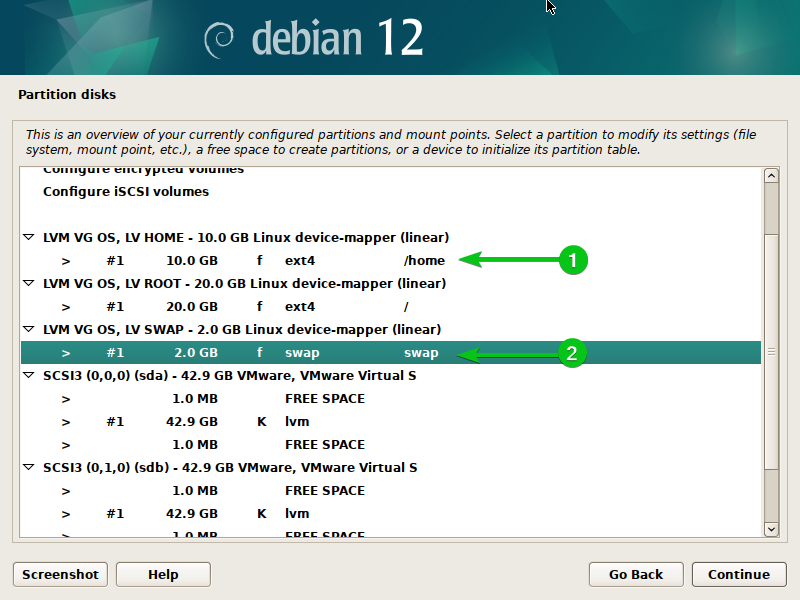
In the same way, we set the “Ext4” filesystem, the /home mount point for the LVM HOME logical volume (LV)[1], and the “Swap filesystem” for the SWAP LVM logical volume (LV)[2].
Create an EFI Boot Partition from the Debian 12 Installer
Debian 12 can’t boot from the LVM logical volumes. So, you have to create an ordinary boot partition or EFI boot partition on the disk.
If you want to install Debian 12 on multiple disks, you can manage one disk with LVM and create the ordinary disk partitions on another disk. You can create the EFI boot partition on the disk where you create the ordinary partitions.
If you have a single disk installed on your computer and you want to use LVM to manage it, you can create an ordinary 512MB EFI boot partition on the disk first and manage the rest of the FREE SPACE with LVM.
In this article, we create the EFI boot partition on a separate disk. For more information on advanced ordinary (MBR/GPT) disk partitioning, read this article.
Since we used the “sdb” disk to demonstrate how the LVM volume groups (VGs) are extended from the Debian 12 installer, we have to create a new partition table on the “sdb” disk to create an ordinary EFI boot partition on it.
To create a new partition table on the “sdb” disk, select it and press <Enter>.
Select “Yes”[1] and click on “Continue”[2].
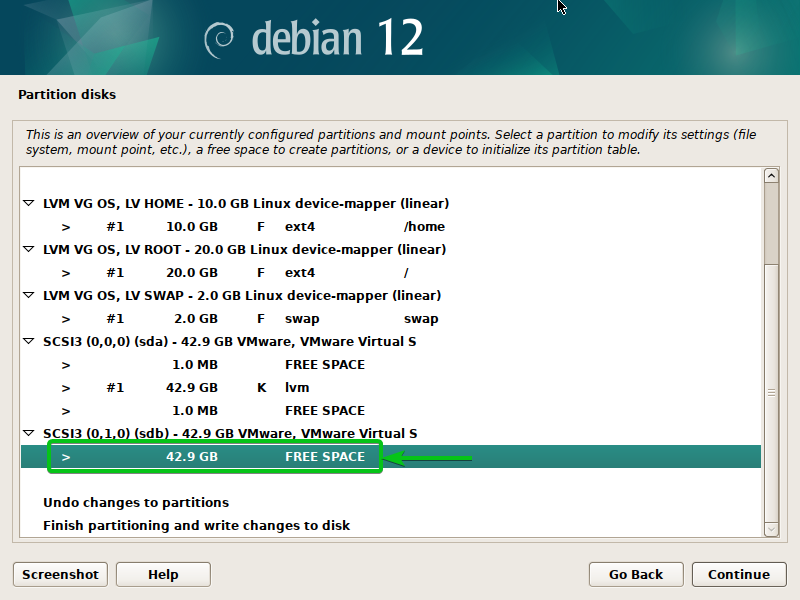
Select the “FREE SPACE” of the “sdb” disk and press <Enter>.
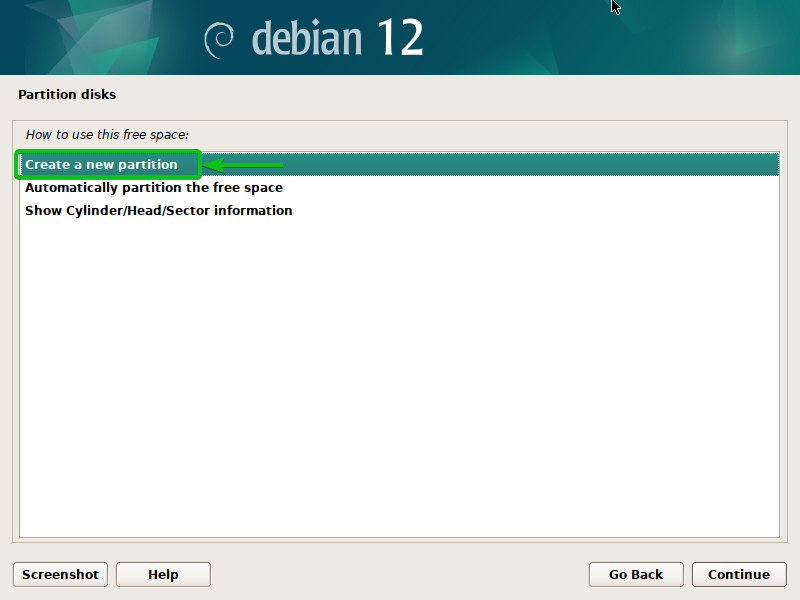
Select “Create a new partition” and press <Enter>.
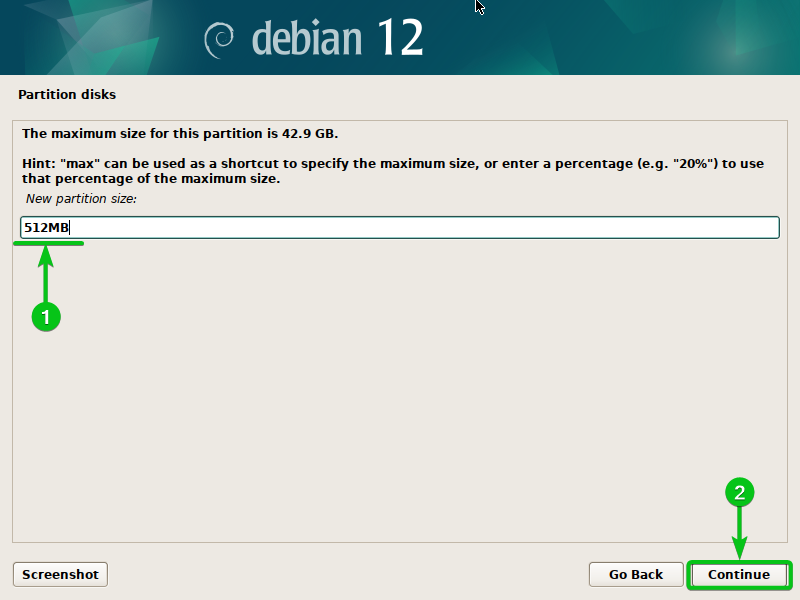
Type in “512 MB” as the partition size[1] and click on “Continue”[2].
Select “Beginning” and press <Enter>.

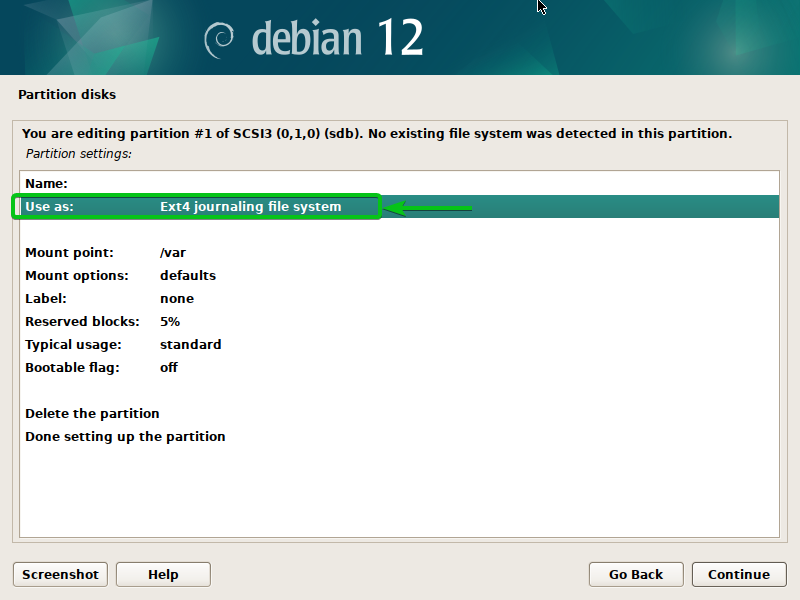
Select “Use as” and press <Enter>.
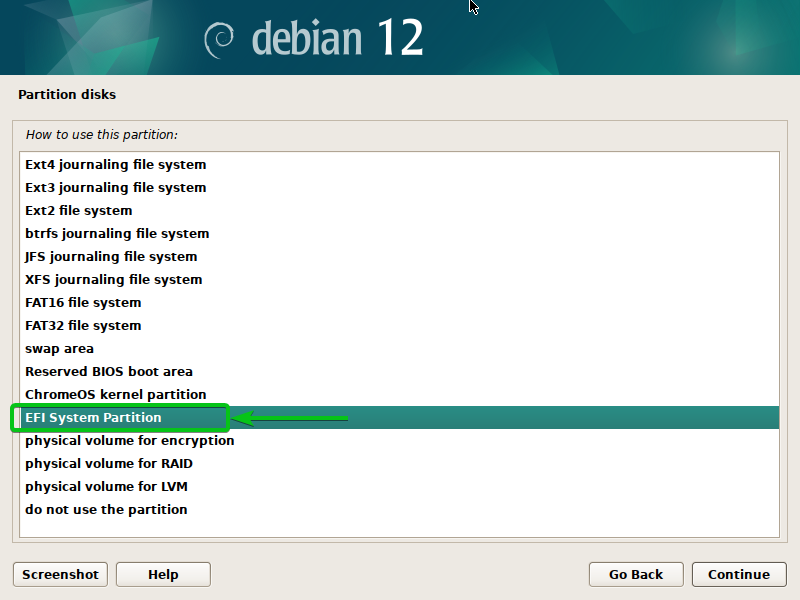
Select “EFI System Partition” and press <Enter>.
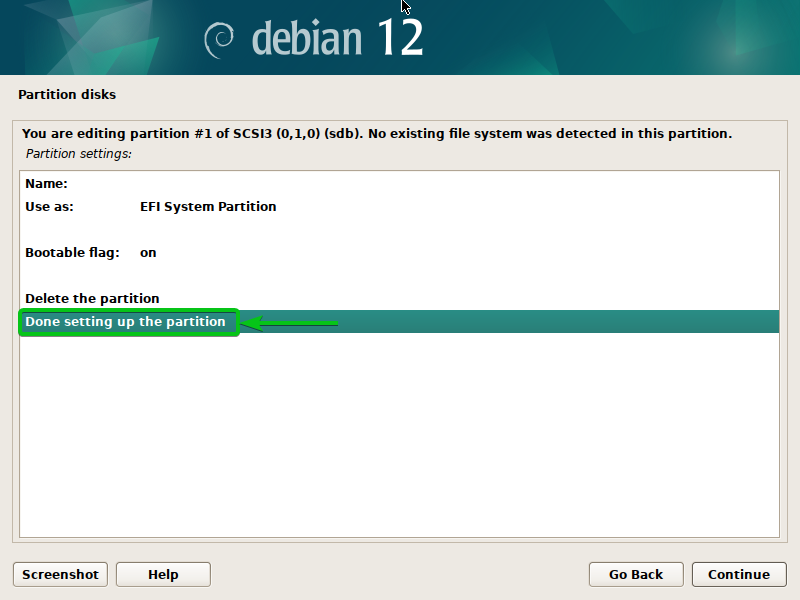
Select “Done setting up the partition” and press <Enter>.
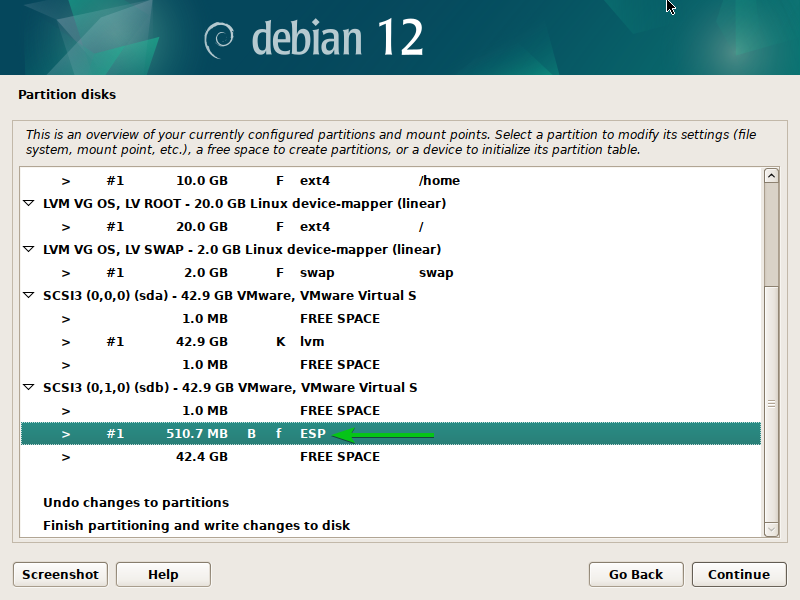
A new EFI boot partition should be created.
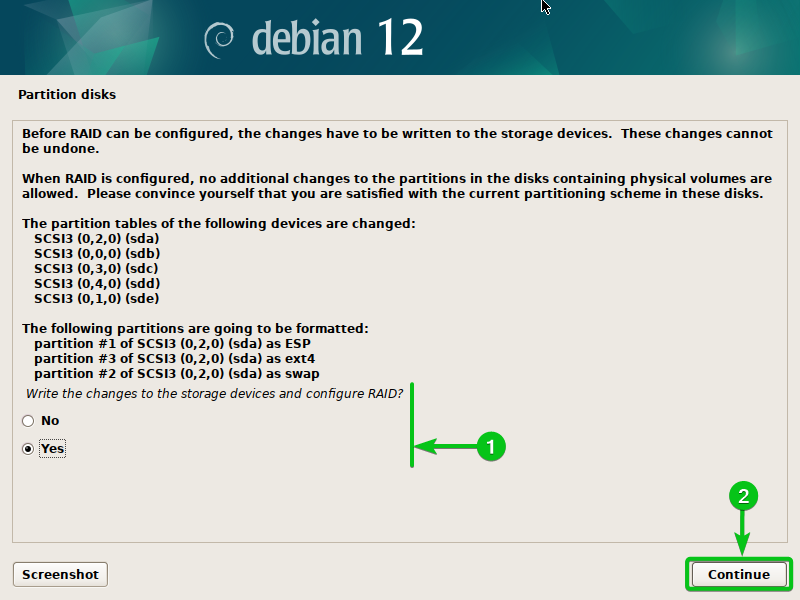
Save the Changes and Continue the Debian 12 Installation
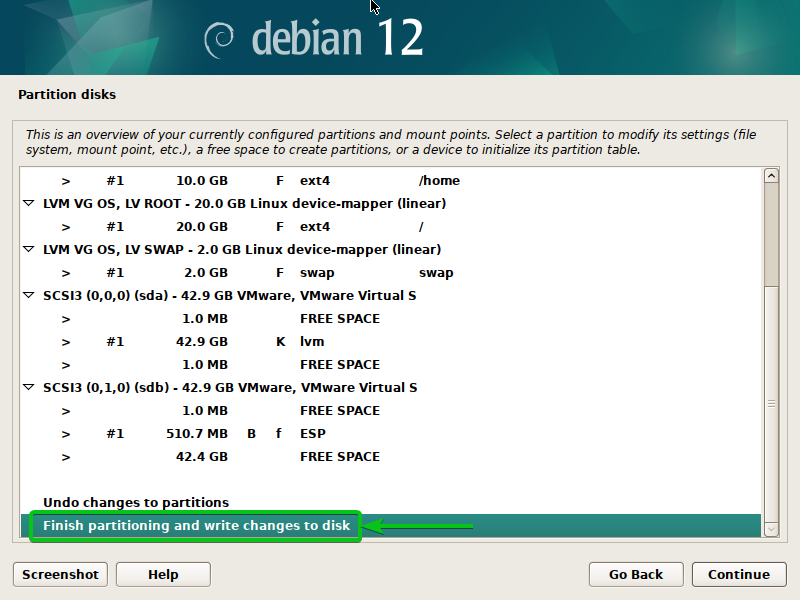
Once you’re done with disk partitioning for the Debian 12 installation, select “Finish partitioning”, write the changes to the disk, and press <Enter>.
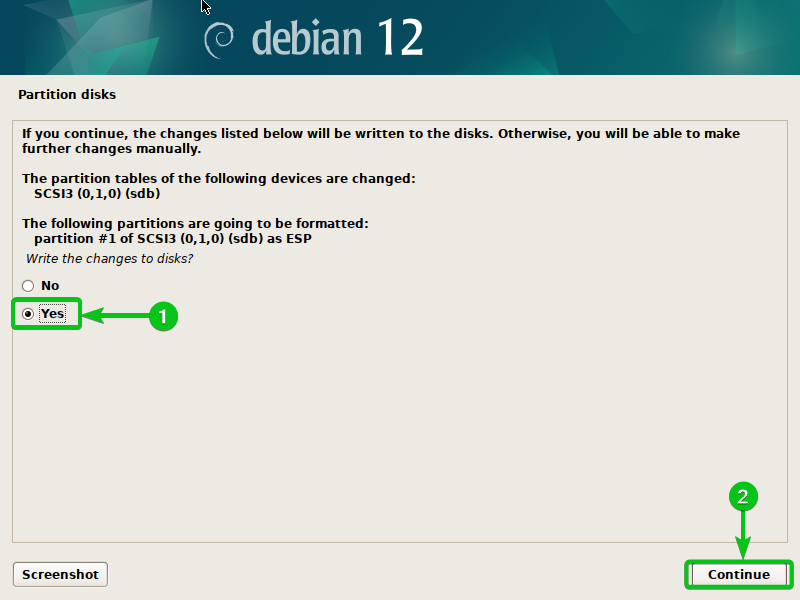
Select “Yes”[1] and click on “Continue”[2].
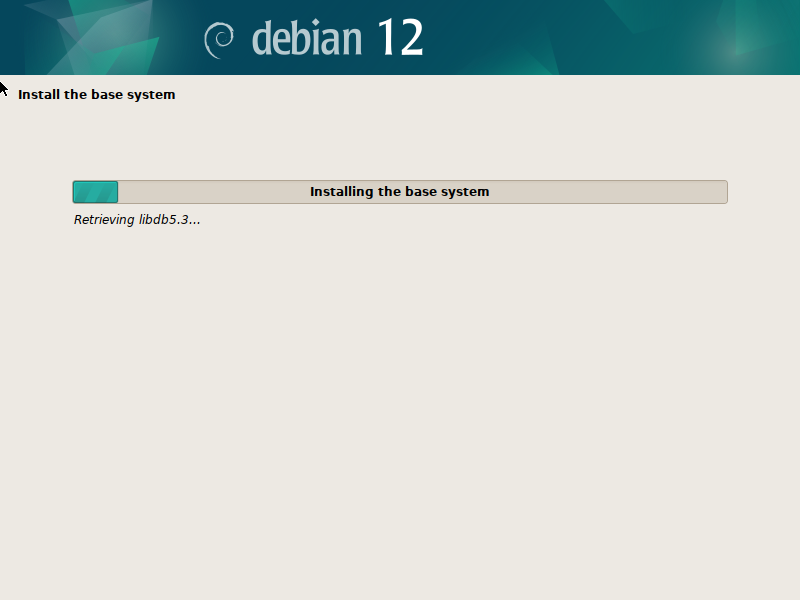
The Debian 12 installation should continue.
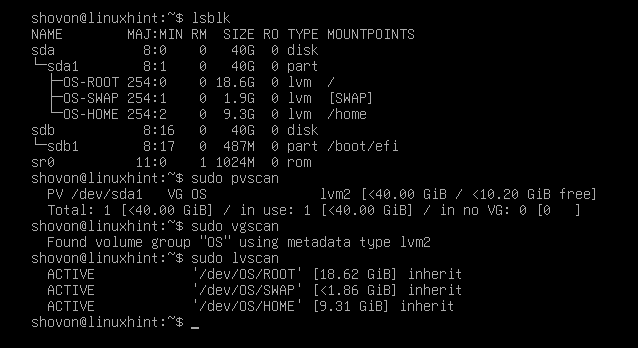
Once Debian 12 is installed and you boot into the newly installed Debian 12 system, open a Terminal program and run the following commands. You should see that LVM is used to manage the partitions on your desired disks:
$ sudo pvscan
$ sudo vgscan
$ usdo lvscan
Conclusion
We showed you how to manually partition the disks from the Debian 12 installer using LVM so that you can install Debian 12 on them. We also showed you how to create the LVM volume groups (VGs), add new disks to the LVM volume groups (VGs), create/delete the logical volumes (LVs), format the LVM logical volumes (LVs), etc. We showed you how to create the required LVM logical volumes (LVs), format them, and create an ordinary EFI boot partition for the Debian 12 installation as well. Finally, we showed you how to save the changes to the disks, continue the Debian 12 installation, and verify the LVM disk configuration after Debian 12 is installed on your computer.