- New physical volume creation
- The volume group extension
- The logical volume extension
- Mounted filesystem extension
Pre-requisites
To follow this tutorial, you must have a physical volume created from a disk. The physical volume should have a volume group, vg01, on it. A logical volume lv01, created on this volume group vg01.
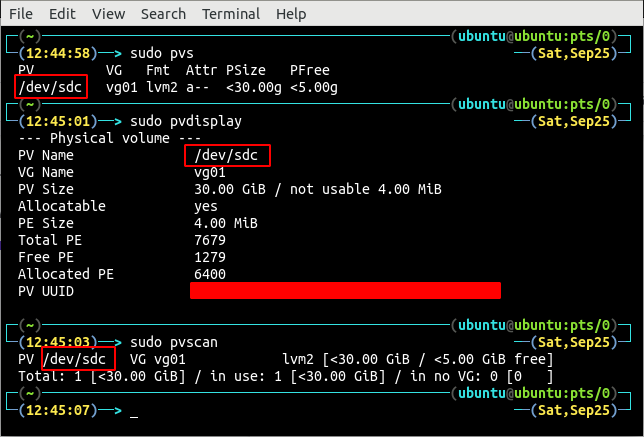
List all the available physical volumes by running pvs, pvscan or pvdisplay commands in the terminal.
OR
OR
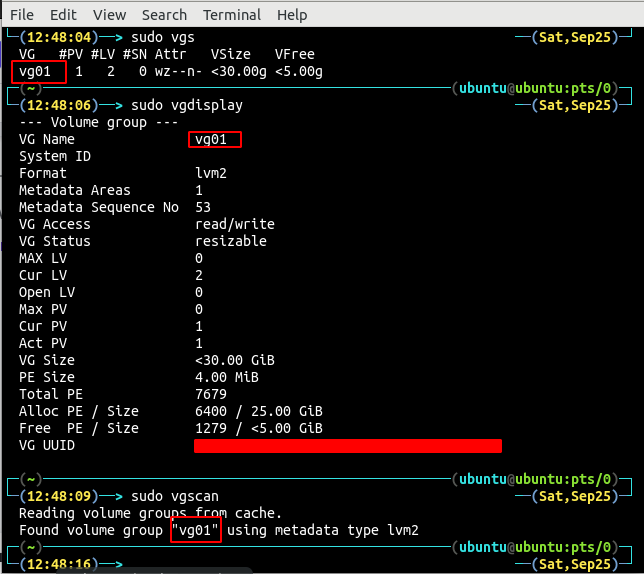
Notice the only one physical volume /dev/sdc in the system. Now, list all the volume groups created on /dev/sdc physical volume using any of the vgs, vgscan or vgdisplay commands.
OR
OR
The command displays the presence of only one volume group vg01 on the physical volume /dev/sdc, in the system. The following commands can be used to find all the logical volumes over the volume group.
OR
OR
There are two logical volumes lv01 and lv02 on the volume group vg01.
Create a New Physical Volume
First list all the physical devices connected to the system by using the lsblk command.
There are 3 physical devices connected to the system and one of them (/dev/sdc) is the device which is being used as physical volume. Now, attach a new physical device and again list all the connected devices.
There are four physical devices connected to the system. The newly attached device (/dev/sdd1) is currently mounted on the system. Unmount the /dev/sdd1 device as follows:
Now, format the device with the dd command. This command will take some time to format the device depending upon the size of the device attached.
NOTE: Formatting the device will erase all the data in the device. Create a backup of the data before formatting it.
Create a physical volume from the newly attached physical device using the pvcreate command.
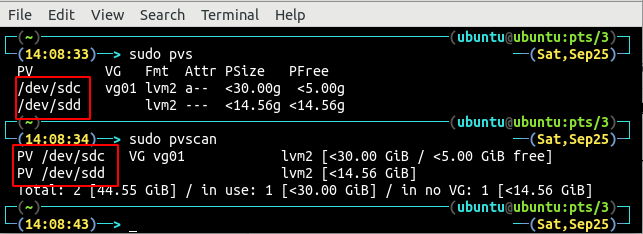
It will create a physical volume from the physical device connected. Display all the physical volumes by using any of the pvs, pvscan or pvdisplay commands.
OR
OR
The output displays two physical volumes /dev/sdc and /dev/sdd created on the system.
Volume Group Extension
Extend the volume group vg01 using the vgextend command to cover both the physical volumes.
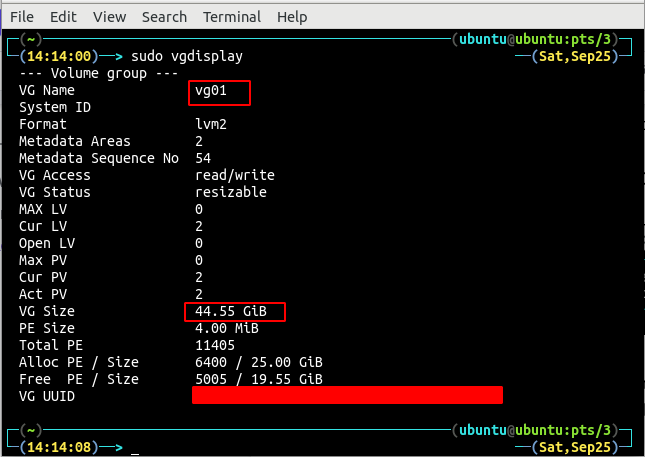
The above command output shows that the volume group vg01 is spanning both the physical volumes /dev/sdc and /dev/sdd and it has more space. List the details of the volume group vg01 using the vgdisplay command.
The total size of the volume group vg01 is now 44.5 GB that previously was only 30 GB.
Extend the Logical Volume
Now, we can either create another logical volume from this space or we can extend the existing logical volume to use this space. For this guide, we will extend the existing logical volume to add more space.
Display the available logical volumes with any of the following commands:
OR
OR
Currently there are only two logical volumes lv01 and lv02 with 15 GB and 10 GB space respectively. For this tutorial, we will extend the logical volume lv01 using the lvextend command from 15 GB to 25 GB.
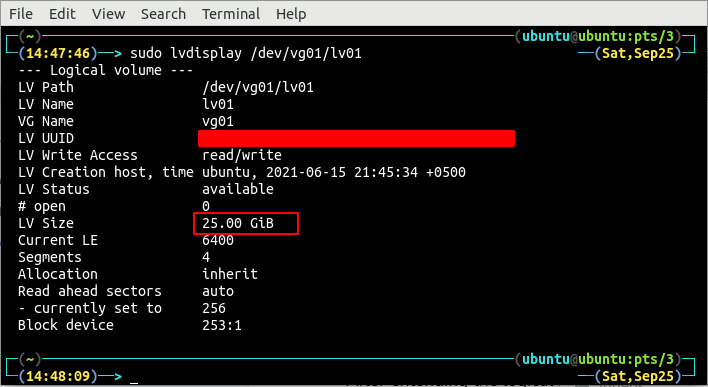
After extending the logical volume size, now list the logical volume details using the lvdisplay command.
So, the size of the logical volume lv01 is now 25 GB and has been extended successfully.
Extend the Filesystem Mounted on the System
Mount the logical volume using the mount command:
After mounting the logical volume, now display the filesystem with the df command to check the filesystem size.
The filesystem size is not extended so it needs to be extended using the resize2fs command.

After extending the filesystem, run the df command to verify size extension of the filesystem.

Now, the filesystem size is 25 GB and it has been extended successfully.
Conclusion
Logical volume size management on the running servers is one of the many job responsibilities of the system administrator. Such that they have to deal with its space shortage due to excessive data on a day-to-day basis.
Logical volume extension requires some space in the volume group on which logical volume exists. In case there is no free space available on the volume group, a new physical device is attached to create free space. The article is a guide that provides them with a step by step guide on how to add a new disk to extend the logical volume and the file system mounted on the system.

