This write-up will cover a guide for looping through in a directory using PowerShell.
How to Loop Through Files in a Directory Using PowerShell?
The PowerShell can loop through files in the directory using the “Foreach()” loop. The “Foreach()” loop is used to process all the items at once, such as renaming or copying multiple files. While the “Foreach-Object()” cmdlet refers to one item at a time in a loop. It processes one item at a time.
Example 1: Loop Through Files Using “Foreach-Object” in PowerShell Script
In this example, we will loop through files in a directory using PowerShell and print the name of the files available inside that directory:
According to the above code:
- First, add the “Get-ChildItem” alongside the directory path to get the files available inside that directory.
- After that, use the “|” pipeline to transfer the output to the “Foreach-Object()” cmdlet to operate against each item in the collection of input objects.
- Add the “$_.FullName” cmdlet to display the name of the retrieved files from the directory:
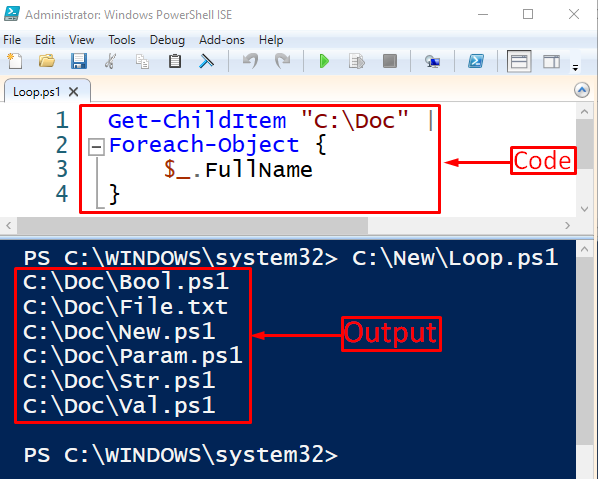
It can be observed that the files in the directory have been displayed in the PowerShell console using the “Foreach-Object()” loop.
Example 2: Loop Through Files Using “Foreach-Object” With “-Recurse” in PowerShell Script
Now, loop through the sub-directories using PowerShell’s “-Recurse” parameter:
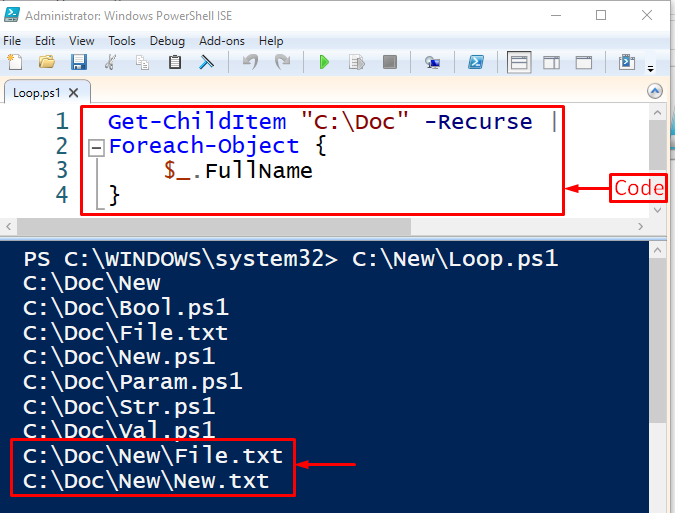
It can be observed that the files from the sub-directories have also been displayed in the PowerShell console.
Example 3: Loop Through Files Using “Foreach-Object” in PowerShell Console
To perform the same operation, first of all, let’s see the available files before deleting the selected one in the respective directory by using the “Get-ChildItem” cmdlet alongside the directory path:
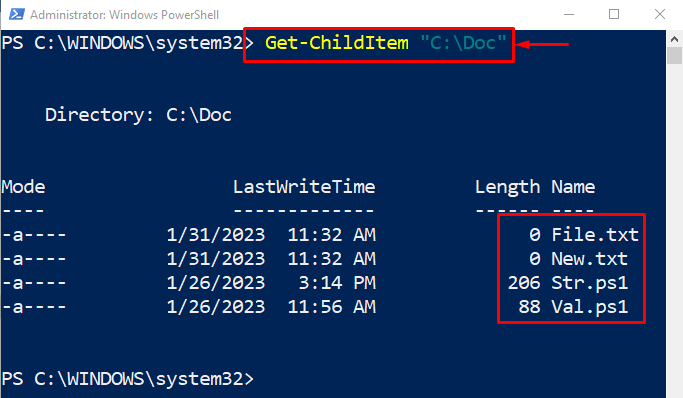
The available files in the directory have been displayed in the PowerShell console.
Now, let’s delete the files with the “.txt” extension by using the “Foreach-Object()” loop in PowerShell:
According to the above code:
- First, add the “Get-ChildItem” cmdlet followed by the directory path and the “*.ps1” extension to select the files with the “.ps1” extension.
- After that, use the “|” pipeline to transfer the output to the “Foreach-Object()” loop.
- Inside the “Foreach-Object()” loop, add the “Remove-Item” cmdlet to remove the files retrieved by the “$_.FullName” property:

Now, let’s verify whether the files were deleted or not by getting the files in the directory:
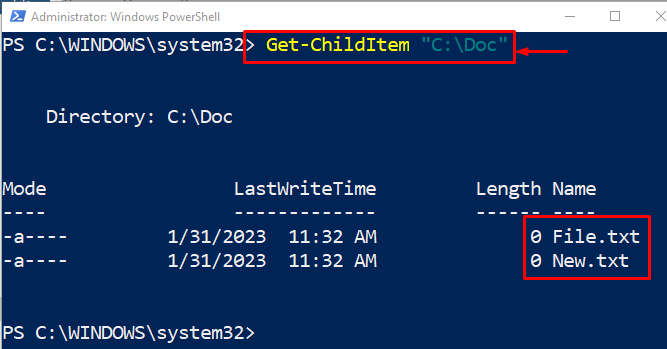
As you can see that the files with the “.txt” extension have been removed using a loop in PowerShell.
Conclusion
To loop through the files in a directory “Foreach-Object()” loop is used in PowerShell. It processes and refers to one item at a time from a collection of items or objects. Moreover, it helps deleting, renaming, or copying multiple files. This write-up has covered a complete guide to loop through the files in a directory using PowerShell.