In this scenario, even if a hacker gets a PayPal or hosting password, he won’t be able to log in without the confirmation code sent to the victim’s phone or email.
Implementing the two-factor authentication is one of the best practices to protect our email, social network accounts, hosting, and more. Unfortunately, our system is not the exception.
This tutorial shows how to implement the two-factor authentication to protect your SSH access using Google Authenticator or Authy-ssh. Google Authenticator allows you to verify a login using the mobile app, while Authy-ssh can be implemented without an app using SMS verification.
Linux Two-factor Authentication Using Google Authenticator
Note: Please, before continuing, make sure you have Google Authenticator installed on your mobile device.
To start, execute the following command to install Google Authenticator (Debian-based Linux distributions):

To install Google Authenticator on Red Hat-based Linux distributions (CentOS, Fedora), run the following command:
Once installed, run Google Authenticator as shown in the screenshot below.
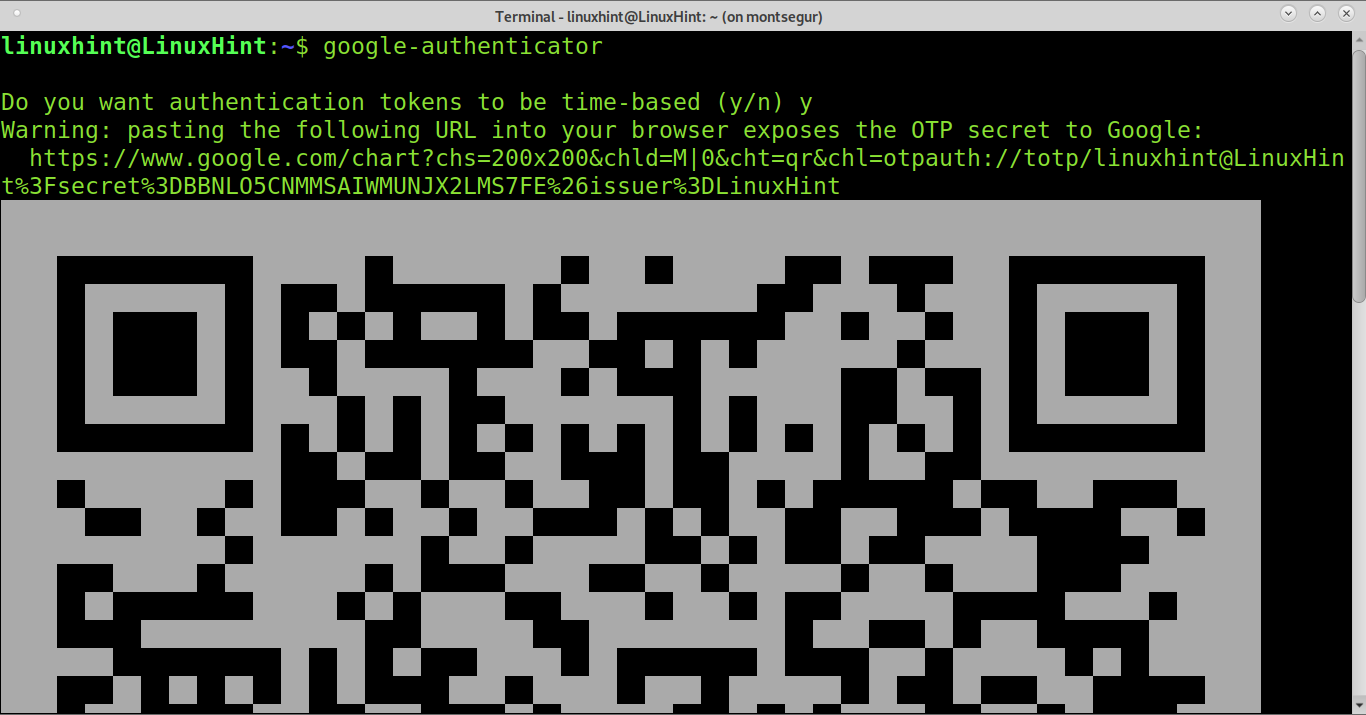
As you can see, a QR code shows up. You need to add the new account by clicking on the + icon in your mobile Google Authenticator App and select Scan QR code.
Google Authenticator will also provide backup codes you need to print and save in case you lose access to your mobile device.
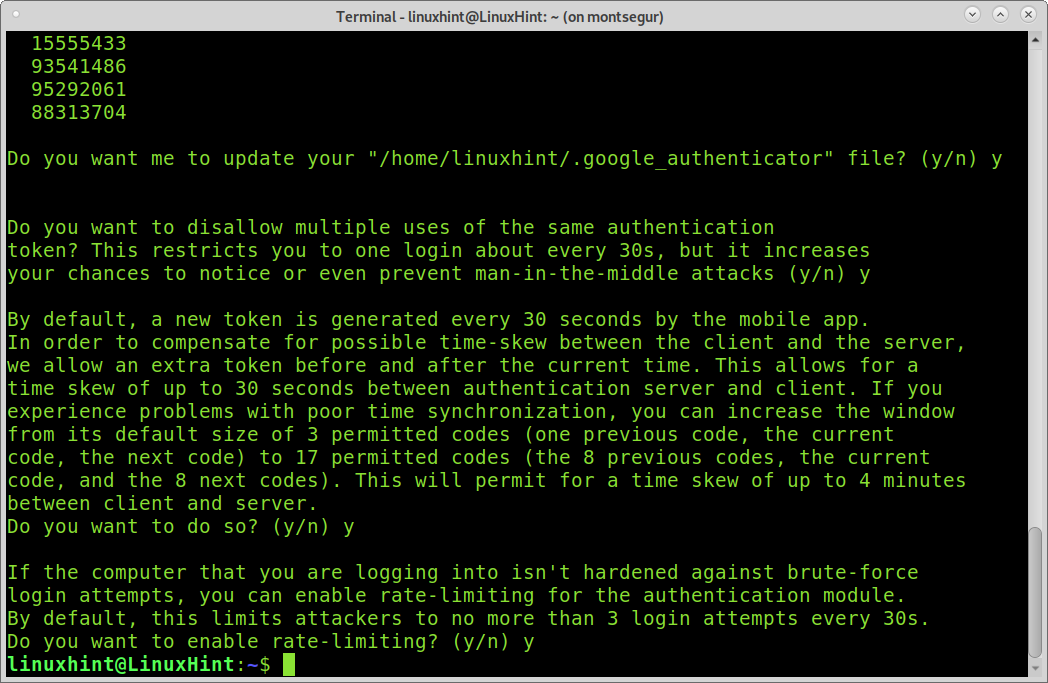
You will be asked some questions, which are detailed below, and you can accept all default options by selecting Y for all questions:
- After scanning the QR code, the installation process will require permission to edit your home. Press Y to continue to the next question.
- The second question recommends disabling multiple logins using the same verification code. Press Y to continue.
- The third question refers to the expiry timing for each generated code. Again, you can allow time skew, press Y to continue.
- Enable rate-limiting, up to 3 log in attempts every 30s. Press Y to continue.
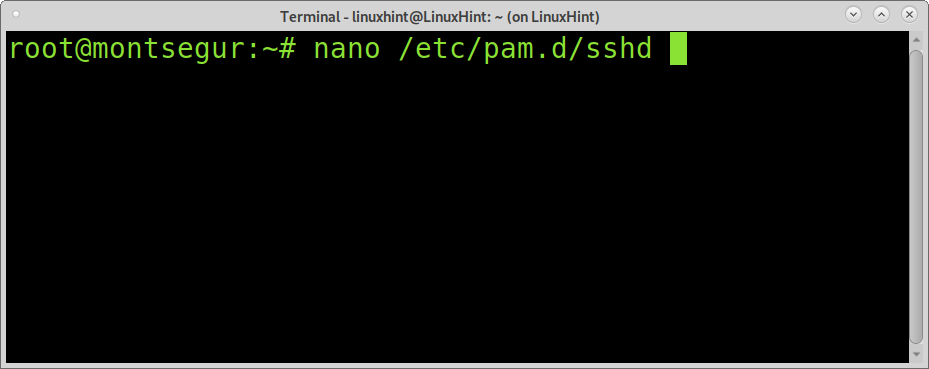
Once Google Authenticator is installed, you need to edit the file /etc/pam.d/sshd to add a new authentication module. Use nano or any other editor as shown in the screenshot below to edit the file /etc/pam.d/sshd:
Add the following line to /etc/pam.d/sshd as shown in the image below:

Note: Red Hat instructions mention a line containing #auth substack password-auth. If you find this line in your /etc/pam.d./sshd, comment on it.
Save /etc/pam.d./sshd and edit the file /etc/ssh/sshd_config as shown in the example below:

Find the line:
Uncomment on it and replace no with yes:

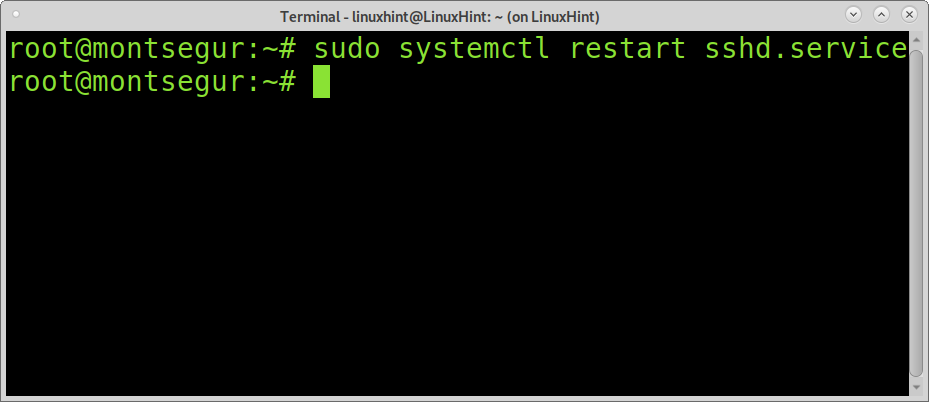
Exit saving changes and restart the SSH service:
You can test the two-factor authentication by connecting to your localhost as shown below:
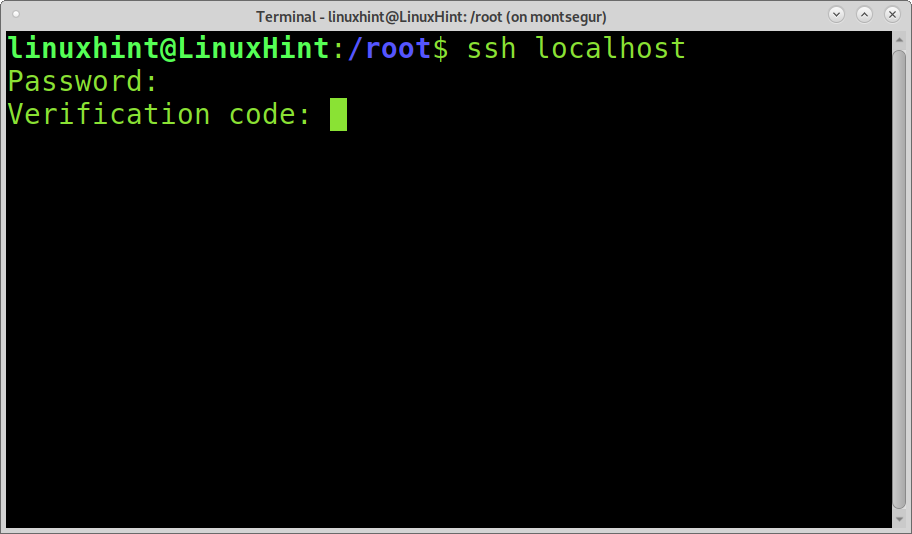
You can find the code in your Google Authentication mobile app. Without this code, no one will be able to access your device through SSH. Note: this code changes after 30 seconds. Therefore, you need to verify it fast.
As you can see, the 2FA process worked successfully. Below you can find the instructions for a different 2FA implementation using SMS instead of a mobile app.
Linux Two-factor Authentication Using Authy-ssh (SMS)
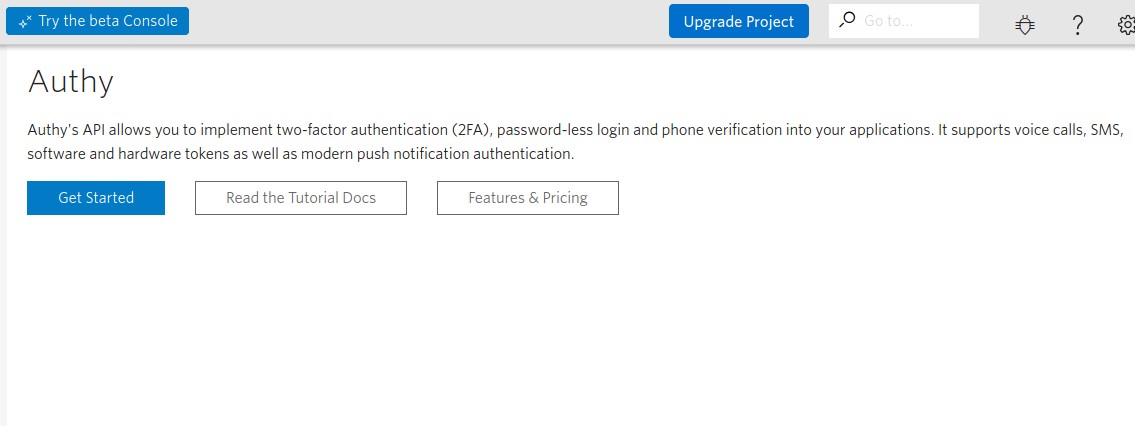
You can also implement the two-factor authentication using Authy (Twilio). For this example, a mobile app will not be required, and the process will be done through SMS verification.
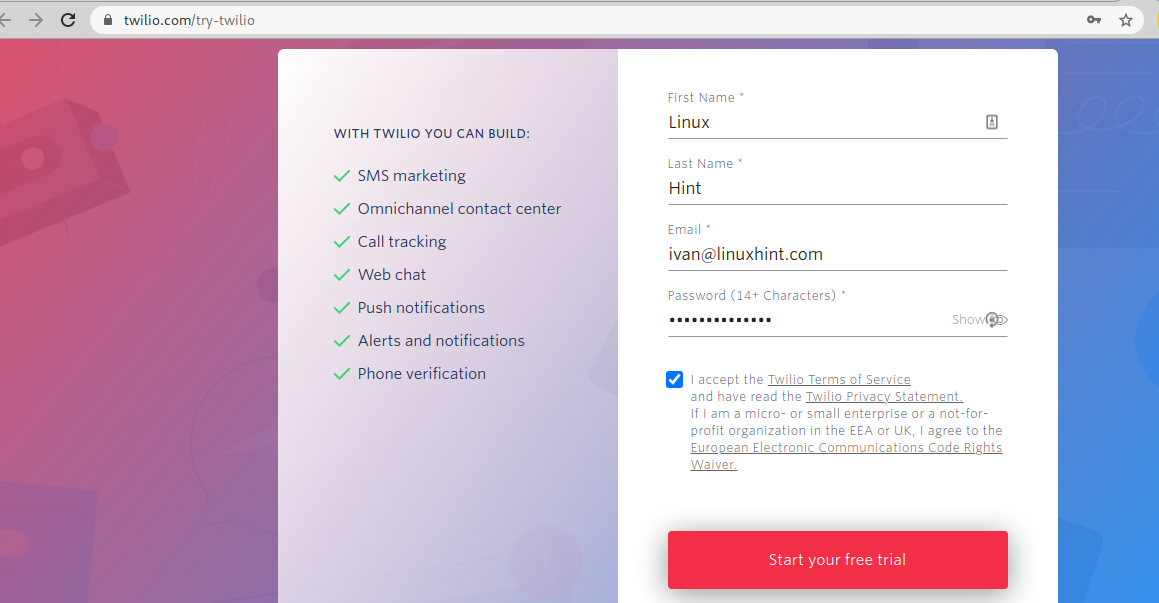
To get started, go to https://www.twilio.com/try-twilio and fill the registration form.
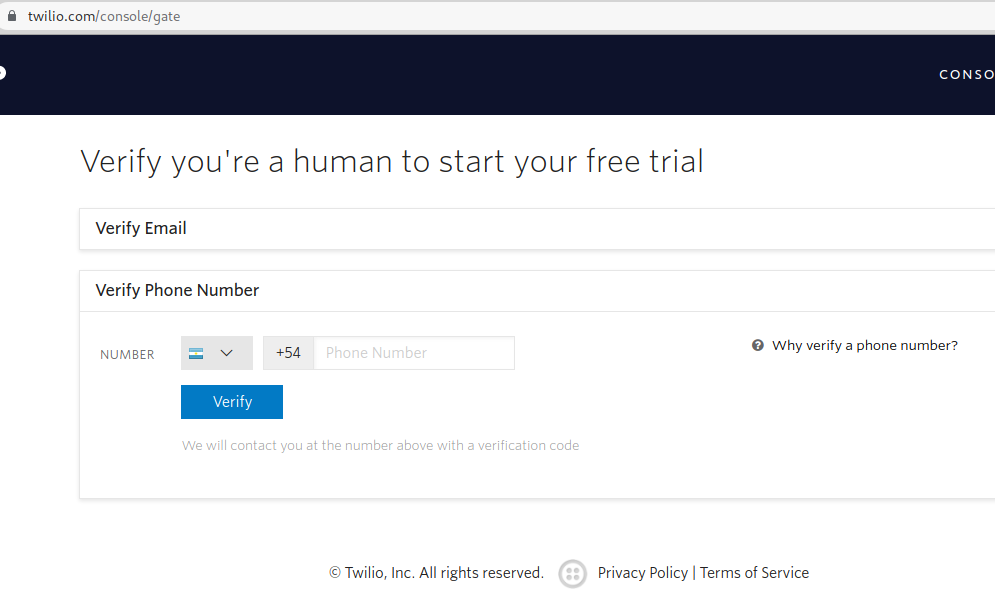
Write and verify your phone number:
Verify the phone number using the code sent by SMS:

Once registered, go to https://www.twilio.com/console/authy and press the Get Started button:
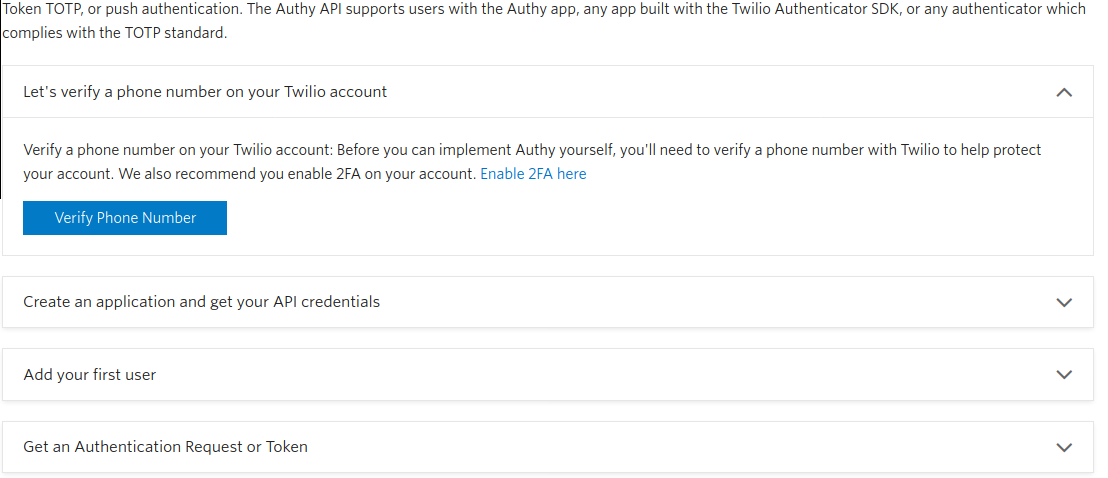
Click the Verify Phone Number button and follow the steps to confirm your number:
Verify your number:

Once verified, return to the console by clicking on Return to Console:

Select a name for the API and click on Create Application:

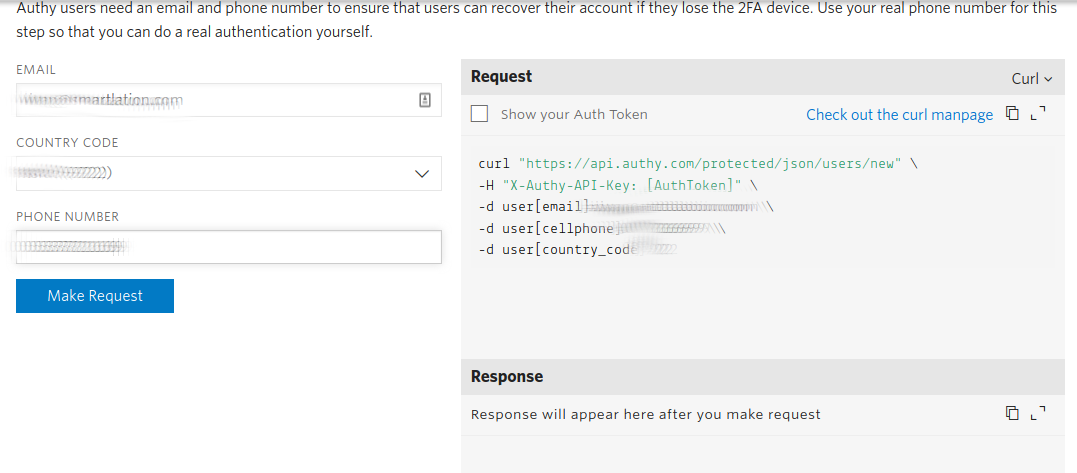
Fill in the requested information and press Make Request:
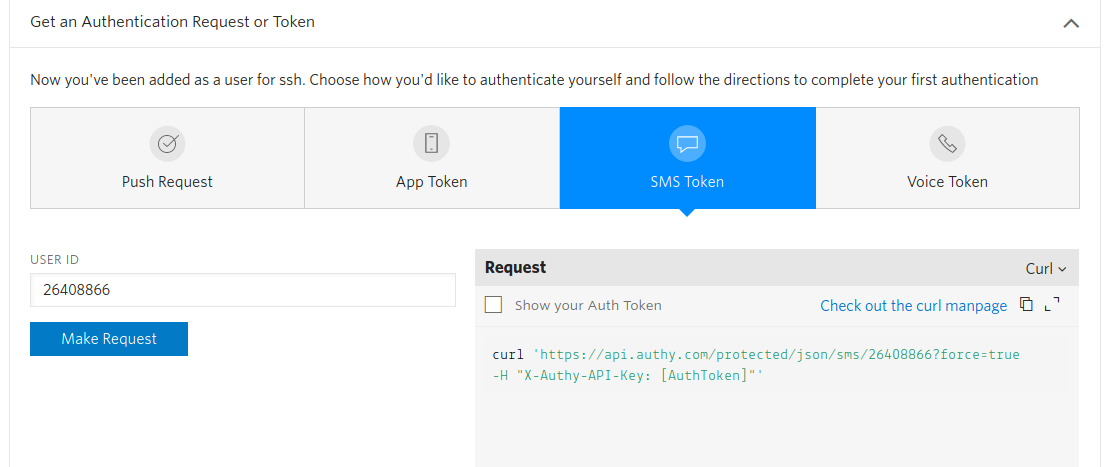
Select SMS Token and press Make Request:
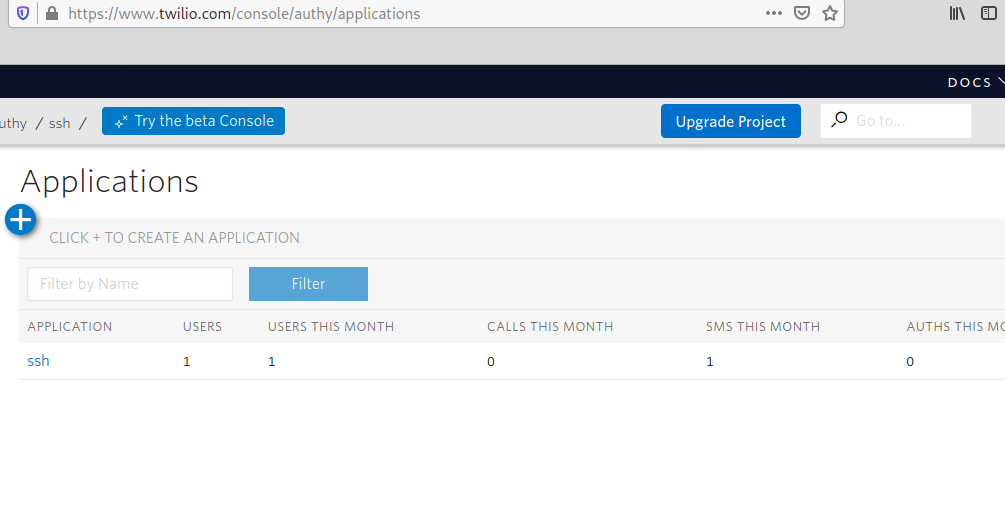
Go to https://www.twilio.com/console/authy/applications and click on the Application you created in the previous steps:
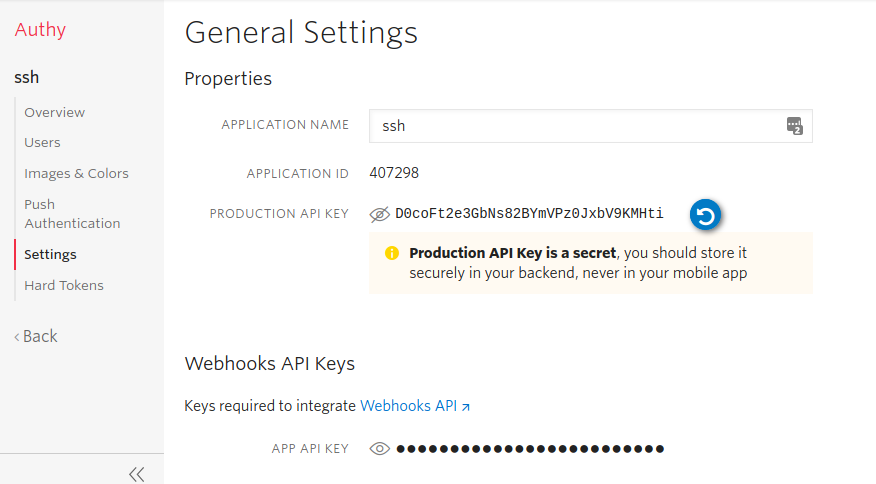
Once selected, you will see in the left menu the option Settings. Click on Settings and copy the PRODUCTION API KEY. We will use it in the following steps:
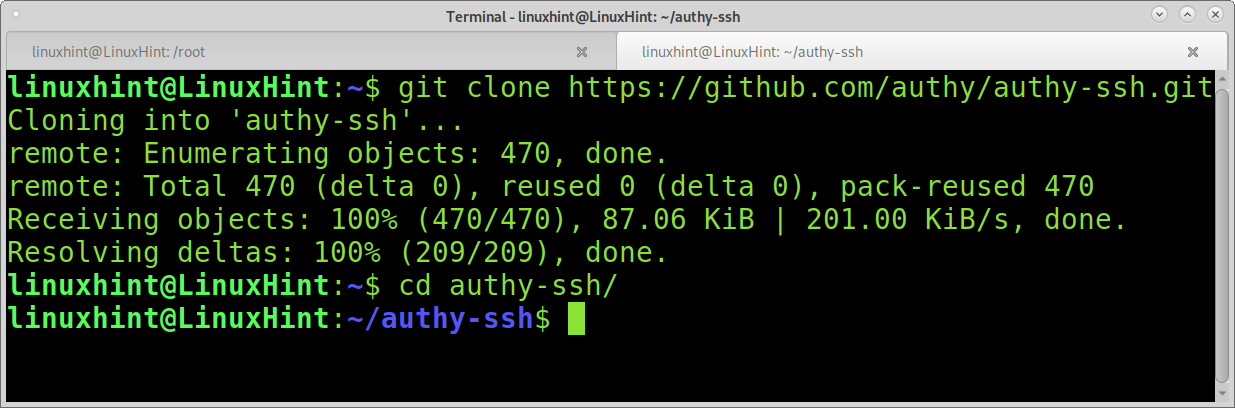
From the console, download authy-ssh running the following command:
Then, enter the authy-ssh directory:
Inside the authy-ssh directory run:
You will be asked to paste the PRODUCTION API KEY I requested you to copy, paste, and press ENTER to continue.
When asked about default action when api.authy.com can’t be contacted, select 1. And press ENTER.

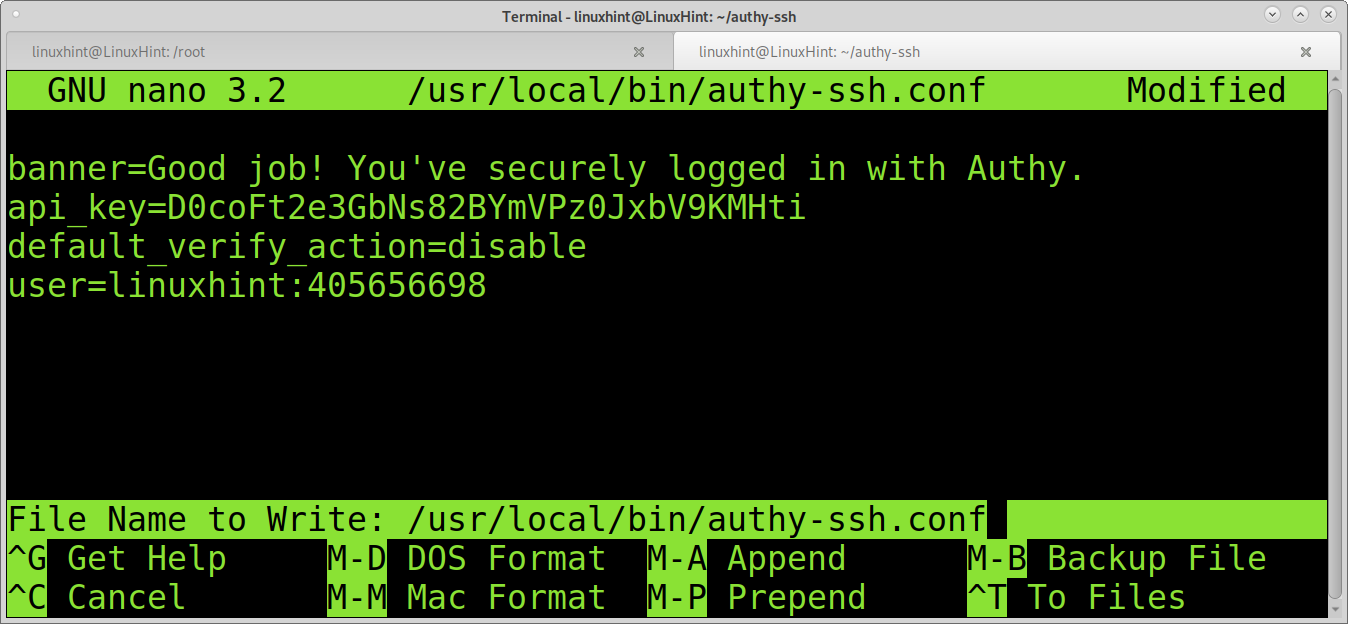
Note: If you paste a wrong API key, you can edit it in the file /usr/local/bin/authy-ssh.conf as shown in the image below. Replace the content after “api_key=” with your API key:
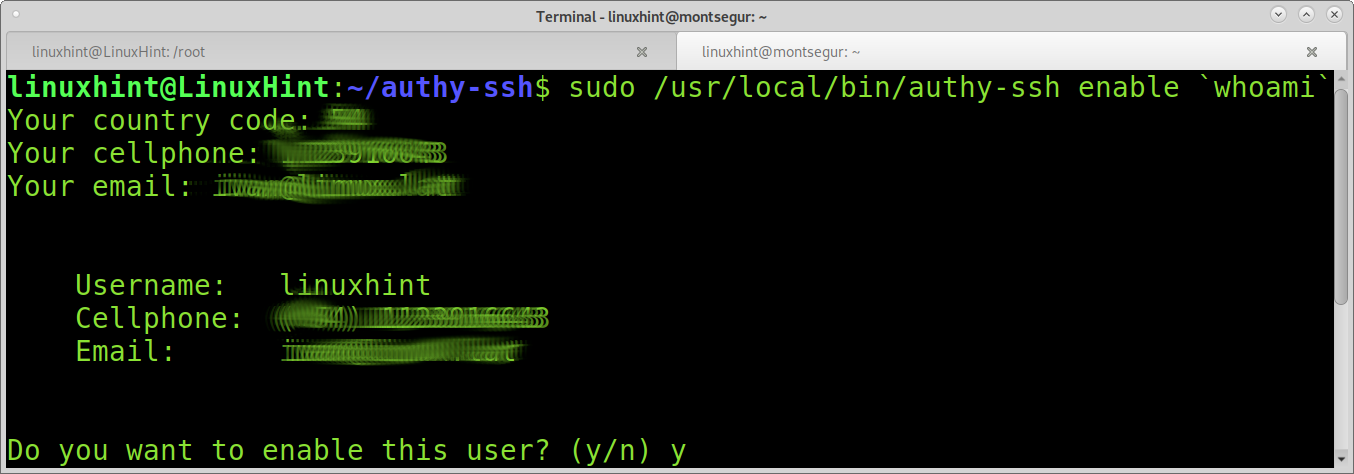
Enable authy-ssh by running:
Fill the required information and press Y:
You can test authy-ssh executing:
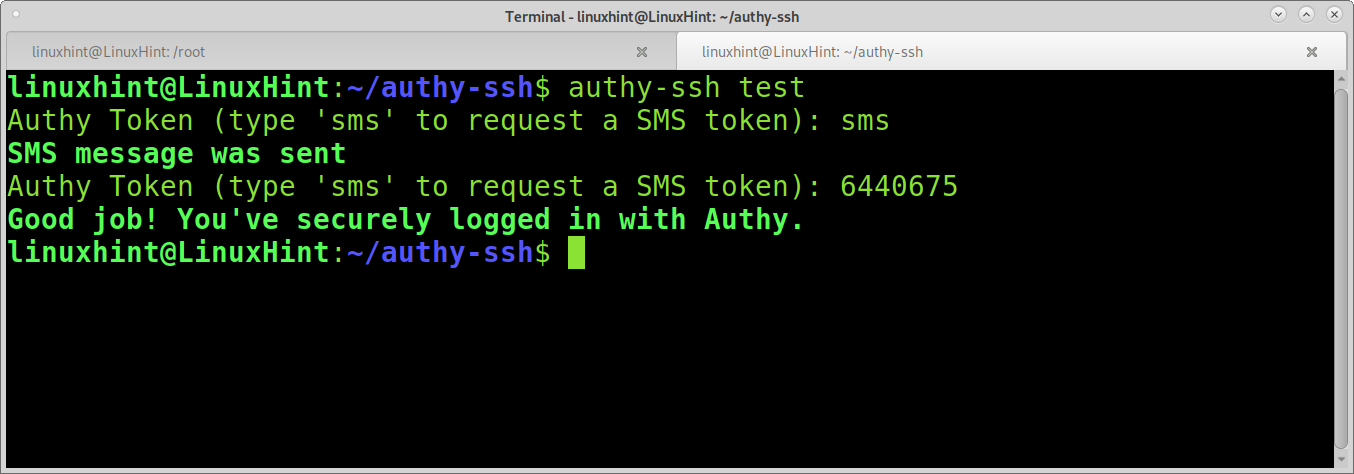
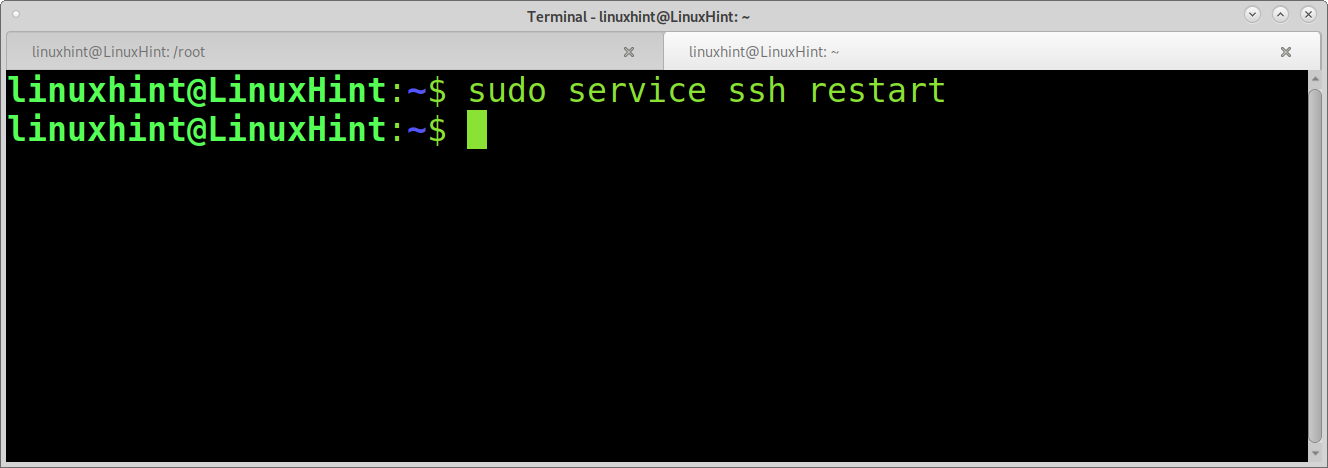
As you can see, 2FA is working properly. Restart the SSH service, run:
You can also test it by connecting through SSH to localhost:
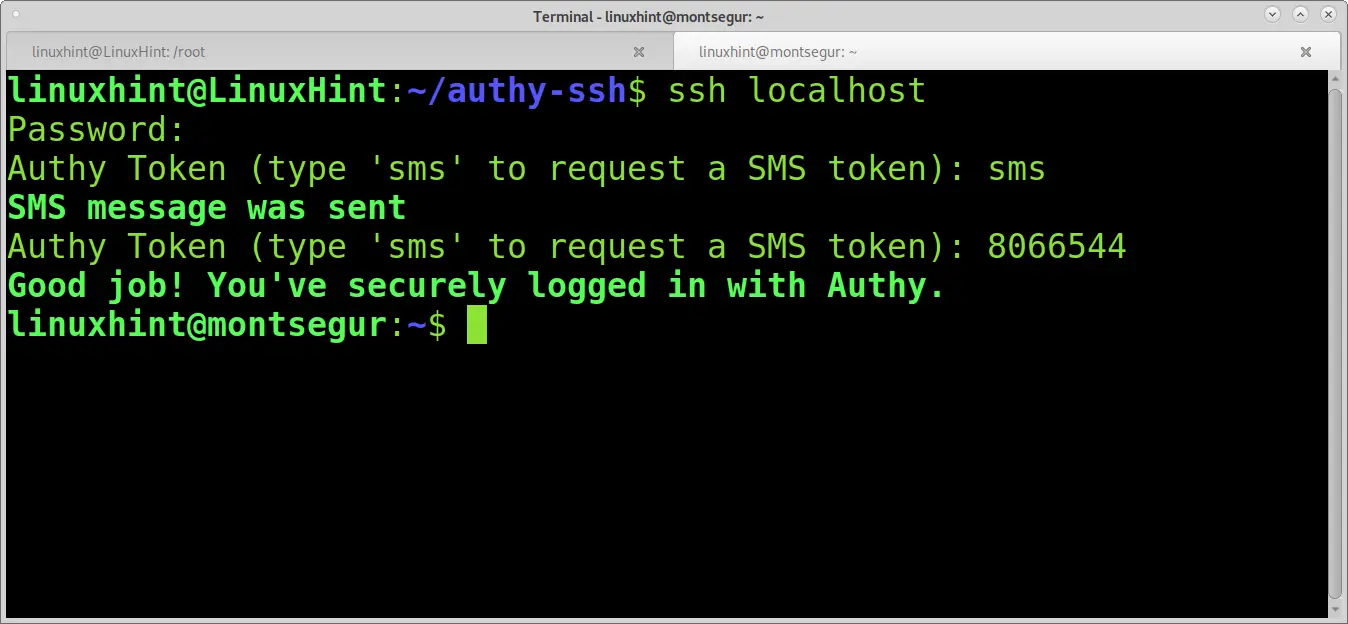
As illustrated, 2FA worked successfully.
Authy offers additional 2FA options, including mobile app verification. You can see all available products at https://authy.com/.
Conclusion:
As you can see, 2FA can be easily implemented by any Linux user level. Both options mentioned in this tutorial can be applied within minutes.
Ssh-authy is an excellent option for users without smartphones who can’t install a mobile app.
The two-step verification implementation can prevent any type of login-based attack, including social engineering attacks, many of which became obsolete with this technology because the victim password isn’t enough to access the victim information.
Other Linux 2FA alternatives include FreeOTP (Red Hat), World Authenticator, and OTP Client, but some of these options only offer double authentication from the same device.
I hope you found this tutorial useful. Keep following Linux Hint for more Linux tips and tutorials.