In this write-up, we will discuss the installation and use of the telnet commands in Linux.
How to install the telnet utility in Linux
The telnet protocol can be installed in the distributions of Linux. There are different commands for installing the telnet, in CentoOS, Fedora, and RHEL, it can be installed using the command:
In Ubuntu and Debian based distributions it can be installed using the command:
After the installation is completed, check the status of telnet protocol using the systemctl command:
The telnet protocol is installed and is in running status. We know that it uses port 23, so we will enable port 23 using the ufw command:
Reload the ufw using the command:
How to use the telnet command in Linux
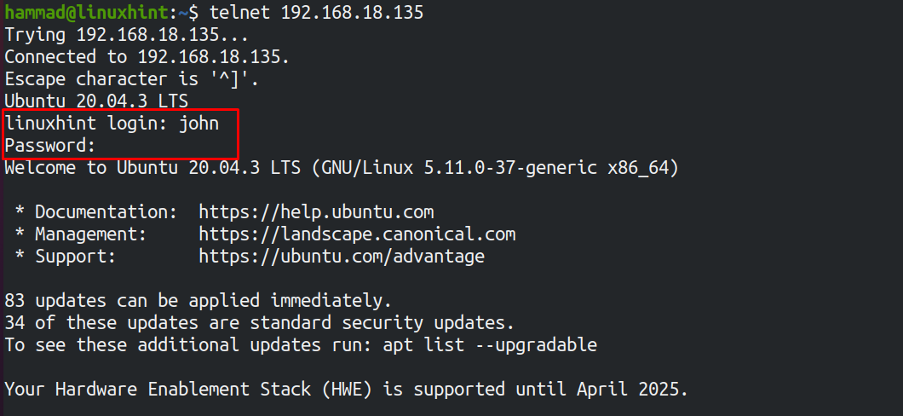
To connect to the devices we need the IP address of the particular machine and also make sure the telnet protocol is installed in that machine as well and port 23 is enabled. In our case, the IP address of the machine to which we want to connect is 192.168.18.135, we will run the command:
Type the username to login, it will ask for the password:
Once it is successfully log in, we are operating the other machine remotely:
Now, we are logged in, let’s create the text file in that(john’s) machine:
To display the contents of the file using the cat command:
We can also list down the directory of other machine using the ls command:
We can also connect to the telnet shell using the command:
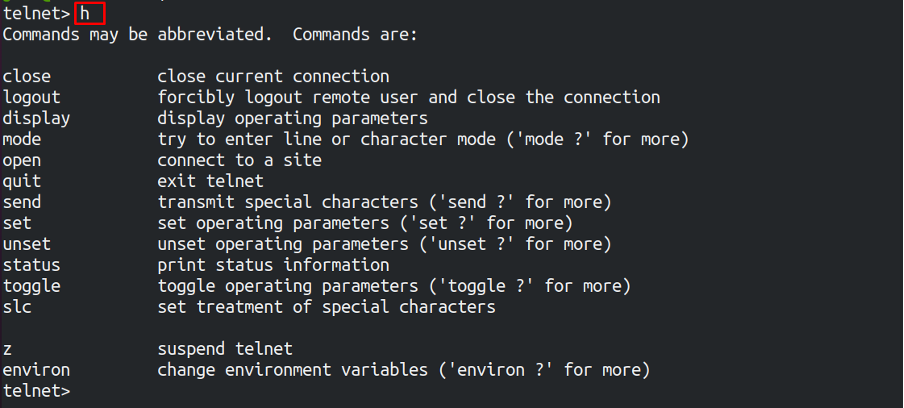
In the telnet server, we can find out the help by typing “h” letter:
Exit the telnet shell:
To exit the machine, use the command:
Conclusion
The telnet command is used to communicate with other machines remotely using the command line. It works similar to SSH but the difference between telnet and SSH is that the information communicated through the telnet is not encrypted and can easily be hacked by the hackers. In this article, we have discussed the installation of the telnet command and connecting to other machines using the telnet command.


