There are different instances when you may be working with object files or executable files. Such scenarios may require you to check the symbols in your file. In Linux, you can utilize the “name” command to display an information on the available symbols in your object or executable file.
According to its man page, the “nm” command is used to “list the symbols from the object files”. The same command also works with executable files, and we will discuss it in detail throughout today’s
Understanding the Linux Nm Command Using Different Examples
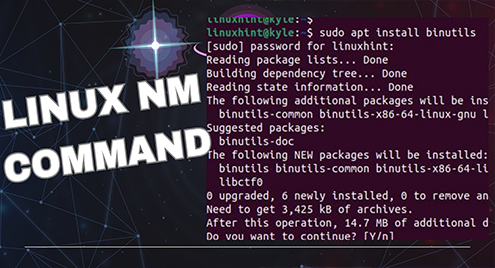
The “nm” command doesn’t come preinstalled in some Linux distros. Try checking its version with the following command to see if it’s installed:

If you get an output that is similar to the one in the following, it means that “nm” is not installed:
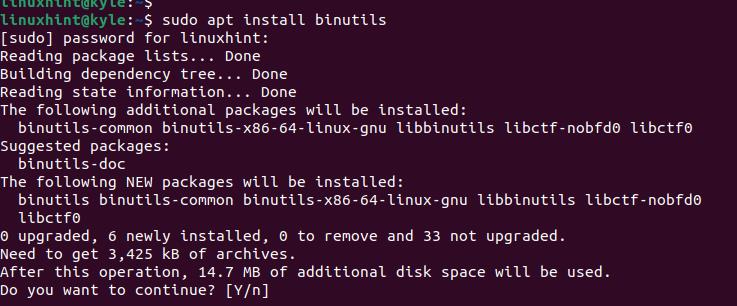
So, install it using “apt” with the following command. Ensure to confirm the action by pressing “y” when prompted:
You can now verify that “nm” is available on your system by checking its version again.

Now, you’ve successfully installed “nm” on your Linux system. The next thing is to learn how to use it to get an information regarding your target object files.
Example 1: Running the Nm Command
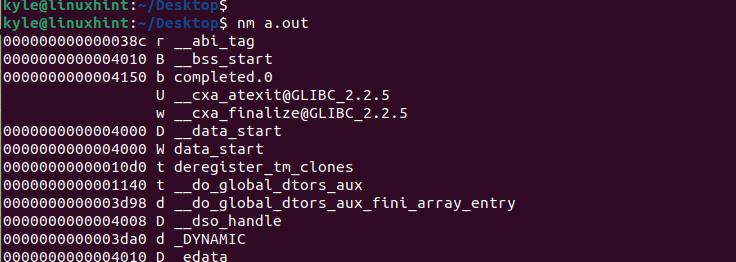
With “nm”, when you execute it, the command looks for a file named “a.out” which is an executable object file. If found, it then displays the contained symbols.
However, if you have no such file in the current directory, you will get an output as shown in the following image:

Let’s create a C++ file and then compile it using g++. When we do, we get an “a.out” file that we can use with the “nm” command.

If we rerun the “nm” command, notice that we get an output that shows all the symbols in our object file. That’s how the “nm” commands work.
Example 2: Displaying Specific Symbols
It’s possible to find a specific symbol in your object file. If you only have one object file, like in our case, and you want to find the “main” symbol, run your command as follows:

However, if you have multiple object or executable files, change your command to appear as follows:
Example 3: Display the Undefined Symbols
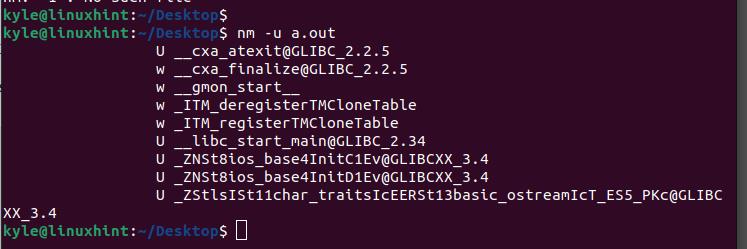
With the “-u” option, it’s possible to only get the undefined symbols in your object file. Here’s an example where we add the “-u” option when running the command:
Note that the output that we get is smaller and that’s because not all symbols are displayed, only the undefined ones.
Example 4: Display the Size of a Symbol
You can search for a particular symbol and display its size. For that, use the “-s” option. Let’s search for the “abi” object in our case and see what we get.
Only those symbols that match your search criteria are displayed and their size.

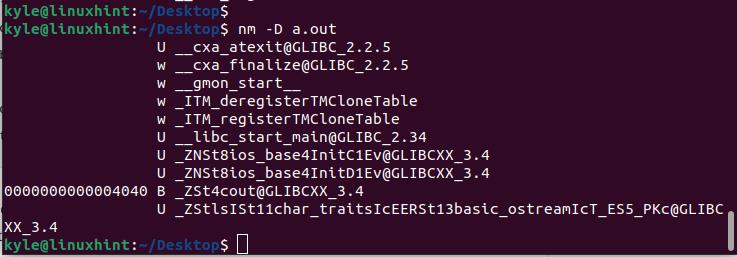
Example 5: Get the Dynamic Symbols
The “-D” option specifies that only the dynamic symbols should be displayed in the output. In the following image, we can see that after adding “-D”, our output is narrowed since only the dynamic symbols are printed out:
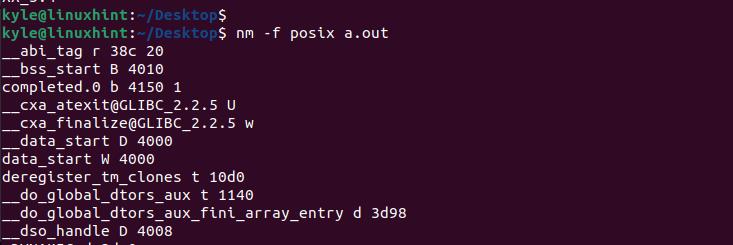
Example 6: Changing the Output Format
The default output format that is used by “nm” is the “bsd”. However, you can specify a different format using the “-f” option. For instance, if we want to use the posix format, run our “nm” command as follows:
Example 7: Working with a File
Instead of specifying each option that you want to use with the “nm” command on the terminal, you can use a file. The file contains the options, and you add the file when executing the “nm” command. The command checks all the options in the file and perform the needed action.
Here’s an example of a file which is “file1” that contains the “-g –size-sort” option.

To reference the file, run the command as shown in the following:
When the command runs, you will get the desired output. In this case, we sort the symbols and add the “-g” option to get the external symbols and ignore the rest.

Conclusion
The “nm” command lets the users work with symbols. You can use the command to display all the symbols in an executable or object file. This post explained about the “nm” command. Besides, we provided different examples to ensure that you get comfortable using the command. Hopefully, the “nm” command is now clear.