It entails a client-server directory protocol and service that distributes system configuration data between computers. The framework enables you to create shareable user accounts across all the machines and systems within your network. Like most frameworks, it consists of an array of daemons, including”
- rpcbind/portmap: The foundation or primary RPC daemon on which NIS runs.
- ypserve: The master server daemon.
- yppasswdd: The daemon allows users to change their respective passwords from NIS client machines, affecting NIS server changes.
- ypxfrd: You can use this daemon to transfer larger NIS maps.
- ypbind: This is the primary NIS client daemon.
This step-by-step guide provides a detailed illustration of configuring NIS in various Linux platforms. Among the configuration steps that we will handle include:
- How to configure the NIS master server on Linux
- How to add new NIS users on Linux
- How to configure the NIS slave server on Linux
- How to configure NIS clients on Linux
Note: For this demonstration, we will use Linux RHEL 6/CentOS versions. Again, it is vital to note that we will be pretty specific to NIS, not NIS+.
Let’s get started!
NIS Linux Master Server Configuration
Consider the following steps:
Step 1: Install NIS
Begin by installing the NIS server packages using the following command:
Step 2: Set the Domain Name
Proceed to set the domain name at the master server using the following command:
Step 3: Start Any Server-Related Daemons
Once your domain name is set, you can start and run the primary NIS server daemons. The command below should help:
Step 4: Start the rpcbind Daemon
Notably, it is essential to note that portmap is not useable in CentOS/RHEL 6. Instead, use the rpcbind daemon. Thus, start this daemon using the following command:
Step 5: Confirm the State of Services
Ensure that all the correct services are up and running. You can do this by using the following command:
The previous command should produce results similar to those in the following illustration:
Step 6: Initialize the NIS Database
The final step of the server configuration process is to initialize the NIS database. This step ensures that your master server is already up and running. You can achieve that using the following command:
How To Add New NIS Users
Once your server is up, add new users whose details your systems will store. The following steps are necessary:
Step 1: Create New User Accounts
You can create new user accounts on your master server by adding their credentials appropriately using the following command:
Step 2: Update the Database
Once you add users, proceed to update your database using the command below:
Step 3: Verify Your Entries
The following command will help you verify your entries. Besides, it will help you confirm that your master server is fully configured and running correctly.
Configuring NIS Slave Servers
Having two or more servers in your system allows reliability and productivity. Notably, slave servers come in handy when the master server is too slow or completely down. If such a scenario happens, the clients will automatically look into any fully functional slave servers for information. This makes it vital always to include one or more slave servers to improve or maximize uptime.
When configuring the slave server, you will handle the configuration both at the master server machine and the intended slave machine.
The following steps are important:
Configuring the Master Server-Side
Step 1: Edit /var/yp/Makefile
Start by editing the /var/yp/Makefile. This edit should enable the “PUSH” maps feature to the slave server whenever there are updates on the database. The following command is necessary:
Step 2: Edit /etc/yp.conf
Next, you should edit the file to refer to your user.
Step 3: Start ypxfrd and ypbind Services
Start both ypbind and ypxfrd services to ensure they are running correctly using this command:
Step 4: Edit /var/yp/ypservers to Add Slave Servers
Proceed to add slave servers to your master server’s database using the following command:
Step 5: Update ypservers Map
The final step of configuring your slave server on the master side is to update your ypservers map by running the following utility:
Configuring the Slave-Side
You must also configure the slave side after successfully configuring the master side. This process begins by installing the NIS or yp packages on the slave server. You should ensure that the name matches the master’s hostname/IP address. correct /etc/hosts files. Use the following steps:
Step 1: Set the Domain Name on Slave Server
Like when you set the domain name when configuring the master server, you also need to select the domain name on your slave machine(s) using this utility:
Step 2: Start the Server
Use the following command to start and run your NIS server:
Step 3: Ascertain the Condition of Your Server
Ensure that your server is up and running using this command:
Step 4: Verify Slave Server Configuration
You can verify the slave server configuration using the following utility. The ypwhich tool will also show you the status of the server.
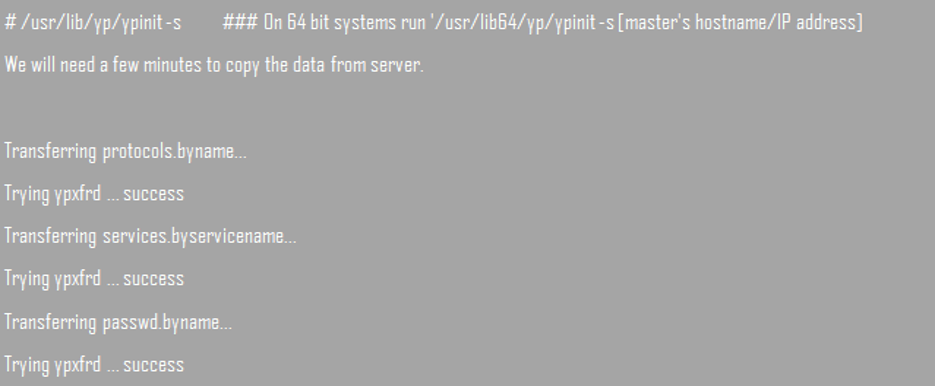
Step 5: Download the Database
You can make the initial database download from your master server using the ypinit –s tool. It specifies the master as your server’s big boy from where you obtain your data.
How To Configure NIS Client on Linux
The NIS service features a server-client framework. So, apart from configuring the servers, you also need to set up the clients. The following steps are necessary for setting up the client:
Step 1: Stop Any NIS-Related Services
First, you must stop any NIS-related services on your client’s machine. Also, remember to erase all files from /var/ypbind directory using the following two separate commands:
Step 2: Set Up the Domain Name
Of course, you also need to set the NIS domain name on your client machines using this utility:
You can follow this by making edits to the /etc/yp.conf file as shown below:
Step 3: Start portmap/rpcbind and ypbind Daemons
You can start the two daemons related to the client platform. The system will look like this:

Step 4: Check the Database for the User’s Credentials
You can proceed to confirm if the user credentials already exist in the master database. You can do this using the following NIS tool:
![]()
Step 5: Edit the /etc/nsswitch.conf File
Edit the /etc/nsswitch.conf file to include the following details:

Step 6: View the Data as Updated in the /etc/nsswitch.conf File
Use the getent utility to view any updates on your database. The getent utility appears below:

Conclusion
The previous demonstration illustrates how you can configure NIS on your systems. We delved deeper to provide you with a complete outline. So, you can now configure the master server, the client, and the slave servers.


