This article will focus on using a Linux server to authenticate against the Linux directory. LDAP directories in Linux environments can either be local or network directories. Notably, network directories come in handy where and when there is a need for central authentication, while local directories operate within the same computer and not over a network.
While we will focus on LDAP protocol, discussing a Linux LDAP authentication is impossible without including NSS and PAM in the tutorial. Thus, we will also discuss how to configure NSS and PAM modules to work with client computers through the authentication process. This guide focuses on online authentication.
Step 1: Install OpenLDAP Server
You will not authenticate with LDAP if you do not have it installed in your systems. So, the first step is ensuring that you have OpenLDAP installed in your system. We already discussed the installation process elaborately in our previous write-up.
This command should help you install OpenLDAP on Ubuntu 22:04:

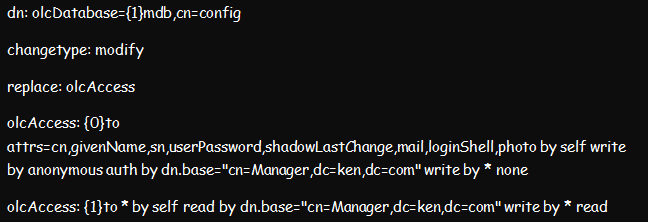
Step 2: Set Access Controls
Once the installation process is complete, proceed to set up the access controls. Setting up the access controls ensures that no one can access and read any encrypted passwords from the LDAP server. Yet, users can still edit some of their attributes, such as personal passwords and photos.
You can achieve this setup by creating and importing the below ldif file. And once done, you can restart the slapd.service.
Step 3: Add Base Data to the LDAP Tree
Create a temporary base.ldif file containing the following details:
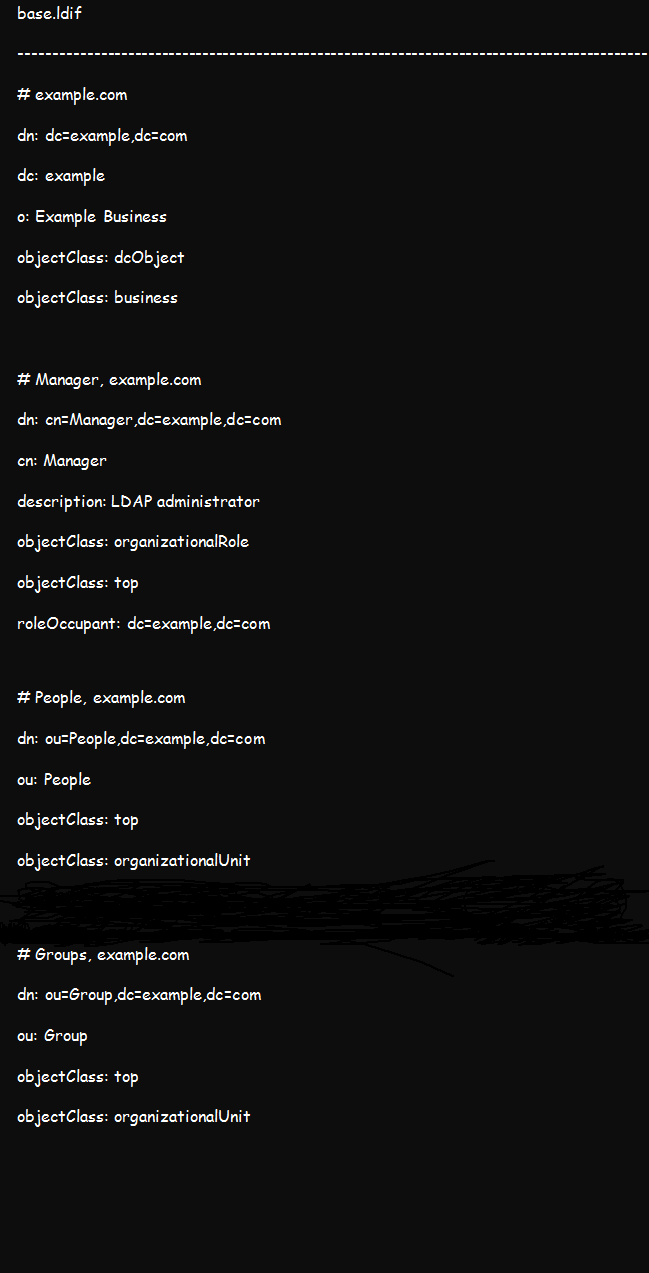
You can customize the details by replacing example and org with your actual domain credentials. Once done, add the above details to your OpenLDAP tee using this command:
![]()
Test using the below command to confirm if the data importation was successful:
![]()
Step 3: Add Users
To add a user, you should create a .ldif file such as the one below. Our user for this demonstration is kenbrian and our domain credential is linhint.com.
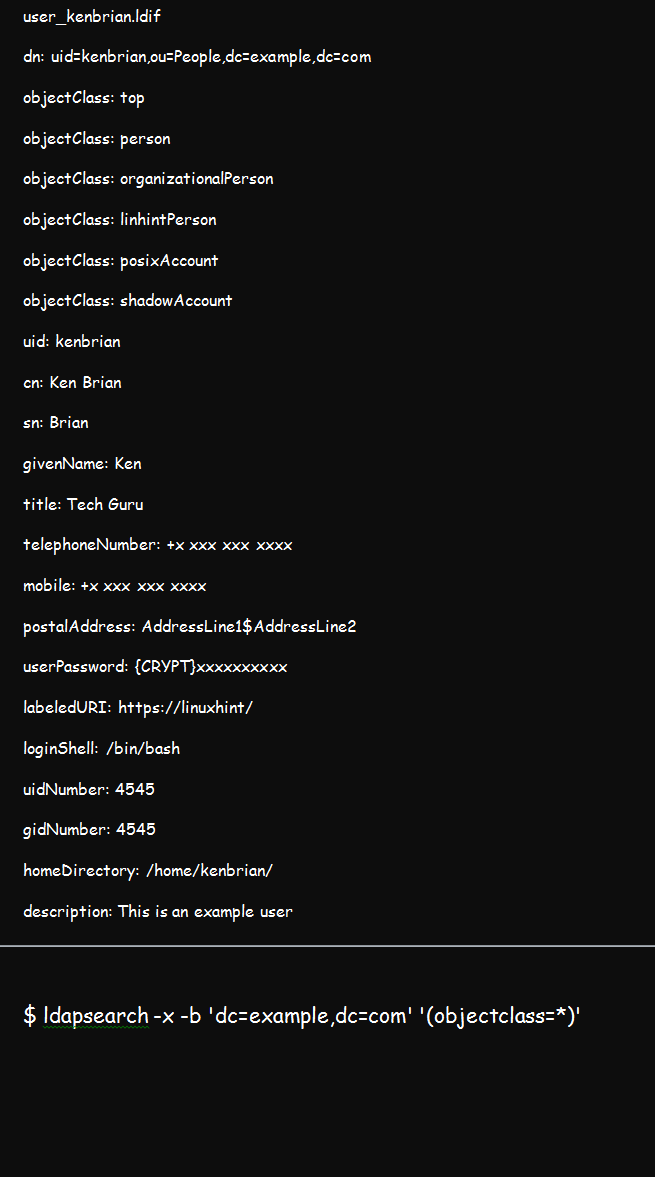
The ********* present in the userPassword entry represents your password, which is the value of slappasswd or /etc/shadow. You can now add the user once you have the .ldif file using the below command:
![]()
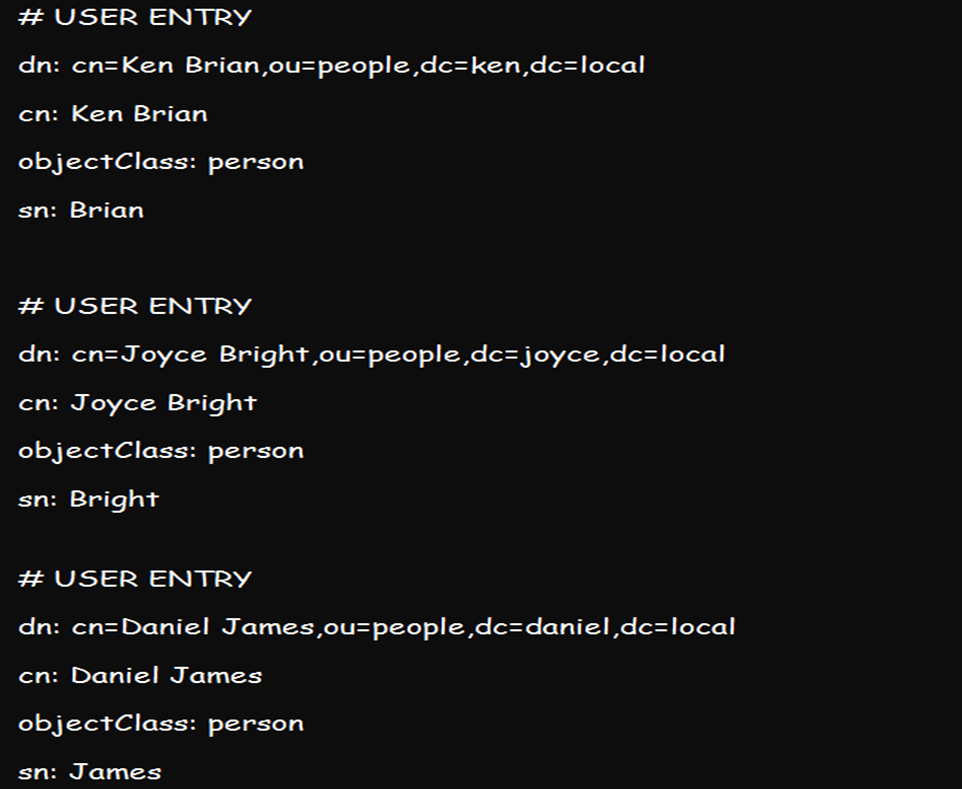
You can also use the ldapadd command to add more than one user to the directory by creating their various credentials all at once and adding them using the above utility. A list of credentials can look like this:
Step 4: Set Up the Client LDAP Server
You can set up an OpenLDAP server and ensure you can successfully query the server using the ldapsearch command. Once set up, you can decide whether to proceed with online and offline or online-only authentication.
Below is the basic ldapsearch command line or syntax:

Step 5: Configure NSS
NSS, also known as Name Service Switch, is a system often used for managing configuration databases of different sources. So, you will find it vital in a range of LDAP applications. The following steps will be vital for configuring NSS:
- Install NSS using the nss-pam-ldapd package.
- Edit the NSS central configuration file, which is the /etc/nsswitch.conf. This file informs NSS of the files to use for respective system databases. Editing the file will require you to add ldap directives to the group, passwd, and shadow databases. Ensure that your edited file looks like this:
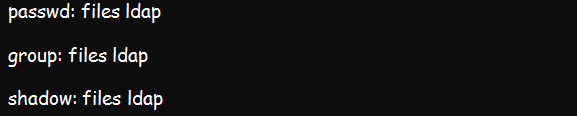
- You will also need to edit the /etc/nsswitch.conf. file to change the uri and base lines so that they fit your ldap server settings.
- If your LDAP server prompts for a password, edit both the bindpw and binddn sections. Continue to replace your /etc/nsswitch.conf permission from nslcd to 0600 for a proper start.
- Use the systemd command to start the nslcd.service. With that, your LDAP users should be visible when you run getent passwd command on your client-server.
Step 6: Configure PAM
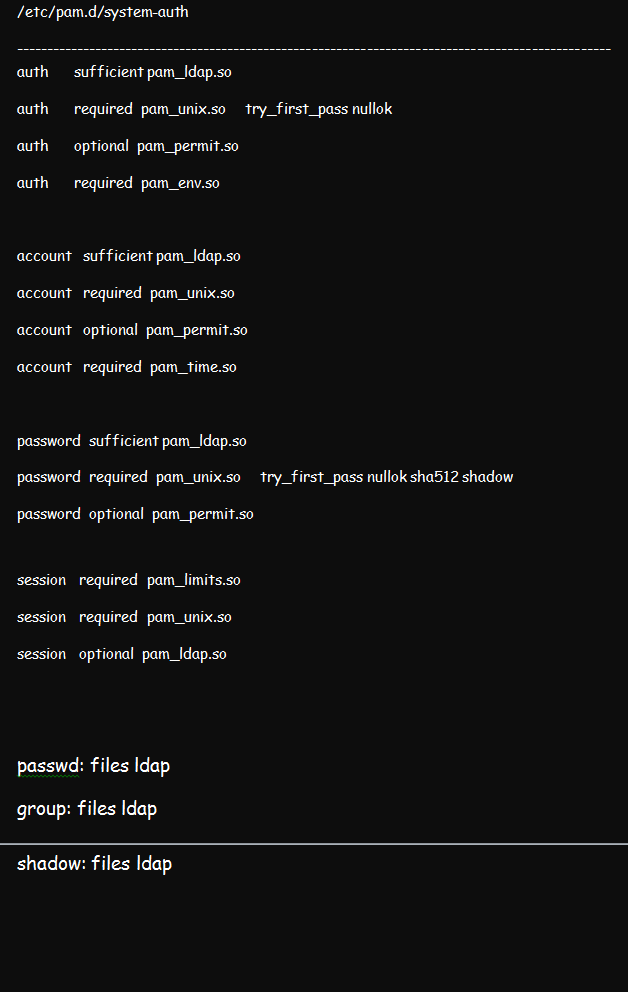
We discussed how to configure PAM in a Linux environment in a previous article. But for this illustration, ensure that you configure the Pluggable Authentication Module using the pam_ldap.so. While at that, edit the /etc/pam.d/system-auth file from pam.d. the result should be like in the figure below:
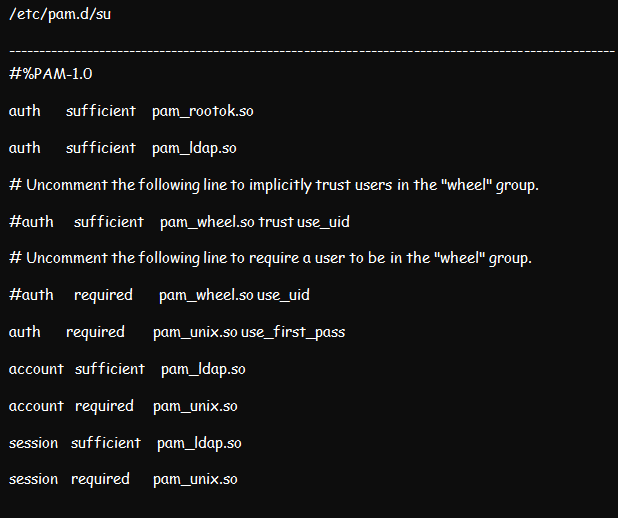
Proceed to edit the /etc/pam.d/su as well as the /etc/pam.d/su-l files. The /etc/pam.d/su-l file comes in handy whenever the /etc/pam.d/su login is run by the user. Place pam_ldap.so sufficient above each section except the pam_rootok.
Now, permit users to edit their passwords by making edits to the /etc/pam.d/passwd file.
Step 7: Create Home Folders at the Login
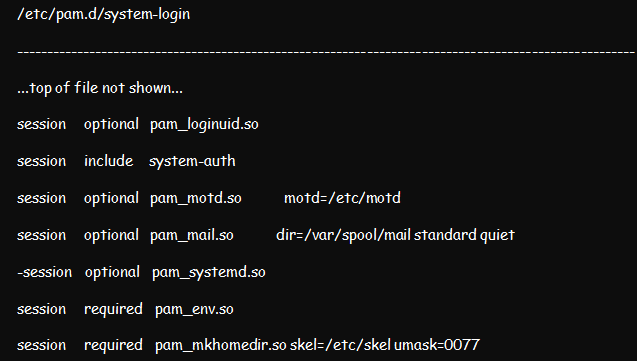
You can choose to create home folders at the login in case your system does not use NFS to store folders. Create a home folder at login by editing /etc/pam.d/system-login and then adding pam_mkhomedir.so to session sections above all sufficient items.
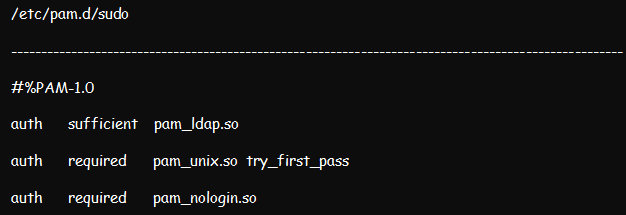
Step 8: Enable sudo
Enable sudo from the LDAP user by editing /etc/pam.d/sudo and modifying it appropriately.
Add the command below to the /etc/openldap/ldap.conf file:

Conclusion
The above steps should help you implement an online authentication of Linux LDAP alongside PAM and NSS. This system comes in handy in securing your systems. More importantly, you can use it to query and manage your company information.