In the Linux Operating System, some users wish to install the applications to check how much memory is used and whether free space is available. The installation of those applications might take a large memory size.
Linux provides a “free” built-in command utility that provides a detailed information about the total amount of used memory and free space, swap memory, and buffer which are used by the kernel. The content of this guide is as follows:
- How Does the Free Command Work in Linux?
- Show the Memory Using the Free Command
- Check the Availability and Used Memory in Other Display Metrics
- Continuously Monitor the RAM Usage in Linux
- Display the Total Sum of Memory Figures in Linux
Let’s start the guide with the “free” command.
How Does the Free Command Work in Linux?
The “free” command in the Linux operating system allows the users to get a complete picture of the total Ram, how much is used, and its free space. It also shows the swap memory and used cache.
The syntax with multiple options is as follows:
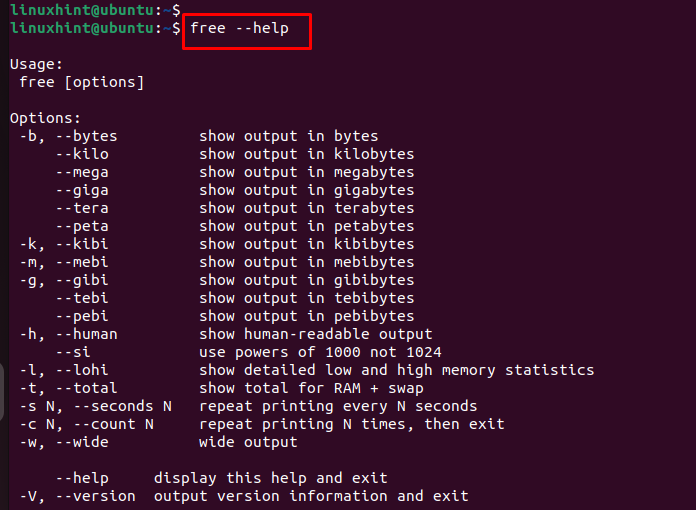
Different options with description are given in the following:
| Options | Description |
|---|---|
| -b | It is used to show the data in bytes. |
| -k | This option displays the data in kilobytes (Kbs). |
| -m | It displays the memory information in megabytes (Mbs). |
| -g | It gets the result in gigabytes (Gbs). |
| -t | It gives an additional “total” column along with the total, used, and free space memory information. |
| -s | This option is used to set a time gap. |
| -c | This option sets a counter loop. |
To explore more options of free command, execute the following script:
Example 1: How to Show the Memory Using the Free Command
When you run a “free” command on the terminal, it shows the memory in kilobytes by default. To do so, execute the following script:
As you can see, the output displays the complete picture of the total, used, free, buffer/cache, shared, and available memory along with the swap memory.
When you enter the “free” command, you will see some terminologies that you need to understand as follows:
total: The amount of all memory installed in your system.
used: The memory that your system is currently using.
free: The free unallocated memory on your system.
shared: The amount of memory that is shared between many processes.
buffers: The memory that is used by the OS kernel.
available: This shows the amount of memory that can be allocated to the new processes.
Let’s explore other examples.
Example 2: How to Check the Availability and Used Memory in Other Display Metrics
You can see the status of your memory in different display metrics like bytes, kilobytes, megabytes, gigabytes, and terabytes using the following command according to your choice. In our case, the “m” is used for megabytes as it is most suitable for most users:
Example 3: How to Continuously Monitor the RAM Usage in Linux
Using the following “free” command, you can monitor your system’s memory:
This is a loop that does not end until you close the terminal.
You can also do this with a specific number of cycles. The “c” stands for cycles. We use 4 as follows:
The output shows that the loop terminates after the 4 rounds.
Example 4: How to Display the Total Sum of Memory Figures in Linux
You need to use the following “free” command to display the sum of all memory figures via the “t” option in Linux:

Conclusion
The “free” command in the Linux-based systems looks promising as it shows you the amount of RAM or memory that is used by your system. Since many software setups require a specific amount of RAM, you should know how much of the free memory is available on your system. In this tutorial, we learned how to use the free command with different options to get the desired results.


