Bash scripts make the automation of tasks an easy thing. There are numerous ways where you can automate different repetitive tasks to save time and effort, including automating the tasks that require a user input. Besides, Linux offers commands such as “expect” to easily work your way around using scripts.
The Linux “expect” command lets you control how the scripts that require a user input to execute works. If your script requires a user input to continue executing, there is a way on how you can control this interactivity using the “expect” command.
Getting Started with the Linux Expect Command
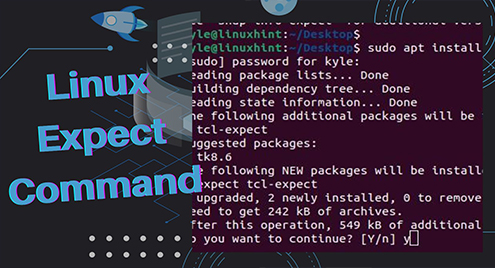
The Linux “expect” command doesn’t come installed on your system. However, you can use different methods to install it. For our case, we are using the “apt” option to install it using the following command:
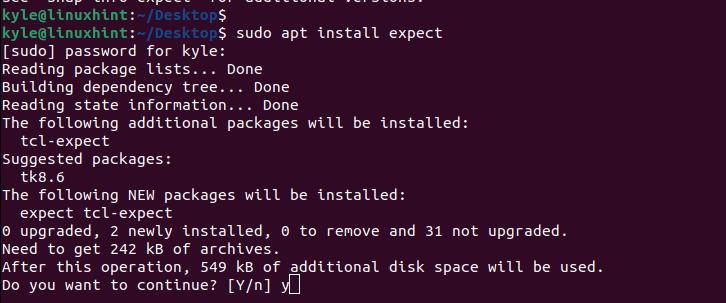
Once the process completes, check the expect version to verify that the installation was a success.

Once you have the information available on your Linux, the next thing is learning how to use it to automate the interactive tasks.
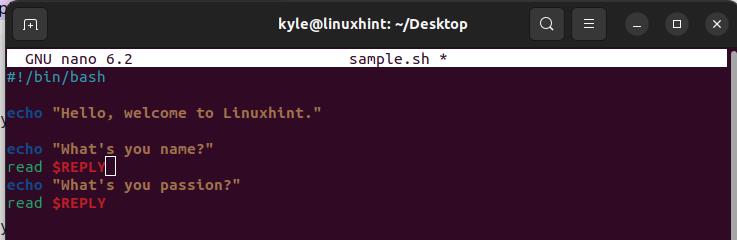
First, let’s create a simple Bash script to see how it would run interactively. Our script prompts the user to input a few details, and it can only continue running when a user input has been read.
Create a Bash script using a text editor of your choice. Once you have your script code written, save and exit the text editor.
You must make the script file executable. For that, use the following syntax and match it with your target script file:
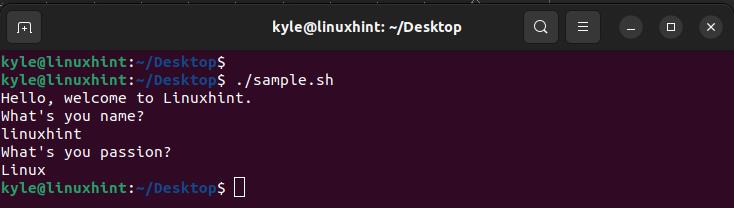
To run the script, use the “./” command followed by the script’s name. Notice how the script prompts for user input and can only continue when we type the input.
When you want to automate such an interactive session, you must use the “expect” command to send the required inputs when required instead of a user having to input them.
Before we see how the “expect” command comes into play, locate its location using the “which” command. Note the path where the “expect” command lies as you will need it when writing the “expect” script.

For this case, “expect” is stored in the /usr/bin/expect location.
Again, open your text editor and create another script. This time, save it with a “.exp” extension to identify it as an expect script. There are four main commands that you can use when writing your expect script:
- spawn – It initiates a new process and is added to invoke the script that you wish to automate the interactive sections.
- send – It sends the required response that would otherwise be inserted by the user.
- expect – It shows the line in the target script that awaits an output.
- interact – It initiates interacting with the program.
For this case, we have our “expect” script written as shown in the following. We highlighted the target script and given the “expect” options and what response they will get.
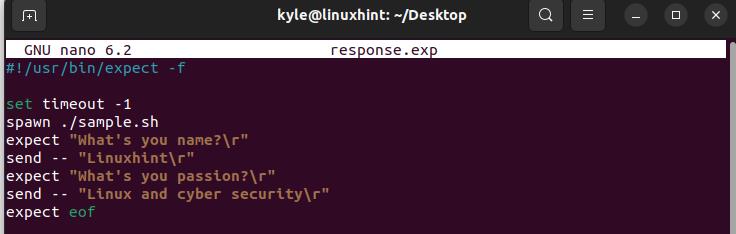
The last line shows the end of the script and must be included whenever you are writing an “expect” script. Make the “expect” script executable using “chmod”.

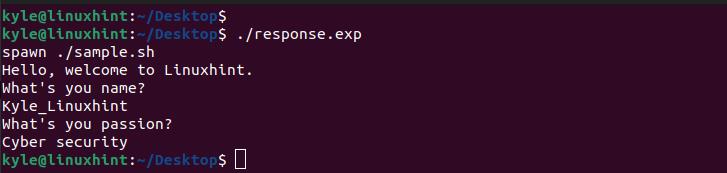
Lastly, run the script and watch what happens. Instead of requiring a user to interact with the script by inserting the required input, the values that we sent in the “expect” script are added as the user responses. That way, you manage to automate the interactive user inputs.

Suppose you prefer working with variables for the values that you want to have as the user inputs; that, too, is possible. Set the target variables and their values, then invoke the variable name to send it as the expected user input. Take a look at the following example:
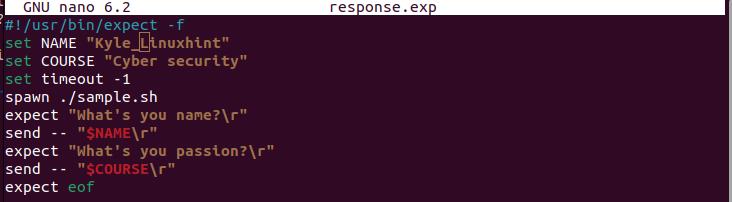
When you rerun this modified script, you still obtain the same goal, only that you used variables this time.
Working with Autoexpect
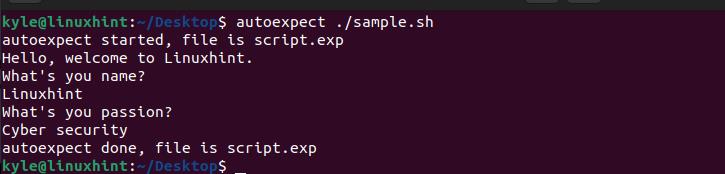
You can avoid creating the “expect” script using the “autoexpect” command. How this works is that you run the “autoexpect” command followed by the script that you wish to create an “expect” script for.
For instance, our initial script is “sample.sh”. For that, we use “autoexpect” with the following command:
Once you run it, a new “expect” script automatically gets created under the “script.sh” name, and you will get prompted to give the expected responses for the user inputs.
All you need is to run the created script, and you simplify the process by eliminating the need to create the “expect” script manually.
Conclusion
The “expect” command helps to automate the interactive user inputs when creating a Bash script. Once you give it with the expected values, your script will run without halting, even though the user input is required. We’ve seen an example of working with the “expect” command, including how to generate an “expect” script using the autoexpect program automatically. That’s it!