There are several methods for cloning a hard drive in a Linux system. Cloning the hard drive or compressing its contents into a single file is the best solution for backing up its data. In this article, we will show you how to clone your hard drive on Linux using three different tools, so let’s begin!
Cloning Hard Drive using the dd tool
By default, most Linux systems have this incredibly effective disk cloning tool. The “dd” command-line tool was initially designed to copy and convert massive volumes of data to and from hard disk drives. It can be used to create system backups to clone the entire storage space. Have a look at below given some other features of the “dd” tool:
- In Linux-based systems, it is a command-line utility that is utilized for converting and copying files.
- You can mount your backup disk drives by using the dd tool which is much more readily than compared to other Linux disk cloning tools.
- dd is a freely available, standalone hard drive cloning tool that runs flawlessly on Linux systems.
- dd is considered a de-facto utility when creating new CD/DVD or Live USB distributions from their respective ISO images.
- dd permits you to copy your hard drive data to any external storage devices such as USB flash drives or SSDs.
- To use this utility, you must execute a single “dd” command. That’s how it provides a simple method for mounting your backup disk drive or cloning your hard drive compared to the other software that follows a series of steps of the same purpose.
In your Linux terminal, execute the below-given command to clone a hard drive:
Here,
- sdb is the destination
- sda is the source hard drive
- bs is the block size command which corresponds to 64K
- conv=no error, sync will sync I/O, and in case of error, it will not stop.
The default value for the 64K settings is 512 bytes, which is relatively small. As a condition, it is better to include 64K or 128K. On the other hand, the transfer of a small block is more reliable.
Cloning Hard Drive using Partimage
The “Partimage” is another utility that many Linux users utilize for cloning their hard drives. It is a powerful disk cloning tool with many useful capabilities like large-scale operating system deployment, imaging disc partitions, and software provisioning. Partimage is an open-source software which means that anyone can use and modify it according to their preference. Check below-given features of Partimage software:
- It has a simple GUI
- Partimage permits its users to compress and encrypt their disk image data
- HPFS, FAT, JFS, Xfs, Ext2, UFS, Ext3 HFS, NTFS, ReiserFS, all filesystems are supported by Partimage
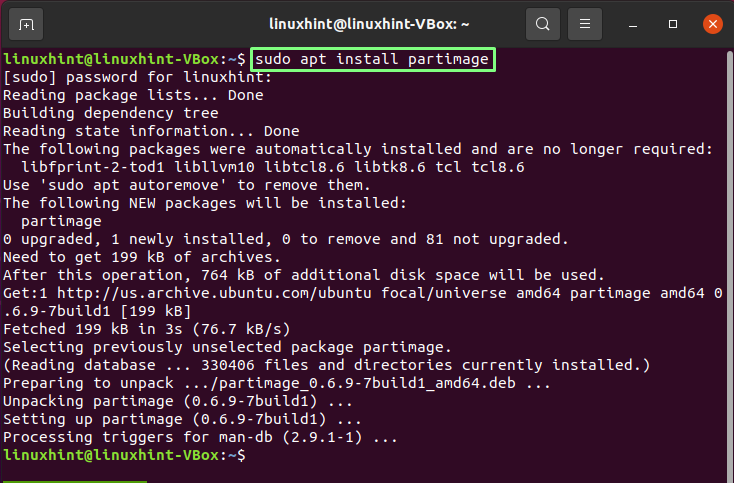
On your Linux system, install Partimage using the following command:
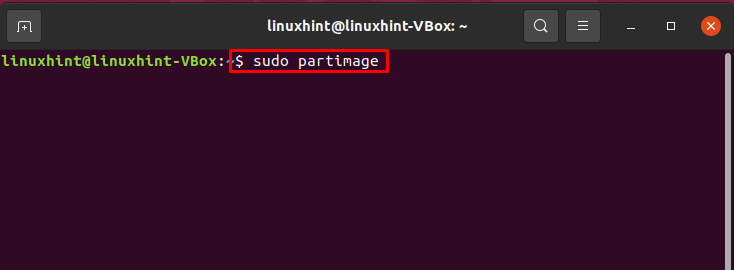
After completing the installation procedure, open up Partimage on your system:
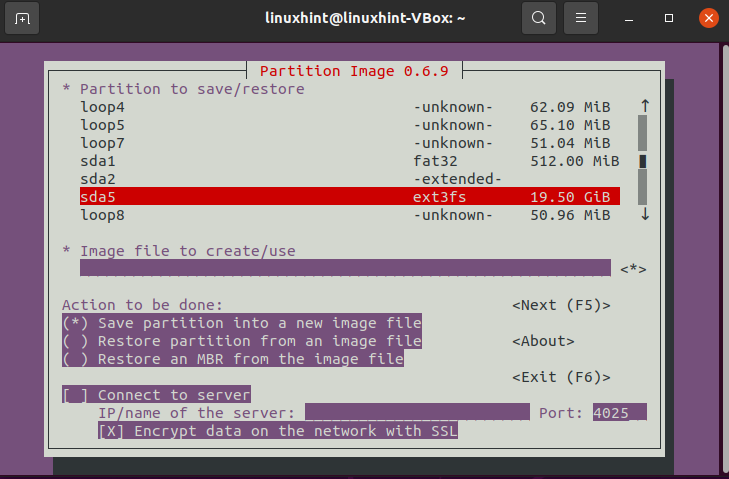
Using this tool, you can back up any partition. I’m going to backup “sda5”:
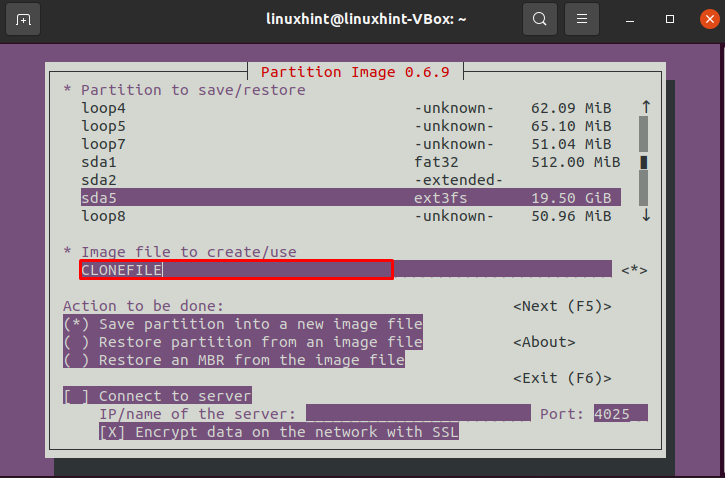
Write out the name of the new image file, if which you are going to clone your hard drive data:
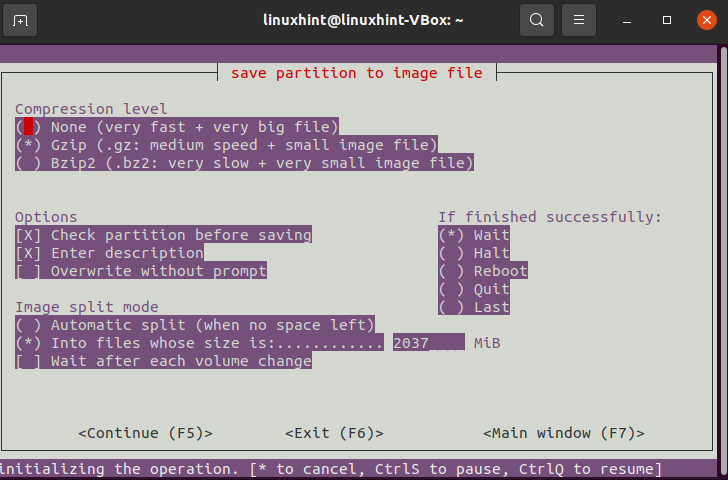
Select a compression level according to the size of your hard drive:
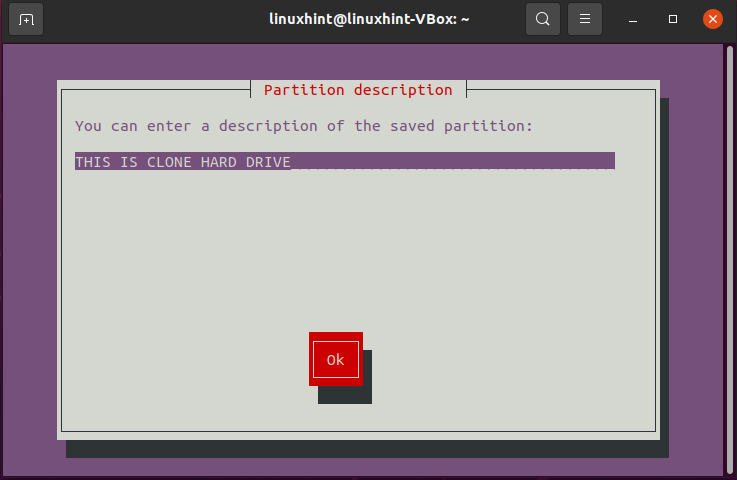
Enter a description of your clone drive:
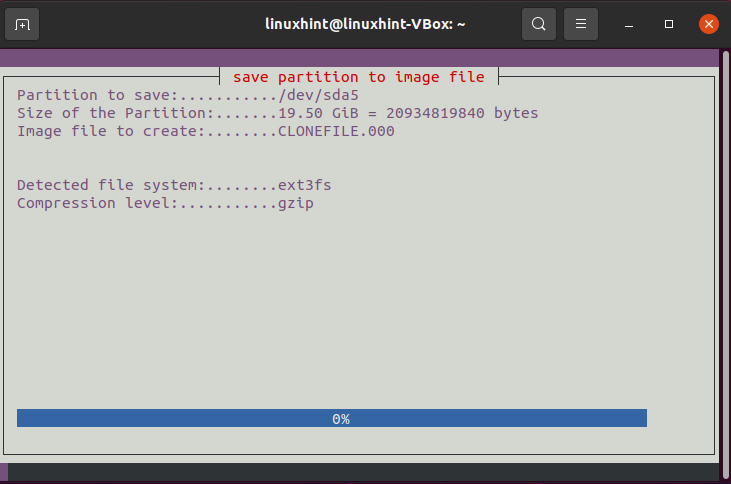
The system will show you some information related to your hard drive. Check it out and Press Enter:
All done!
Cloning Hard Drive using Clonezilla
Clonezilla has several cloning features to ensure that your important data is protected in the case of any security failure. Clonezilla is a disk cloning program based on a console, which borrows features from other hard drive cloning software such as Partimage. It is available in two versions: Server and Live. It also permits its users to back up a single hard drive while simultaneously cloning up to 30 computers. Now, check out the below-given features to know more about this software:
- This hard disk cloning software is distributed under the GNU GPL license, which means anybody can use and add changes.
- Linux users can utilize Clonezilla for cloning only specified partitions of their hard drives.
- Users have the option of saving their Hard Disk Drives (HDDs) to local or external HDDs.
- Clonezilla supports ext2, reiserfs, ext3, xfs, FAT, JFS, and NTFS file systems.
- It also can share photos over a network which boosts productivity and allows enterprises to use Clonezilla for bulk cloning.
Want to use Clonezilla for cloning your hard drive? Follow the below-given procedure!
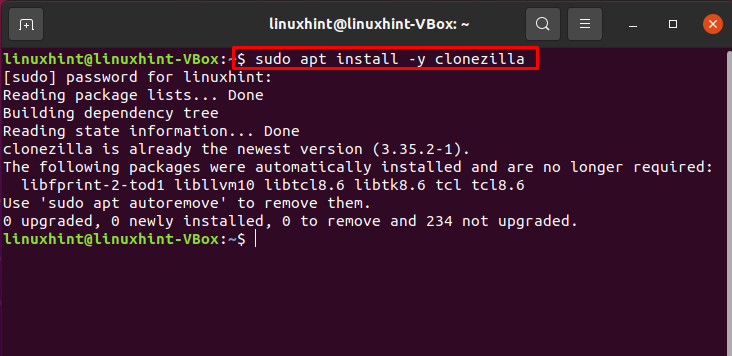
First, we will utilize this command or installing Clonezilla on Linux:
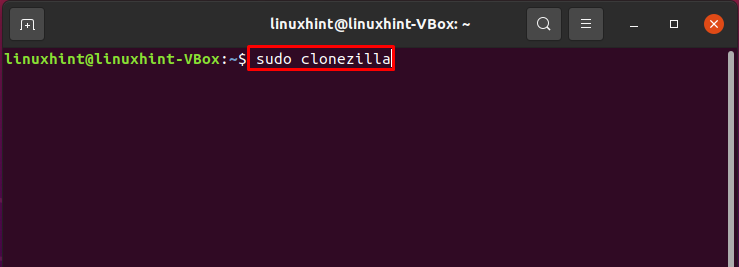
Now, open it up in your Linux terminal using the following command:
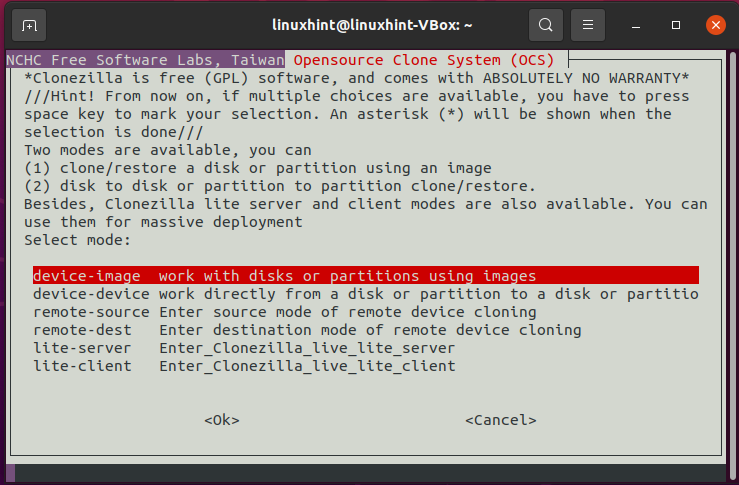
We have selected “device-image” as Clonezilla mode for cloning our hard drive:
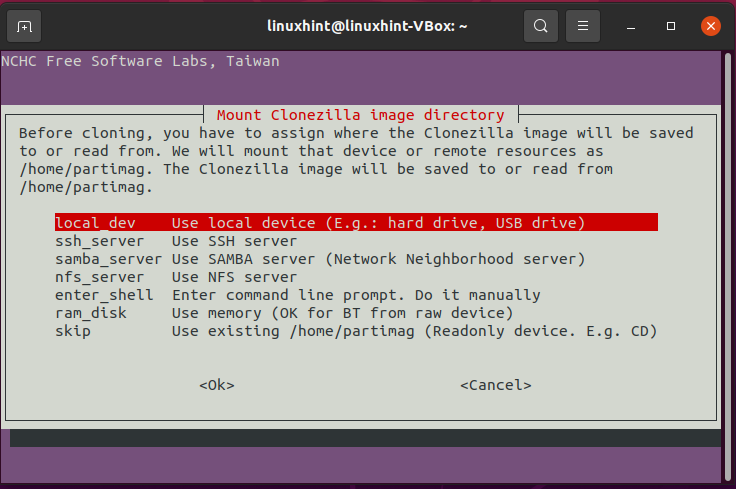
Now select your cloning medium, which is the hard drive in our case:
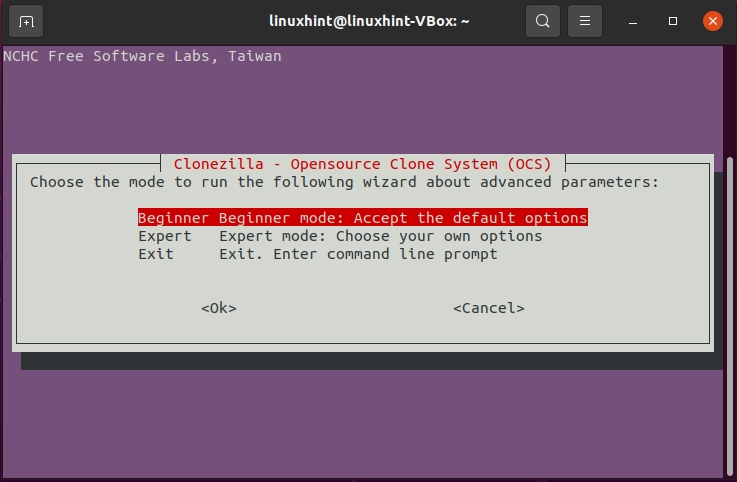
Press “Enter” to continue the cloning procedure. To get into the advanced parameters of Clonezilla, choose the “Beginner mode”:
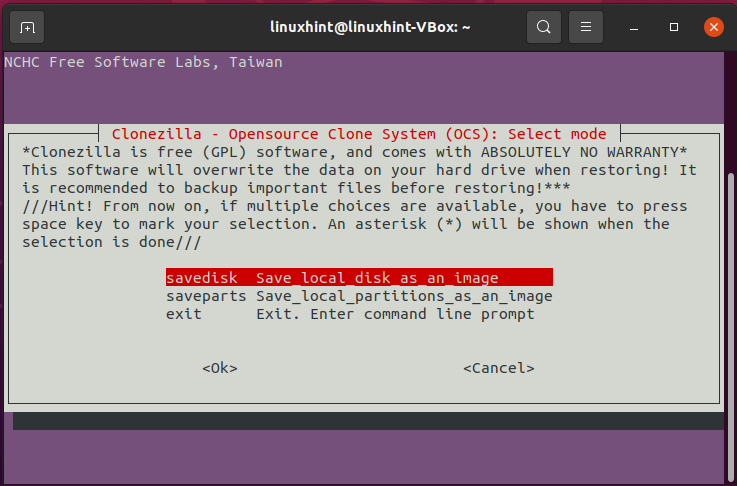
Select the mode of the Clonezilla application. We are cloning our hard drive as an image, whereas Clonezilla also provides you the option to save your local partition as an image:
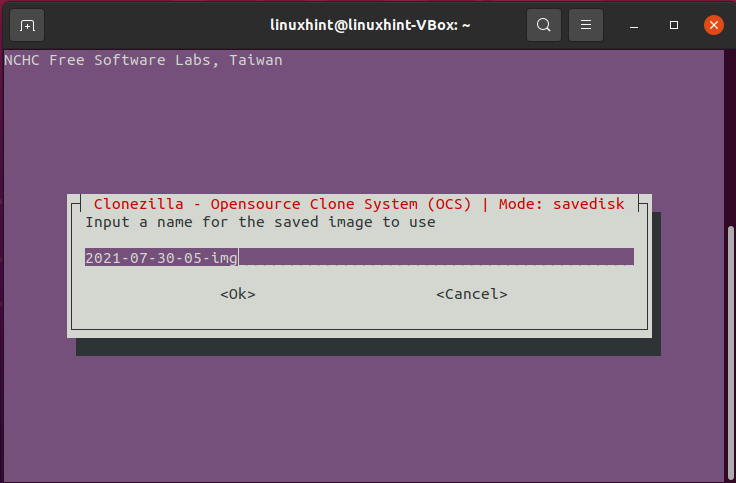
The final step is to enter the name of your image, in which you cloned all of your hard drive data. Input a name, and you are all done!
Conclusion
Storage devices can get corrupt anytime. As a result, having a hard drive data backup is critical. Linux users frequently struggle to discover the best disk cloning software according to their requirements. We solve this dilemma by providing three different methods for cloning your hard drive on Linux. According to our practical demonstration of the cloning process, we recommend the “dd” tool as the best cloning utility, as it can save a lot of your precious time while cloning your hard drive using a single command.

