Let’s get started with the implementation of this article within the Ubuntu 20.04 Linux operating system. First, you need to log in from the admin user account of your Ubuntu 20.04 Linux operating system to prevent any hassle. After a successful login, open the terminal shell while you are currently at the desktop of your Linux operating system. You can try out the simple shortcut key “Ctrl+Alt+T” for this. Another way to open this shell is via the use of the “Activity” menu held at the top of your Linux desktop screen. Knock on it, and write “terminal” inside the search bar. The terminal application will pop-up in a few seconds. Tap on it to quickly launch it.
Now, it’s time to make your system error free and updated with all the new requirements via the update instructions. You can use the apt package for this instruction execution. Tap enter to continue. It might ask you for the currently logged-in account password to continue. Add its password and continue the process. Within a few minutes, your system will be updated fully. The command’s outcome is shown in the following output:
Install Using the Apt Package
The very first method to install the group in your Ubuntu 20.04 system is to make use of the apt package in the installation instruction. You need to utilize the installation instructions of Cgroup with the sudo rights. Within the terminal shell’s query area, type the installation command starting with the keyword “sudo” followed by the supporting package name to be used in the instruction for installation, i.e. “apt”.
Also, you need to use the “-y” option to enforce the installation of a particular cgroup package followed by the install keyword of this instruction and the title of the package to be configured, i.e. cgroup-tools. After writing the command, press “Enter” to execute it. It may request you for the root password before processing. You have to provide your passcode and press the “Enter” button to continue it. It displays the list of packages to be installed while on installation and configuration. The command’s outcome is shown in the following output:
This is about the use of the apt package to install the cgroup-tools package on our Ubuntu 20.04 Linux operating system. To remove it from the overall Ubuntu 20.04 system, you have to use the same package to avoid any issues while removing it. So, we showed a demonstration of using the apt package to remove the cgroup-tools setup from our system. This installation is used with the sudo rights, followed by the keyword “apt” and “remove” along with the “cgroup-tools” package name. On the execution of this instruction, the processing shows the package name “cgroup-tools” to be removed from the system. The command’s outcome is shown in the following output:
While processing this instruction, it will ask for the confirmation of this removal process. You need to answer yes via the keyword “y” to continue the removal of the cgroup-tools package.
After affirming the removal of the cgroup-tools, it continues the removal process as the process bar has been displayed in the following image. It will be eliminated in a few seconds.
Install Using the Apt-Get Package
The second method to install the cgroup in your Ubuntu 20.04 system is to make use of the apt-get package within the installation instruction. To utilize this package in your shell terminal, you must use the “sudo” rights at the start of this instruction followed by the keyword apt-get for using the apt-get package, -y option to force the installation process, install keyword for the specification of a command and the cgroup-tools keyword to specify the name of a package or tool to be installed. Tap on the “Enter” key from your keyboard to continue executing this command. The following lines of processing is displayed on your shell screen. The command’s outcome is shown in the following output:
While processing, you will be shown the new packages that are being installed in your Ubuntu 20.04 Linux operating system, i.e. cgroup-tools and libcgroup1.
The last few lines of this instruction’s processing is to show you that the package to be installed has been set up in your Ubuntu 20.04 Linux operating system as per the following image:
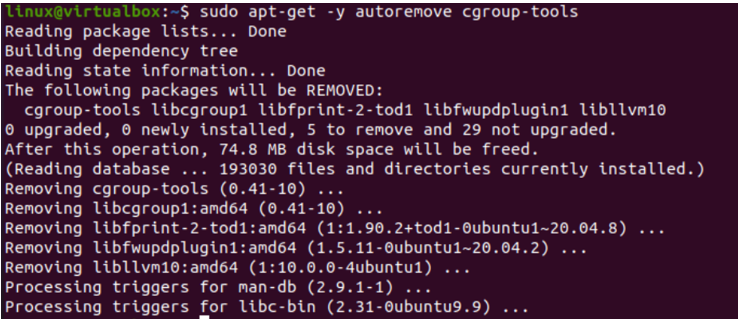
To remove the cgroup-tools already installed in your specific Linux system, you can utilize the apt-get package within the remove instruction. But, this removed instruction is a little different. This time, you need to use the keyword “autoremove” instead of the simple “remove” keyword. The removal command of the cgroup-tools is displayed in the following output:
Another way to use the apt-get package in the removal command to remove the cgroup-tools package from the system is to use the purge keyword. The use of purge instruction shown in the following image would not only uninstall it but remove all the related files and folders from the system as well. The command’s outcome is shown in the following output:
You can merge both purge and autoremove instructions to perform an efficient removal. The command’s outcome is shown in the following output:
The dpkg instruction with the “-L” option can list all the related files and folders of the cgroup-tools. The command’s outcome is shown in the following output:
Conclusion
This article is all about the use of the different methods on the shell to set up the cgroup-tools package in the Ubuntu 20.04 Linux operating system. For this, we tried the apt package and apt-get package in the shell. We also learned the other commands to remove it from the system.


