Description
ARM platform is the board based on the ARM Architecture. There are many manufactures in the market who designs the platforms based on this architecture. Generally, an ARM platform have the following building blocks:
- CPU/SOC: This is the main processing unit on the platform. Components have the internal components as well like Cache, SCU etc.
- Internal s-RAM: This is the RAM which is present within the SOC. Size of this memory is limited and will be few KBs.
- External DDR: This is the external RAM, which is of significant size compare to internal RAM. This memory acts as the execution memory for CPU. Generally, this is of few GBs, based on the system design.
- Boot device: This is the external permanent storage device used to store the software images needed by the system to boot. Few examples of the components are Bootloaders, Linux Image, Root filesystem. These 3 components are basic components needed by any system to boot Linux. Example of boot devices are EMMC, NV Flash memory devices, SD Card, USB Memory stick, etc. These devices can only be used to boot if the system supports the booting with that media. Few system have multiple boot options , which can be controlled by either Straps or DIP Switches. Any required boot type can be selected and images can programmed to the boot media. Programming of the boot images can be done with the help of some external programmer like dediprog tool.
Images for the System to Boot
First and most important item needed to boot Linux on ARM platform is we need the build images of boot loaders, Linux kernel and root filesystems. These images can be compiled if the board is designed internal to the organization but if the device is purchased through some Vendor, then he should provide the instructions on the image generation. Even in some cases, if they do not provide the source code to compile or build, then they provide the prebuilt images.
Programming of the images to the boot device
After we have images ready to boot on platform, we need to burn/program the images on the boot device. There should be instruction available from the vendor or any HW programmer can be used to program the images to the boot device. Example of such programmer is Dediprog.
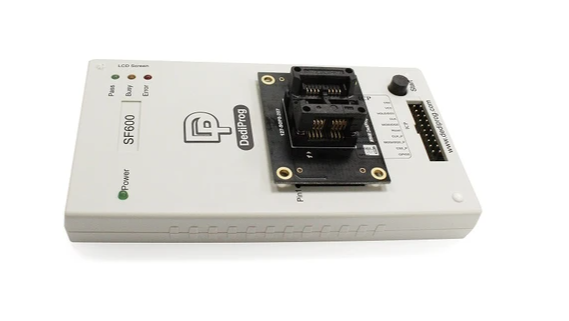
Dediprog is the tool which can be used to program the flash image to the NV Flash. This is the case of Flash booting mode. Jumpers or configuration is needed to enable the flash boot if multiple boot devices are present.
Snapshot of Dediprog:
After all, the images are programmed into the boot media and all the boot configuration is done to enable the boot type where we have kept the images for booting.
Booting of the Linux can be considered in multiple stages:
- Boot ROM Phase
- Booting of the First stage boot loader
- Booting of second stage boot loader, this is u-boot generally.
- Booting of Linux
- Mounting of rootfs and execution of Linux init scripts till the login console comes.
Let us discuss all these booting stages in details now.
Boot ROM Phase
At this stage, there is no access to the external DDR, All the execution needs to be done in the internal S-RAM. As soon as system is powered on, Boot ROM code initializes the boot interface and then fetches the first stage boot loader. Once the boot loader is available in internal RAM and is ready to execute, then control is transferred to the first stage boot loader.
Booting of the First Stage Boot Loader
Immediately after the board is powered on, there is no access to external RAM available for CPU. Execution starts from the reset vector. Reset Vector is the location from where CPU starts executing first programming instructions. At this stage, only internal RAM is available. Later, the external DDR is initialized and then second stage bootloader is fetched from the boot media and loaded to the initialized external DDR and controller is passed on to the second stage boot loader i.e., u-boot.
Booting of Second Stage Boot Loader or U-boot
This is minimal software needed for the environment setup needed by Linux kernel before booting. Various drivers and HW interfaces are enabled in u-boot environment. This bootloader provides the command line and hence we can modify the several configurations at runtime. The main purpose of this stage is to prepare the setup/board for the Linux kernel. At this stage, Linux image can be fetched from multiple options available. Linux image can be loaded over any interface from the different interfaces. This stage fetches the Linux kernel image and passes the execution control to the bootloader.
Booting Linux
After the second stage, boot loader has copied the Linux image to the external DDR. It will pass the execution control to the Linux image. Once the Linux image starts booting it starts the initialization of all the devices/peripherals on the board. It initializes all the sub system including all the controllers and devices. After all the drivers and devices are initialized at this stage and Linux kernel is running at maximum capacity possible.
Once the booting or initialization of the drivers is done, there is a search of the rootfs device. Rootfs device location can also be configured or modified from the command line parameters of Linux. Command-line parameters for Linux are the environment variables in u-boot environment, hence to update the rootsfs device location is just a modification of the environment variable in u-boot. There is other information as well available in u-boot environment.
Few examples are init process location, memory size, enabling the devmem, increasing the kernel loglevels etc. Few other u-boot environment variable options are available for to facilitate other user cases in u-boot. For example, the IP address assignment in the u-boot is done with the help of environment variable.
Mounting of rootfs and Execution of Linux init scripts:
Rootfs device is searched and mounted and then the init process is searched within the rootfs device. After the init image is located control is passed on to the init after invoking the init process. This is the first userland process which starts execution. Once init gets the control, it initializes the userspace services by running the init scripts.
All the daemons are started and system level services are started either executing the init services present in /etc/ or if the system is systemctl based system then all the services are started as per the guidelines mentioned for systemctl system. After all the services are started then shell program is invoked which creates a login session prompt for the user.
User can use this command console to request various services from the Linux kernel.
Now, let us see the boot logs of the Linux system which will demonstrate the booting stage we have discussed so far. Note these are not complete logs. I have removed few lines in between as they are huge logs. Not relevant to the topic, hence I have just provided the logs relevant for our discussion.
Booting of the First stage boot loader:
U-Boot SPL 2019.04 (Aug 17 2021 - 18:33:14 +0000)
Trying to boot from RAM
Booting of second stage boot loader or u-boot:
U-Boot 2019.04(Aug 17 2021 - 18:33:14 +0000)
SOC: AST2600-A1
RST: Power On
LPC Mode: SIO:Enable : SuperIO-2e
Eth: MAC0: RMII/NCSI, MAC1: RMII/NCSI, MAC2: RMII/NCSI, MAC3: RMII/NCSI
Model: vendor BMC
DRAM: already initialized, 1008 MiB (capacity:1024 MiB, VGA:16 MiB), ECC off
PCIE-0: Link down
MMC: emmc_slot0@100: 0
Loading Environment from SPI Flash... SF: Detected n25q256a with page size 256 Bytes, erase size 4 KiB, total 32 MiB
*** Warning - bad CRC, using default environment
In: serial@1e784000
Out: serial@1e784000
Err: serial@1e784000
Model: vendor BMC
eeprom eth2addr : EA=aa:bb:cc:dd:de:e0
BMC eth2addr=aa:bb:cc:dd:de:e3
Net: ftgmac100_probe - NCSI detected
eth2: ftgmac@1e670000ftgmac100_probe - NCSI detected
Warning: ftgmac@1e690000 (eth3) using random MAC address - fa:12:fb:ca:bc:ff
, eth3: ftgmac@1e690000
Hit any key to stop autoboot: 2 1 0
## Loading kernel from FIT Image at 20100000 ...
Using 'conf-1' configuration
Trying 'kernel-1' kernel subimage
Description: Linux kernel
Type: Kernel Image
.
.
.
.
Compression: uncompressed
Data Start: 0x2067e1c4
Data Size: 54387 Bytes = 53.1 KiB
Architecture: ARM
Verifying Hash Integrity ... OK
Booting using the fdt blob at 0x2067e1c4
Loading Kernel Image ... OK
Loading Ramdisk to 8fbe0000, end 8ffffbf0 ... OK
Loading Device Tree to 8fbcf000, end 8fbdf472 ... OK
Booting Linux:
Starting kernel ...
[ 0.000000] Booting Linux on physical CPU 0xf00
[ 0.000000] Linux version 5.1.3.sdk-v00.05.07 (cienauser@haxv-srathore-2) (gcc version 8.3.0 (Buildroot 2019.05-rc2)) #3 SMP Sun Aug 29 14:19:01 UTC 2021
[ 0.000000] CPU: ARMv7 Processor [410fc075] revision 5 (ARMv7), cr=10c5387d
[ 0.000000] CPU: div instructions available: patching division code
[ 0.000000] CPU: PIPT / VIPT nonaliasing data cache, VIPT aliasing instruction cache
[ 0.000000] OF: fdt: Machine model: AST2600 A1 EVB
[ 0.000000] Memory policy: Data cache writealloc
[ 0.000000] Reserved memory: created CMA memory pool at 0xbb000000, size 64 MiB
[ 0.000000] OF: reserved mem: initialized node video, compatible id shared-dma-pool
[ 0.000000] Reserved memory: created CMA memory pool at 0xb7000000, size 64 MiB
[ 0.000000] OF: reserved mem: initialized node rvas, compatible id shared-dma-pool
[ 0.000000] Reserved memory: created DMA memory pool at 0xb6e00000, size 2 MiB
[ 0.000000] OF: reserved mem: initialized node ssp_memory, compatible id shared-dma-pool
[ 0.000000] Reserved memory: created DMA memory pool at 0xb6d00000, size 1 MiB
.
.
.
.
[ 1.184367] 0x000000000000-0x0000000f0000 : "u-boot"
[ 1.191246] 0x0000000f0000-0x000000100000 : "u-boot-env"
[ 1.198363] 0x000000100000-0x000002060000 : "fit"
[ 1.203661] mtd: partition "fit" extends beyond the end of device "bmc" -- size truncated to 0x1f00000
[ 1.215347] vendor-smc 1e620000.spi: bus_width 2, Using 50 MHz SPI frequency
[ 1.223375] vendor-smc 1e620000.spi: n25q256a (32768 Kbytes)
[ 1.229723] vendor-smc 1e620000.spi: CE1 window [ 0x22000000 - 0x24000000 ] 32MB
[ 1.237996] vendor-smc 1e620000.spi: CE2 window [ 0x24000000 - 0x30000000 ] 192MB
[ 1.246357] vendor-smc 1e620000.spi: read control register: [203c0441]
[ 1.316884] vendor-smc 1e630000.spi: bus_width 2, Using 50 MHz SPI frequency
[ 1.324821] vendor-smc 1e630000.spi: unrecognized JEDEC id bytes: 00 00 00 00 00 00
[ 1.333384] vendor-smc 1e630000.spi: chip 0 does not exist.
.
.
.
[ 1.631342] uhci_hcd: USB Universal Host Controller Interface driver
[ 1.638622] platform-uhci 1e6b0000.usb: Detected 2 ports from device-tree
[ 1.646217] platform-uhci 1e6b0000.usb: Enabled vendor implementation workarounds
[ 1.664722] platform-uhci 1e6b0000.usb: Generic UHCI Host Controller
[ 1.671844] platform-uhci 1e6b0000.usb: new USB bus registered, assigned bus number 2
[ 1.680671] platform-uhci 1e6b0000.usb: irq 42, io mem 0x1e6b0000
[ 1.687977] usb usb2: New USB device found, idVendor=1d6b, idProduct=0001, bcdDevice= 5.01
[ 1.697237] usb usb2: New USB device strings: Mfr=3, Product=2, SerialNumber=1
[ 1.705311] usb usb2: Product: Generic UHCI Host Controller
[ 1.711542] usb usb2: Manufacturer: Linux 5.1.3.sdk-v00.05.07 uhci_hcd
[ 1.718824] usb usb2: SerialNumber: 1e6b0000.usb
[ 1.724589] hub 2-0:1.0: USB hub found
[ 1.728830] hub 2-0:1.0: 2 ports detected
[ 1.734689] usbcore: registered new interface driver usb-storage
[ 1.753347] vendor_vhub 1e6a0000.usb-vhub: Initialized virtual hub in USB2 mode
[ 1.762327] i2c /dev entries driver
[ 1.767491] i2c_new_vendor 1e78a080.i2c-bus: NEW-I2C: i2c-bus [0]: adapter [100 khz] mode [2]
.
.
.
[ 2.960181] Freeing unused kernel memory: 1024K
[ 2.970760] mmcblk0: mmc0:0001 R1J57L 27.5 GiB
[ 2.976119] mmcblk0boot0: mmc0:0001 R1J57L partition 1 16.0 MiB
[ 2.983067] mmcblk0boot1: mmc0:0001 R1J57L partition 2 16.0 MiB
[ 2.989980] mmcblk0rpmb: mmc0:0001 R1J57L partition 3 128 KiB, chardev (246:0)
[ 2.999275] mmcblk0: p1
[ 3.012035] Checked W+X mappings: passed, no W+X pages found
Mounting of rootfs and execution of Linux init scripts
[ 3.018367] Run /sbin/init as init process
Conclusion
We have seen the complete Linux boot process in details with sample logs. We have also discussed the various building blocks of the Linux booting. Few other pre-requisites needed for Linux to boot were also discussed. There are various stages involved in the Linux boot on any ARM processor board, all the stages were discussed in detail and are mapped with the sample boot logs. This discussion is enough to provide the basic understanding on the Linux booting on ARM Systems.