In this write-up following aspects of java threads will be covered:
- Lifecycle of a Thread
- How to create a Thread in Java
- Basic Syntax of Threads
- How to run a Thread in Java
So let’s start!
Lifecycle of a Thread
In java, once a thread is created then it has a life cycle and it lives in one of the below listed states:
New: A thread initiates its lifecycle with a “New” state and stays in it until the program starts/initiates a thread.
Runnable: Once the new thread starts then its state changes to the “Runnable” state and the thread will remain in this state until it is executing its task.
Running: A thread starts execution in the running state.
Waiting: In this state, a thread is in a temporarily inactive state i.e. either a thread is sleeping, waiting, or in a blocked state.
Terminated: A thread enters in a terminated state when it completes its execution or when an unusual erroneous event occurs.
How to create a Thread
Java allows us to create a thread in one of the below-listed ways:
- Thread Creation using Thread class.
- Thread Creation using Runnable Interface.
Thread Creation Using Thread class
To create a thread initially, we have to extend a predefined “Thread” class, and afterward, we can override its run() method.
Syntax
The below-snippet shows the basic syntax of thread creation using Thread class:
public void run() {
//code
}
In the above snippet, the “ThreadExample” class extends the “Threads” class, and later on, it overrides the run() method of Thread class.
Thread Creation Using Runnable Interface
Another way of thread creation in java is “implements” the “Runnable” interface.
Syntax
The below-given snippet provides a basic syntax of thread creation using Runnable interface:
public void run() {
//code
}
}
“ThreadExample” is a user-defined class that implements the “Runnable” interface.
How to run a Thread in Java
We can run a thread using one of the following ways:
- Using Thread class.
- Using Runnable Interface.
How to run a Thread using Thread Class
In order to run a thread in java, we need to create the instance/object of the class and afterward, that object can be used to invoke the start() method of the Thread class.
Example
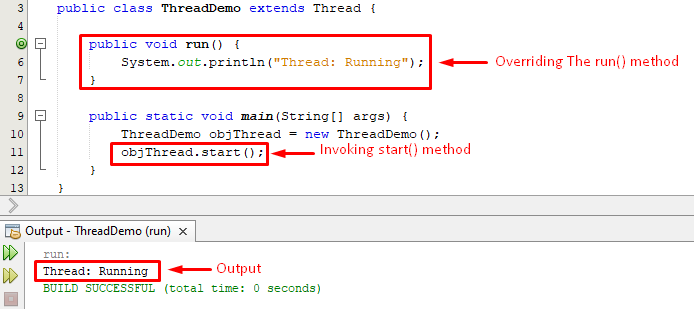
In this example, we create a class “ThreadDemo” that extends a built-in class “Thread”:
public void run() {
System.out.println("Thread: Running");
}
public static void main(String[] args) {
ThreadDemo objThread = new ThreadDemo();
objThread.start();
}
}
In the main method we created an instance of the class and with the help of that instance we invoked the start() method.
The above-given snippet shows the appropriateness of the program.
How to run a Thread using Runnable Interface in Java
Java provides another useful way of running a thread that says implement the Runnable interface, create the object of the user-defined class, and Thread class afterwards, to run a thread, invoke the start() method.
Example
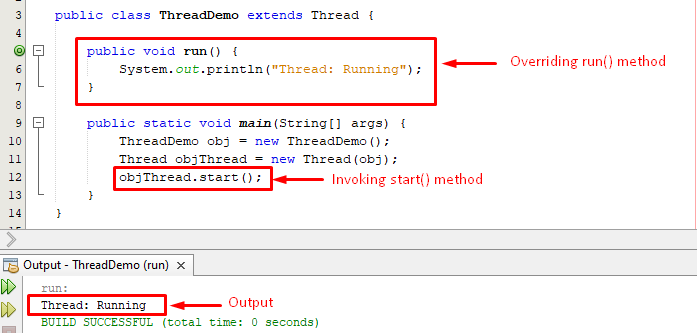
In this example, firstly, we create a “ThreadDemo” class and implement the Runnable interface afterward we override the run() method.
public void run() {
System.out.println("Thread: Running");
}
public static void main(String[] args) {
ThreadDemo obj = new ThreadDemo();
Thread objThread = new Thread(obj);
objThread.start();
}
}
Within the main method, we created objects of “ThreadDemo”, and “Thread” classes and we passed the object of “ThreadDemo” class to the “Thread” class. Finally, we called the start() method with the object of the Thread class which starts the thread’s execution.
From the above-given snippet, it is clear that the thread is running successfully.
Conclusion
To create a thread in java, either we have to extend the Thread class, or we need to implement the Runnable interface and then the run() method will be overridden. Once a thread is created then it will remain in one of the following states: new, running, runnable, waiting or terminating states. While in order to run a thread we need to invoke the start() method which will start the execution.


