PyTorch is a deep-learning framework that enables users to create/build and train neural networks. A dataset is a data structure that contains a set/collection of data samples and labels. It provides a way to access the data as a whole or using indexing and slicing operations. Moreover, a dataset can also apply transformations to the data, such as cropping, resizing, etc. Users can easily iterate and visualize the dataset in PyTorch.
This write-up will illustrate the method to iterate and visualize a specific dataset using PyTorch.
How to Iterate and Visualize the Dataset Using PyTorch?
To iterate and visualize a particular dataset using PyTorch, follow the provided steps:
Step 1: Import Necessary Library
First, import the required libraries. For instance, we have imported the following libraries:
from torch.utils.data import Dataset
from torchvision import datasets
from torchvision.transforms import ToTensor
import matplotlib.pyplot as plt
Here:
-
- “import torch” imports the PyTorch library.
- “from torch.utils.data import Dataset” imports the “Dataset” class from PyTorch’s “torch.utils.data” module for creating custom datasets in PyTorch.
- “from torchvision import datasets” imports the “datasets” module from the “torchvision” library which provides pre-defined datasets for computer vision tasks.
- “from torchvision.transforms import ToTensor” imports the “ToTensor” transform from “torchvision.transforms” for converting PIL images or NumPy arrays to PyTorch tensors.
- “import matplotlib.pyplot as plt” imports the matplotlib library for data visualization:
Step 2: Load Dataset
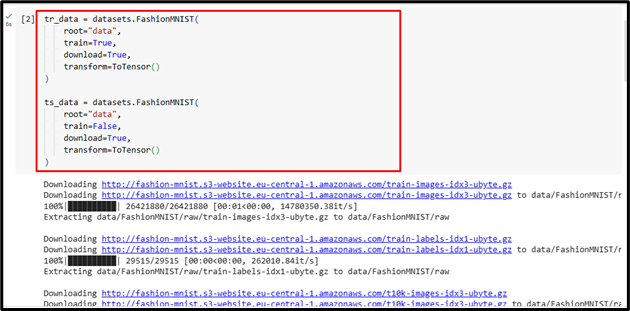
Now, we will load the FashionMNIST dataset from torchvision for both training and testing purposes with the following parameters:
)
ts_data = datasets.FashionMNIST(root="data", train=False, download=True, transform=ToTensor()
)
Here:
-
- “FashionMNIST” loads the FashionMNIST dataset from the torchvision library.
- “root=”data”” specifies the directory where the dataset will be stored or loaded if it already exists. In our case, it is the “data” directory.
- “train” indicates training or test dataset.
- “download=True” downloads the dataset if it is not already present.
- “transform=ToTensor()” applies the ToTensor transform to convert the images in the dataset to PyTorch tensors:
Step 3: Label Classes in Dataset
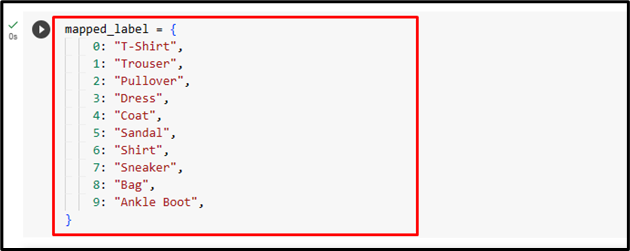
Next, create a dictionary that maps class indices to their corresponding class labels in the FashionMNIST dataset. It provides human-readable labels for each class. Here, we created the “mapped_label” dictionary and we will use this to convert class indices into their corresponding class labels:
0: "T-Shirt",
1: "Trouser",
2: "Pullover",
3: "Dress",
4: "Coat",
5: "Sandal",
6: "Shirt",
7: "Sneaker",
8: "Bag",
9: "Ankle Boot",
}
Step 4: Visualize Dataset
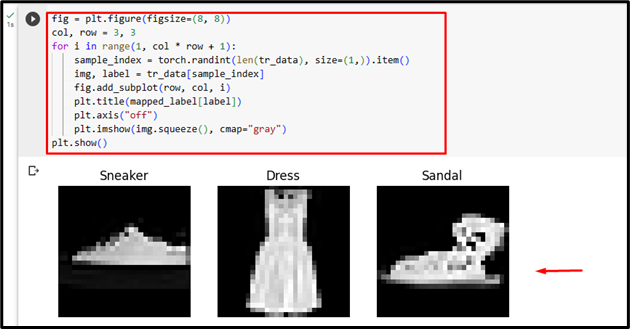
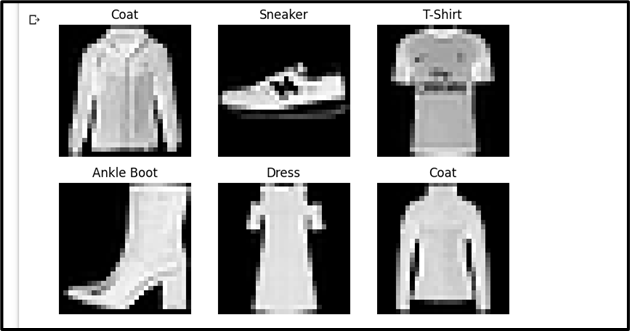
Finally, visualize the samples in the training data using the “matplotlib” library:
col, row = 3, 3
for i in range(1, col * row + 1):
sample_index = torch.randint(len(tr_data), size=(1,)).item()
img, label = tr_data[sample_index]
fig.add_subplot(row, col, i)
plt.title(mapped_label[label])
plt.axis("off")
plt.imshow(img.squeeze(), cmap="gray")
plt.show()
Note: You can access our Google Colab Notebook at this link.
That was all about iterating and visualizing the desired dataset using PyTorch.
Conclusion
To iterate and visualize a particular dataset using PyTorch, first, import the necessary libraries. Then, load the desired dataset for training and testing with the required parameters. Next, label classes in the dataset and visualize samples in the training data using the “matplotlib” library. This write-up has illustrated the method to iterate and visualize a specific dataset using PyTorch.


