
Iptables is a command-line firewall that filters packets according to the defined rules. With Iptables, users can accept, refuse, or onward connections; it is incredibly versatile and widely used despite being replaced by nftables.
After reading this tutorial, you will understand Iptables policies and define Iptables rules to protect your home network.
Note: sudo command was added for readers who need to copy-paste the rules mentioned in this iptables tutorial.
Iptables glossary:
TARGET: When using iptables, a target is an action you want Iptables to apply when a packet matches a rule.
CHAIN: A chain is a list of rules; available built-in chains are: INPUT, OUTPUT, FORWARD, PREROUTING, and POSTROUTING.
TABLE: Tables are iptables features for each purpose. For example, there is a table for routing tasks and another table for filtering tasks; each table contains rule chains.
Available tables are filter, nat, raw, security, and mangle. Each table contains built-in (rule) chains. The following list shows what chains include each table:
| FILTER | INPUT | OUTPUT | FORWARD | ||
|---|---|---|---|---|---|
| NAT | PREROUTING | POSTROUTING | OUTPUT | ||
| RAW | PREROUTING | OUTPUT | |||
| MANGLE | PREROUTING | POSTROUTING | OUTPUT | INPUT | FORWARD |
| SECURITY | INPUT | OUTPUT | FORWARD |
Depending on the action you want iptables to do, you need to specify a table using the option -t followed by the table name. In this tutorial, the option -t isn’t used. This tutorial focuses on filtering purposes using the filter table applied by default when the option -t isn’t passed. While reading this tutorial, you will learn some of the concepts mentioned above.
How to install:
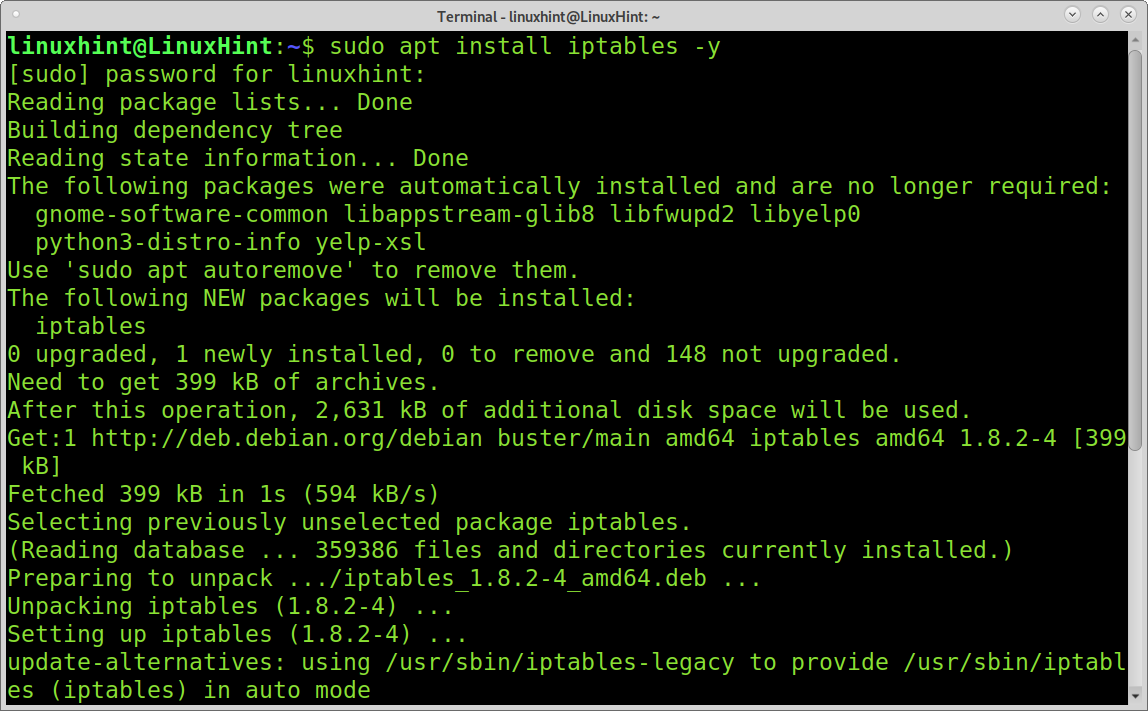
To install Iptables on Debian and its based Linux distributions run:
Before installing Iptables on RedHat based Linux distributions, you need to disable Firewalld by running:
sudo systemctl disable firewalld
sudo systemctl mask --now firewalld
Then install Iptables by executing:
sudo systemctl start iptables
sudo systemctl start ip6tables
sudo systemctl enable iptables
sudo systemctl enable ip6tables
sudo systemctl start ip6tables
Getting started with Iptables:
Before starting, check for previous rules by instructing iptables to list existing policies and rules using the -L (–list) parameter.

The output above shows 3 rows: Chain INPUT, Chain FORWARD, and Chain OUTPUT. Where INPUT refers to policies regarding incoming traffic, OUTPUT refers to policies applied to outgoing traffic, and FORWARD refers to routing policies.
The output also shows there are no defined rules, and all defined policies are accepted.
There are 3 types of policies: ACCEPT, REJECT and DROP.
The policy ACCEPT allows connections; the policy REJECT refuses connections returning an error; the policy DROP refuses connections without producing errors.
When using DROP, UDP packets are dropped, and the behavior will be the same as connecting to a port with no service. TCP packets will return an ACK/RST, which is the same response that an open port with no service on it will respond with. When using REJECT, an ICMP packet returns destination-unreachable to the source host.
When you deal with Iptables, you need first to define the three policies for each chain; after that, you can add exceptions and specifications. Adding policies looks like this:
sudo iptables -P OUTPUT <ACCEPT/DROP/REJECT>
sudo iptables -P FORWARD <ACCEPT/DROP/REJECT>
Iptables permissive and restrictive policies:
You can apply Iptables with a permissive policy by accepting all incoming connections except for these you specifically drop or reject. In this case, every connection is allowed unless you define a rule to refuse it specifically.
On the contrary, restrictive policies refuse all connections except for these you specifically accept. In this case, every connection is refused unless you define a rule to accept it.
Applying a restrictive policy with Iptables:
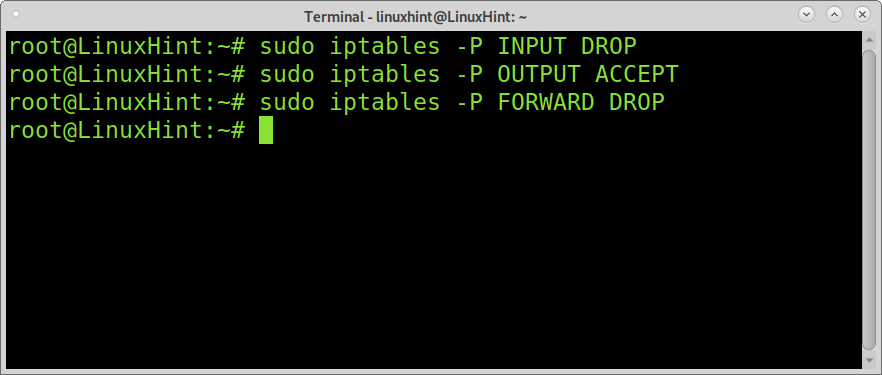
The following example shows how to apply a restrictive policy with Iptables by dropping all incoming traffic except for the allowed.
Blocking incoming traffic.
IMPORTANT: applying the following 3 rules may leave you without an internet connection. Using the rules mentioned in “Iptables Appending rules and Iptables states,” you add the necessary exceptions to restore your access to the internet. You can consistently execute sudo iptables -F to flush rules.
You can block all incoming traffic, allowing only outgoing traffic to browse the web and for applications you need.
sudo iptables -P OUTPUT ACCEPT
sudo iptables -P FORWARD DROP
Where:
-P = Policy
sudo iptables -P INPUT DROP: instruct iptables to refuse all incoming traffic without replying to the source.
sudo iptables -P OUTPUT ACCEPT: defines an ACCEPT policy for outgoing traffic.
sudo iptables -P FORWARD DROP: instructs iptables not to execute routing tasks dropping all packets destined to a different host (trying to pass through the firewalled device) without reply.
The example above allows browsing the web and connections started by the local device (-P OUTPUT ACCEPT) but will prevent connections initiated by another host (-P INPUT DROP) like ssh attempts to access your device not return error messages.
When you enable Iptables with a restrictive policy like in the previous example, you need to append rules to adjust your configuration. For example, if you keep the configuration mentioned above without adding a reasonable exception for the loopback (lo) interface, some applications may not work correctly. You will also need to allow incoming traffic belonging to or related to a connection started by your device.
Iptables Appending rules and Iptables states
It is essential to understand that Iptables applies rules by order. When you define a rule after a previous rule, the second rule will rewrite the last if a packet matches the same rule.
I like the previous example; you blocked all incoming traffic, you need to append exceptions for the loopback interface; this can be achieved by adding the -A (Append) parameter.
sudo iptables -A OUTPUT -m conntrack --ctstate ESTABLISHED -j ACCEPT
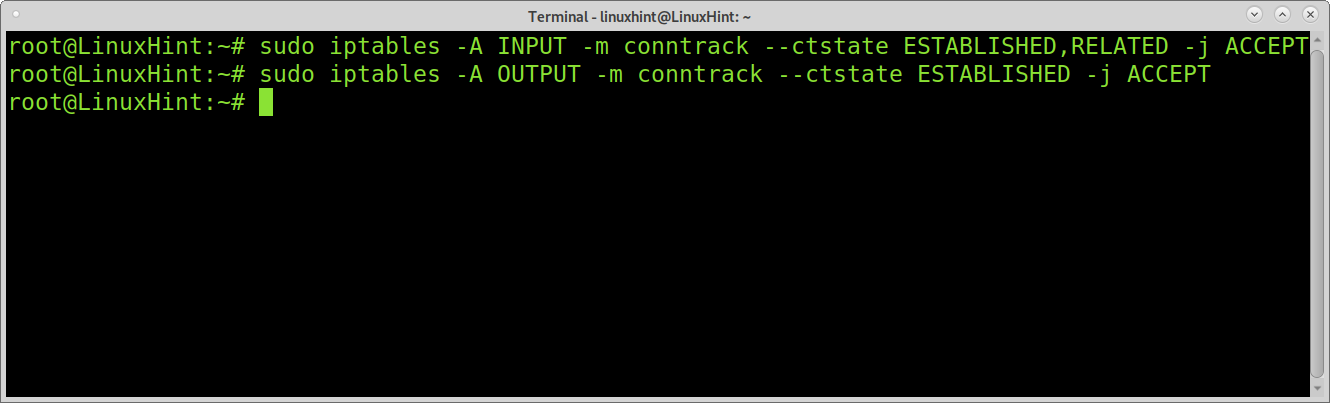
The module (-m) conntrack –ctstate ESTABLISHED,RELATED instructs Iptables to confirm if the connection state is ESTABLISHED or RELATED to an existing connection before applying the defined rule policy.
There are 4 possible states Iptables can check:
Iptables state NEW: The packet or traffic you allow or block tries to start a new connection.
Iptables state ESTABLISHED: The packet or traffic you allow or block is part of an established connection.
Iptables state RELATED: The packet or traffic starts a new connection but is related to an existing connection.
Iptables state INVALID: The packet or traffic is unknown without the state.
The first line of the example above instructs Iptables to accept incoming packets from the traffic coming from or related to connections started by your device. The second line instructs Iptables to accept only outgoing traffic from already established connections.
Iptables Append to accept loopback traffic and defining interfaces:
The loopback interface is used by programs that need to interact with the localhost. If you don’t allow loopback traffic, some applications may not work.
The following command allows loopback connections:
sudo iptables -A OUTPUT -o lo -j ACCEPT
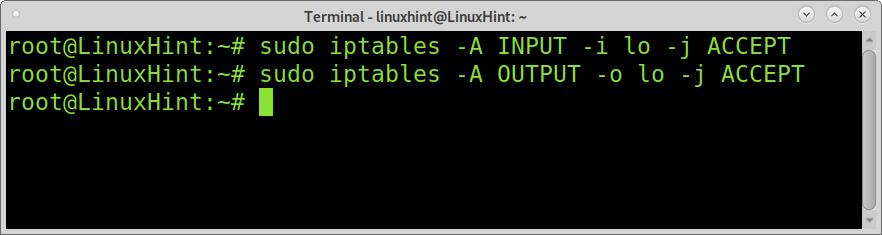
Where -i and -o are used to specify the network device for incoming traffic (-i) and outgoing traffic (-o).
Applying a permissive policy with Iptables:
You can also define a permissive policy allowing all traffic except for the specified dropped or rejected. You can enable everything except a specific IP or IP range, or you can refuse packets based on their headers, among more possibilities.
The following example shows how to apply a permissive policy allowing all traffic except for an IP range blocked for the ssh service.
sudo iptables -P OUTPUT ACCEPT
sudo iptables -P FORWARD DROP
sudo iptables -A INPUT -p tcp --dport 22 -m iprange --src-range 192.168.1.100-192.168.1.110 -j REJECT
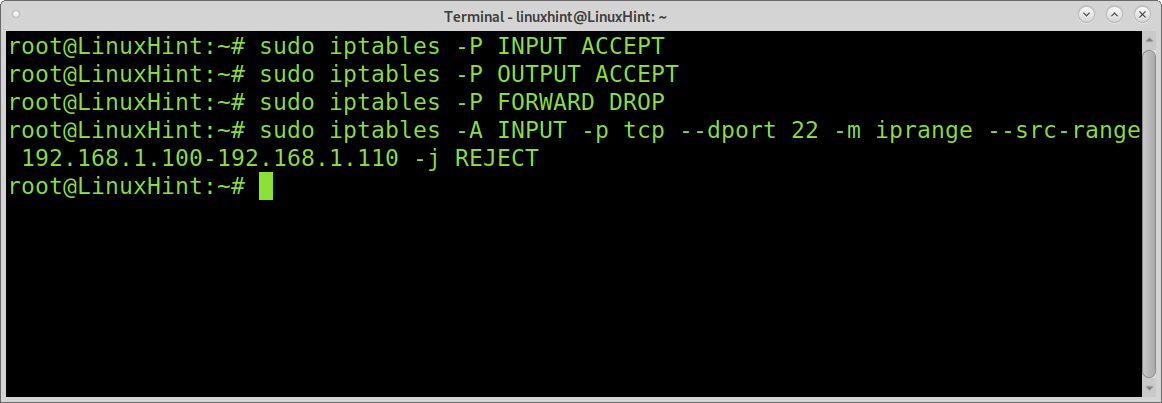
The example above applies a permissive policy but blocks ssh access to all IPs belonging to the range 192.168.1.100 and 192.168.1.110.
Where -p specifies the protocol, –dport (or –destination-port) the destination port (22,ssh), and the module iprange with the argument –src-range (source range) allows defining the IP range. The option -j (–jump) instructs iptables what to do with the packet; in this case, we represent REJECT.
Blocking ports with Iptables
The following example shows how to block a specific port for all connections, the ssh port.

Saving Iptables changes
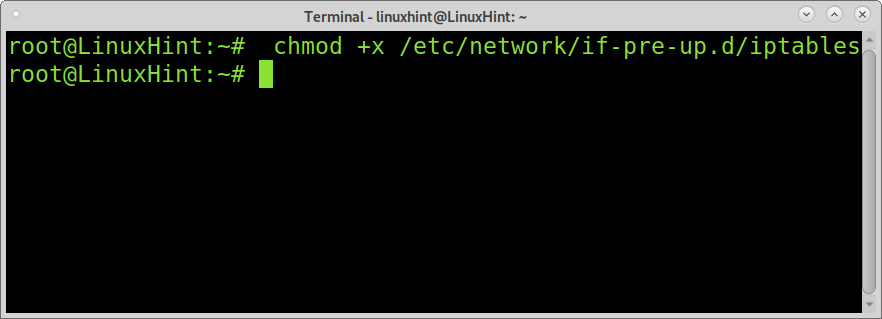
Iptables rules are not persistent; after rebooting, the rules will not be restored. To make your rules persistent, run the following commands where the first line saves the rules in the file /etc/iptables.up.rules, and the second line is to create the file for iptables to start after reboot.
nano /etc/network/if-pre-up.d/iptables
Add the following to the file and close saving changes (CTRL+X).

/sbin/iptables-restore < /etc/iptables.up.rules

Finally, give the file execution permissions by running:
Flushing or removing Iptables rules:
You can remove all your Iptables rules by running the following command:

To remove a specific chain like INPUT, you can run:

Conclusion:
Iptables are among the most sophisticated and flexible firewalls in the market. Despite being replaced, it remains as one of the most spread defensive and routing software.
Its implementation can be quickly learned by new Linux users with basic knowledge of TCP/IP. Once users understand the syntax, defining rules becomes an easy task.
There are a lot more additional modules and options that weren’t covered by this introductive tutorial. You can see more iptables examples at Iptables for beginners.
I hope this Iptables tutorial was helpful. Keep following Linux Hint for more Linux tips and tutorials.