Rationale Behind the Development of Nemo File Manager
GNOME shell and many GTK-3 apps embraced a minimalistic approach by simplifying the user interface. In this process, some features were removed, some were relocated, and some were stripped down. The result was that GNOME-3 applications turned out to be a whole lot different than GNOME-2 applications. Many Linux distributions and desktop environments use the GNOME application stack as a base, and the development of GNOME-2 applications stopped with the advent of GNOME-3. Developers had to choose whether to stick to a fully-featured, but older application stack or embrace the new, minimalistic GNOME-3 suite.
Linux Mint developers decided to go with the old, tried and tested, feature-packed desktop environment layout that is friendly for both casual and power users. Since many GNOME-2 apps were almost defunct, Linux Mint developers created new apps, forked some of the old and new apps, and developed a new desktop environment called “Cinnamon”. These forked apps received new features and patches. Nemo file manager is one such app forked from the Nautilus file manager.
Main Features of the Nemo File Manager
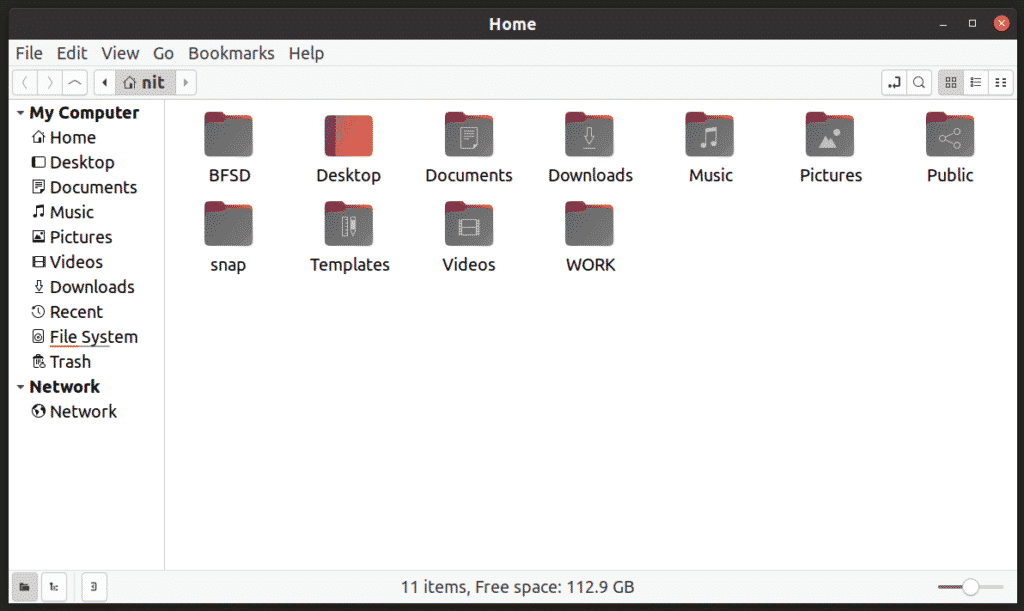
New and improved features that make Nemo File manager different than Nautilus file manager are:
- Supports nested tree view for directories (called “list view” in Nemo)
- Shows free hard disk space in the sidebar and bottom information bar
- Includes a button for toggling location address bar (shows the address in readable string form)
- Includes full menu bar by default (File, Edit, View and so on)
- Includes a “directory up” button (goes to parent folder on click)
- Supports plugins that add custom actions to the right-click menu (Send by Email etc.)
- Supports side-by-side two-pane view
- Includes support for opening files and folders by a single click
- Includes an option to open any location as a root user
- Supports automatic mounting of external media
- Supports bulk renaming of files and folders
- Unlike Nautilus file manager, Nemo allows toolbar customization
- Supports many right-click actions by default, much more than Nautilus
Installing Nemo File Manager in Linux
To install Nemo file manager in Ubuntu, run the following command:
Maintainers of Nemo file manager don’t provide any installable packages. Major Linux distributions like Debian, Fedora and Ubuntu already have Nemo packages in their official repositories. You can search for the “Nemo” keyword in the package manager of your Linux distributions to install the app. In case it is not available in your Linux distribution, you may have to compile it from source code available here.
Once installed, search for “Nemo” in the application launcher to launch it. Note that both Nautilus and Nemo file managers may be named “Files” in the application launcher, but their icons are different. It may take a couple of tries to correctly identify the Nemo file manager in the application launcher.
Making Nemo Default File Manager
To check the current default file manager on your system, run the command below:
You will get some output like this (make a note of the line, it will be used in the next command):
To check what all mimetypes Nautilus is being used for, run the command below:
You will get some output like this:
Note that in some distributions, “defaults.list” is called “mimeapps.list” and the exact location in the root folder may be slightly different.
Now to set Nemo as the default file manager, run the command below (the goal is to assign Nemo same mimetypes that are used for Nautilus file manager):
Since the output above shows only one mimetype for Nautilus, the command for setting Nemo as the default file manager changes only one mimetype. If you get multiple mimetypes when querying “defaults.list” file, use a command in the following format:
To confirm the change, run the query command again:
You will now get some output like this:
Logout and re-login for the changes to take effect. Finally, to confirm that Nemo has been indeed set as the default file manager, run the command below:
If you have followed the instructions correctly so far, the home folder on your system will now open in the Nemo file manager instead of Nautilus.
To revert back to Nautilus, run the command below:
Note that desktop wallpaper and desktop icons are handled by the default file manager in GNOME-based Linux distributions. I will advise you to not to change the default file manager for desktop background rendering to avoid system issues.
Conclusion
Nemo is an extremely powerful and customizable graphical file manager for Linux. If you prefer a much more feature-packed and one-stop file manager for handling a lot of file actions, Nemo gets the job done. If you prefer a minimalistic, clutter-free user interface, Nautilus is always there.

