Tomcat is an Apache-based web server that is used to host web applications and websites on your machine. Apache can work as a locally hosted Web server, but when that local hosting is done on the AWS EC2 virtual machines with specific inbound ports, then users can access it even from outside of the local network.
This post will teach how to install the Apache Tomcat server on an EC2 VM instance running an Amazon Linux operating system.
Step 1: Create an EC2 Instance With Amazon Linux
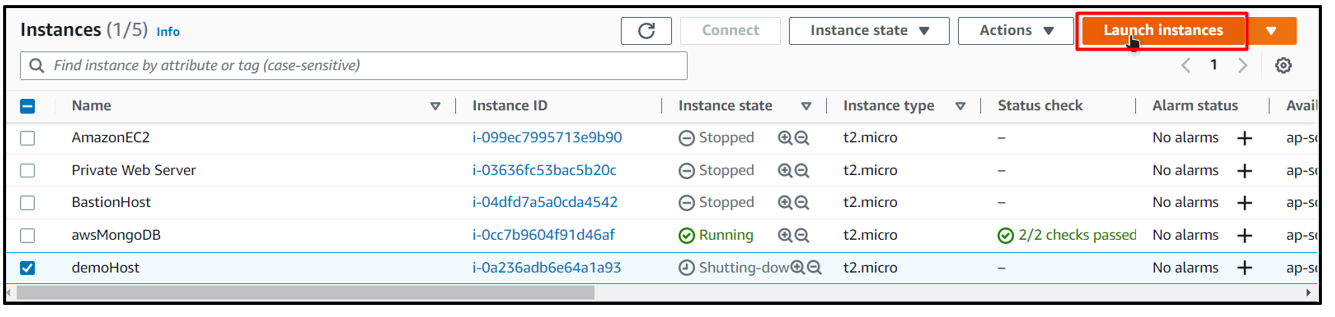
Head inside the AWS Console and head over to the EC2 console. Inside there simply click on the launch instance button:
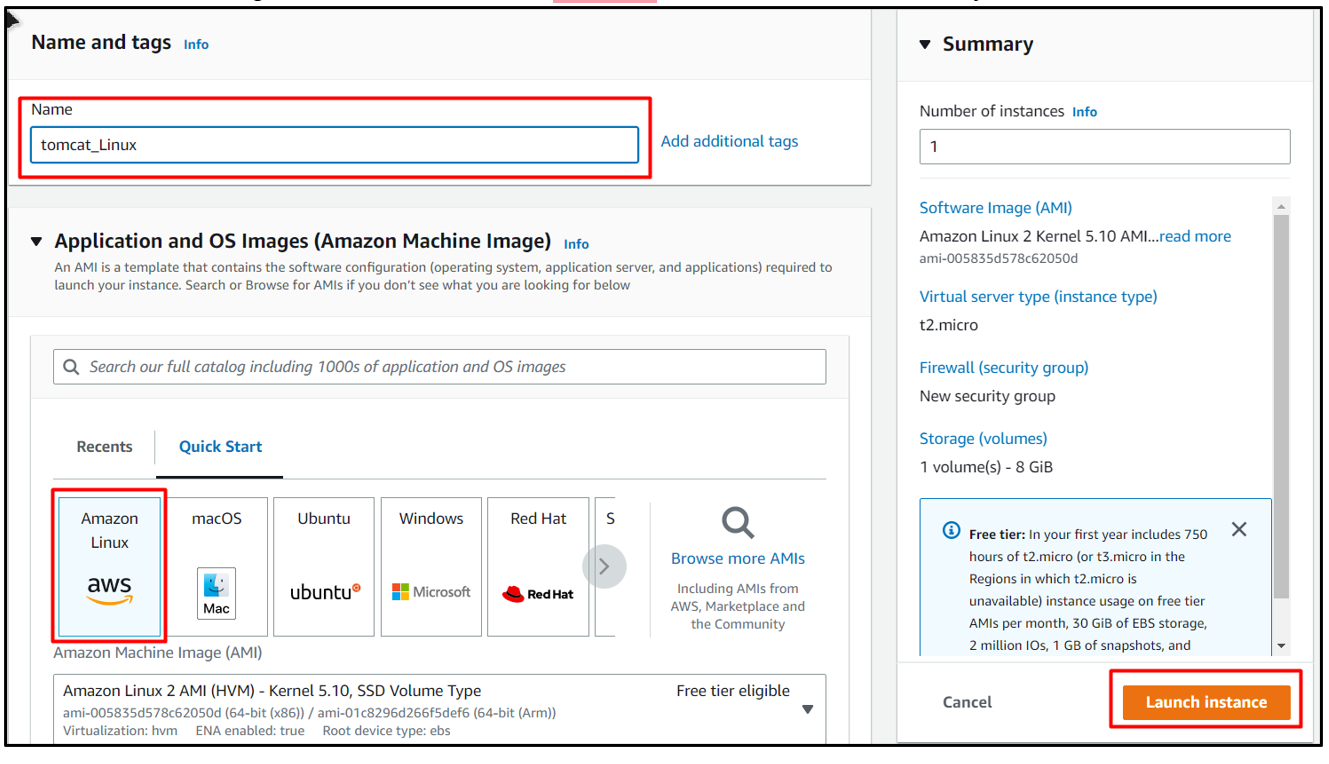
In the launch configuration wizard, provide the following details:
- A name for the EC2 VM
- Set the AMI to Amazon Linux
- Select a keypair (or create one if you don’t already have one)
- Network settings as default
After all these settings, click on the “Launch instance” button from the summary tab:
This will create a new instance, which can be seen in the list of EC2s in the EC2 console:
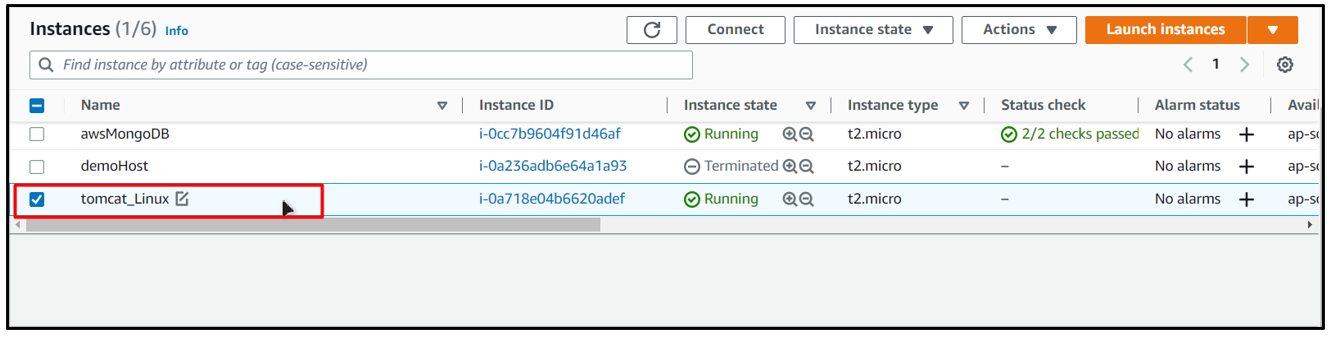
Once the virtual machine is in the running state, move to the next step.
Step 2: Connecting With the EC2
From the EC2 dashboard, click on the newly created EC2 virtual machine and then click on the “Connect” option:

From the connection page, switch over to the SSH option and copy the command being displayed at the bottom of the page:
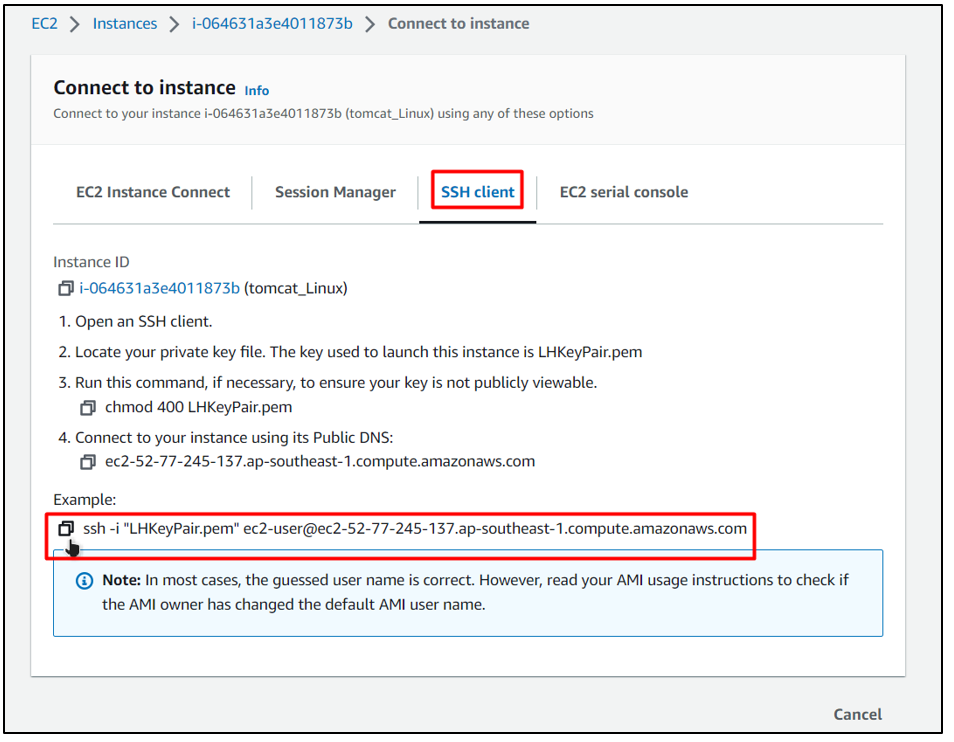
After that, open up a Command Prompt and paste the command inside it by using the right-mouse button inside it:
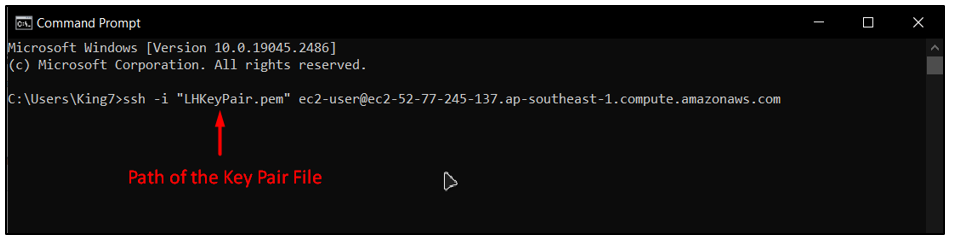
Note: Ensure that you have replaced the path of the key pair file with the path of the key pair on your PC, as the key pair is downloaded locally at the time of creation.
After that, hit the “Enter” key, and you will be logged inside the Amazon Linux running inside the EC2 VM:

Step 3: Installing Java JDK
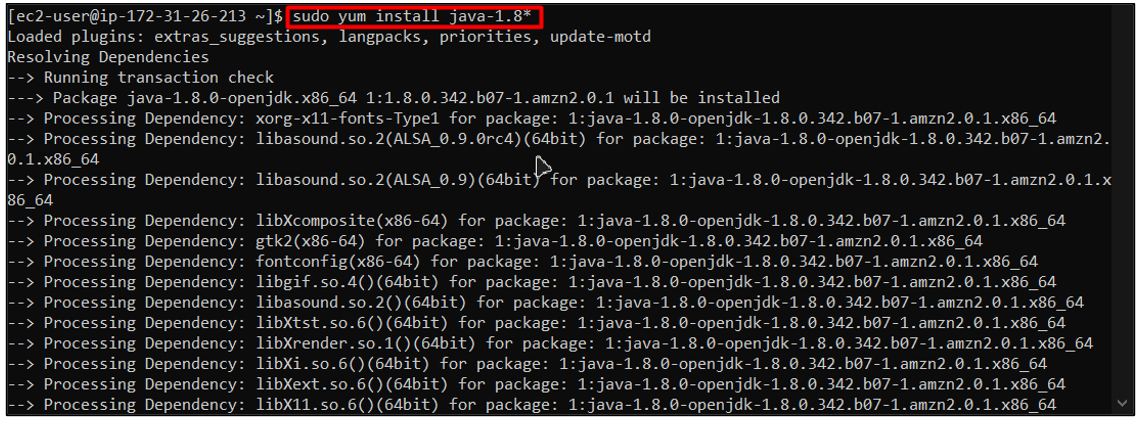
To install Apache Tomcat on your EC2 virtual machine instance, you need to install Java JDK on your instance, and for that, simply type the following command in the SSH terminal (The command prompt with connection to EC2):
Executing this command will initiate the installation process:
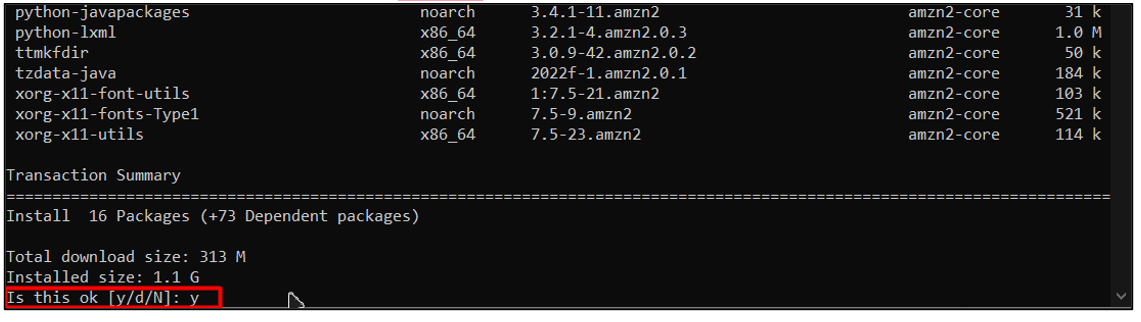
If you are prompted for confirmation, the type “y” and hit “Enter”:
After that, simply wait for the installation process to fully complete. Once it is done, execute the following command to verify the installation of Java JDK:
This will yield the following result:
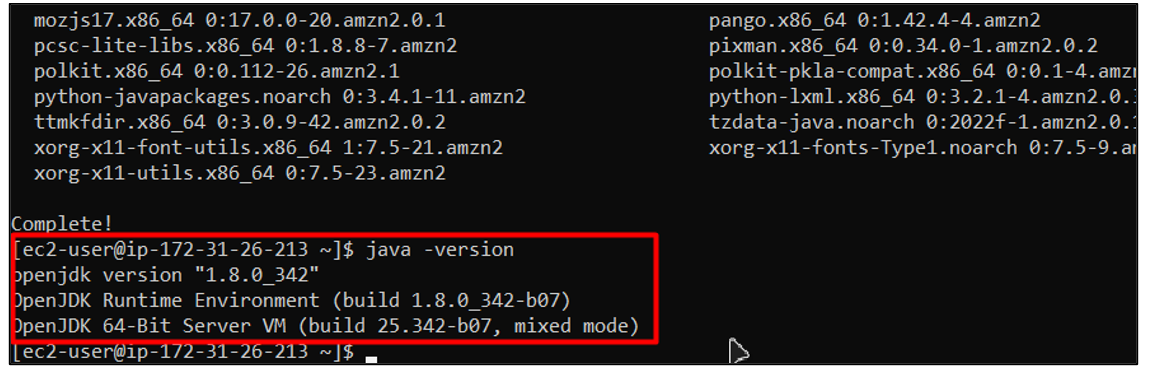
The output confirms that Java has been successfully installed on the EC2 instance.
Step 4: Install and Configure Tomcat
First, create a new directory and then head inside that directory using the following commands:
cd /
cd /opt
The next step is to install the apache tomcat; For this, you need to download the tomcat’s zipped file from their official website using the following command:
Once the download is done, the terminal will display the following output:
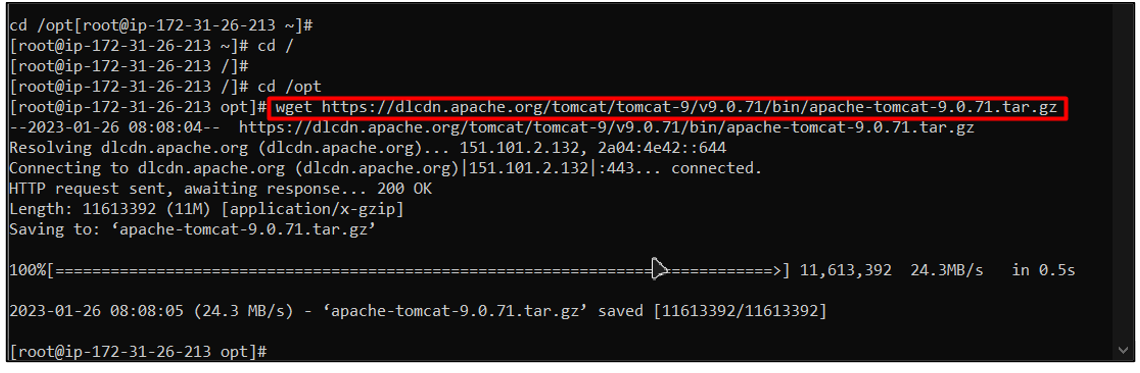
Note: If the terminal shows the output to be an “Error 404”, this means that a newer version of Tomcat is available. In that case, go to the downloads page, click on the “.tz.” package, and use the download URL in the above wget command.
After the download is done, you need to extract the contents of this zipped package using the following command:
Once the file has been extracted, change its name for easy use using the following command:
After that, create a new user for tomcat using the following command:
Once the user is created, we want to allow this user to access our tomcat folder, for that use the following command:
The next step is to change the “tomcat.service” file, for that first type the following common:
Executing this command will allow us to type the configuration inside the terminal until we type EOF and hit enter:

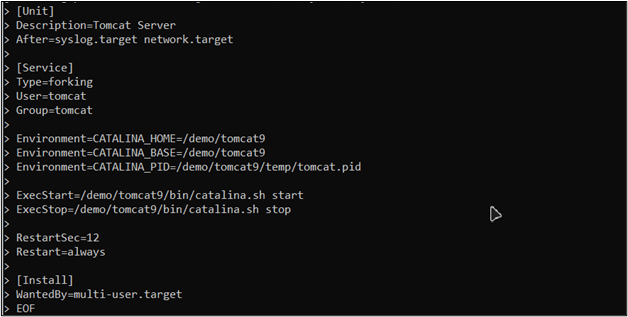
Now, type the following lines:
Description=Tomcat Server
After=syslog.target network.target
[Service]
Type=forking
User=tomcat
Group=tomcat
Environment=CATALINA_HOME=/opt/tomcat9
Environment=CATALINA_BASE=/opt/tomcat9
Environment=CATALINA_PID=/opt/tomcat9/temp/tomcat.pid
ExecStart=/opt/tomcat9/bin/catalina.sh start
ExecStop=/opt/tomcat9/bin/catalina.sh stop
RestartSec=12
Restart=always
[Install]
WantedBy=multi-user.target
EOF
After that, simply hit enter and the terminal will look like this:
After that, restart the services of tomcat by using the following commands:
sudo systemctl start tomcat
After that, verify that the Apache Tomcat is running by checking the service status of tomcat:
Running the command will produce the following results:
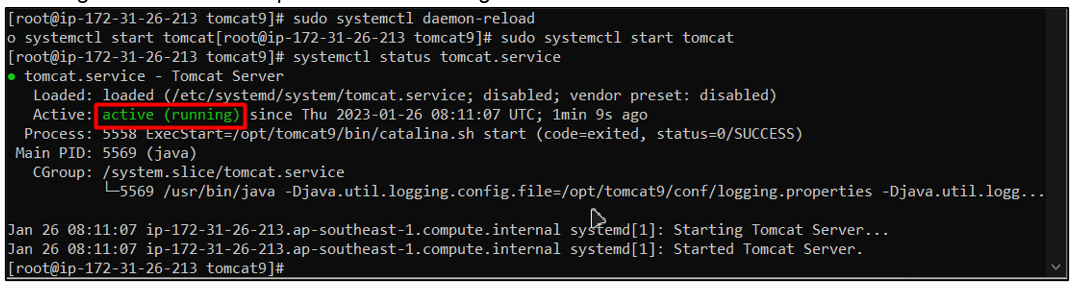
The status is running, which means that the apache tomcat service has been successfully installed and is running.
Note: If you want to access the tomcat server from outside, then make sure to allow port 8080 for the inbound rules of the EC2 instance.
Conclusion
Installation and configuration of Apache Tomcat Server for Amazon Linux in EC2 virtual machine can be quite complex. However, a straightforward and one of the simplest ways of installing Tomcat have been thoroughly explained in this guide. After you have set up your Apache Tomcat server, then you can use it to host your web application on an EC2 instance. And in case you want the external traffic to be able to access your web server then you will have to allow port 8080 for EC2’s inbound traffic.