WebStorm is one of the best IDE from JetBrains for JavaScript development. In this article, I am going to show you how to install WebStorm on Ubuntu 20.04 LTS. So, let’s get started.
Installing Ubuntu Make
You can easily install WebStorm IDE using Ubuntu Make on Ubuntu 20.04 LTS. Ubuntu Make is available in the official package repository of Ubuntu 20.04 LTS.
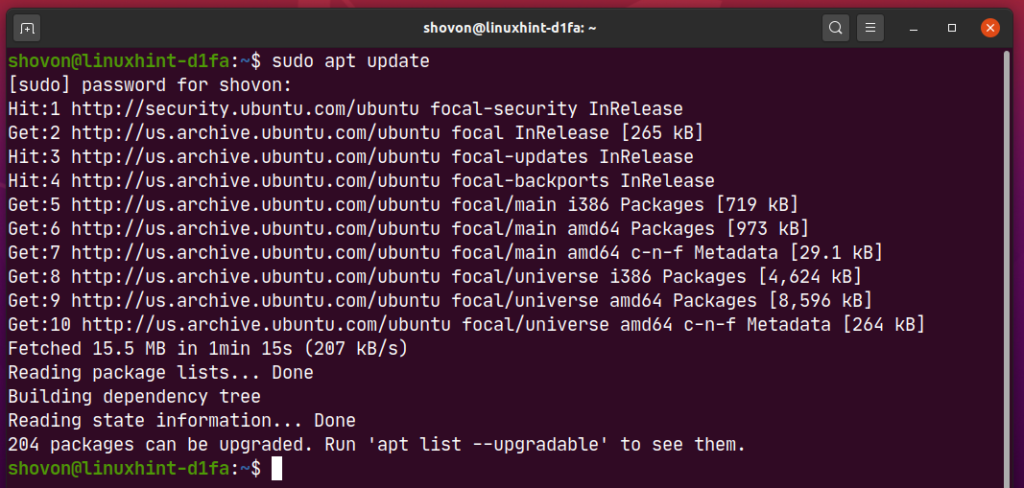
First, update the APT package repository cache as follows:
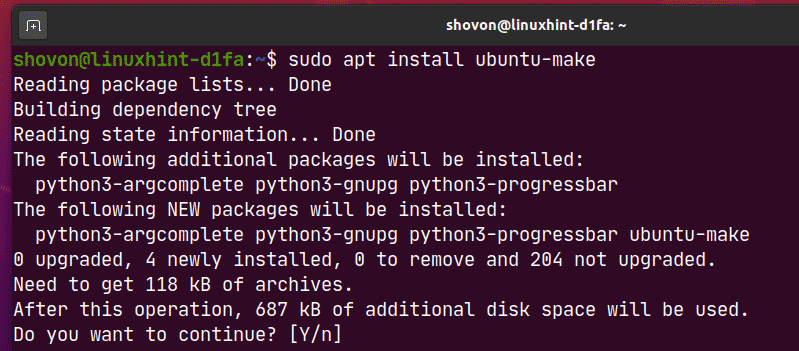
Now, install Ubuntu Make with the following command:
To confirm the installation, press Y and then press <Enter>.
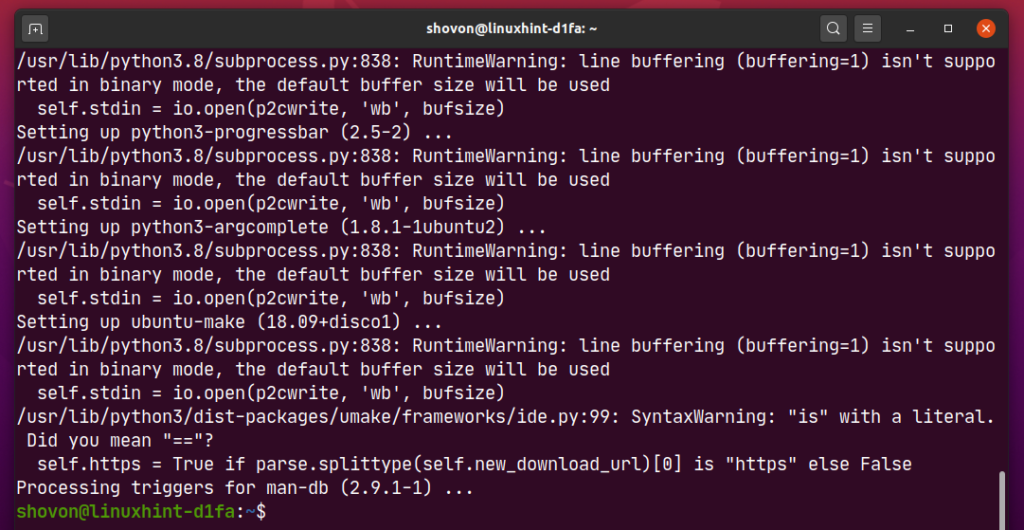
Ubuntu Make should be installed.
Now, run the following command to check if the umake command is available:
Installing WebStorm:
You can easily install WebStorm using the following umake command:
By default, WebStorm IDE should be installed in the path $HOME/.local/umake/ide/webstorm. If you want, you can change it. But the default path is good enough. You don’t have to change it.
Once you’re done, press <Enter>.
Ubuntu Make should download WebStorm from the internet.
At this point, WebStorm should be installed.
Now, add execute permission to the WebStorm desktop file as follows:
Finally, reboot your computer for the changes to take effect.
Once your computer boots, you can access WebStorm from the Application Menu of Ubuntu 20.04 LTS.
Uninstalling WebStorm:
If you want to uninstall WebStorm IDE, run the following command:
WebStorm should be removed from your Ubuntu 20.04 LTS machine.
Upgrading WebStorm:
If there is any new version of WebStorm available, WebStorm IDE will notify you. You can upgrade WebStorm IDE from the IDE itself.
Ubuntu Make does not provide any method of upgrading WebStorm IDE. If you badly want to upgrade WebStorm using Ubuntu Make, you can use a little trick. Just remove WebStorm and install it again using Ubuntu Make.
To remove WebStorm, run the following command:
To install WebStorm again, run the following command:
Initial Configuration of WebStorm:
First, start WebStorm from the Application Menu of Ubuntu 20.04 LTS.
As you’re running WebStorm for the first time, you will have to do some initial configuration.
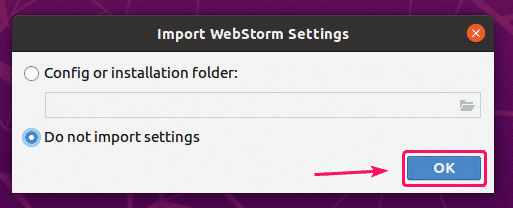
From the Import WebStorm Settings dialog, you can import settings from older version of WebStorm (if you had it installed before).
If It’s the first time you’re installing WebStorm, select Do not import settings and click on OK.
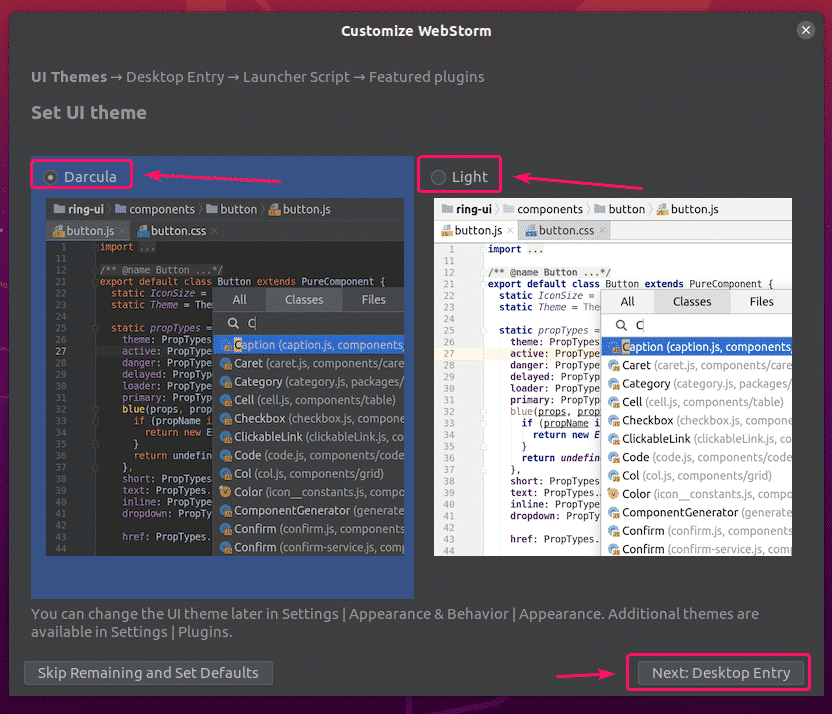
Now, select a UI theme and click on Next: Desktop Entry.
Make sure Create a desktop entry for integration with system application menu checkbox is not checked as WebStorm desktop icon is already available.
Then, click on Next: Launcher Script.
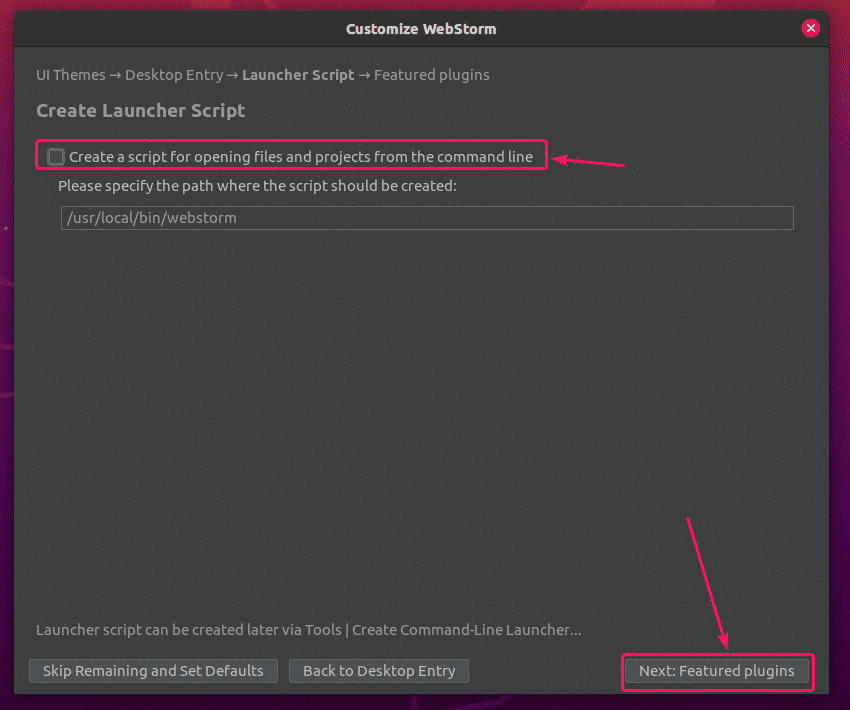
If you want to open WebStorm projects from the command line, check Create a script for opening files and projects from the command line and click on Next: Featured plugins.
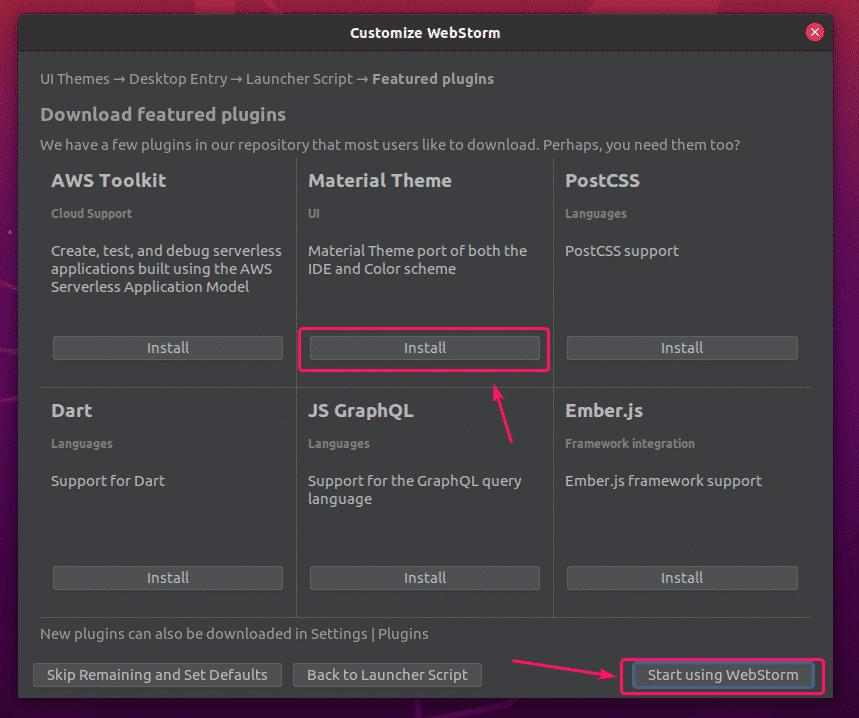
WebStorm will recommend you some popular plugins. If you need any of them, just click on Install to install it.
Once you’re done, click on Start using WebStorm.
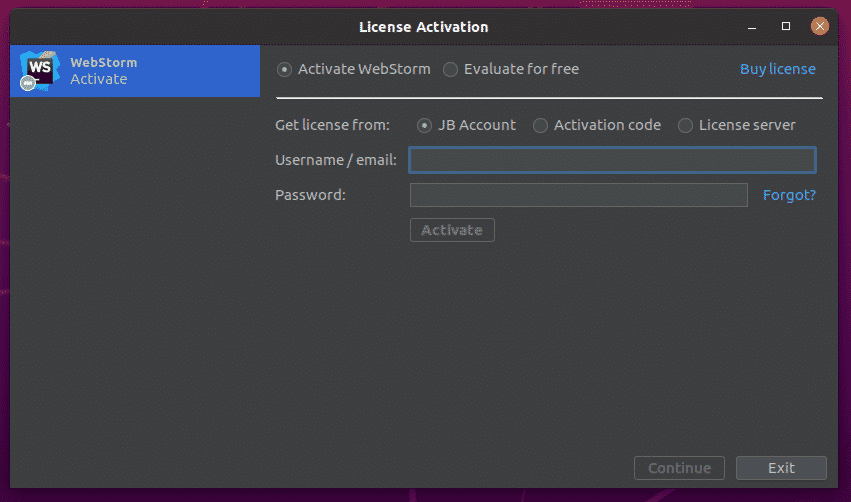
Now, you will be asked to activate WebStorm. You can buy a WebStorm license from JetBrains and activate it from here.
If you want to try out WebStorm before buying the license, select Evaluate for free and click on Evaluate. You will get 30 days of free access to WebStorm IDE.
WebStorm is loading.
WebStorm should start. Now, you can use WebStorm for your JavaScript projects.
Basics of WebStorm:
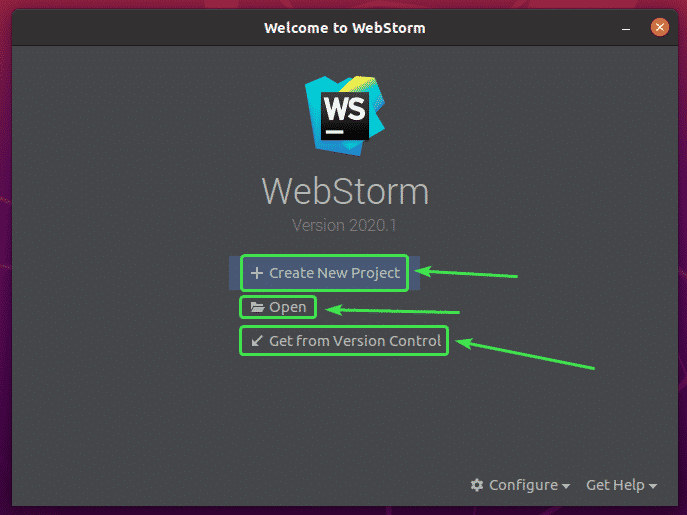
You click on Create New Project to create a new JavaScript project and follow the instructions depending on your project requirements.
You can open existing project in WebStorm. To do that, click on Open and follow the instructions.
You can also create a new project from a GitHub repository. To do that, click on Get from Version Control and follow the instructions.
In this section, I am going to create a new Node.js project and show you how to run it.
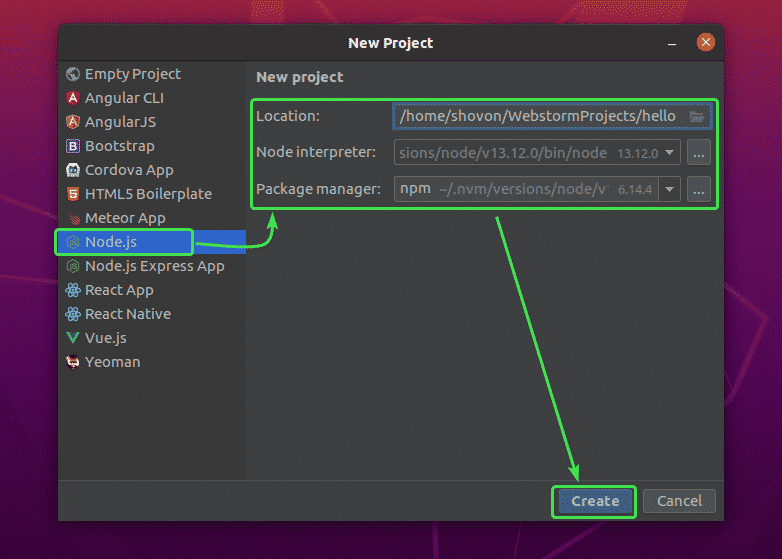
If you want to follow along, click on Create New Project, select Node.js, select a project Location and click on Create.
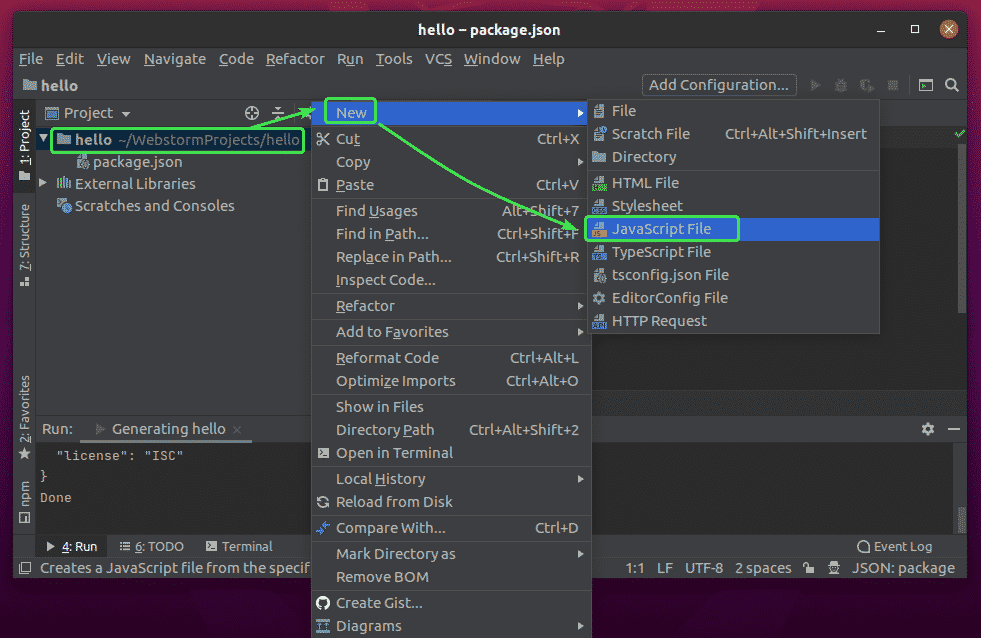
A new Node.js project should be created. The project file manager is on the left side. The code editor is on the right side.
Now, right click on the project folder, and click on New > JavaScript File to create a new JavaScript script.
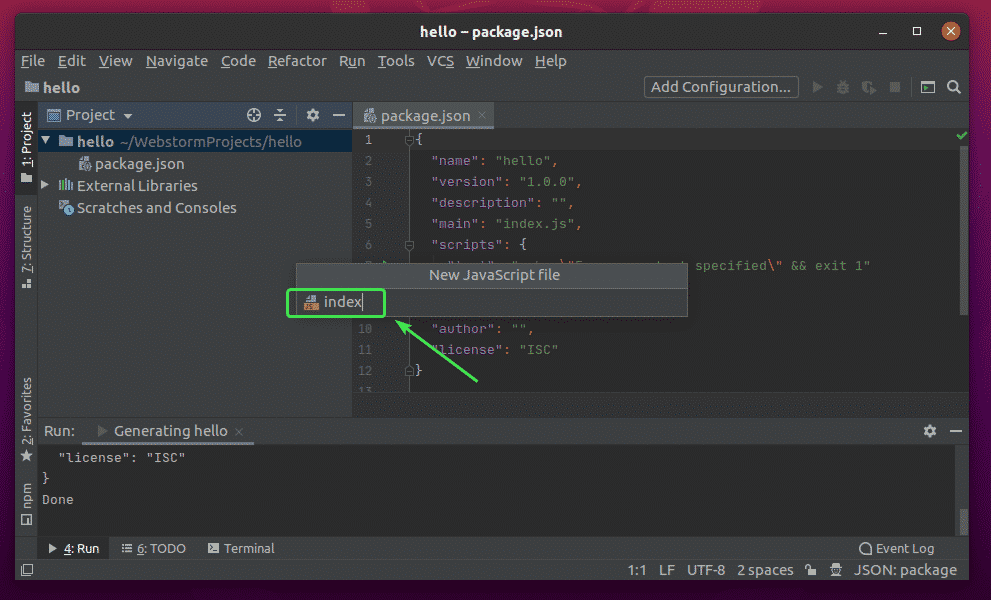
Type in index as the file name and click on OK.
Now, type in the following lines of codes in the index.js file.
console.log(message);
Now, run the index.js script by pressing <Alt> + <Shift> + <F10> or from Run > Run…
Then, select index.js.
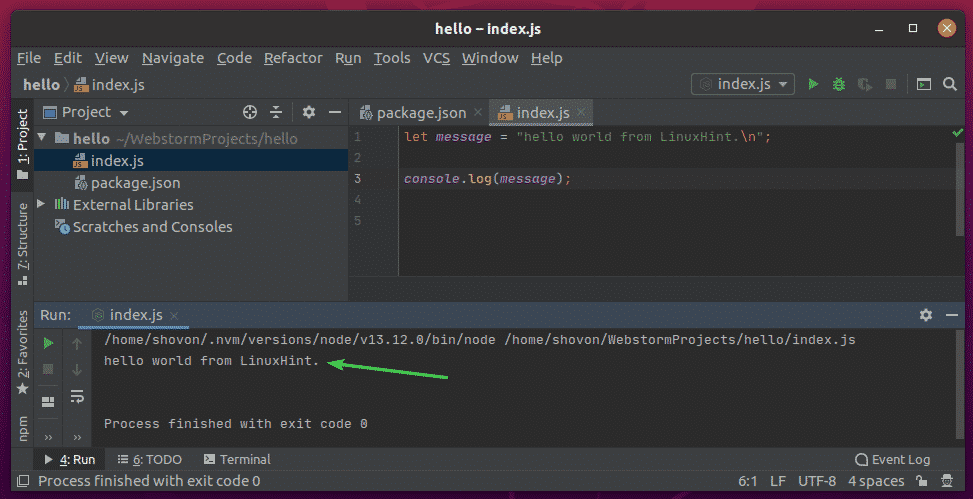
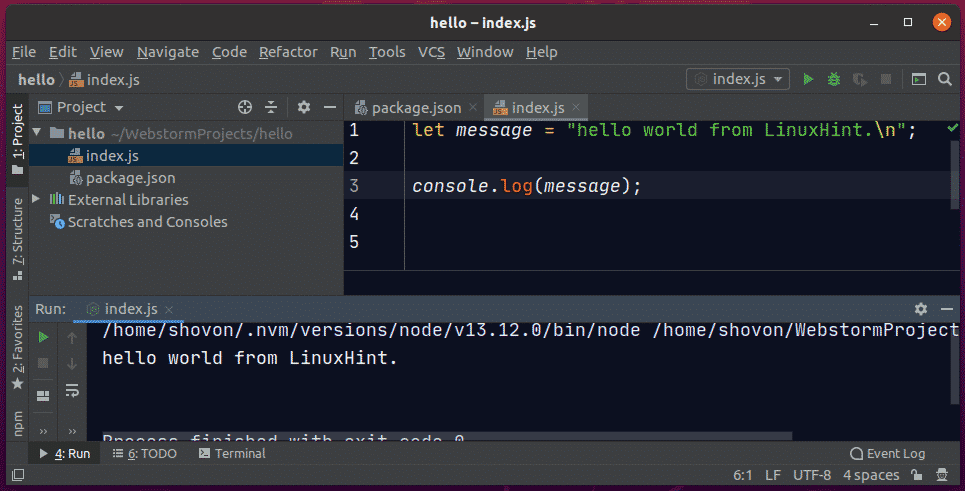
The index.js script should run and the output should be displayed below.
Changing Editor Font and Color Scheme:
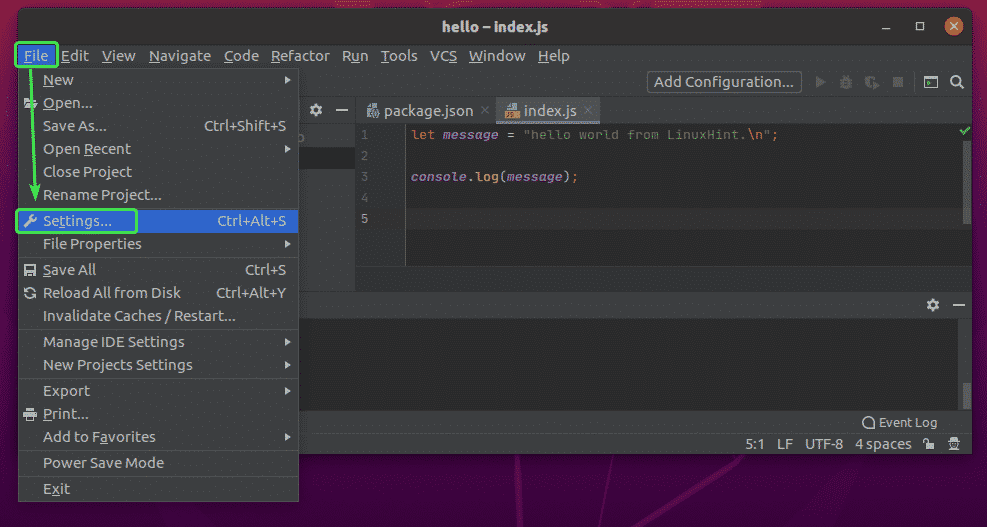
To configure the font or color scheme, go to File > Settings.
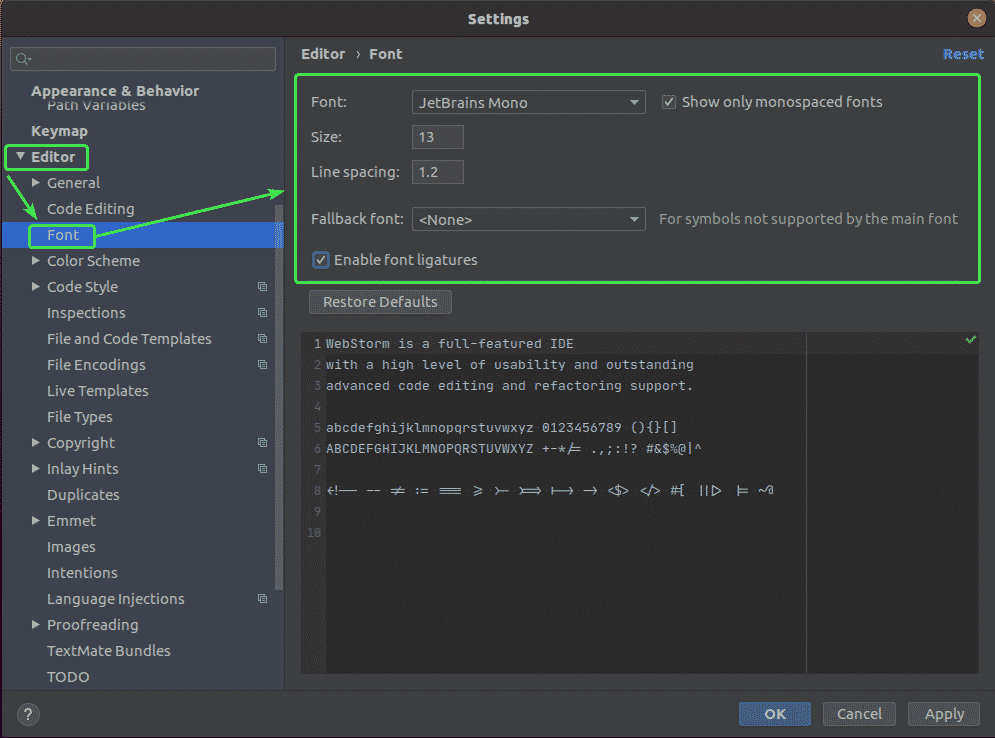
To change the font, go to the Editor > Font tab. You can change the font family, font size, line spacing from here. You can also check Enable font ligatures to enable special font characters.
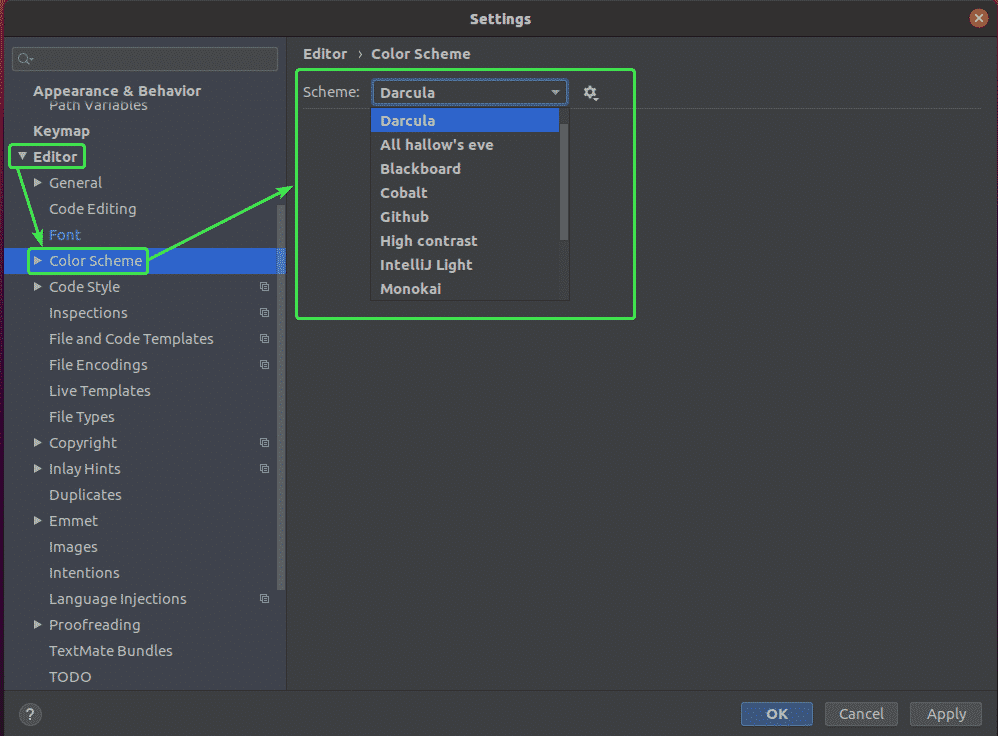
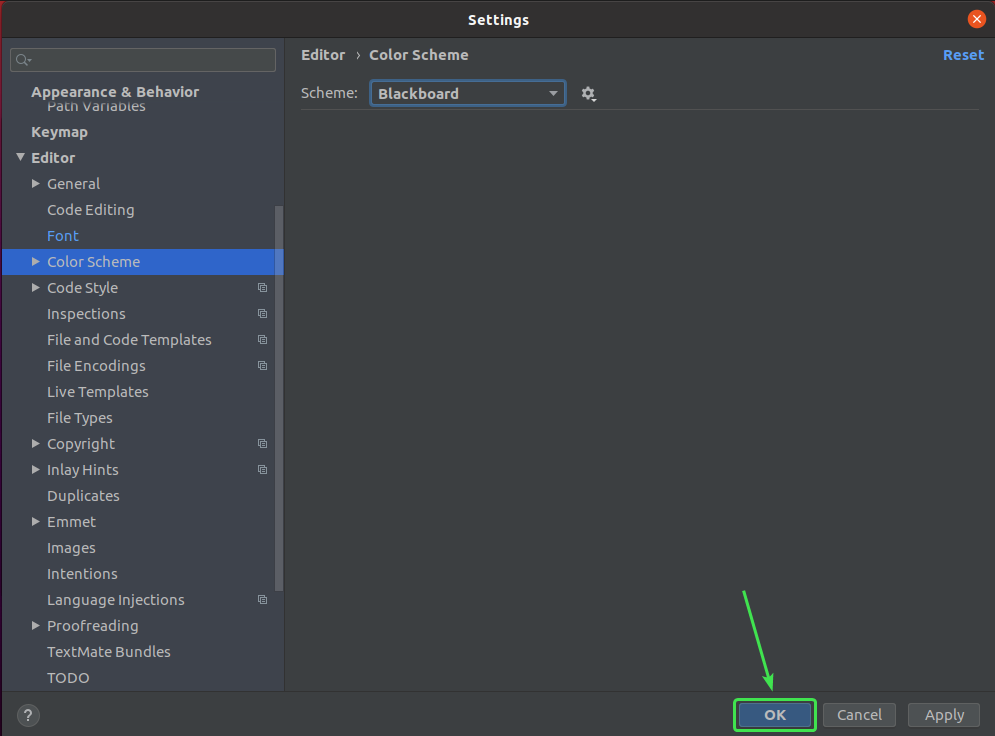
To change the color scheme, go to the Editor > Color Scheme tab. Now, you can select any of the available color schemes from the dropdown menu.
Once you’re done, click on OK.
The changes should be applied.
So, that’s how you install WebStorm on Ubuntu 20.04 LTS. Thanks for reading this article.

