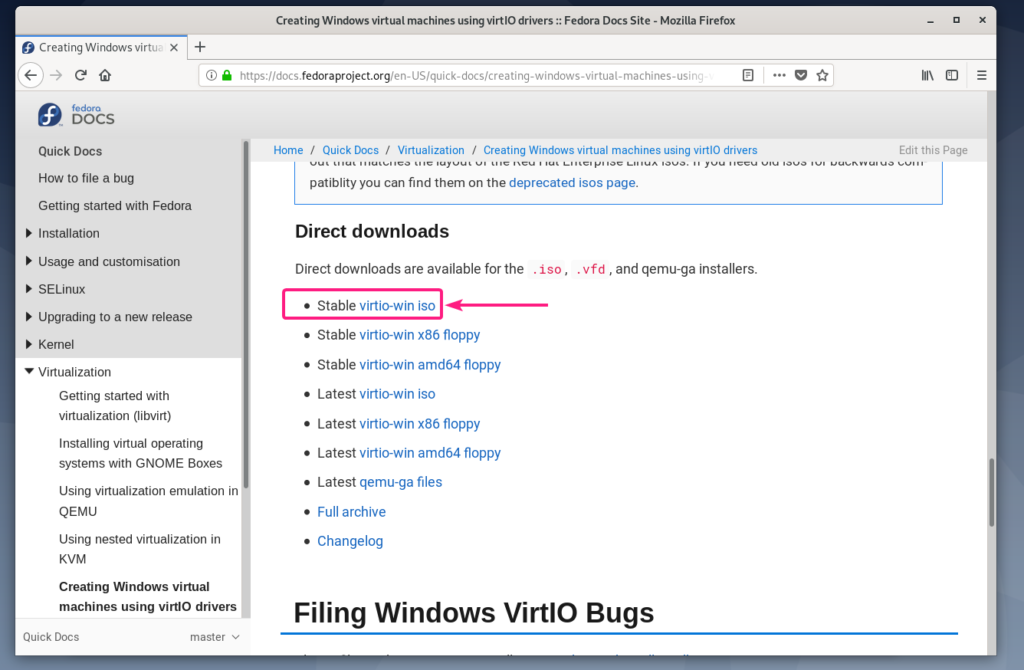
Your browser should prompt you to save the file. Click on Save File.
The download should start. It may take a while to complete. Note that, the filename being downloaded is virtio-win.0.1.171.iso
Once the download is complete, move the virtio-win.0.1.171.iso file to your KVM ISO pool (In my case, its /kvm/iso/).
The ISO file should be moved to the KVM/QEMU pool.
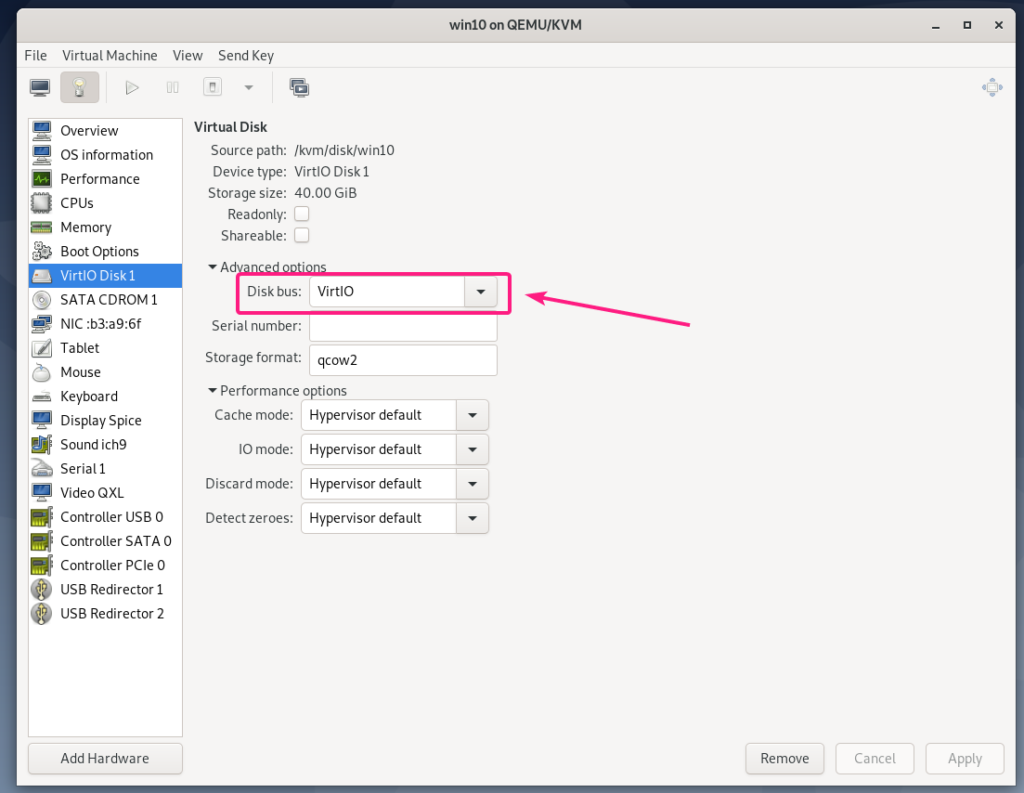
Now, create a new QEMU/KVM Windows VM (I’m using Virtual Machine Manager) and set the Disk bus to VirtIO from the VM Settings.
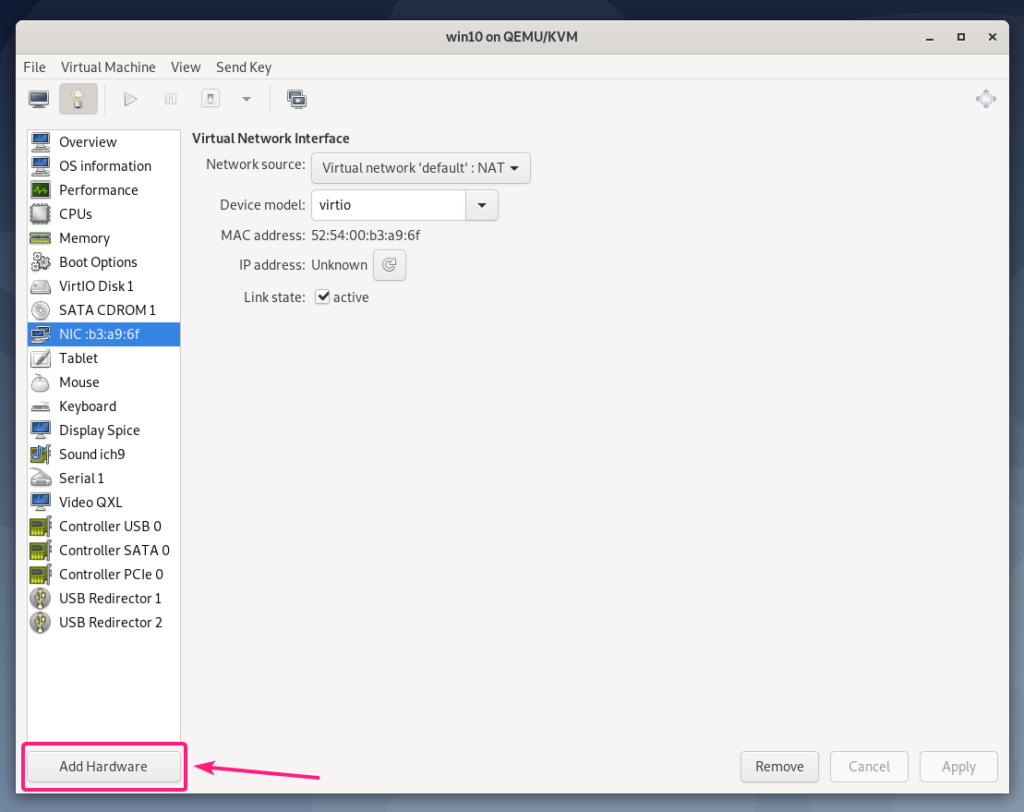
Also, change the network device model of the Windows VM to virtio.
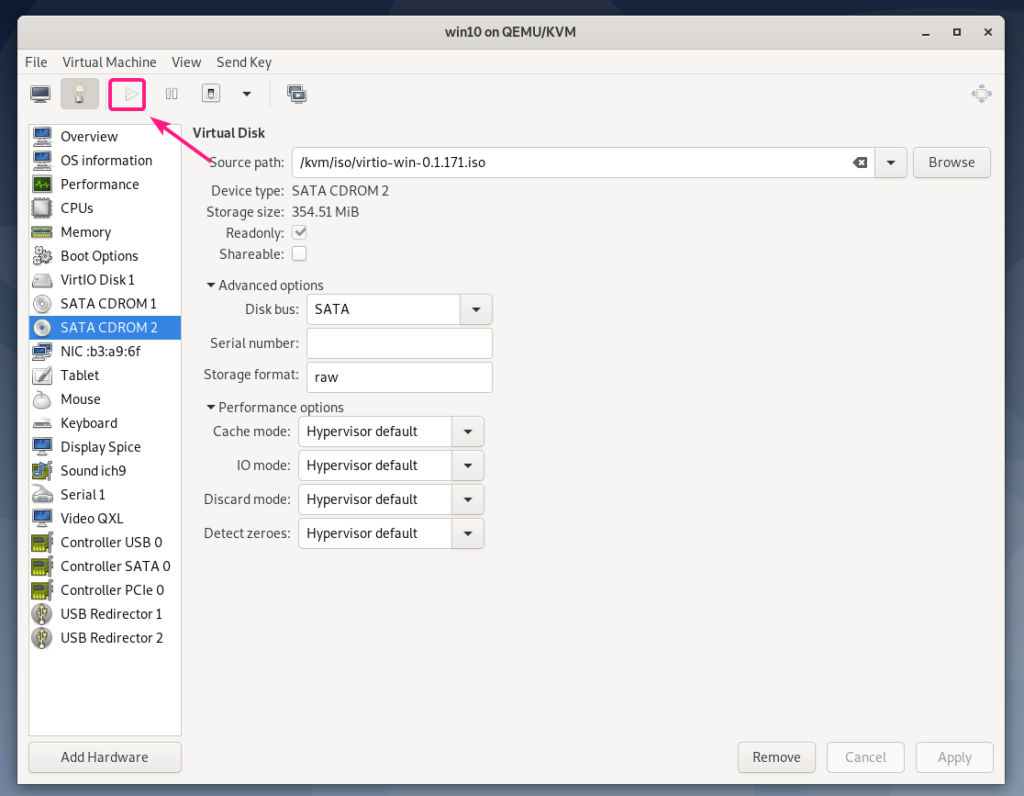
If you want to use the virtio devices on your KVM/QEMU Windows VM, then you need 2 CDROM devices. One with the ISO image of Windows for installing Windows on the VM. The other one for installing virtio drivers from the virtio Windows driver ISO file that you’ve just downloaded.
Let’s add a new CDROM device and add the Windows virtio driver ISO image to it.
First, click on Add Hardware.
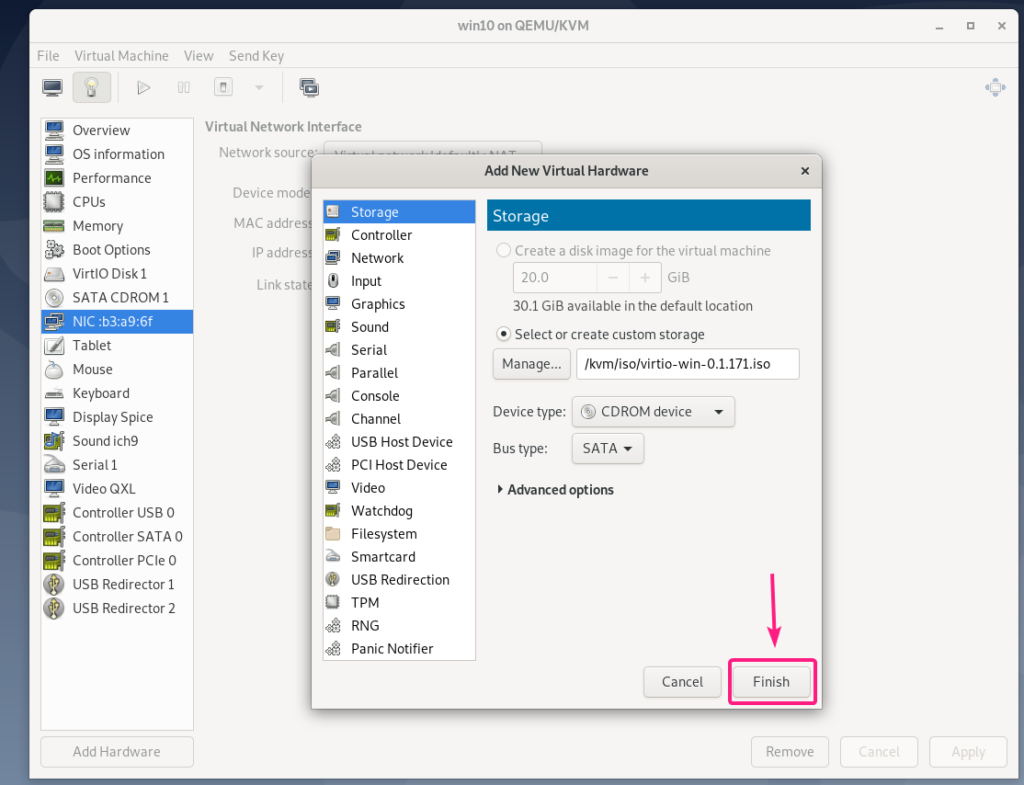
Now, from the Storage section, set Device type to CDROM device. Then, click on Manage.
Now, select the virtio-win-0.1.171.iso file that you’ve just downloaded and click on Choose Volume.
Now, click on Finish.
A new CDROM device should be added. This CDROM should have all the virtio drivers that you need.
Now, start the virtual machine.
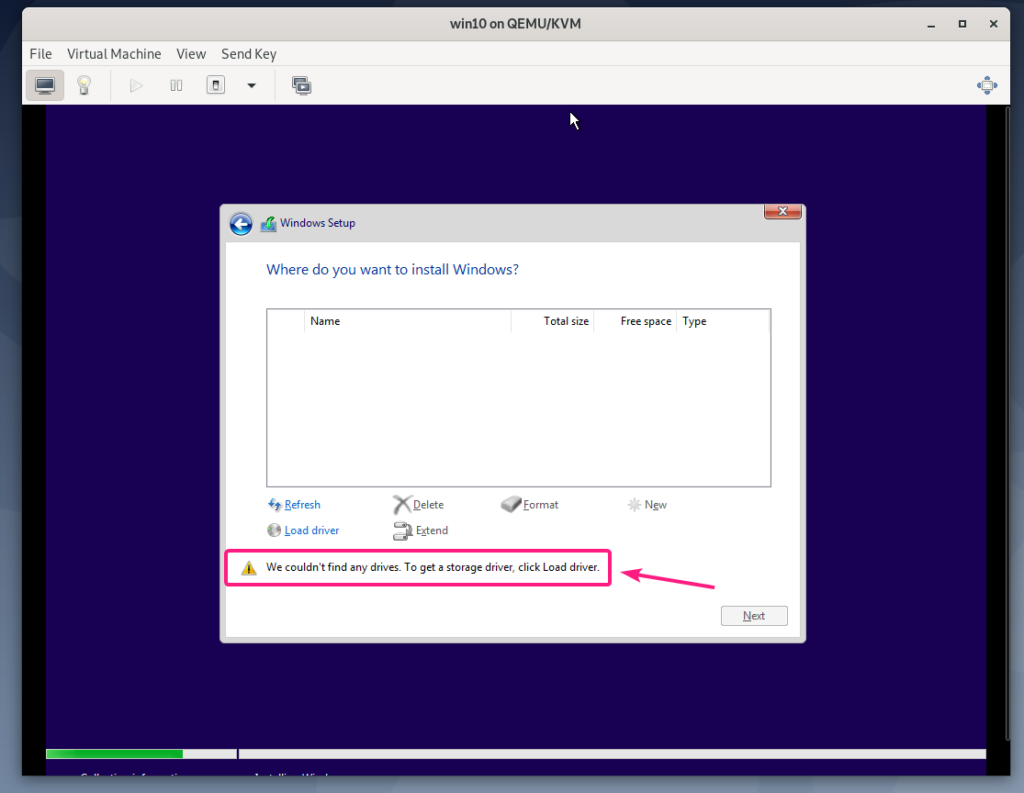
Windows won’t be able to find the storage device of the VM by default. That’s because the virtio storage driver is not installed on Windows by default.
To install the virtio storage driver, click on Load driver.
Now, click on Browse.
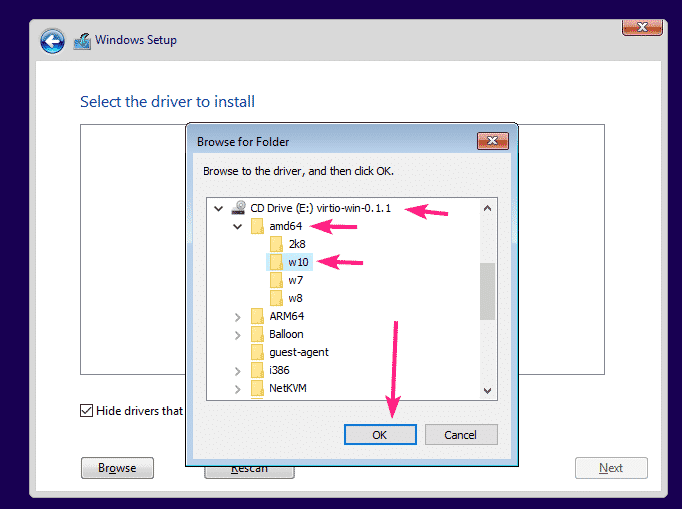
Now, from the virtio CD drive, select amd64 > w10 (for Windows 10), amd64 > 2k8 (for Windows Server 2008), amd64 > w7 (for Windows 7), amd64 > w8 (for Windows 8).
Once you’ve selected the correct driver directory, click on OK.
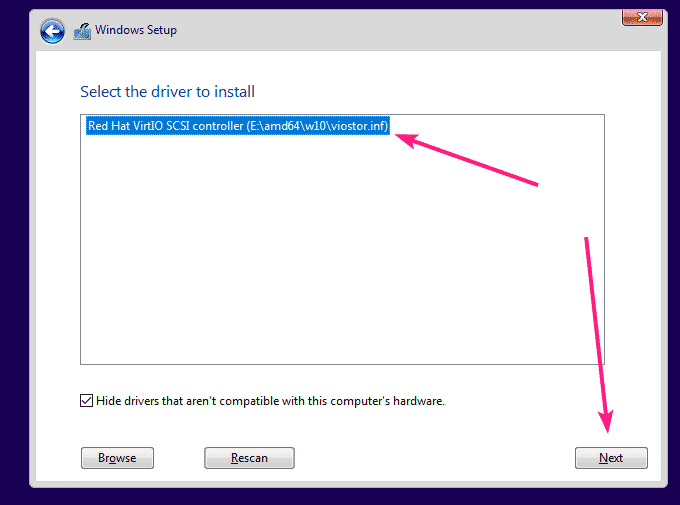
The driver installer should detect the Red Hat VirtIO SCSI controller driver from the CD. Click on Next.
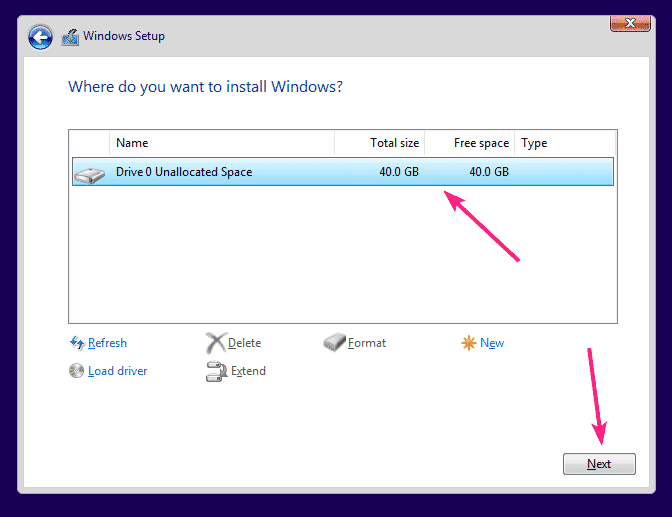
The virtio storage driver should be installed. Now, you should see the storage device in the Windows installer. Select it and click on Next.
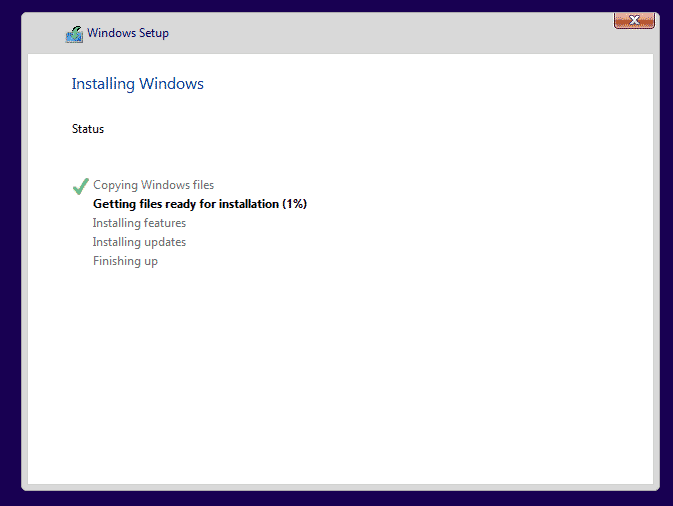
Windows installer should start installing Windows on the virtio storage device. It may take a while to complete the Windows installation on the VM.
At this point, Windows should be installed on the VM.
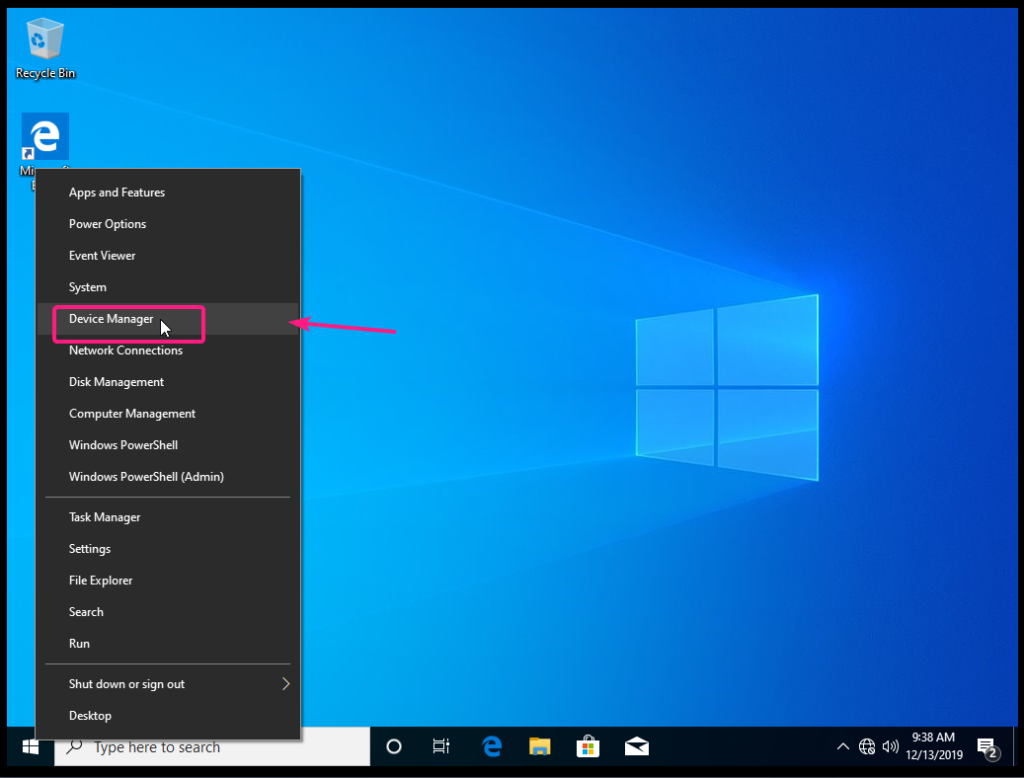
Now, right click (mouse) on the Windows logo of the start menu and select Device Manager.
As you can see, the virtio network device is not recognized on Windows.
To install the virtio network driver, right click on Ethernet Controller and select Update driver.
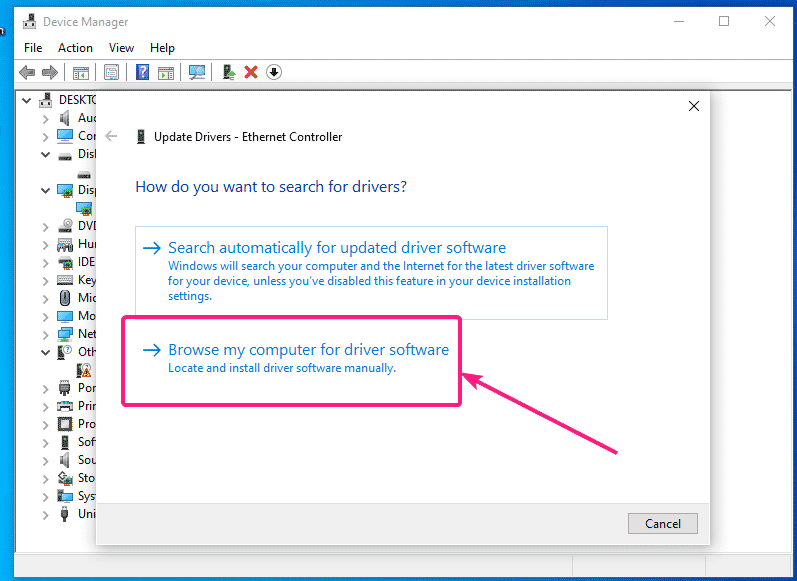
Now, click on Browse my computer for driver software.
Now, click on Browse.
Now, select the virtio driver CDROM and click on OK.
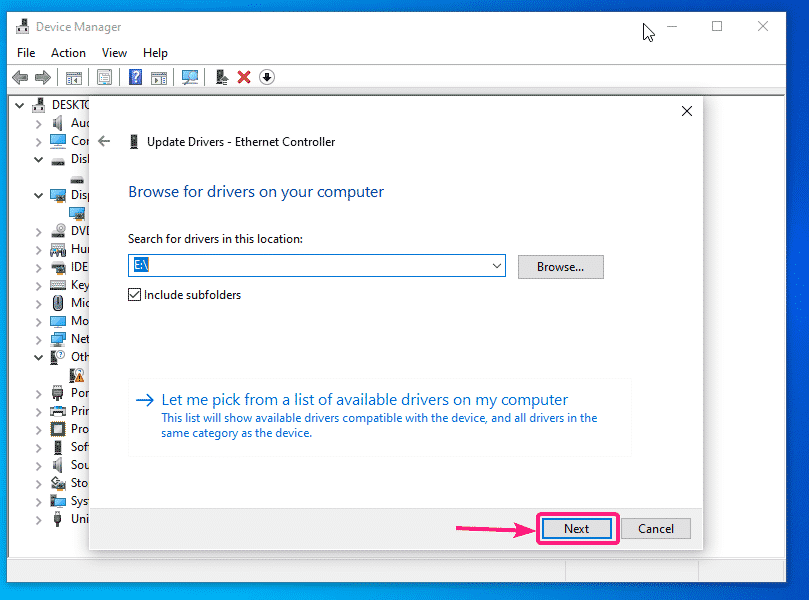
Now, click on Next.
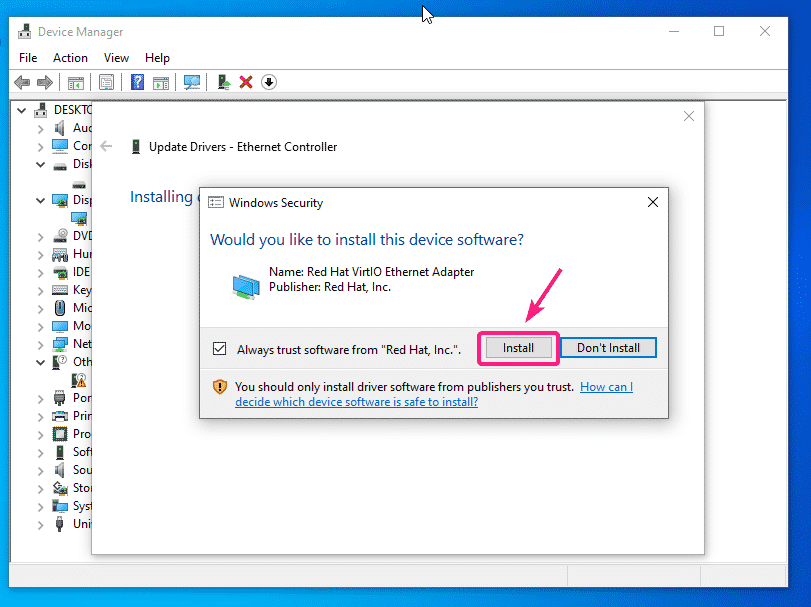
Click on Install.
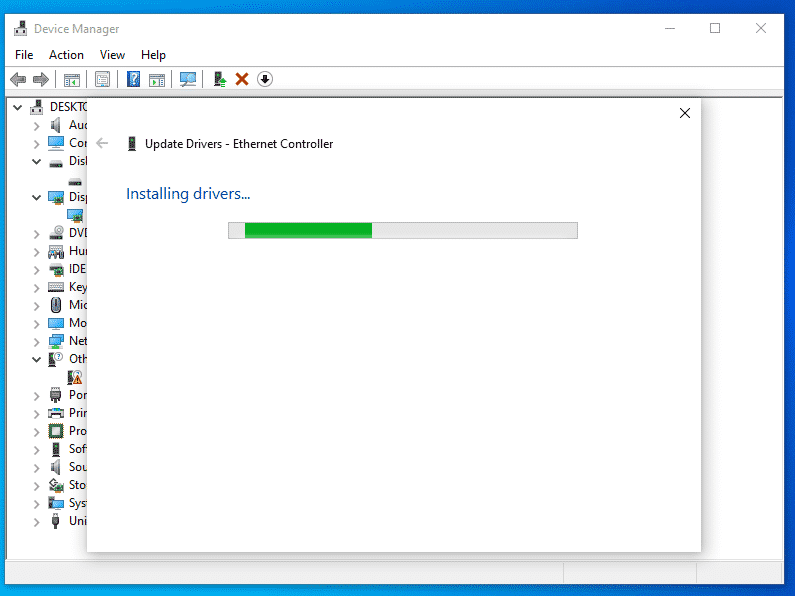
The virtio network driver is being installed.
Once the virtio network driver is installed, click on Close. Your VM should now have a working network connection.
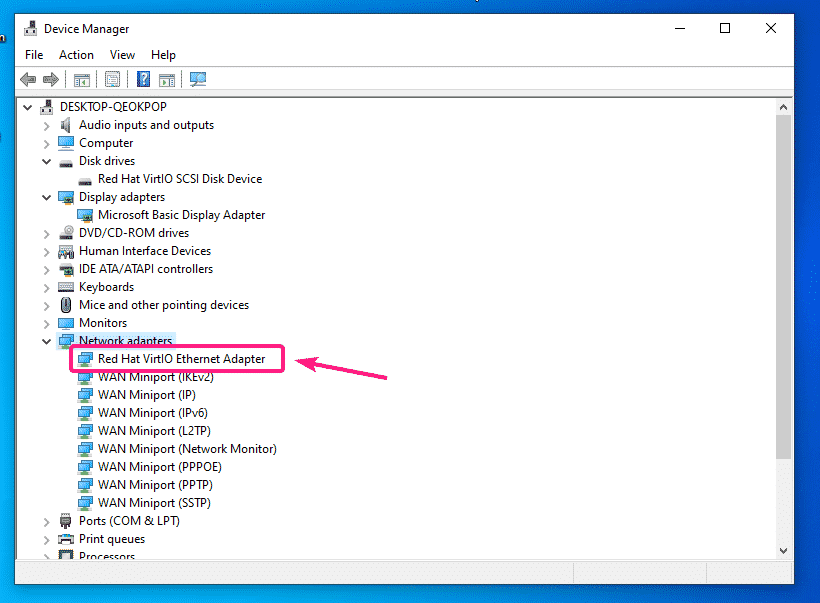
As you can see, the virtio network device is now recognized as Red Hat VirtIO Ethernet Adapter.
If you’re using the QXL display on your Windows VM, you have to install the QXL display driver as well. The QXL display driver is also included in the virtio Windows driver ISO file that you’ve downloaded.
Right click on the Display adapters > Microsoft Basic Display Adapter and click on Update driver.
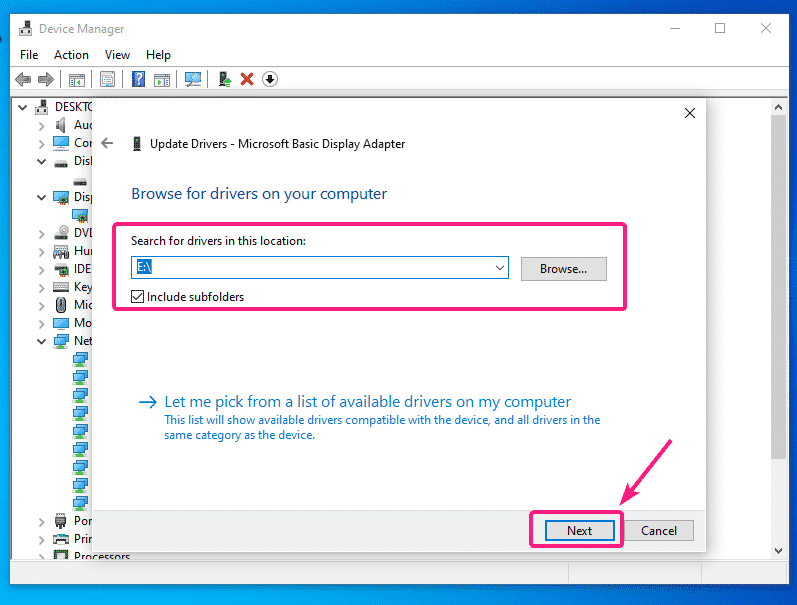
Now, click on Browse my computer for driver software.
Now, select the virtio driver CD and click on Next.
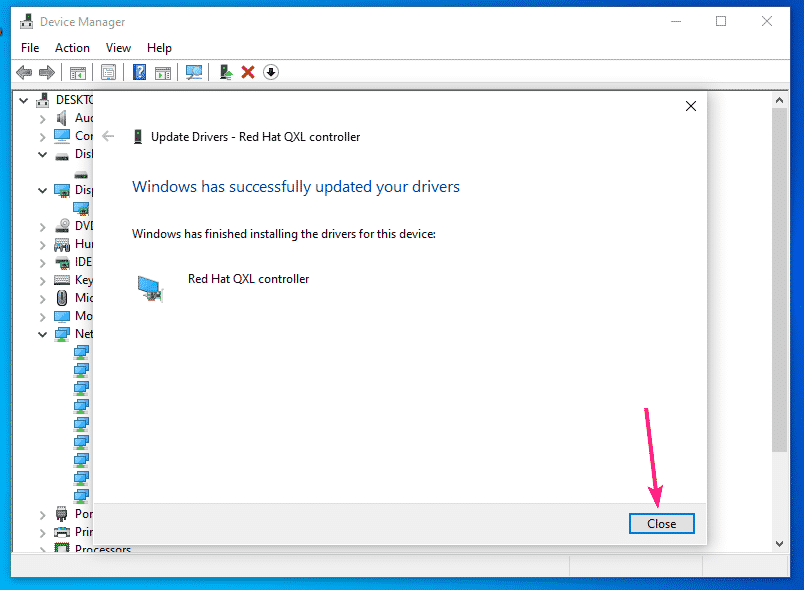
The QXL display driver should be installed. Now, click on Close.
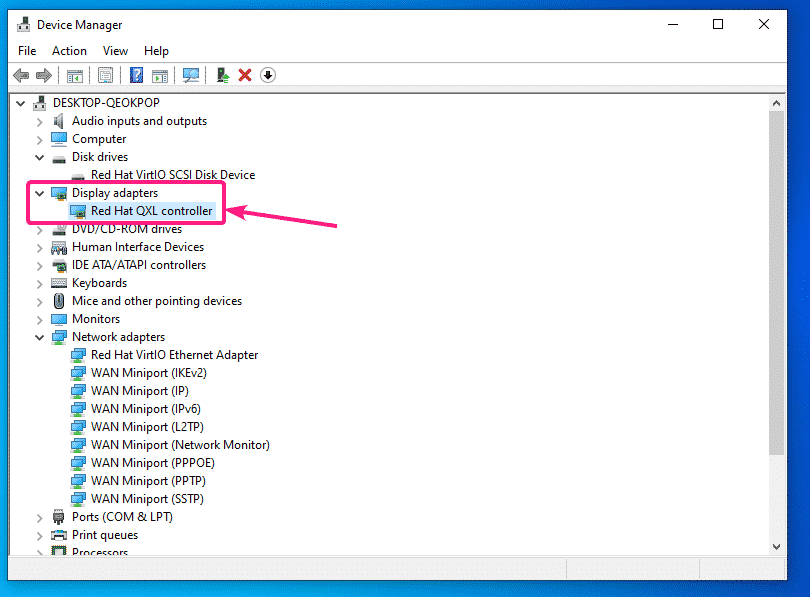
As you can see, the Display adapter is recognized as Red Hat QXL controller.
If you see any other unrecognized devices in the Driver Manager of your Windows VM, you can install drivers for them the same way.
So, that’s how you install virtio Storage, Network and QXL display drivers on KVM/QEMU Windows virtual machines. Thanks for reading this article.

