Enabling WSL:
[adthrive-in-post-video-player video-id=”DSqH6FRu” upload-date=”2023-02-09T12:58:28.000Z” name=”How to Install Ubuntu on Windows 10 WSL” description=”How to Install Ubuntu on Windows 10 WSL” player-type=”collapse” override-embed=”true”]
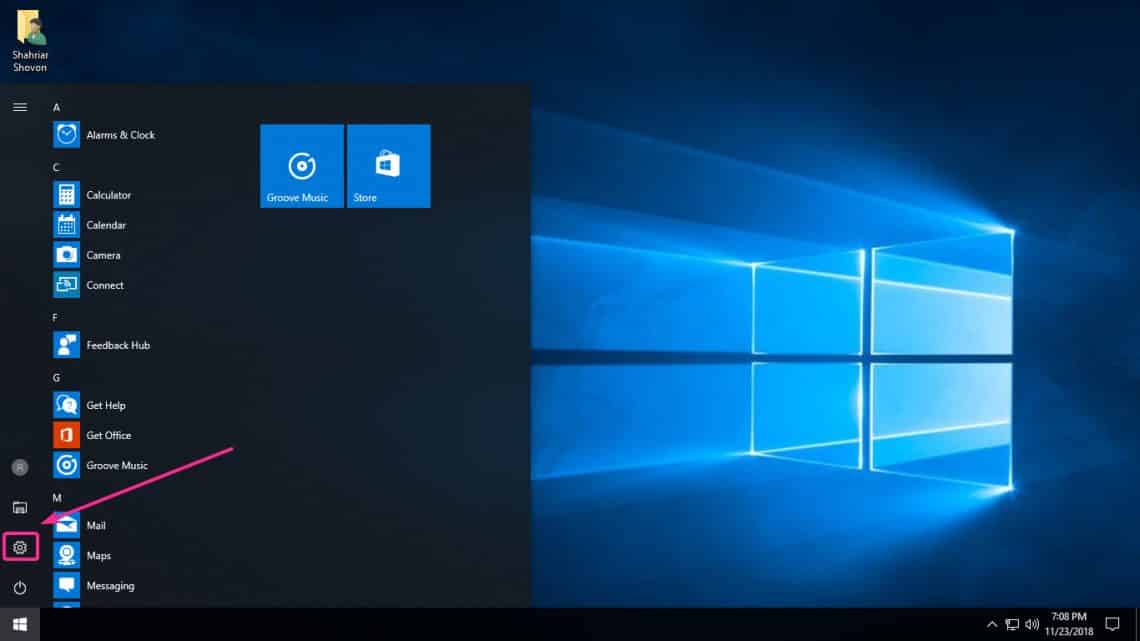
First, you have to enable WSL on Windows 10. It is really easy. First, go to the Settings app from the Start menu.
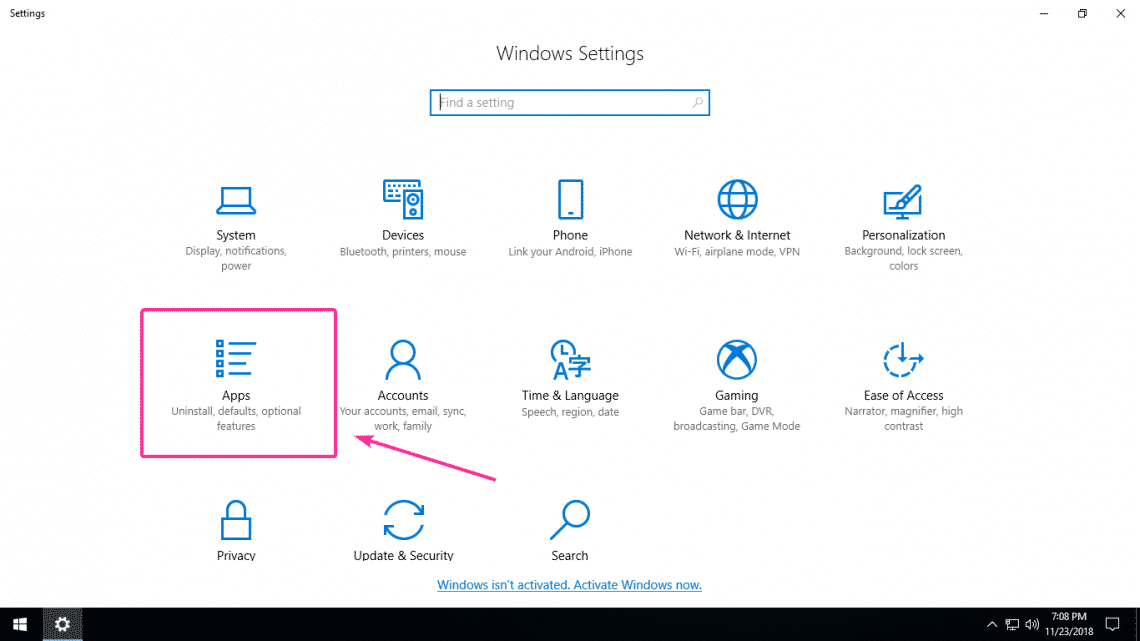
Now, click on Apps.
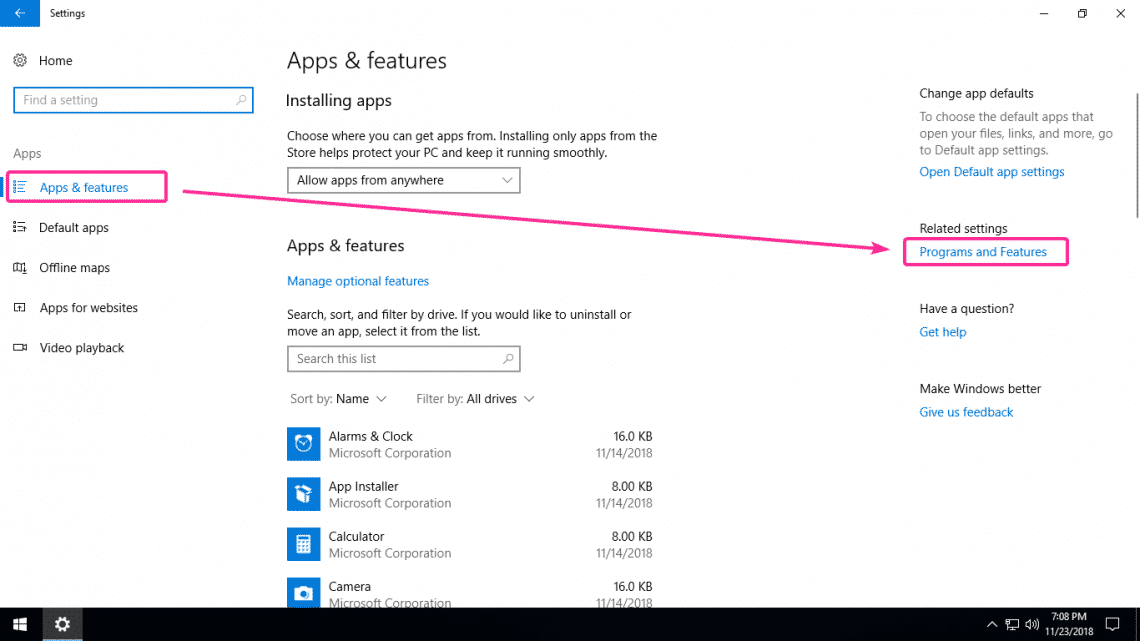
Now, from the Apps & features tab, click on Programs and Features as marked in the screenshot below.
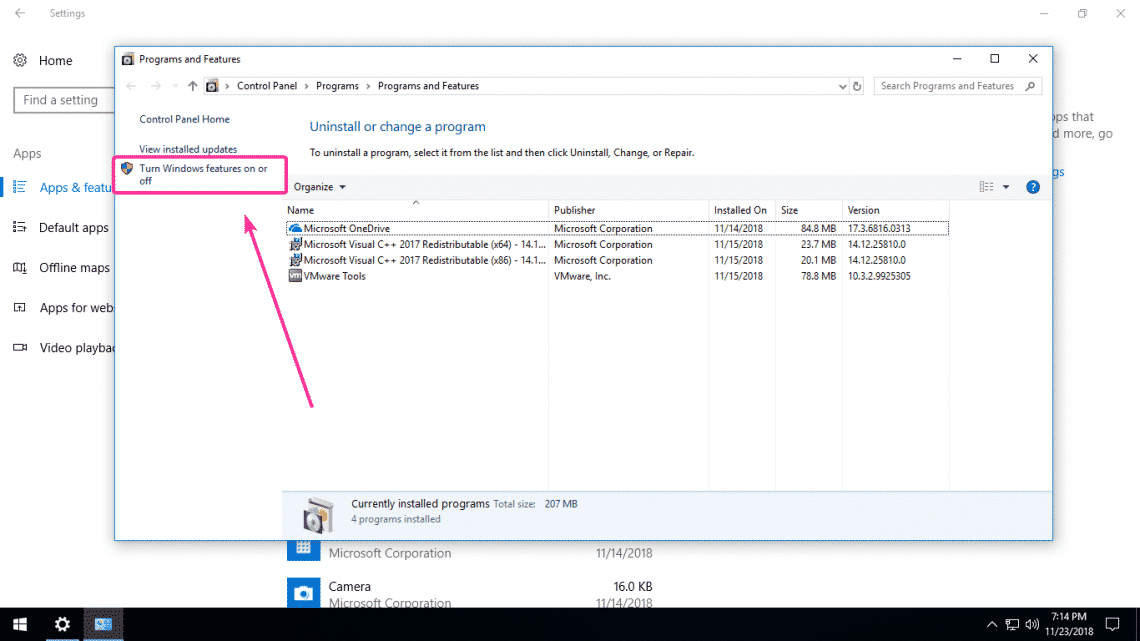
Now click on Turn Windows features on or off from the Programs and Features as marked in the screenshot below.
Now, check the Windows Subsystem for Linux checkbox as marked in the screenshot below and click ok OK.
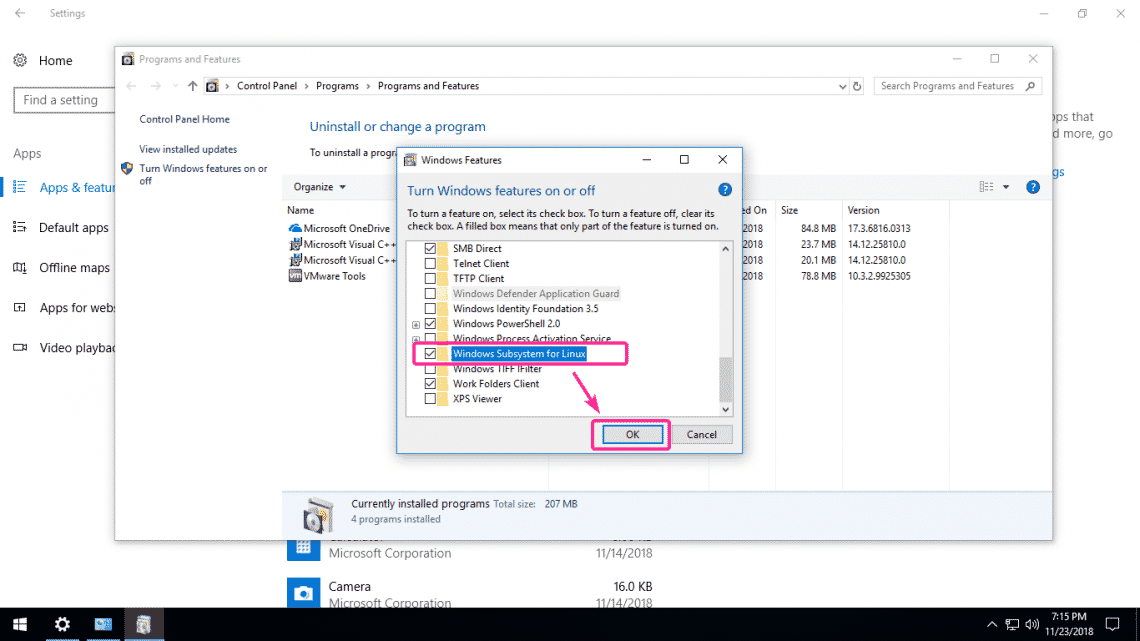
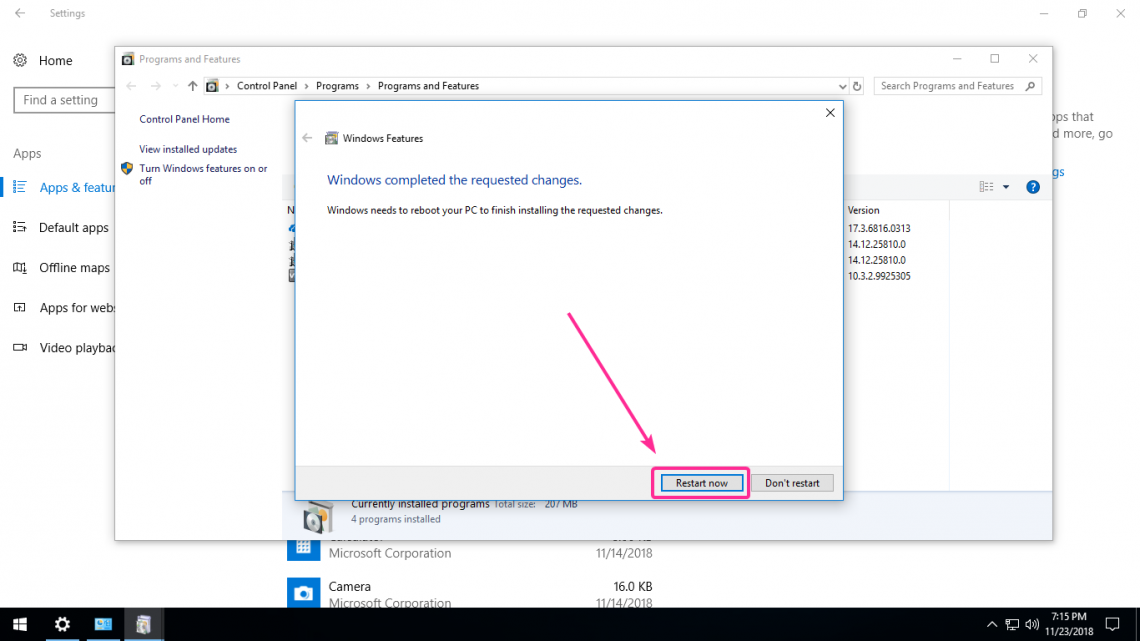
Now, click on Restart now. Windows 10 should reboot.
Installing and Configuring Ubuntu on Windows 10 WSL:
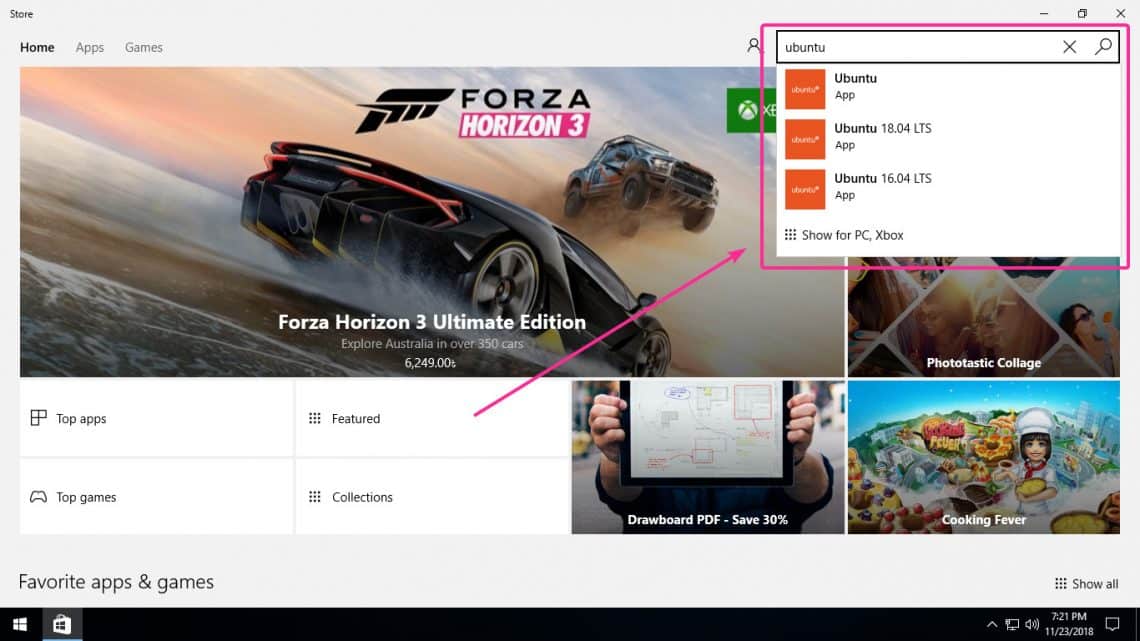
Once your computer starts, open Microsoft Store from the Start menu as shown in the screenshot below.

Now, search for ubuntu. As you can see in the screenshot below, you can install Ubuntu 16.04 LTS or Ubuntu 18.04 LTS at the time of this writing.
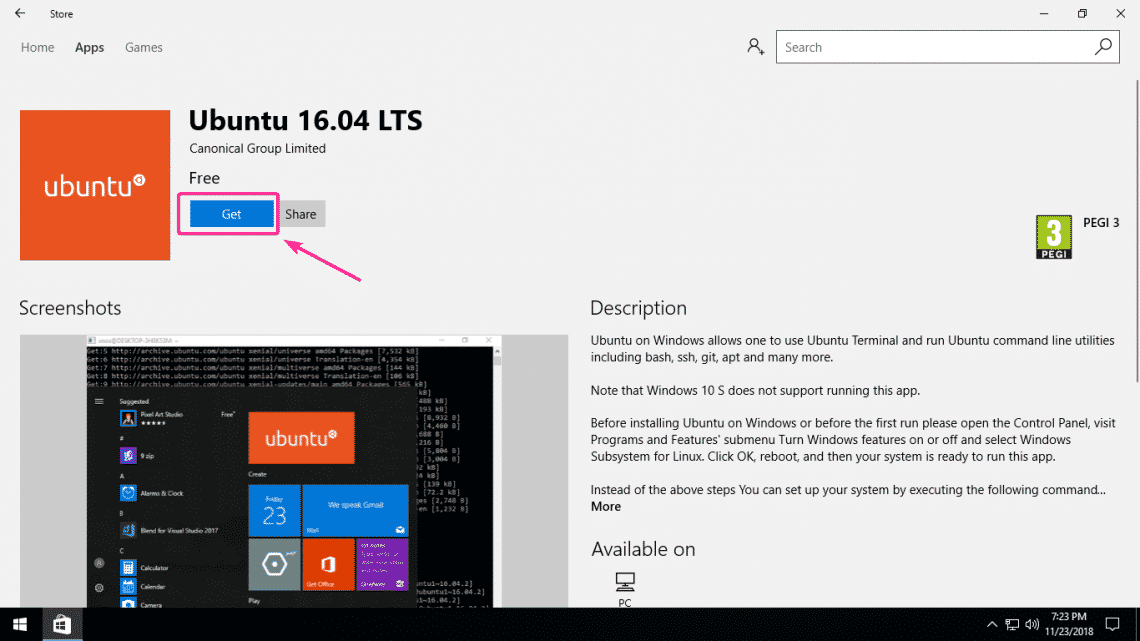
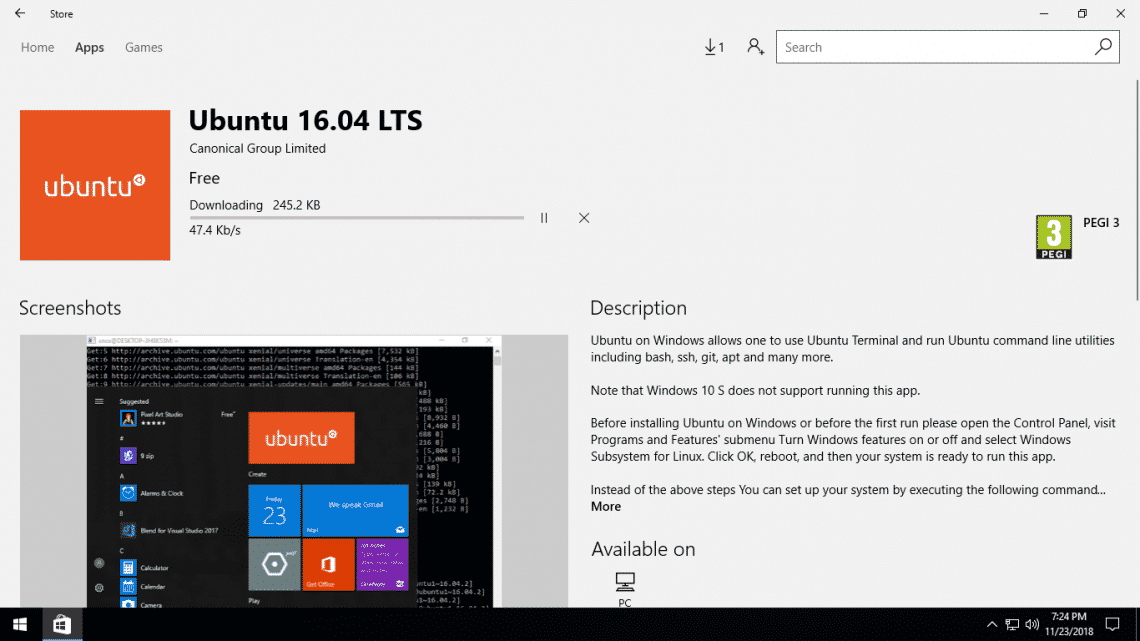
I decided to install Ubuntu 16.04 LTS in this article. So, I clicked on it. Now, click on Get as marked in the screenshot below to install Ubuntu.
As you can see, Ubuntu is being installed from the Microsoft Store. It may take a while to complete.
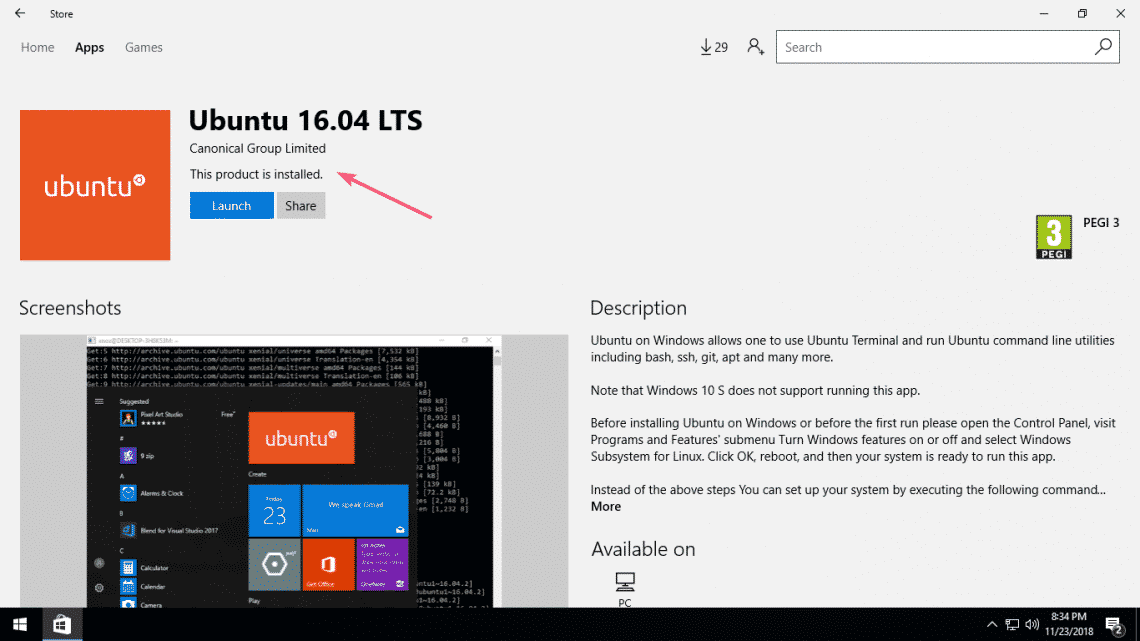
After a while, Ubuntu should be installed.
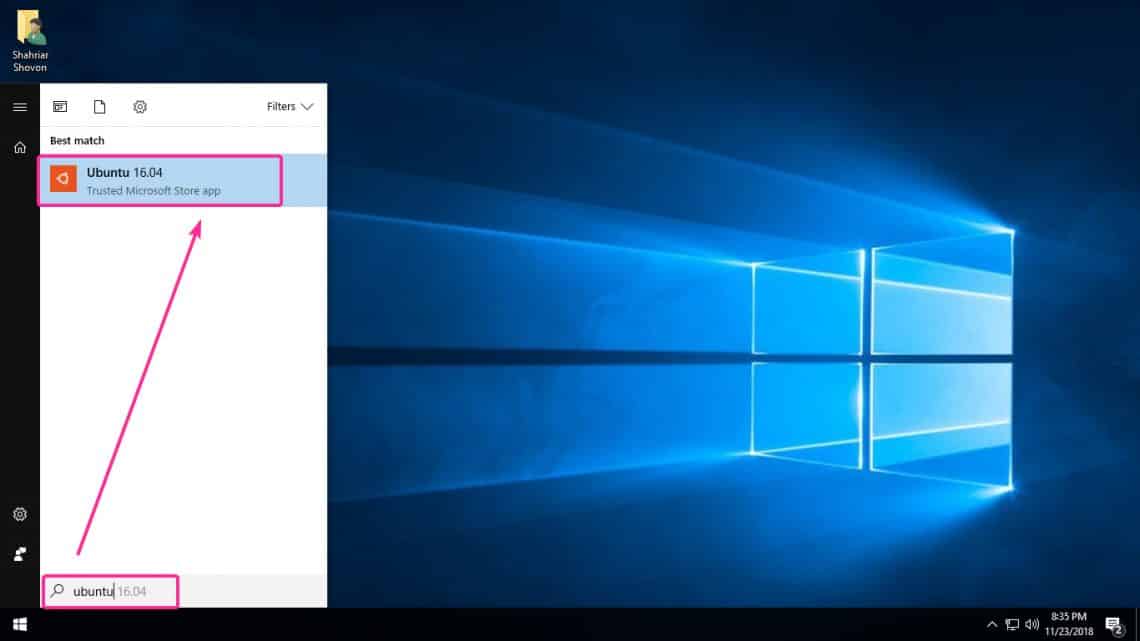
Now, start Ubuntu from the Start menu as shown in the screenshot below.
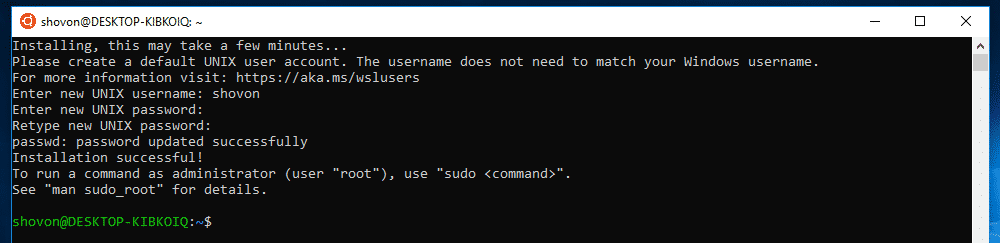
As you’re running Ubuntu on Windows 10 for the first time, you will have to configure it. Just press <Enter> to continue.

Now, you have to create a user account on Ubuntu. Type in the username and press <Enter>.

Now, type in a new password for the username you picked and press <Enter>.

Now, retype the password and press <Enter>.

A new user for Ubuntu should be created.
Now, you can run any Ubuntu Linux command here. I ran the lsb_release -a command and as you can see in the screenshot below, I am running Ubuntu 16.04.5 LTS on Windows 10 through WSL.

Ubuntu WSL version is using a custom version of the Linux kernel as you can see in the screenshot below.

You can also exit out of the bash like you always do with the exit command.
![]()
Once you do the initial configuration, every time you run the Ubuntu app, you will see a bash console as shown in the screenshot below.

As you can see, the Ubuntu’s free command also works.

Installing Ubuntu Packages:
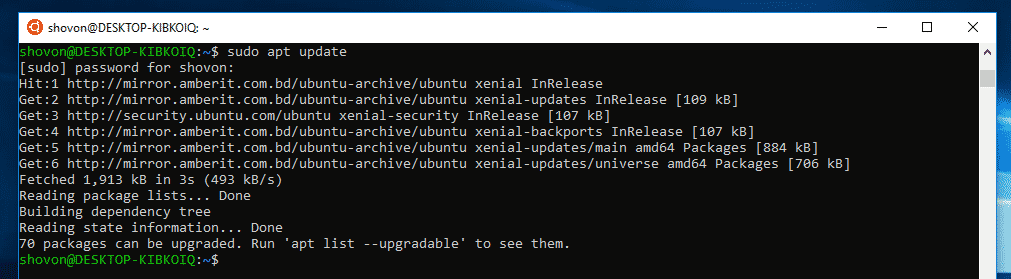
You can also install Ubuntu packages here as well. The popular apt and apt-get commands are available. For example, let’s install the htop package on this version of Ubuntu and see what happens. First, open Ubuntu app and run the following command to update the APT package repository cache:

As you can see, the APT package repository cache is updated.
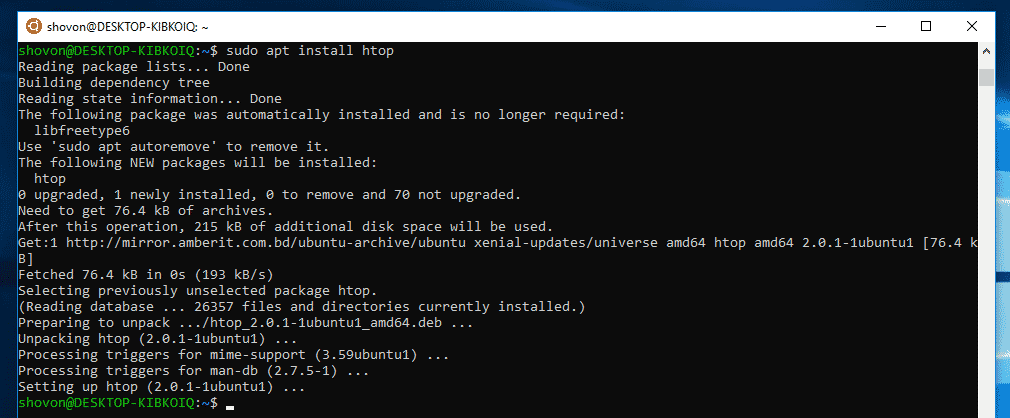
Now, install htop with the following command:

As you can see, htop is installed.
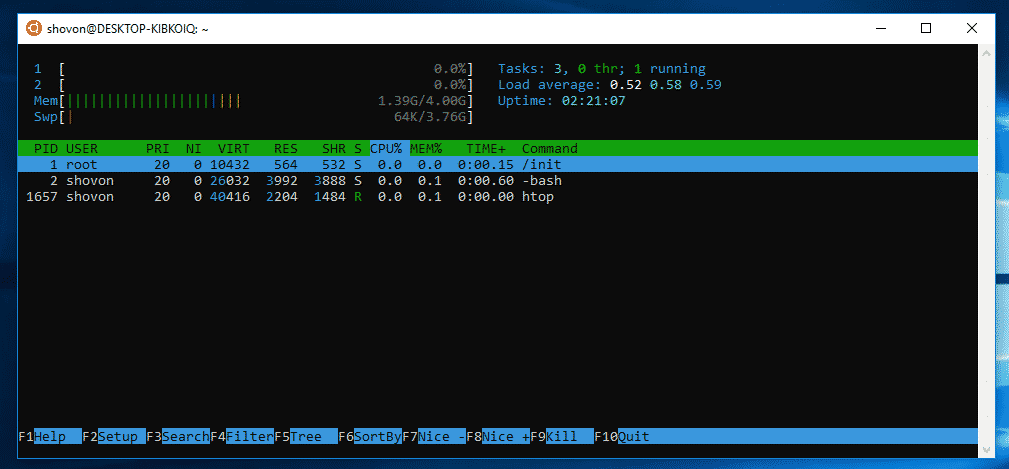
Now, you can run htop with the command:

As you can see, htop is running.
So, that’s how you install and use Ubuntu on Windows 10 through WSL. Thanks for reading this article.