Downloading Ubuntu Desktop 20.04 ISO Image:
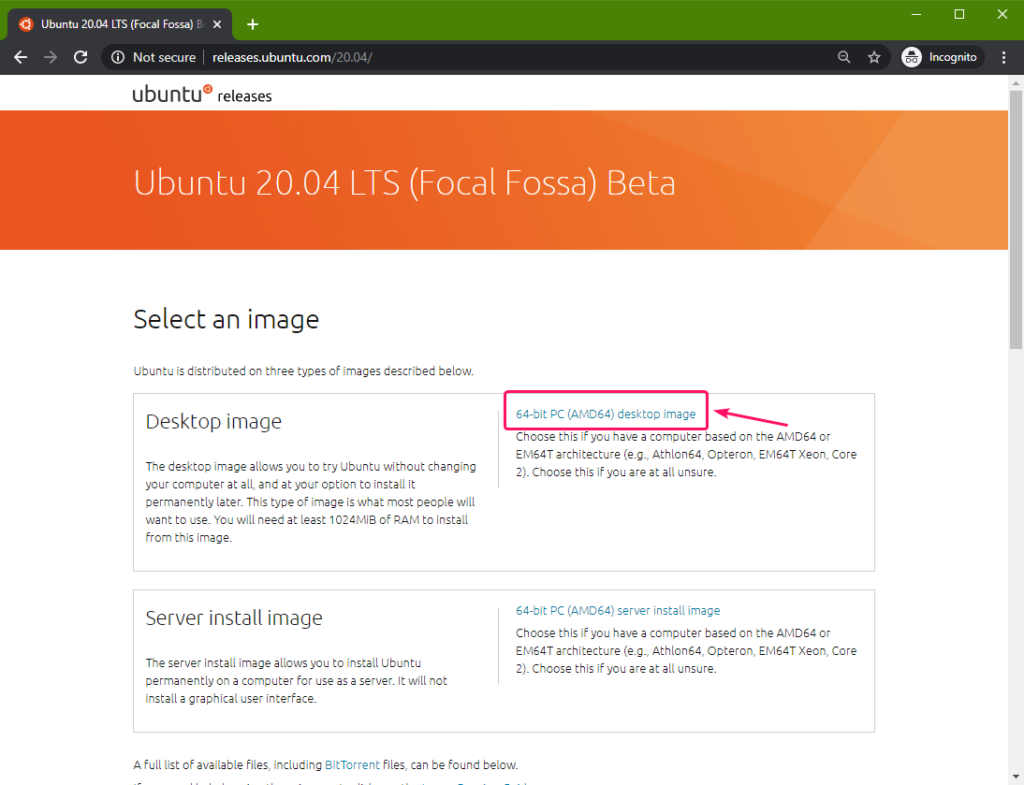
To download Ubuntu Desktop 20.04 LTS ISO image, visit the official release page of Ubuntu 20.04 LTS and click on the desktop image link as marked in the screenshot below.
Your browser should start downloading the Ubuntu Desktop 20.04 LTS ISO image. It may take a while to complete.
Making a Bootable USB Thumb Drive on Windows:
You can use many tools to make a bootable USB thumb drive of Ubuntu Desktop 20.04 LTS on Windows, i.e. Etcher, Rufus. In this article, I am going to use Rufus.
You can download Rufus from the official website of Rufus. Download the Rufus portable version as marked in the screenshot below.
Rufus should be downloaded.
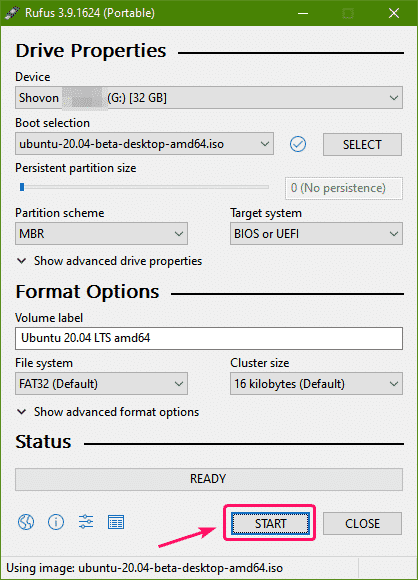
Now, insert a USB thumb drive on your computer and run Rufus. Then, click on SELECT.
Now, select the Ubuntu Desktop 20.04 ISO image that you’ve just downloaded and click on Open.
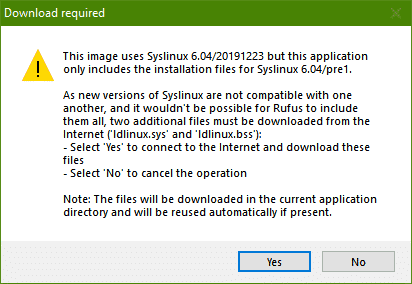
Now, click on Yes.
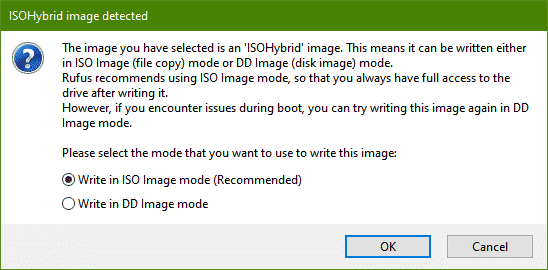
Now, click on OK.
If you have any important data on your USB thumb drive, move them somewhere safe and then click on OK.
Rufus should copy all the important files to your USB thumb drive. It may take a while to complete.
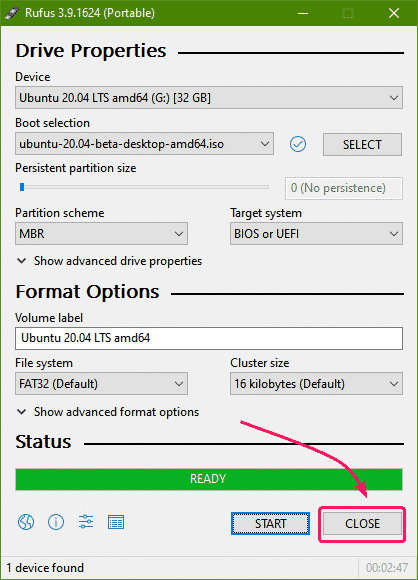
Once the USB thumb drive is ready, click on CLOSE and remove the USB thumb drive from your computer.
Making a Bootable USB Thumb Drive on Linux:
Once you’ve downloaded the Ubuntu Desktop 20.04 ISO image, navigate to the ~/Downloads directory as follows:
You should find the Ubuntu Desktop 20.04 ISO image file there.
Now, run the following command:
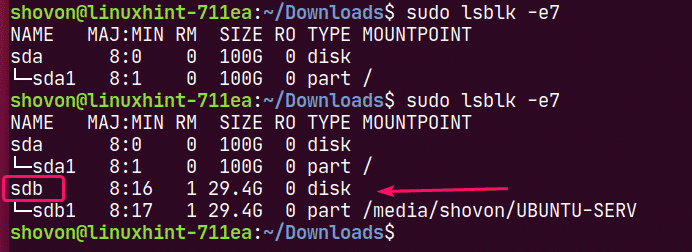
Then, insert the USB thumb drive on your computer and run the following command:
you compare the outputs, you should see a new disk (sdb in my case). This is your USB thumb drive. You can access it as /dev/sdb.
Now, run the following command to write the Ubuntu Desktop 20.04 ISO image to your USB thumb drive /dev/sdb:
NOTE: Make sure that there are no important files on your USB thumb drive.
The requires files are being copied to the USB thumb drive. It should take a while to complete.
At this point, the USB thumb drive should be ready.
Now, eject the USB thumb drive as follows:
Booting Ubuntu Desktop 20.04 from the USB Thumb Drive:
Now, insert the USB thumb drive on your computer and boot from it from the BIOS of your computer.
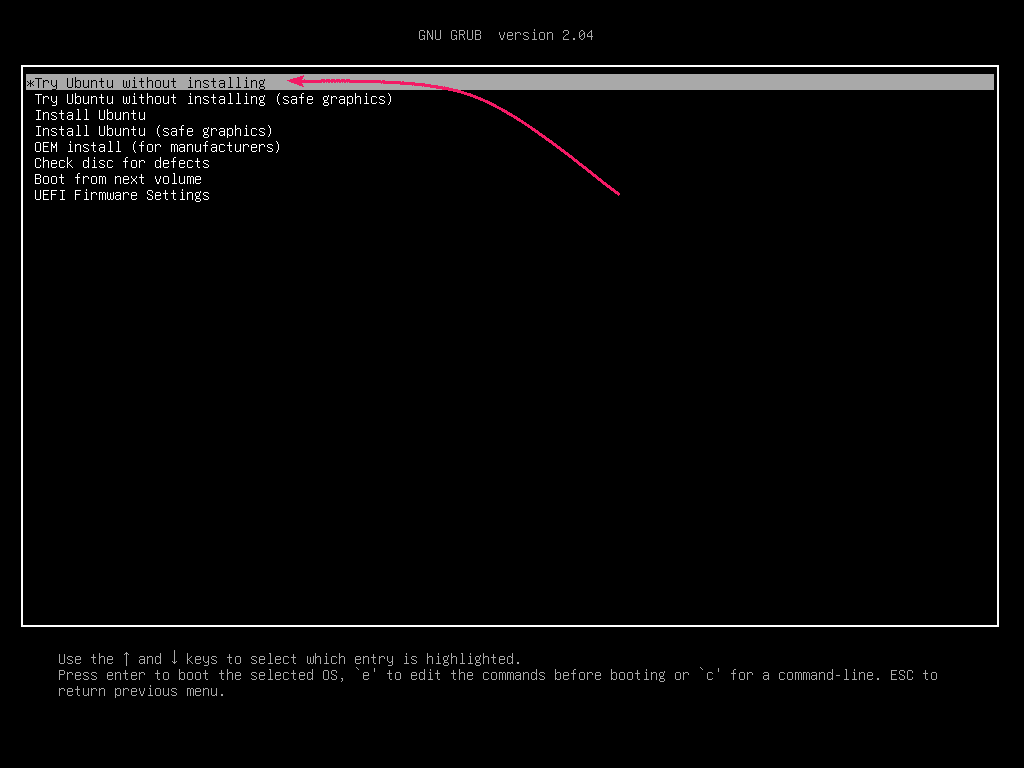
You should see the following GRUB menu. Select Try Ubuntu without installing and press <Enter>.
NOTE: If your computer is unable to boot for some reason, select Try Ubuntu without installing (safe graphics) instead.
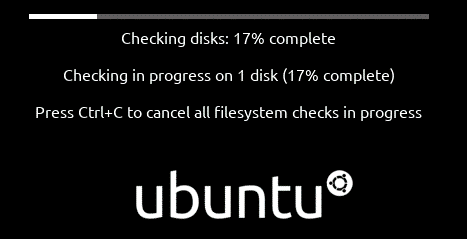
Ubuntu should check the USB thumb drive for errors before booting into the Live Ubuntu Desktop 20.04. These checks will help eliminate a lot of installation problems later on. If you want, you can skip this step by pressing <Ctrl> + C.
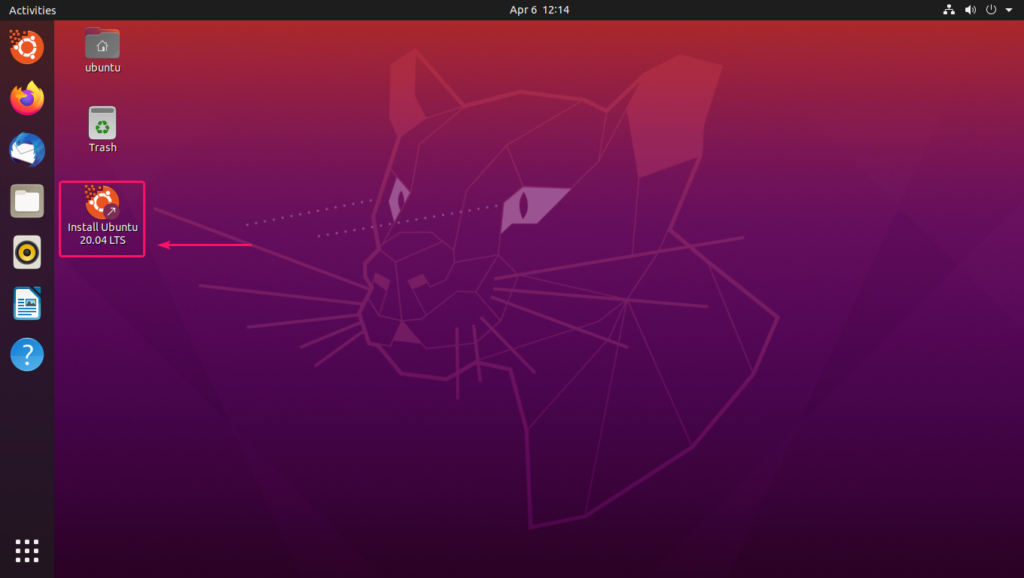
Ubuntu Desktop 20.04 should start in Live mode. You can check if Ubuntu Desktop 20.04 LTS is running well in Live mode. If you don’t see any major issues, then Ubuntu Desktop 20.04 LTS should work well on your hardware. Now, click on Install Ubuntu 20.04 LTS icon to start the Ubuntu Installer.
The Ubuntu installer should start.
Installing Ubuntu Desktop 20.04 LTS:
Now, click on Continue.
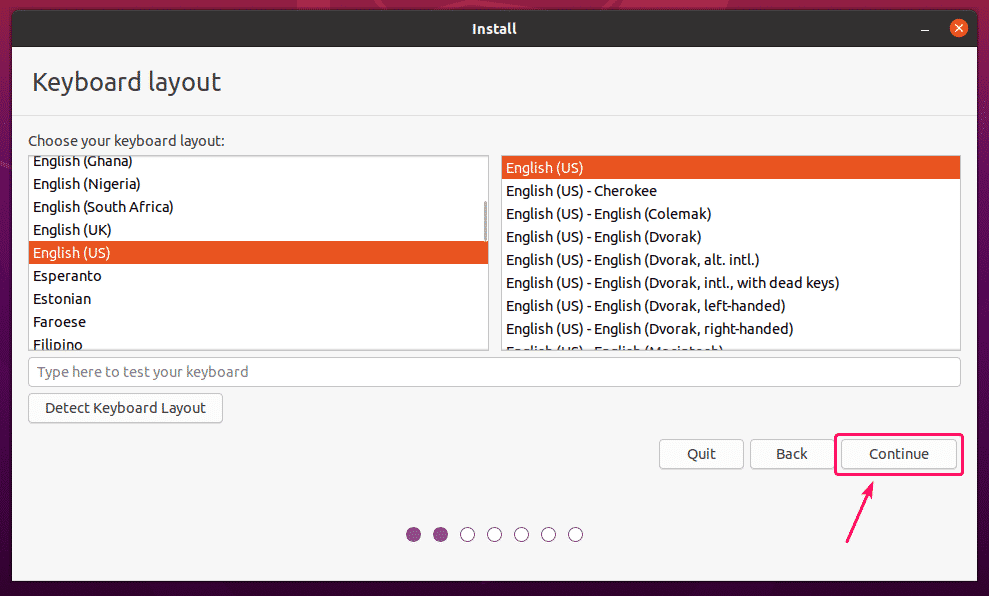
Select your Keyboard Layout and click on Continue.
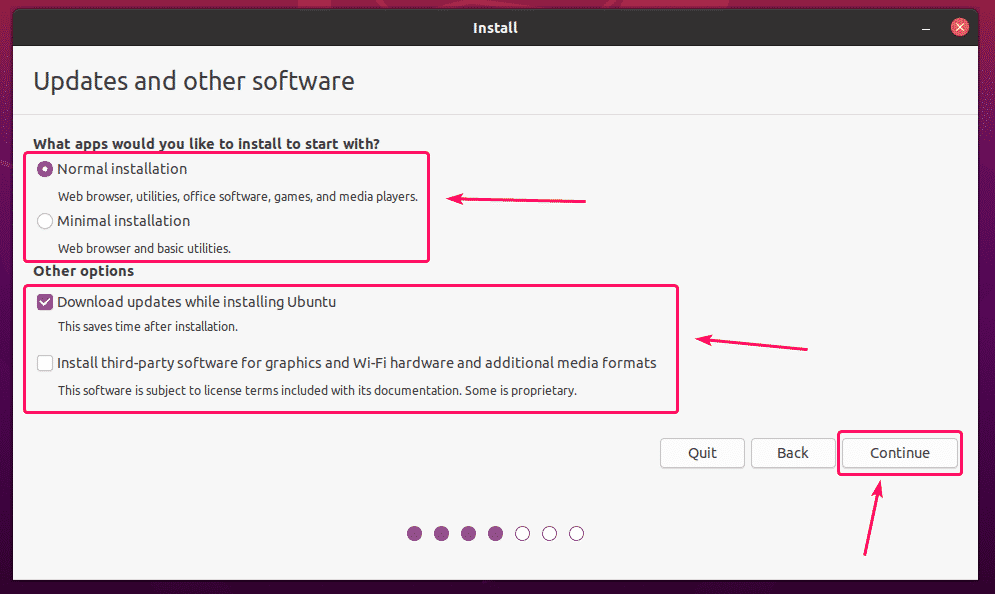
From here, you can do a Normal installation or Minimal installation. Normal installation comes with all the apps as usual. The Minimal installation comes with a limited number of apps.
If you have an internet connection on your computer, you can check Download updates while installing Ubuntu to download all the necessary updates while installing Ubuntu on your computer.
You can also check Install third-party software for graphics and Wi-Fi hardware and additional media formats if you want Ubuntu installer to automatically install GPU, Wi-Fi drivers, and multimedia codecs.
Once you’re done, click on Continue.
Now, you have to partition your hard drive. You can either let the Ubuntu installer partition the hard drive automatically or do a manual partitioning.
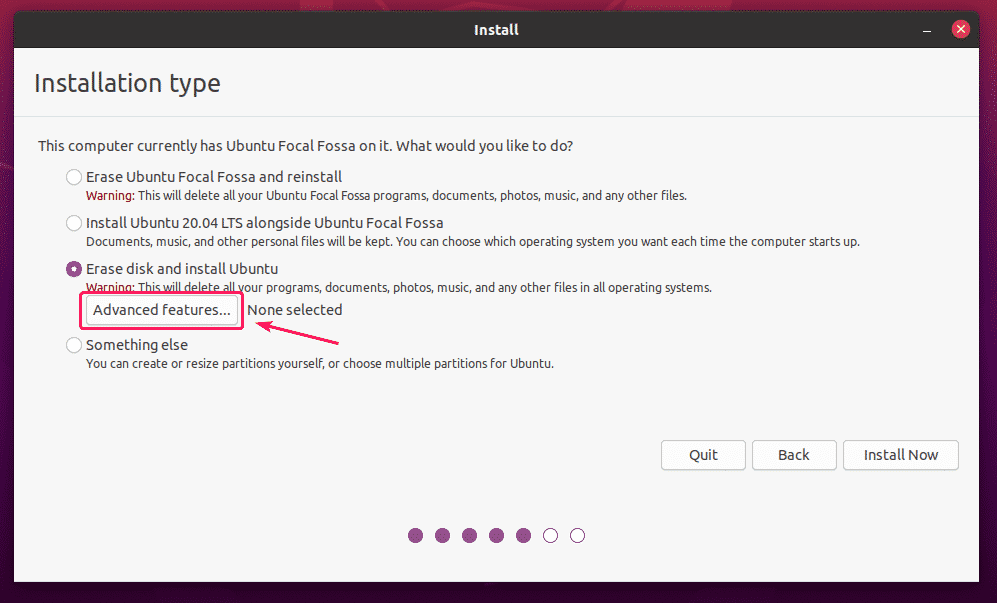
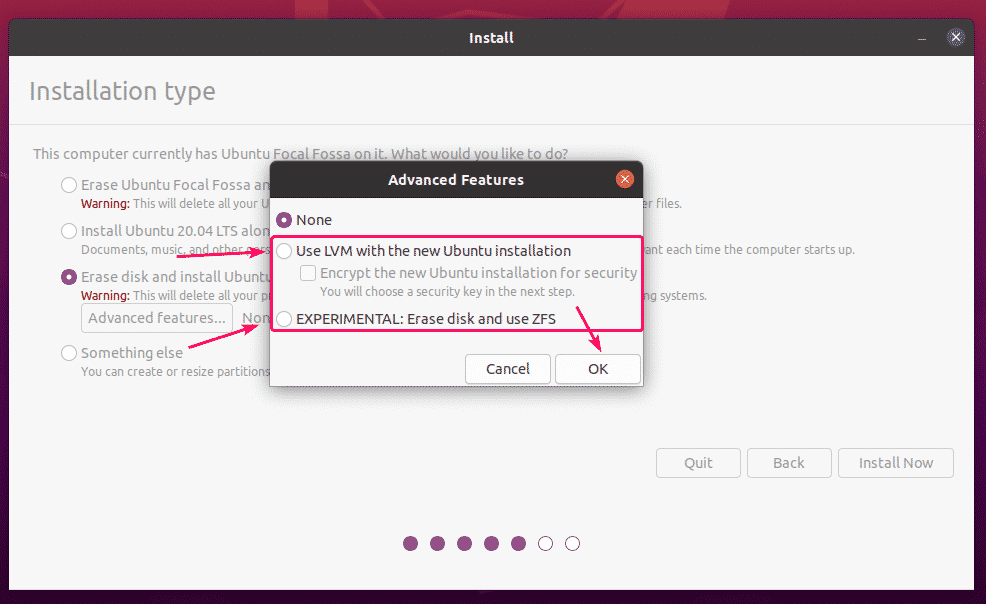
If you don’t have any important data on your hard drive or you have a new hard drive, you can select Erase disk and install Ubuntu. The Ubuntu installer will automatically partition the hard drive and install Ubuntu on it. This is the easiest way of installing Ubuntu.
Erase disk and install Ubuntu has some Advanced features as well.
You can do an LVM based Ubuntu installation. If you use LVM, you can encrypt your hard drive for security as well.
You can also use ZFS filesystems on your Ubuntu installation if you want.
Once you’re done, you can click on Install Now to install Ubuntu.
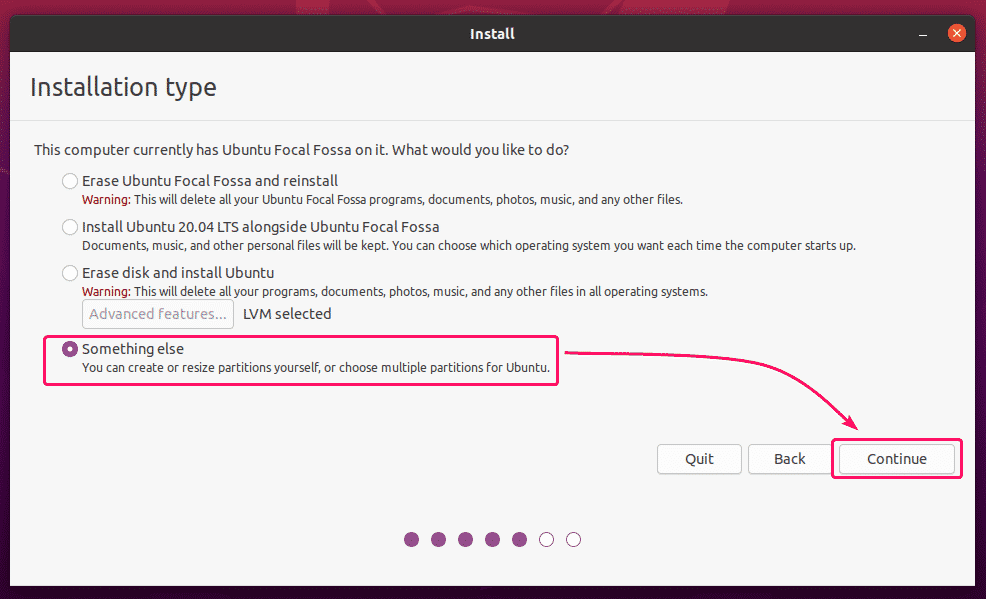
Most of the people will want to do manual partitioning. To do that, select Something else and click on Continue.
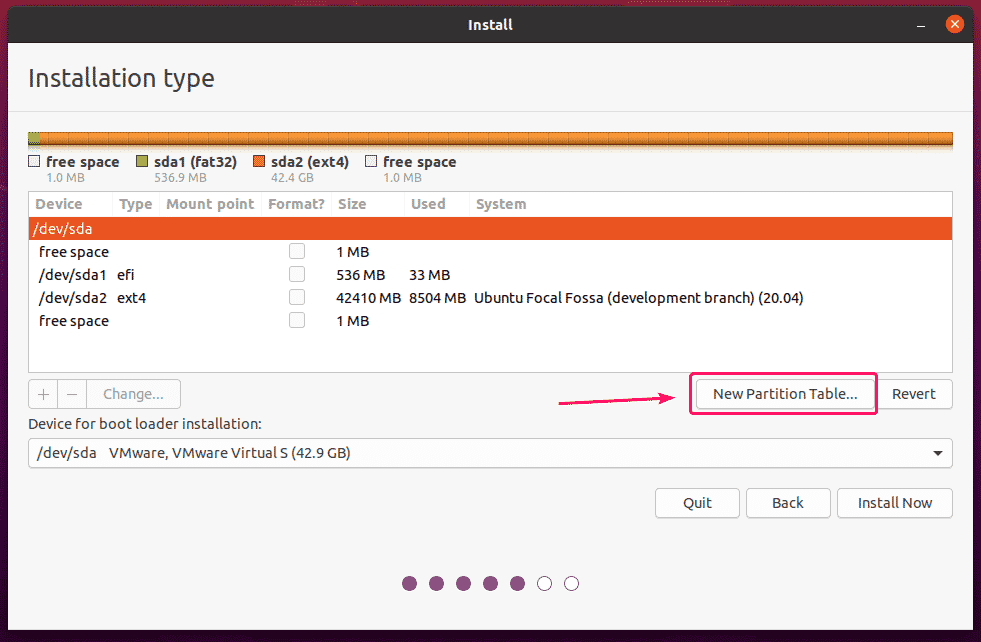
Now, if you want to remove all the existing partitions of your hard drive, you can click on New Partition Table…
If you don’t have any free space on your hard drive, you can remove an existing partition and create required partitions in that free space.
To remove a partition, select it and click on the – button.
Once you’ve some free space, you can start creating partitions.
If you’re using a BIOS-based motherboard, you need at least a root (/) partition.
If you’re using a UEFI-based motherboard, you need at least an EFI System Partition and a root (/) partition.
I will be doing a UEFI-based installation in this article.
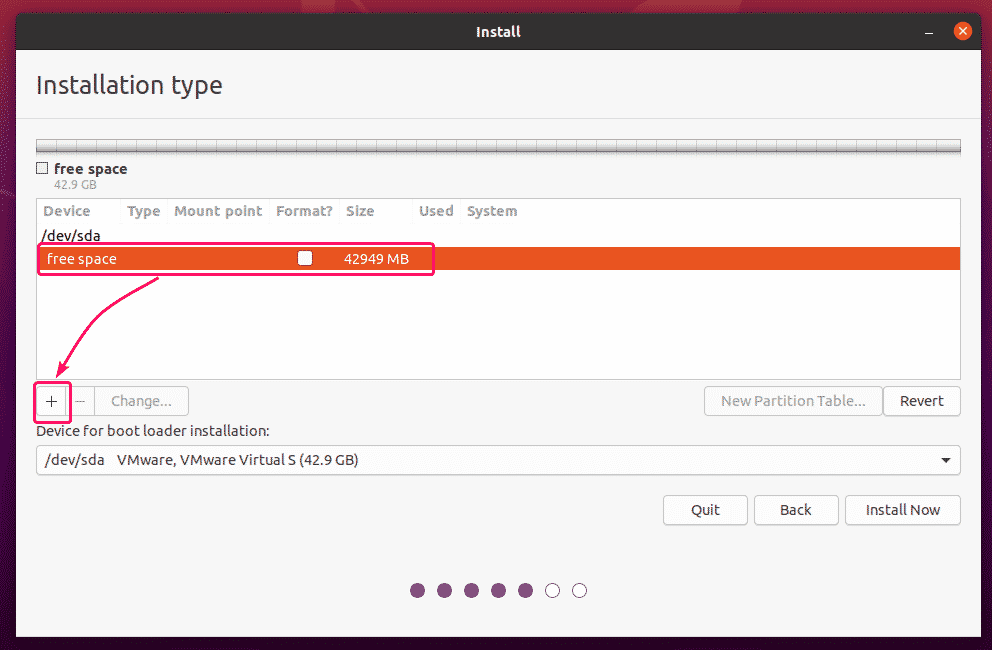
To create a new partition, select the free space and click on the + button.
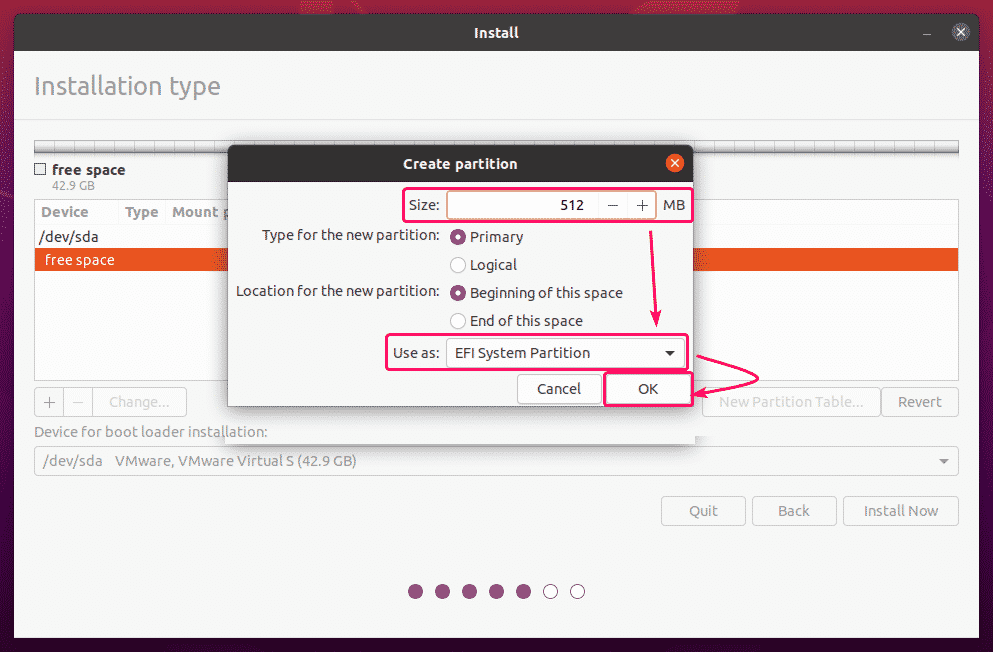
For creating the EFI System Partition, set the Size to 512 MB, and select EFI System Partition from the Use as dropdown menu. Then, click on OK.
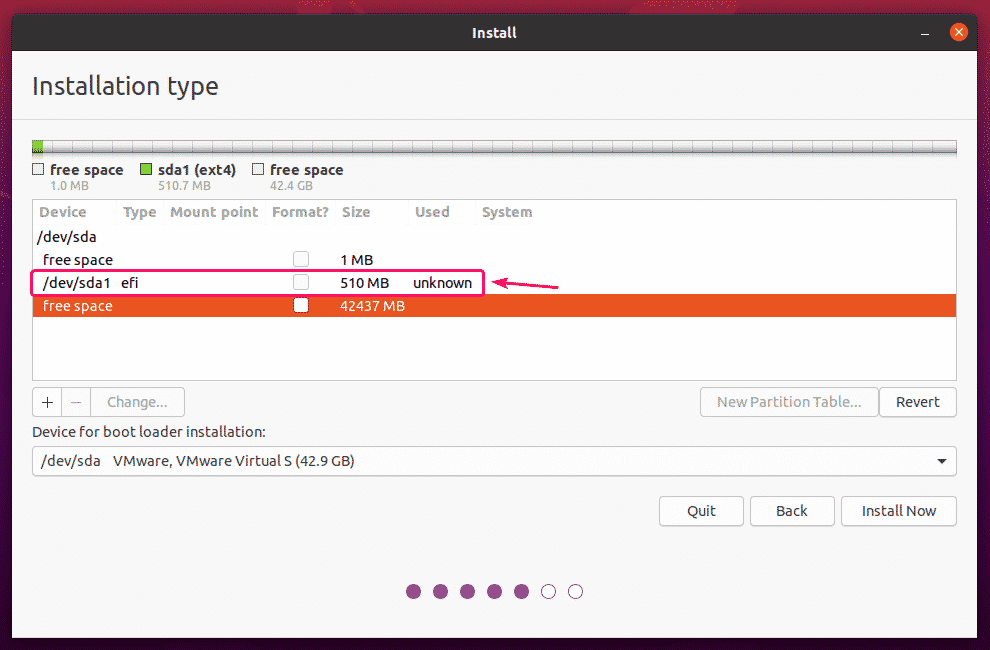
The EFI System Partition should be created.
Now, select the free space and click on the + button again.
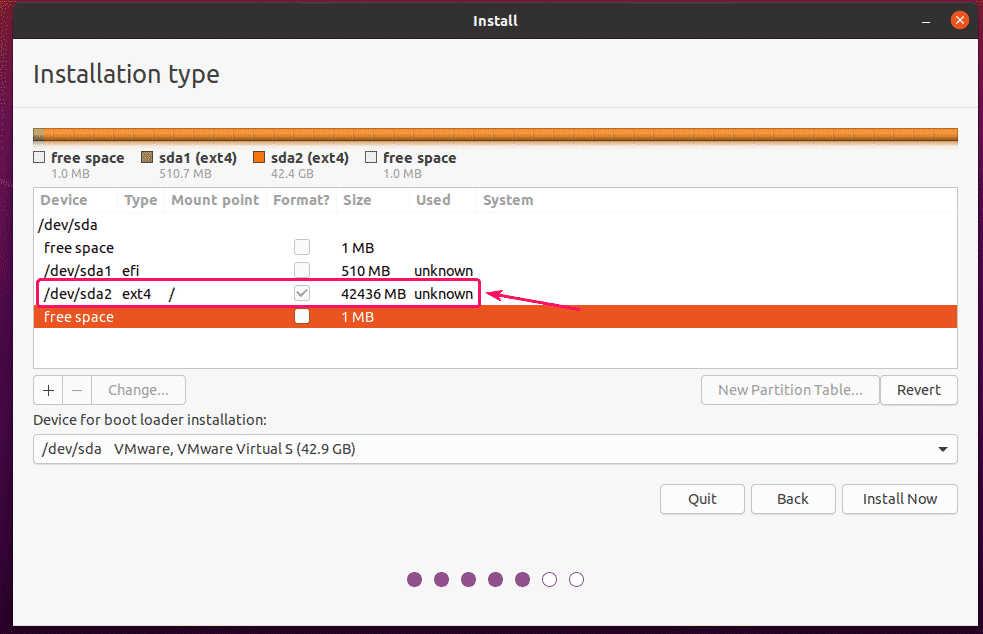
Now, create a root partition with the rest of the free space. For the root partition, set the Mount point to / and Use as to Ext4 journaling file system. Then, click on OK.
The root partition should be created.
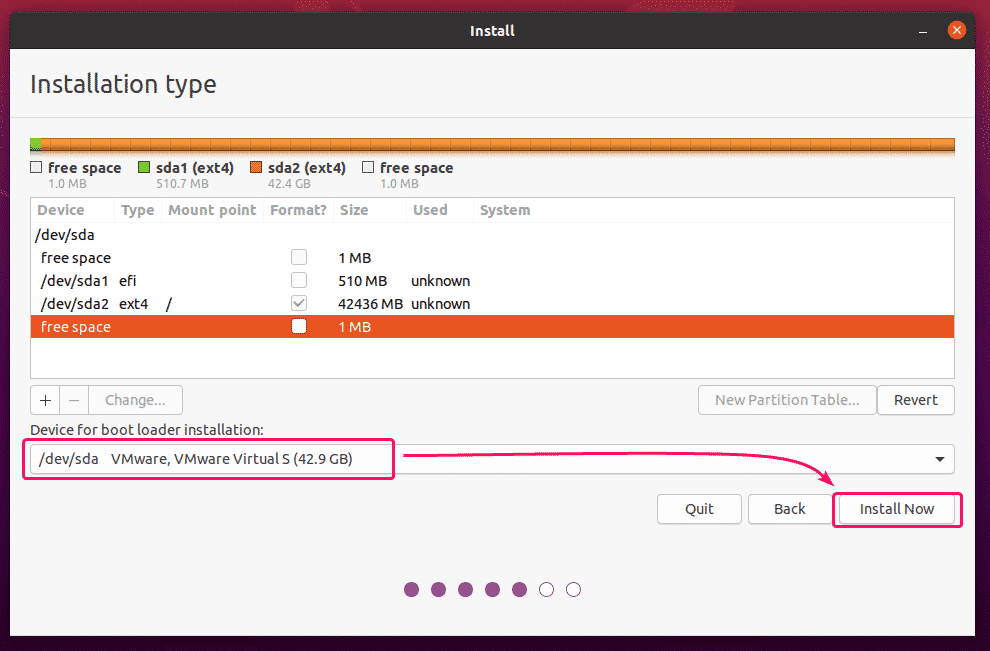
Now, make sure the correct hard drive is selected in the Device for boot loader installation section and click on Install Now.
Now, click on Continue.
Now, select your time zone and click on Continue.
Now, type in your personal information and click on Continue.
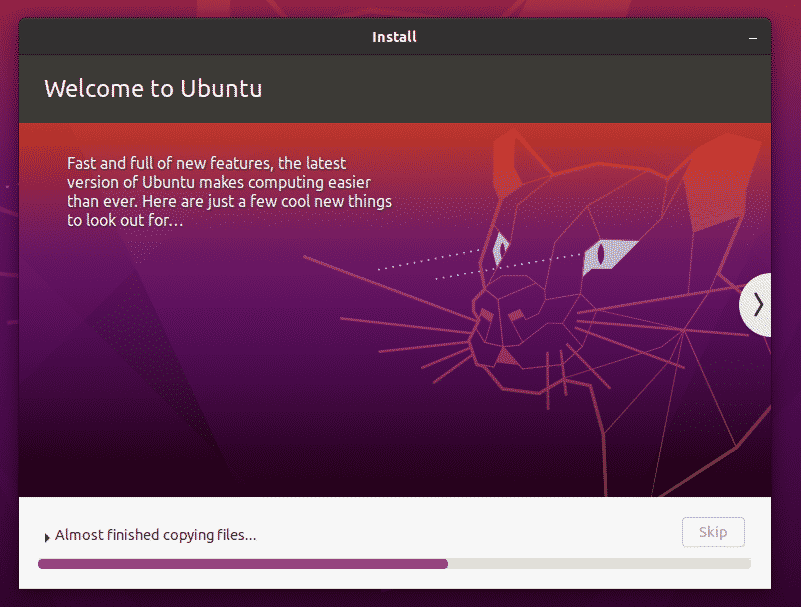
Ubuntu installer should start copying all the required files to your hard drive. It may take a while to complete.
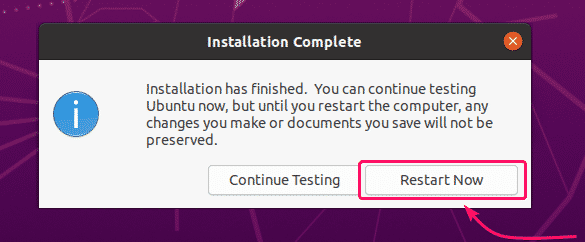
Once the installation is complete, click on Restart Now.
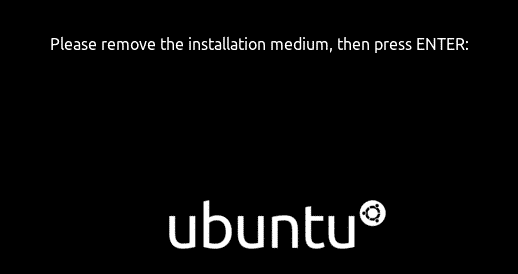
Now, remove the USB thumb drive from your computer and press <Enter>. Your computer should restart.
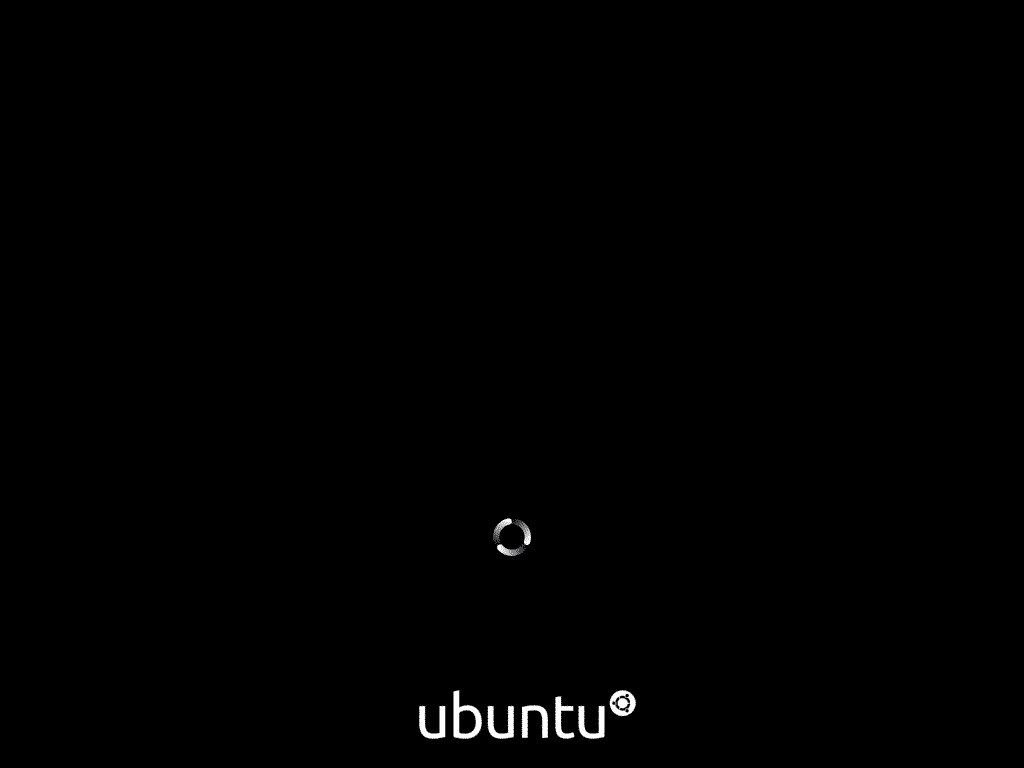
Now, Ubuntu Desktop 20.04 LTS should be booting.
You should see the GDM login screen of Ubuntu Desktop 20.04 LTS. Now, you can log in with the password that you’ve set during the installation.
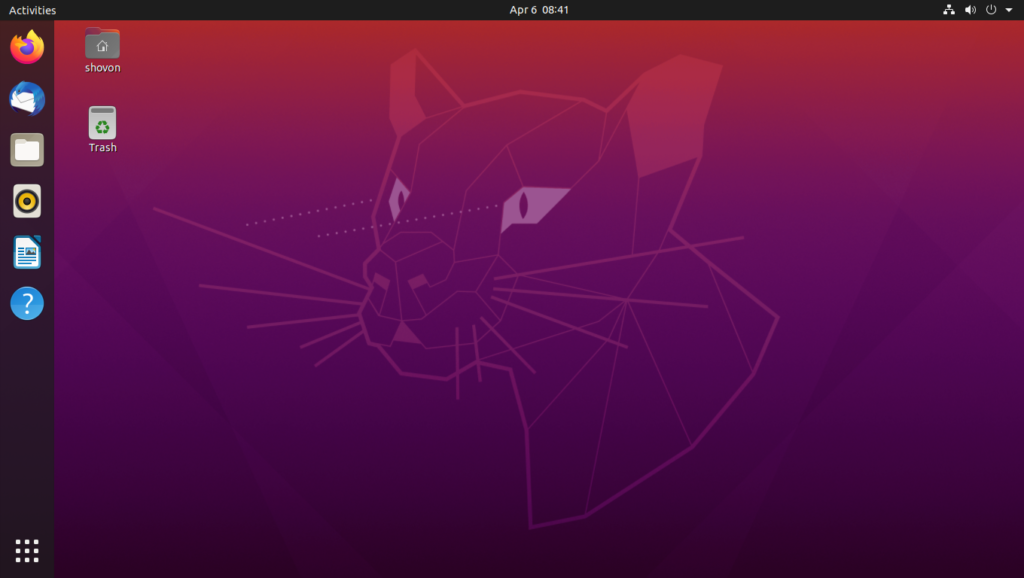
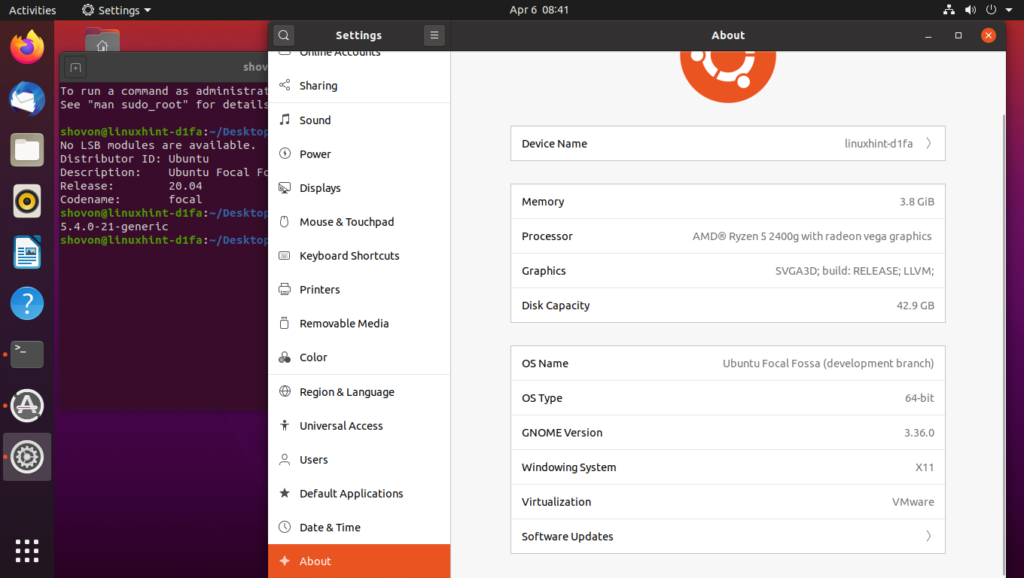
Ubuntu Desktop 20.04 LTS.
As you can see, I am running Ubuntu Desktop 20.04 LTS.
So, that’s how you install Ubuntu Desktop 20.04 LTS on your computer. Thanks for reading this article.

