In a nutshell, SSH or ‘secure shell’ is an encrypted protocol, with which you can connect to a server remotely and have access to the information associated with it. It provides a much safer way of logging to provide a secure way of logging in without compromising on security.
Step 1: Create the Key Pair
We’ll start with creating a key pair on the client’s system first with root access by type in the following:
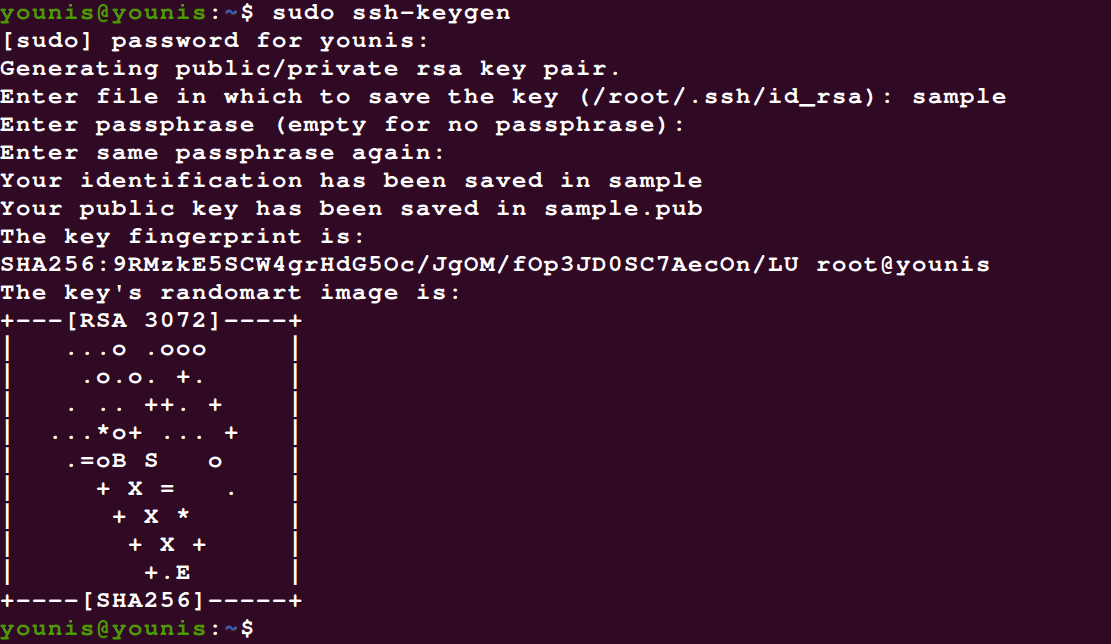
This triggers the latest ssh-keygen into creating a 3072-bit RSA key pair by default. You can add the –b 4086 flag to generate a larger key. Hit enter, and it’ll store the key pair in .ssh/ subdirectory. Note that if you’re a guest on a server that already had a key installed, the prompt will ask you whether you want to overwrite it or not. If that’s the case, type ‘y’ to signal a yes.
Next, the prompt will ask you if you want to add a passphrase. You can opt-out, but we’d recommend you add one. It strengthens the security protocol by serving an additional layer of protection to bypass for an unauthorized user.
Step 2: Copy the public key to your server
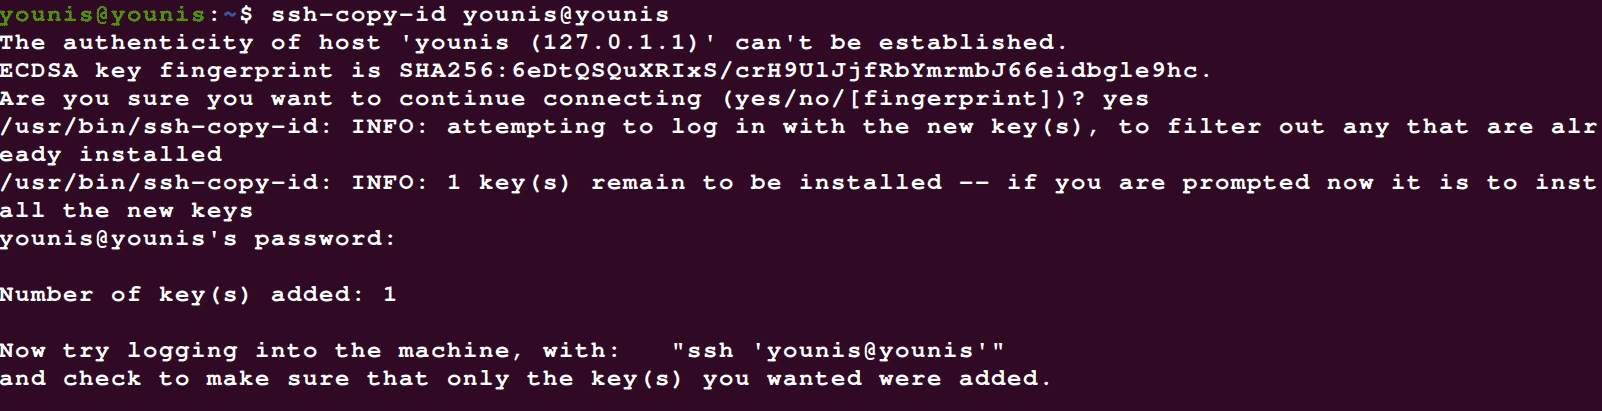
Next, we have to transfer the public key to your ubuntu server.
You can use the ssh-copy-id utility by using the following command:

This should do the trick within just a few seconds. If the key has been copied successfully, move on the third step.
Sometimes, it so happens that the ssh-copy-id method fails, or simply isn’t available. In this case, you’ll need to copy it via password-based SSH. This you can do by using the cat command and make sure to add the >> symbol to add to the content instead of overwriting it.
"mkdir -p ~/.ssh && cat >> ~/.ssh/authorized_keys"

If this is the first time you’re connecting to a new host, your system will show you something like:
Just type yes and hit the Enter button. Then enter the password to the user access account, and the public key will be copied to your Ubuntu server.
In case the password-based SSH access is denied to you for some reason you can’t pin down, you could always just copy the public key manually. Add the ~/.ssh/authorized_keys to the id_rsa.pub file on your remote machine. Next, log on to your remote server account and check if the ~SSH directory exists. If it doesn’t, type in:
![]()
Now you just have to add the key:
![]()
![]()
Also, make sure that you’re using the ~SSH/ USER directory and NOT the root directory:
![]()
Step 3: Authenticate the SSH Keys
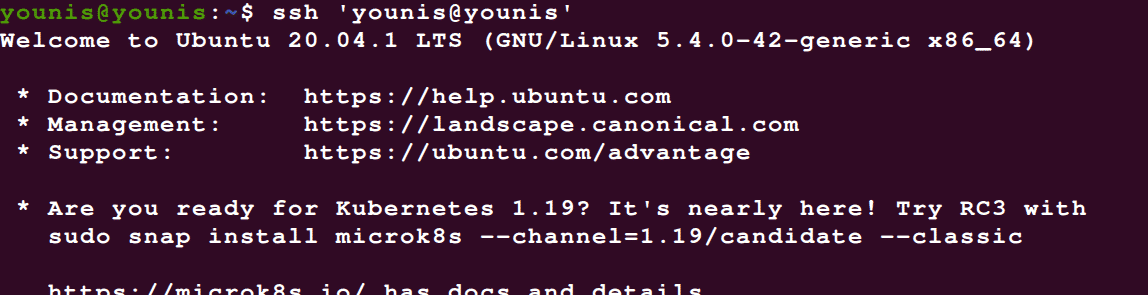
The next step is to authenticate the SSH keys on the Ubuntu server. First, log in to your remote host:
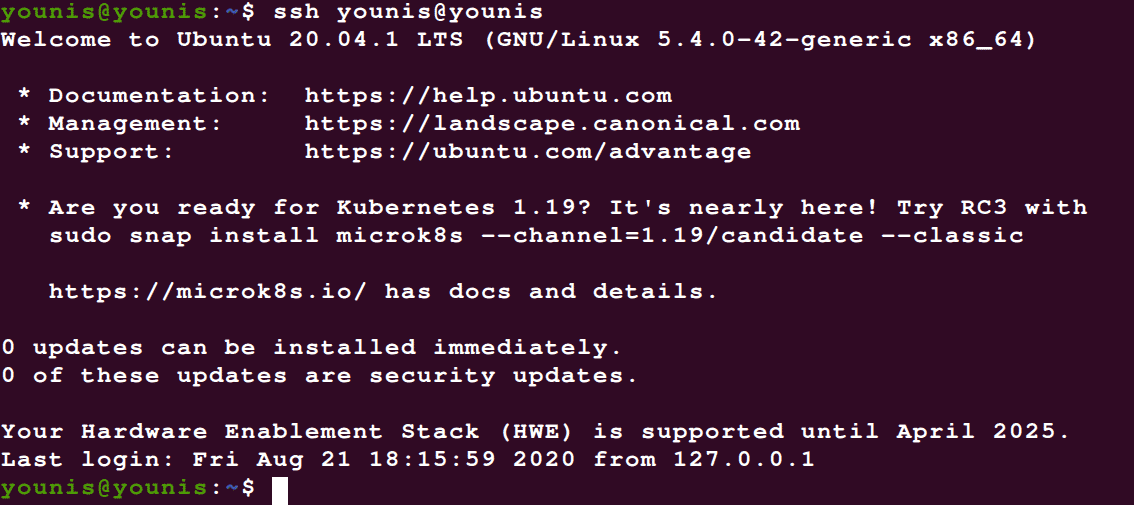
You’ll be prompted to enter the passphrase key that you added in step 2. Type it down and continue. The authentication will take some time, and once it’s done, you’ll be taken to a new interactive shell on your Ubuntu server
Step 4: Disable the password authentication
With the SSH keys authenticated, you no longer need the password authentication system.
If the password authentication is enabled on your server, it will still be prone to unauthorized user access via brute force attacks. So it’d be better if you disable any password-based authentication.
First, check whether or you have the SSH-key-based authentication primed for the root account on this server. If it is, then you should change it to the sudo privileged user access account on this server, so that the admin access is open to you in case of some emergency or when the system is facing some suspicious activities.
Having granted admin privileges to your remote access account, log into the remote server with SSH keys with either root or sudo privileges. Then use the following command to access the SSH daemon’s configuration file:

With the file opened now, search for the ‘PasswordAuthentication’ directory, and type in the following to disable the password authentication and password-based SSH logins.
. . .
PasswordAuthentication no
. . .
To see these changes in effect, you’ll have to restart the sshd service using the following command:
![]()
As a precaution, open up a new terminal window and test that the SSH service is functioning correctly before closing your current session.

With your verified SSH keys, you should be able to see everything working as normal. You may exit all of the current server sessions.
Conclusion
Now that you have an SSH-key-based authentication system in place, you no longer need the vulnerable password authentication system, as you can simply sign in without a password. I hope you’ve found this tutorial helpful.