Image source: https://www.jetbrains.com/pycharm/
In this article, I am going to show you how to install PyCharm Professional and Community Edition IDE on Ubuntu 20.04 LTS. So, let’s get started.
Installing PyCharm from Snap Store:
You can install PyCharm Professional Edition from the Snap Store with the following command:
You can install PyCharm Community Edition from the Snap Store with the following command:
In this article, I am going to install PyCharm Professional Edition from the Snap Store.
The snap package of PyCharm is being downloaded. It may take a while to complete.
At this point, PyCharm should be installed.
Now, you can run PyCharm from the Application Menu of Ubuntu 20.04 LTS.
If you’re running PyCharm for the first time, you will have to do some initial configuration.
From the Import PyCharm Settings dialog, you can import settings from older version of PyCharm (if you had it installed before).
If It’s the first time you’re installing PyCharm, select Do not import settings and click on OK.
Now, select a UI theme and click on Next: Featured plugins.
PyCharm will recommend you some popular plugins. If you need any of them, just click on Install to install it.
Once you’re done, click on Start using PyCharm.
If you’ve installed PyCharm Professional Edition, you will be asked to activate PyCharm. Buy a license from JetBrains to activate PyCharm.
If you want to try out PyCharm before you buy a license, select Evaluate for free and click on Evaluate. You will get 30 days of free access to PyCharm Professional Edition.
PyCharm is being loaded.
PyCharm should start. Now, you can use PyCharm for your projects.
Installing PyCharm Manually:
New versions of PyCharm may not be available as snap packages instantly as they are released. In that case, you will have to download PyCharm from the official website of JetBrains and manually install it on Ubuntu 20.04 LTS.
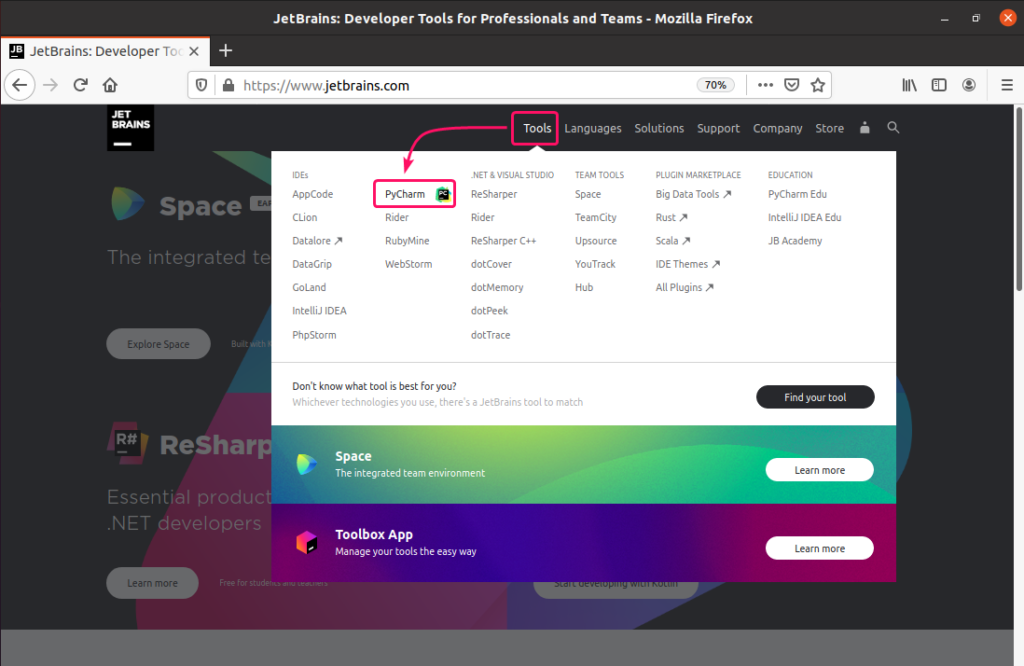
First, visit the official website of JetBrains.
Now, go to Tools > PyCharm.
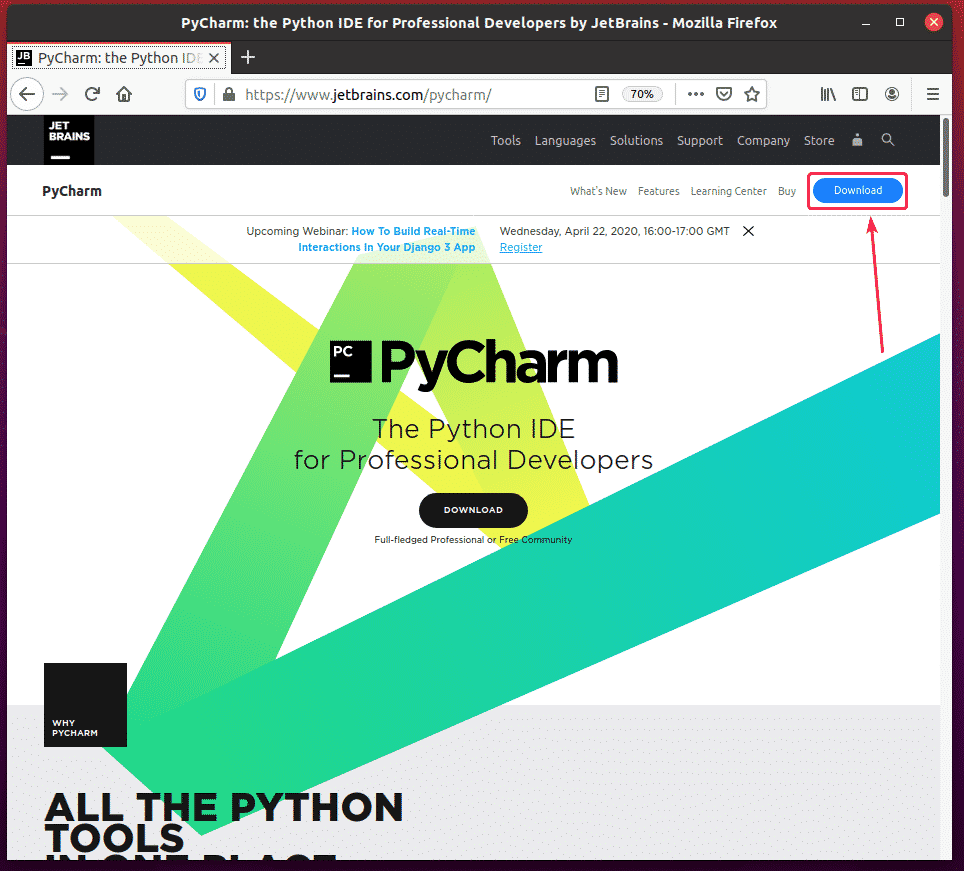
Now, click on Download.
You can download PyCharm Professional and Community Edition archives from here. Just click on the Download button of the PyCharm Edition you want to download.
Your browser should prompt you to save the PyCharm archive. Select Save File and click on OK.
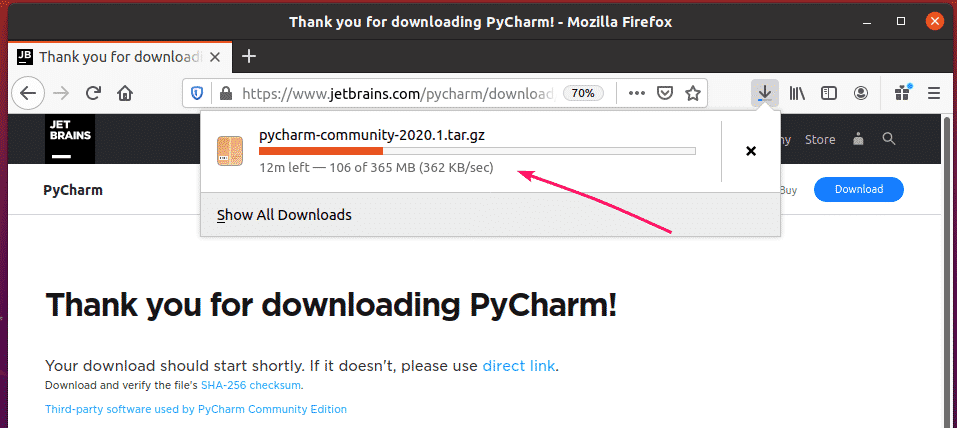
Your download should start. It may take a while to complete.
Once the download is complete, navigate to your ~/Downloads directory as follows:
You should find the PyCharm .tar.gz archive here.
Now, create a apps/ directory in the $HOME/.local/ directory as follows:
Now, extract the PyCharm .tar.gz archive in the $HOME/.local/apps/ directory as follows:
PyCharm archive should be extracted.
A new directory should be created in the $HOME/.local/apps/ directory as you can see in the screenshot below. Remember the directory name.
Now, run PyCharm as follows:
Now, check I confirm that I have read and accept the terms of this User Agreement and click on Continue to accept the JetBrains Privacy Policy.
Now, select a UI theme and click on Next: Launcher Script.
If you want to open PyCharm projects from the command line, check Create a script for opening files and projects from the command line checkbox and click on Next: Featured Plugins.
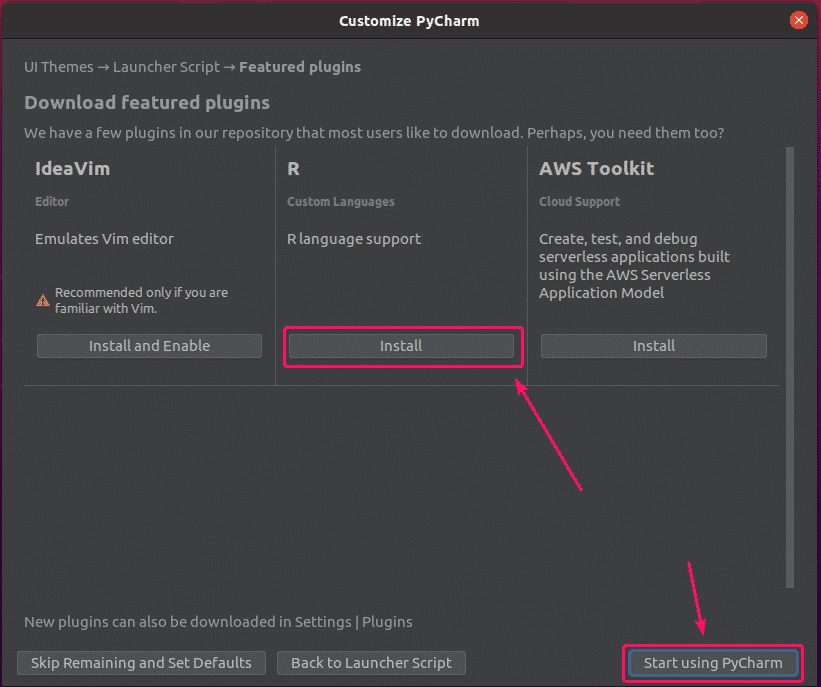
PyCharm will recommend you some popular plugins. If you need any of them, just click on Install to install it.
Once you’re done, click on Start using PyCharm.
If you’ve installed PyCharm Professional Edition, you will see the License Activation window. Buy a license from JetBrains to activate PyCharm Professional Edition.
If you want to try out PyCharm Professional Edition before you buy a license, select Evaluate for free and click on Evaluate. You will get 30 days of free access to PyCharm Professional Edition.
PyCharm is loading.
PyCharm should start.
Now, to create a desktop entry for PyCharm, click on Configure > Create Desktop Entry.
Now, click on OK.
Now, you should be able to access PyCharm from the Application Menu of Ubuntu 20.04 LTS.
So, that’s how you install PyCharm on Ubuntu 20.04 LTS. Thanks for reading this article.


