
Before you start installing OwnCloud on Debian 10, you should know this important thing. OwnCloud is not released for Debian 10 yet. But, the OwnCloud package for Debian 9 works with a few tweaks on Debian 10. The problem is that, the OwnCloud package for Debian 9 does not support PHP 7.3 that comes with Debian 10. That does not mean that OwnCloud won’t work on PHP 7.3. There are actually minor differences between PHP 7.1, PHP 7.2 and PHP 7.3. PHP 7.3 did not introduce any new feature or remove any from PHP 7.1 or PHP 7.2. It’s just that the OwnCloud developers did not test OwnCloud on PHP 7.3. The good news is that the next release of OwnCloud will have support for PHP 7.3 according to their GitHub repository. Till then, the way it’s shown here is the only way to get OwnCloud work on Debian 10. But, I will tell you what to change to install new version of OwnCloud when it’s released.
NOTE: I DO NOT RECOMMEND THIS ON A PRODUCTION SERVER. USE DEBIAN 9 STRETCH INSTEAD UNTILL OWNCLOUD FOR DEBIAN 10 BUSTER IS RELEASED.
Adding Debian 9 OwnCloud Package Repository on Debian 10:
OwnCloud is not available in the official package repository of Debian 10 Buster. But, you can easily add the official package repository of OwnCloud (for Debian 9) and install OwnCloud from there.
First, download and add the GPG key of the OwnCloud package repository as follows:
Debian_9.0/Release.key -O /tmp/Release.key
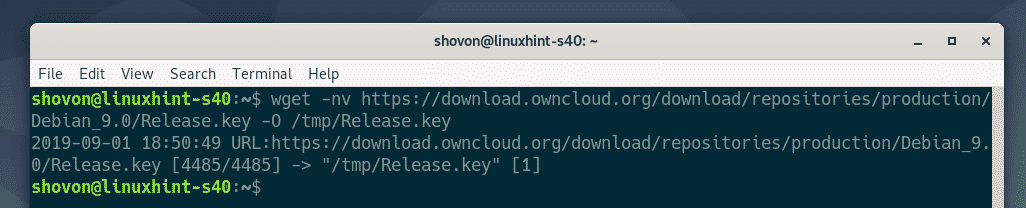
Now, add the OwnCloud GPG key on Debian 10 with the following command:

Now, add the OwnCloud Package repository on your Debian 10 machine with the following command:
/' | sudo tee /etc/apt/sources.list.d/owncloud.list

Now, update the APT package repository cache with the following command:

Things to Change When New Version of OwnCloud is Released:
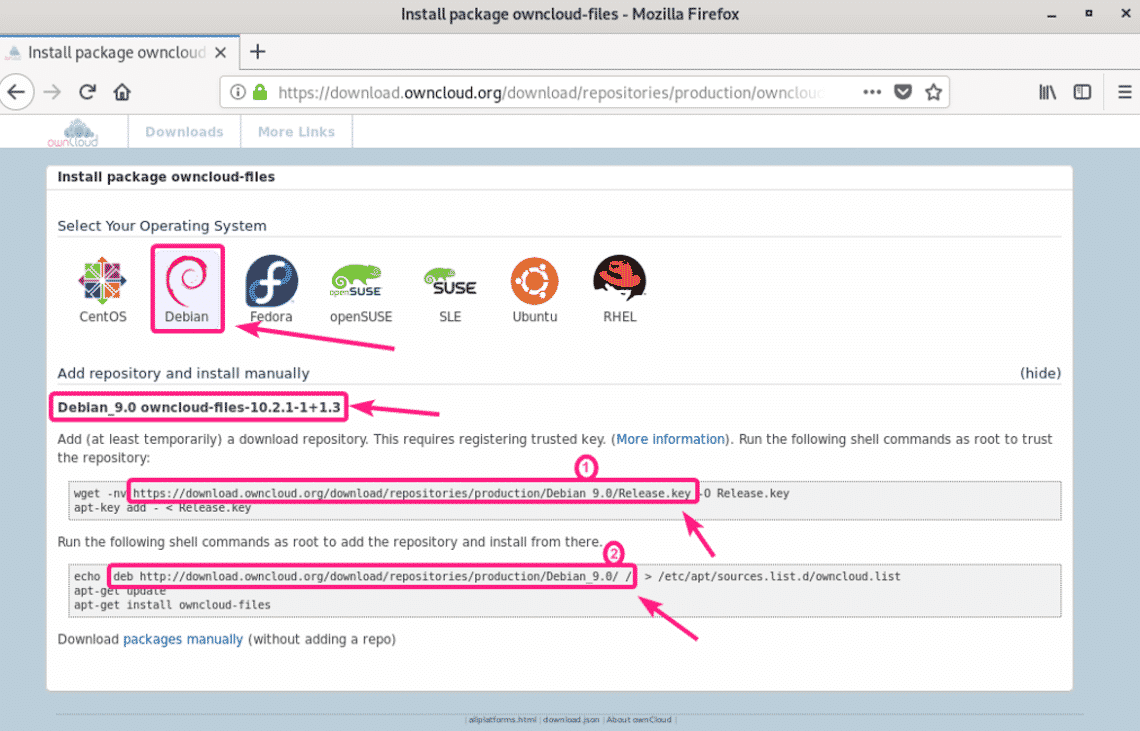
If a new version of OwnCloud is released, visit the page of OwnCloud from your favorite web browser and click on the Debian icon.
At the time of this writing, only Debian 9 section is available. I used the link as marked (1) for the GPG key, and used the repository string as marked (2) for adding the package repository in the earlier section of this article above.
If a new version of OwnCloud is released, then Debian 10 may be included. OR, the GPG key URL or repository string may change. All you have to do is replace the GPG key URL and repository string in the earlier section of this article above with the new ones.
Installing and Configuring Apache and MySQL for OwnCloud:
OwnCloud is a PHP based web application. So, you must have a working LAMP stack in order for OwnCloud to work.
To install LAMP stack on Debian 10, run the following command:
php-bz2 php-mysql php-curl php-gd php-imagick php-intl php-mbstring php-xml php-zip

Press Y and then press <Enter> to confirm the installation.

LAMP stack should be installed.

Now, enable Apache rewrite module as follows:

Now, you have to create a MariaDB database for OwnCloud.
Login to MariaDB shell as root user as follows.
By default, no root password is set. So, just press <Enter>.

You should be logged in.

Create a new MariaDB database owncloud as follows:

Now, to create a new user owncloud, set a password (123 in my case), and allow owncloud user access to owncloud database, run the following SQL command:
IDENTIFIED BY '123';

Now, exit out of the MariaDB shell as follows:

Now, open the default Apache site configuration /etc/apache2/sites-enabled/000-default.conf as follows:

Now, change the line DocumentRoot /var/ww/html to DocumentRoot /var/www/owncloud as marked in the screenshot below.
Once you’re done, save the configuration file by pressing <Ctrl> + X followed by Y and <Enter>.

Installing OwnCloud:
Now, install OwnCloud with the following command:

OwnCloud should be installed.

Now, restart the apache2 service as follows:

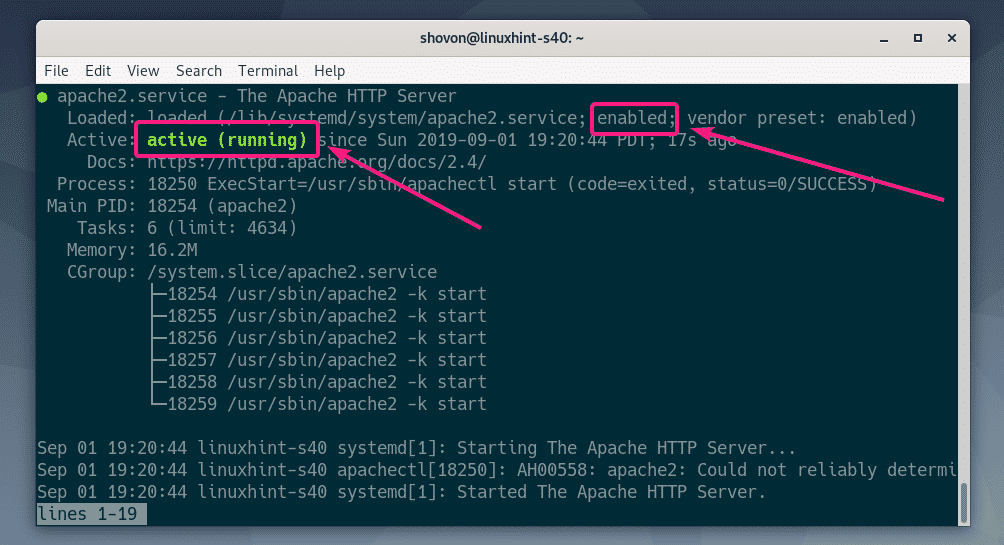
Now, check whether the apache2 service is running correctly as follows:

apache2 service is running and also enabled to start on system boot.
Finding the IP Address:
Now, find the IP address of your Debian 10 machine as follows:
As you can see, the IP address of my Debian 10 machine is 192.168.21.131. It will be different for you. So, make sure to replace it with yours from now on.

Solving “This version of ownCloud is not compatible with PHP 7.3” Error:
If you try to access OwnCloud from your web browser http://192.168.21.131, you may see the following error message. I’ve already explained this. If you’re looking for a workaround, then this section is for you.

Open the /var/www/owncloud/index.php file as follows:

Now, comment out the marked section in the screenshot below. The comment starts from /* and ends in */.
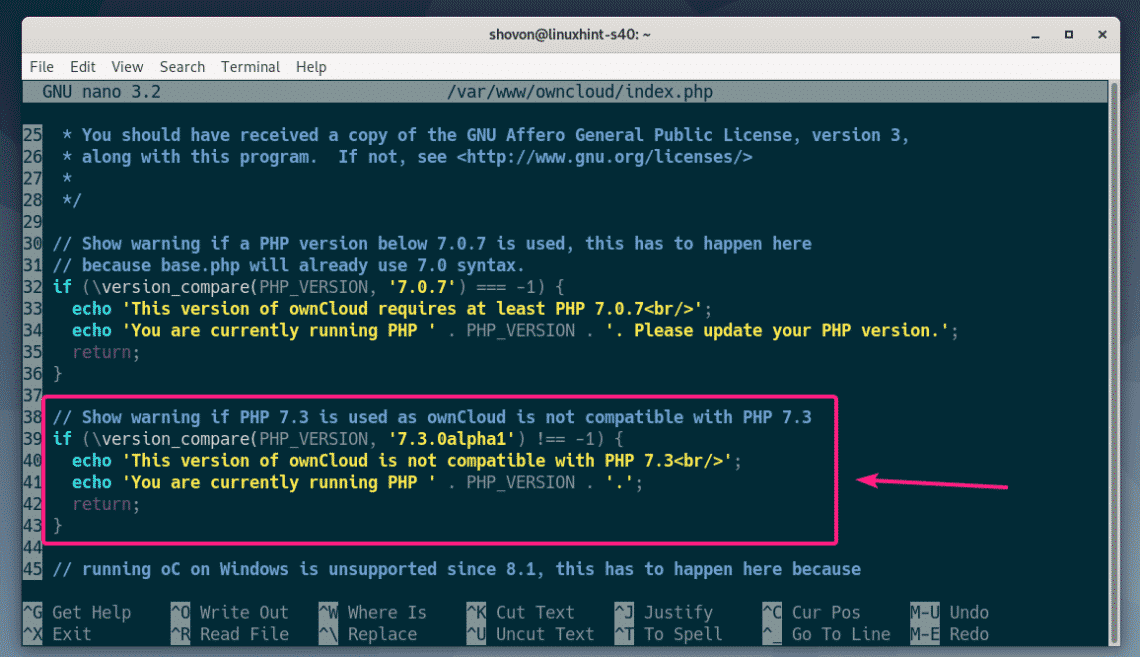
The final index.php file should look as follows. Now, save the index.php file.

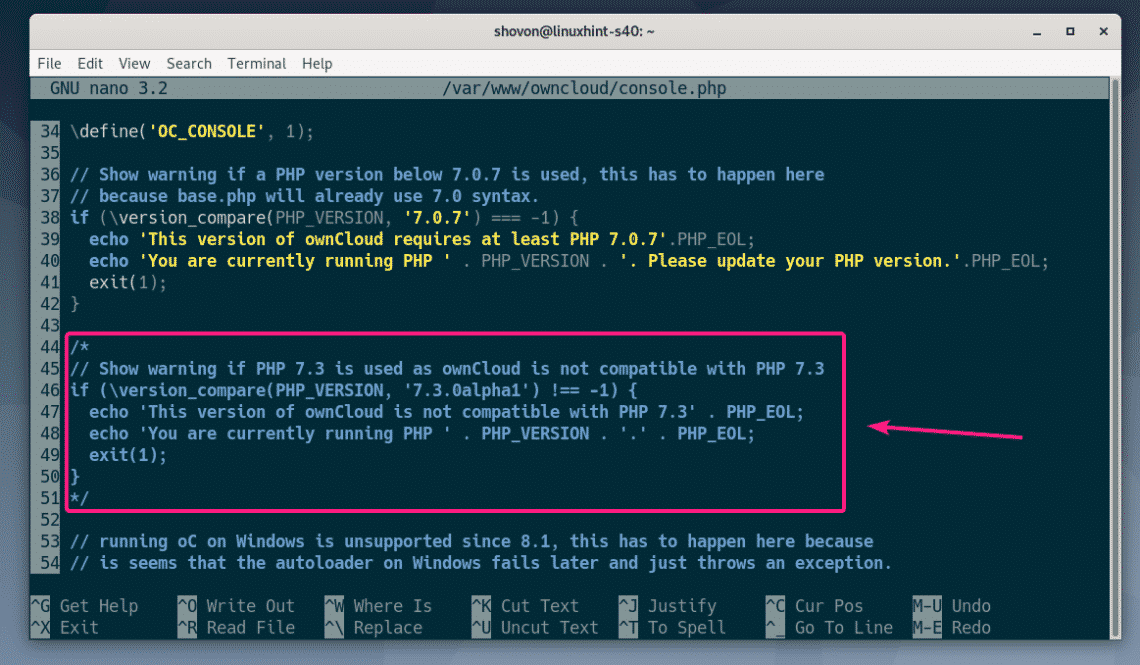
Open the /var/www/owncloud/console.php file as follows:

Do the same thing to console.php file. The final console.php file should look as follows. Now, save console.php file.
Configuring OwnCloud:
Now, visit http://192.168.21.131 from a web browser.
You have to create an OwnCloud administrator account from there.
Type is the username and password for your admin account in the Create an admin account section.
Also, type in the database username (owncloud), password (123 in my case), database name (owncloud), and hostname (localhost) in the Configure the database section.
Then, click on Finish setup.

Now, you can login to your administrator account using the username and password that you’ve set during the configuration of OwnCloud.

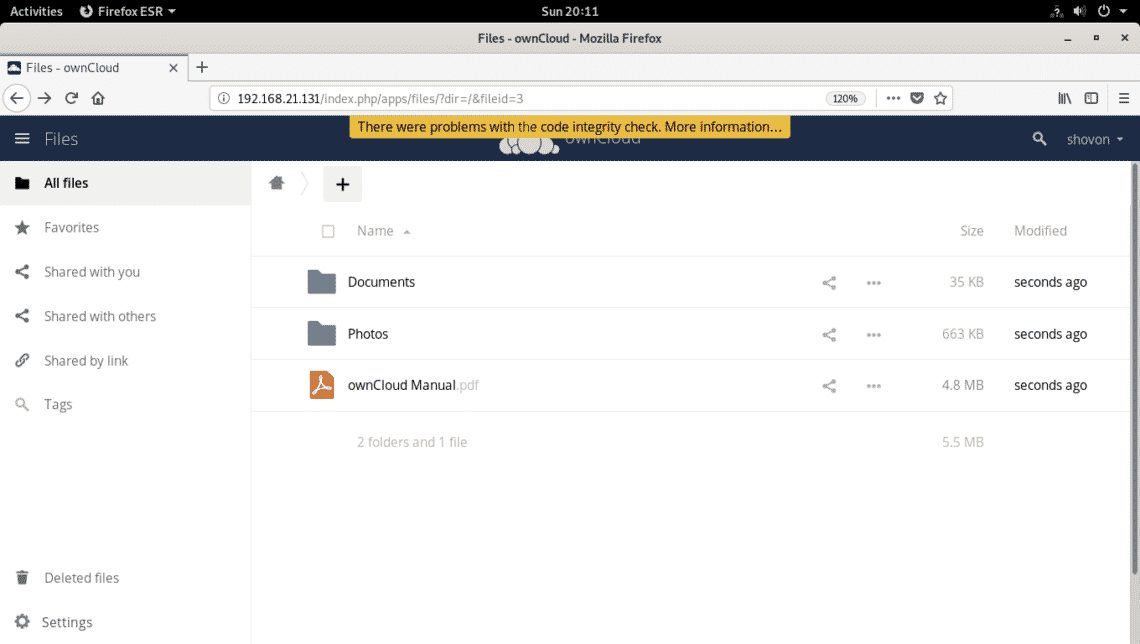
You should be logged in. Click on x.

You should see the OwnCloud Dashboard. Now, you can use OwnCloud as you like.
So, that’s how you install OwnCloud on Debian 10. Thanks for reading this article.