
Although Google supports a lot of open source projects, there still is no official version of Google Drive for Ubuntu. Google Drive is one of the most useful tools; it allows you to share and synchronize your files. You can access your data across different devices. It is so integrated with your everyday work that you can’t work correctly without it.
No worries, Ubuntu has got you covered. Ubuntu has one of the largest and most supportive communities. Developers in this community are always trying to find a solution to such significant problems. This is where ODrive comes into place. ODrive is a client of Google Drive.
Although it’s an unofficial client, it is simple to use and performs all the necessary functions that you may need to sync your files and data. It is open-source software, which means that you can look at its source code and examine it; in addition to this, ODrive is also available for Windows and macOS, so you can test it on all platforms if you like.
Now there are multiple ways to install ODrive in your Ubuntu.
Method 1: Using .deb file
For most new users, this is the safest way to install any software on Ubuntu. It is similar to the way software is installed in Windows, so this method gives the user a sense of similarity and helps them transition better into the Linux environment.
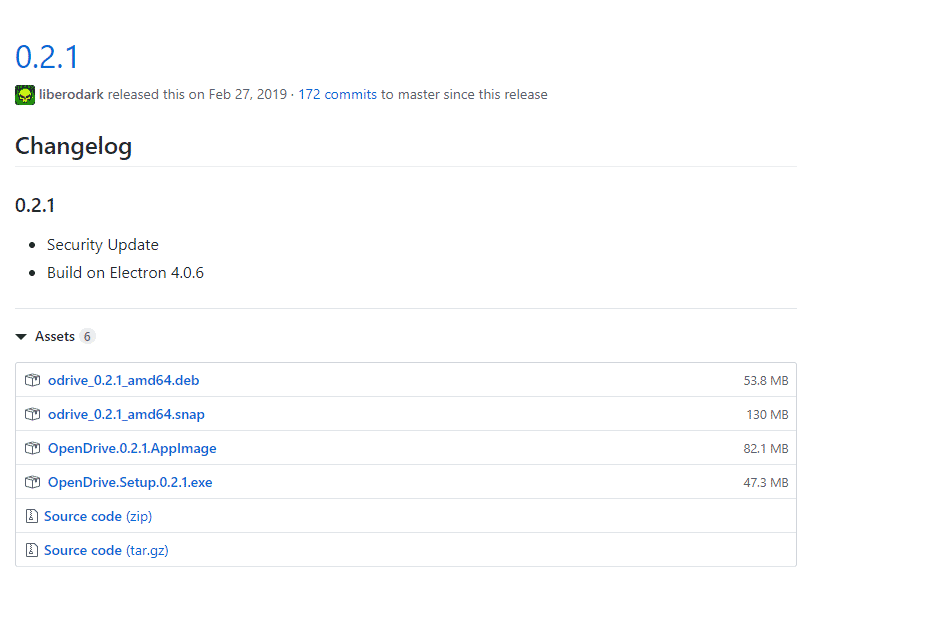
Download the latest stable version of the .deb file.
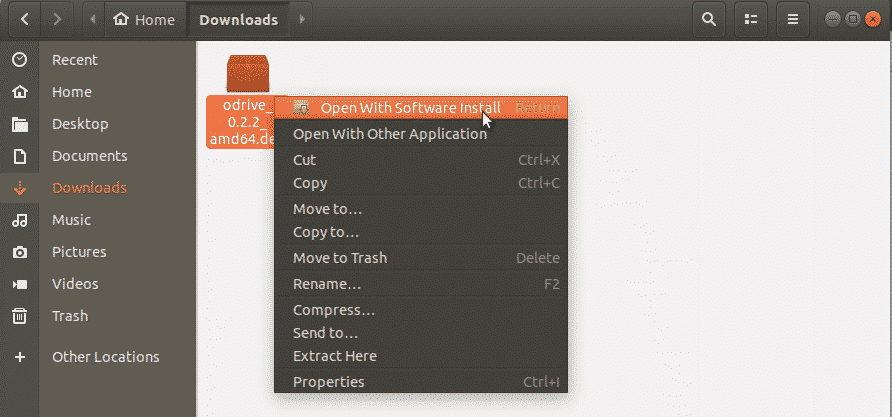
Now that you have the .deb file downloaded go to its location and right-click on the downloaded file, and click Open With Software Install.
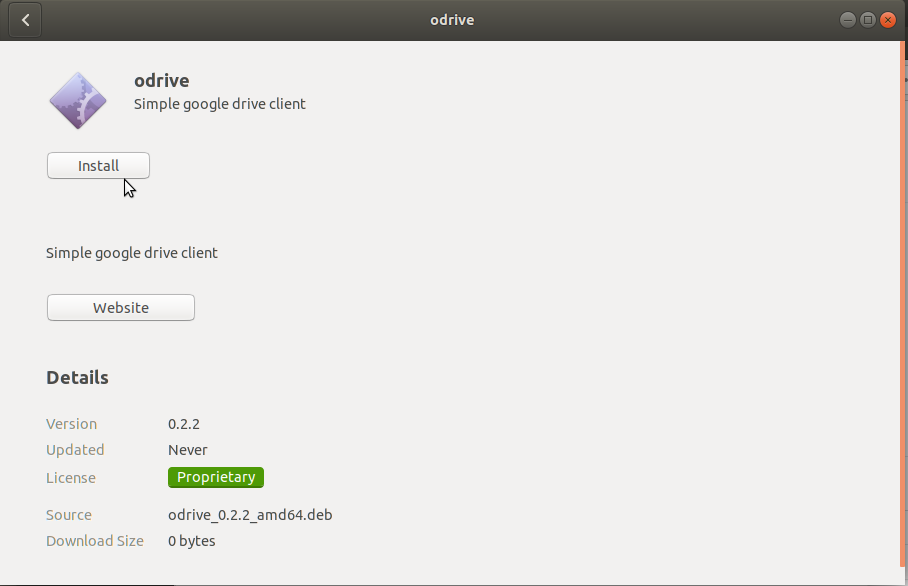
This will open Ubuntu’s Software Center. Click install to start the installation. Ubuntu will ask you to enter your account password for authentication. Enter it to proceed.
Method 2: Using Snap Packages
Installing ODrive using the .deb file method is a lot easier and is very beginner-friendly. This graphical method may not be for everyone. You can also install ODrive using Snap packages. Snap packages are the universal packages that can be installed on all the Linux distros.
Suppose software A was developed for Mint Linux, but a Ubuntu user wanted to install this software. The only way he would be able to do so would be by making changes in the source code, and not everyone can do that. Therefore, snaps and flatpaks were introduced. To install ODrive, we will also be using the snap package.
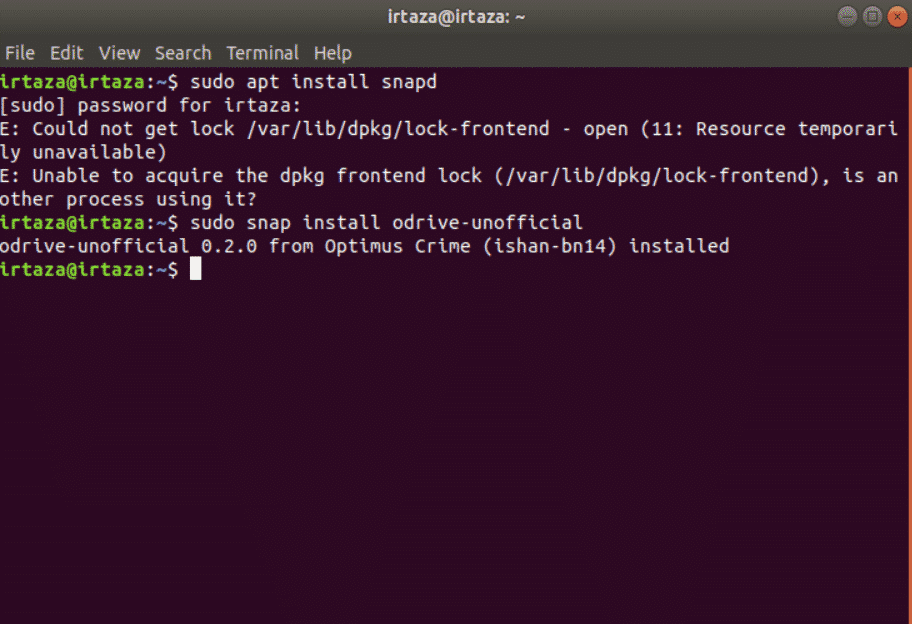
First, we will download the snap package. Go to the terminal and type the following command.
Now type the following command to install ODrive.
This will install ODrive on your Ubuntu.
Method 3: Using AppImage
AppImage is another general package that can install the software on all the Linux distros. It is a step above snap packages and flatpaks. The crazy thing about it is that it doesn’t need extraction or installation. It also doesn’t require root permission, as there is no installation. To run the app, you just must make it executable. If you want to uninstall the software, just delete the file. AppImage can be compared to a .exe file on Windows, which can run the apps without installation. The only downside to AppImage is that it is going to take up a lot of your hardware space. To download the app image, go to this link. Find the latest stable version and download AppImage.
To make the AppImage executable follow the following two steps.

After it has finished downloading, right-click on the AppImage & go to properties.
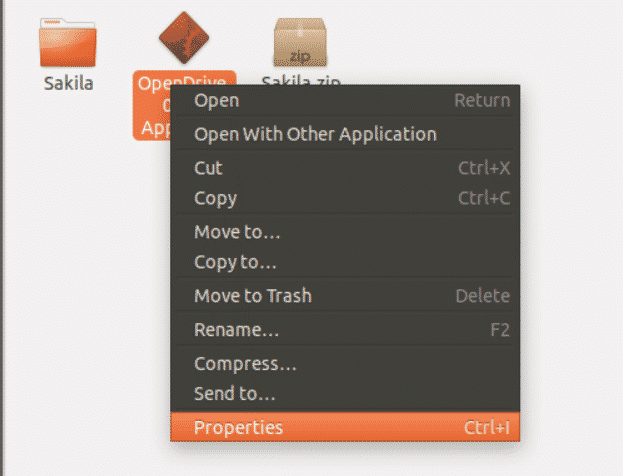
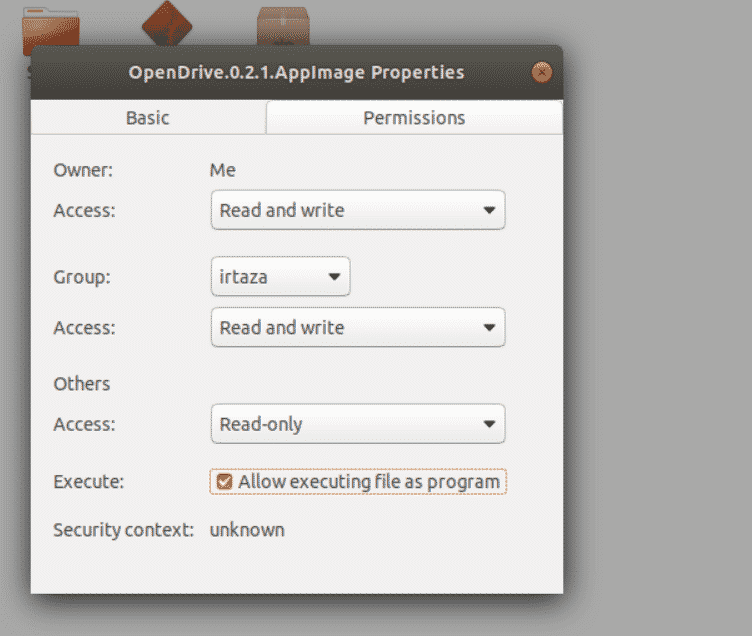
Go to properties, then under the Permissions tab, check the execute box that says Allow executing file as a program.
How to use sync your ODrive
We’ve discussed three methods that will help you install ODrive. Now let’s move on to the basic introduction on how to synchronize your Google Drive data on Ubuntu via ODrive. ODrive is fundamentally the same as Google Drive. So if you have experience with Google Drive, using ODrive should also be a walk in the park.
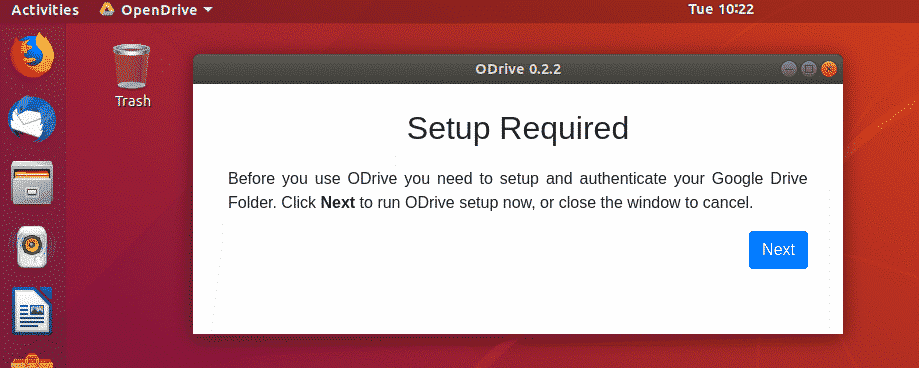
Once you have installed ODrive, launch the app. As this is your first time opening the app, you will be required to configure and authenticate your Google drive. Click next to proceed.
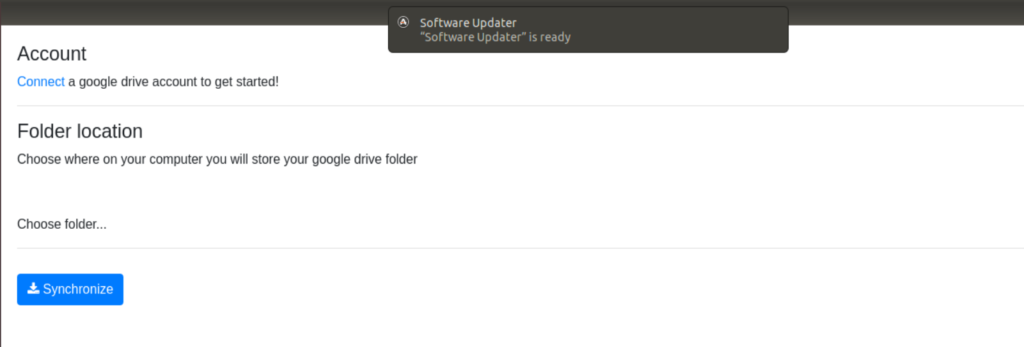
ODrive will access your google account. Sign in to your google account. Also, you will have to specify the local folder that should be used for synchronization. Once you have completed all the above tasks, click synchronize. Your Google Drive content will immediately start syncing. Any future changes in your google drive folder will also be visible in this local folder.
Conclusion
This concludes our guide on how to install and use ODrive on Ubuntu. Although Ubuntu has a lot of its perks, it is missing features like no Google Drive for Linux. But this lacking has been made up by Ubuntu’s large audience and community via ODrive, Linux’s own Google Drive.
There are multiple ways to install ODrive; it all depends on how you want to do it. Once installed, it is very straightforward to configure (only two steps). After this, you are all good to go. All your existing files in google drive are synchronized, and any future changes in your google drive are automatically synchronized.