Foxit Reader is one of the best PDF reader out there. Foxit Reader is free to use and it has many premium features that you can unlock buy buying Foxit Reader. Foxit Reader is available on Windows, macOS and Linux. So, you get almost the same user experience no matter which platform you’re on. Foxit Reader can also sync your PDF documents in the cloud. In this article, I will show you how to install Foxit Reader on Ubuntu 18.04 LTS. So, let’s get started.
Downloading Foxit Reader:
Foxit Reader is not available in the official package repository of Ubuntu. But you can easily download Foxit Reader from the foxitsoftware.com (the official website) and install it on Ubuntu.
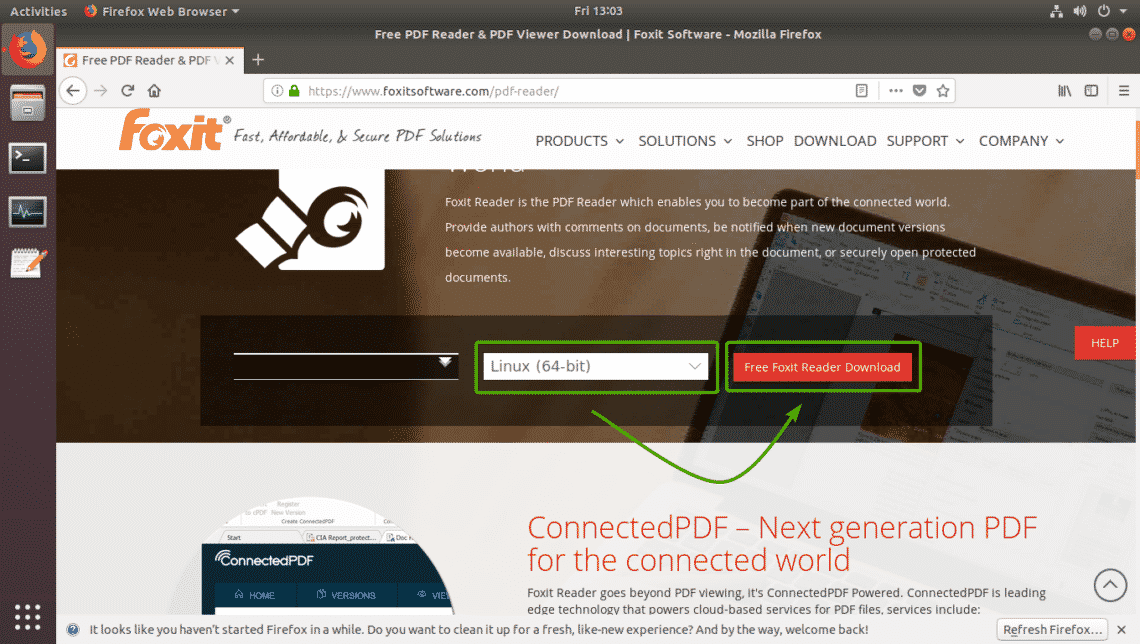
First, visit the official website of Foxit Reader at https://www.foxitsoftware.com/ from your favorite web browser. Once the page loads, go to Products > Foxit Reader as marked in the screenshot below.
Now, make sure Linux (64-bit) is selected. Then, click on Free Foxit Reader Download button as marked in the screenshot below.
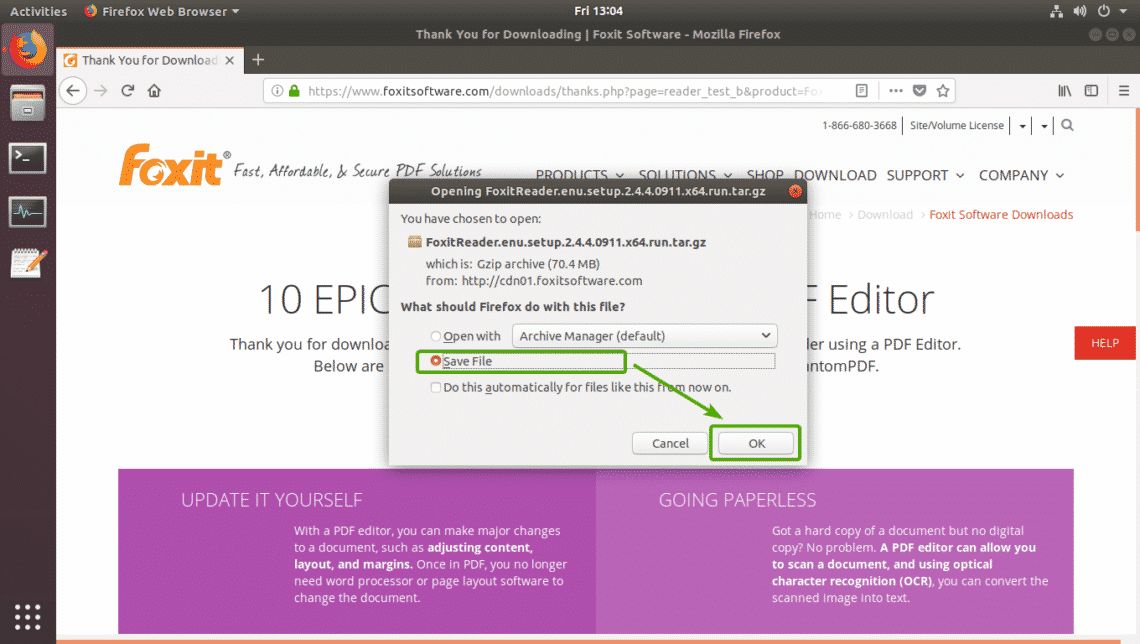
Your browser should prompt you to download the Foxit Reader archive. Select Save File and click on OK as marked in the screenshot below.
Your browser should start downloading the Foxit Reader archive file. It may take a while to complete.
Installing Foxit Reader:
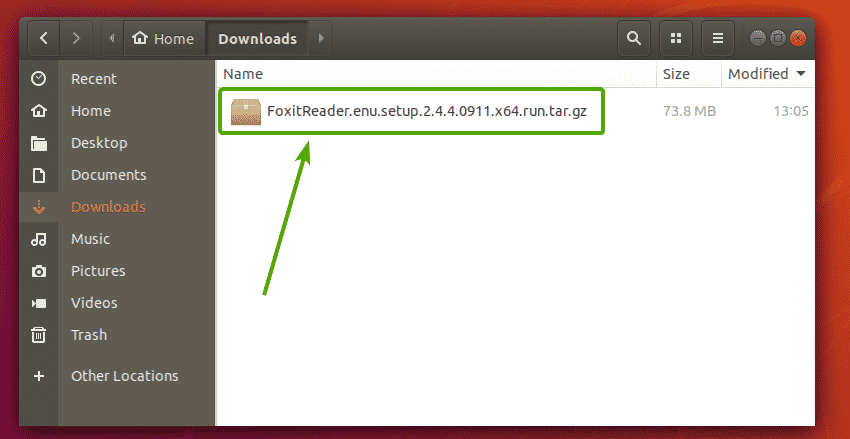
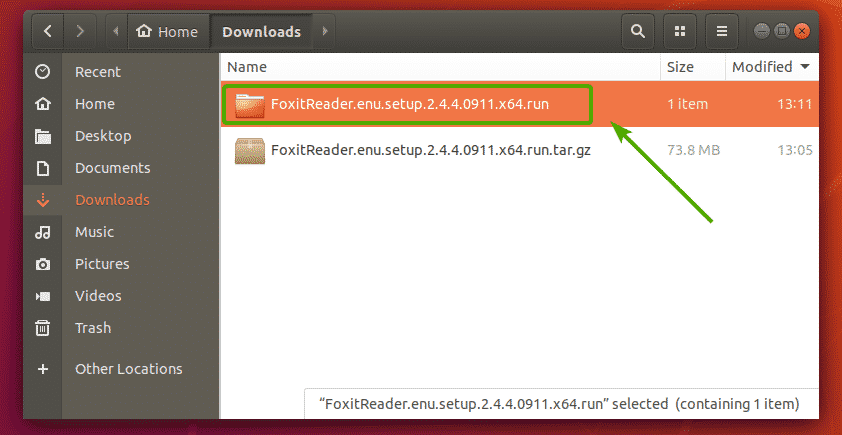
Once the download is complete, you should be able to find the Foxit Reader archive you just downloaded in the ~/Downloads directory in your login users HOME directory.
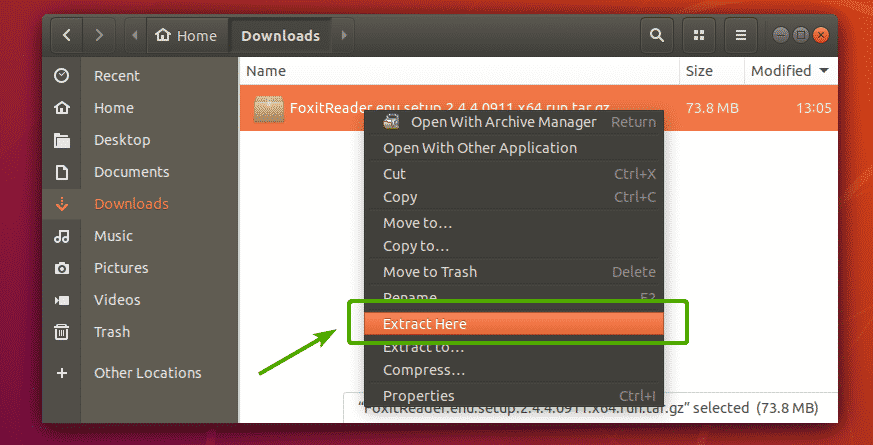
Now, you have to extract the Foxit Reader archive. To do that, Right click (RMB) on the file and click on Extract Here as marked in the screenshot below.
The Foxit Reader archive should be extracted into a new directory as you can see in the screenshot below. Double click on the newly created directory.
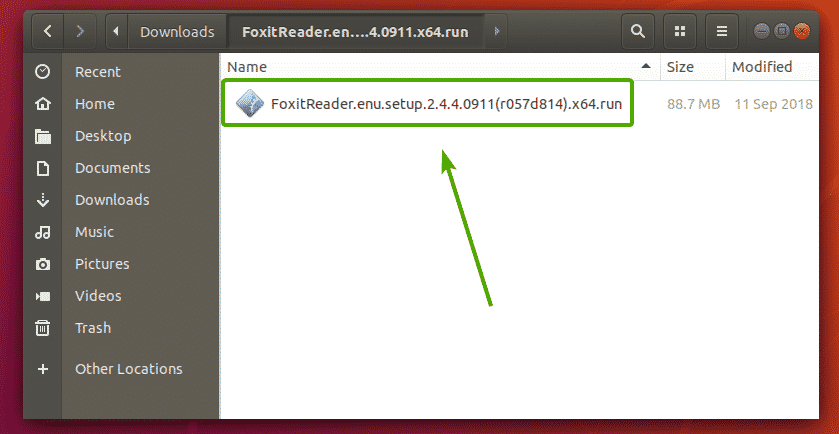
You should see an executable setup file inside the directory as you can see in the screenshot below. Double click on the setup file.
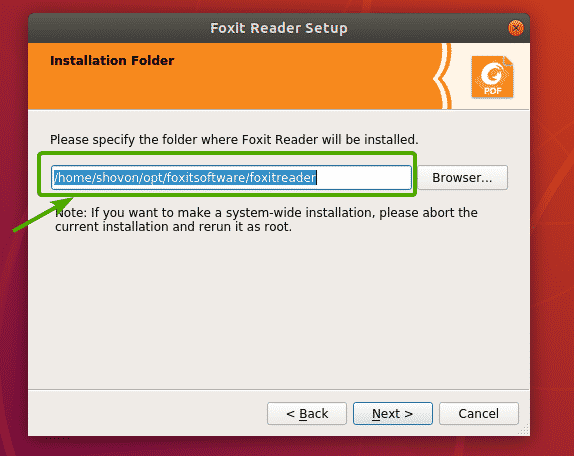
Foxit Reader installer should start as you can see in the screenshot below. The default installation location of Foxit Reader is /home/<your_username>/opt/foxitsoftware/foxitreader. If you want to change it, you can click on Browser… button and select the directory where you want to install Foxit Reader.
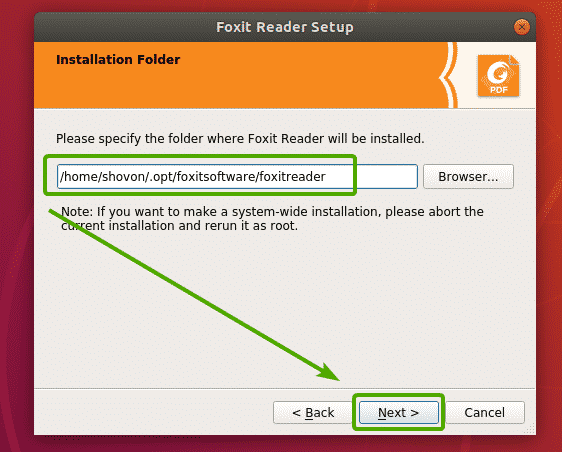
I don’t want to have an opt/ directory inside my HOME directory as I want my HOME directory to be clean. So, I will just put a . (dot) before opt/. That way, the opt/ directory will be hidden and it won’t show up in the directory listing by default. The final installation location path in my case is /home/shovon/.opt/foxitsoftware/foxitreader as you can see in the screenshot below.
Once you’ve decided where you want to install Foxit Reader, click on Next.
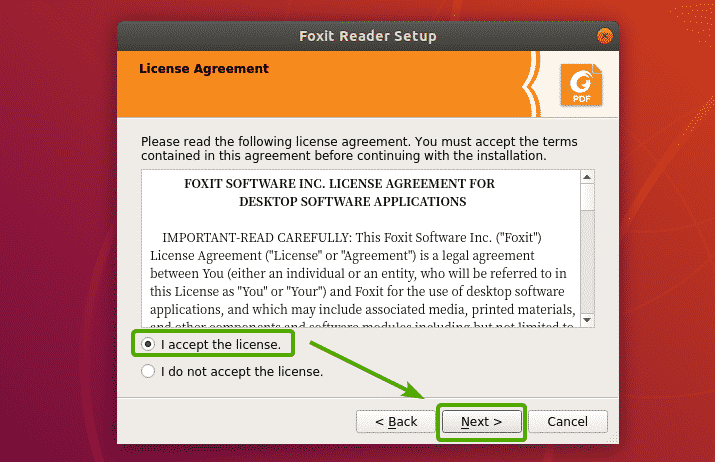
Now, you have to accept the Foxit Software License Agreement. To do that, select I accept the license. and click on Next as marked in the screenshot below.
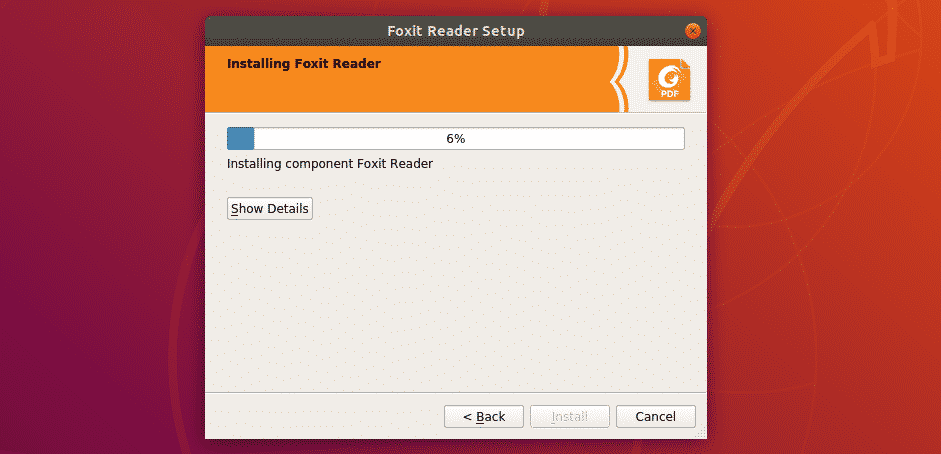
Foxit Reader installer should start installing Foxit Reader on your computer.
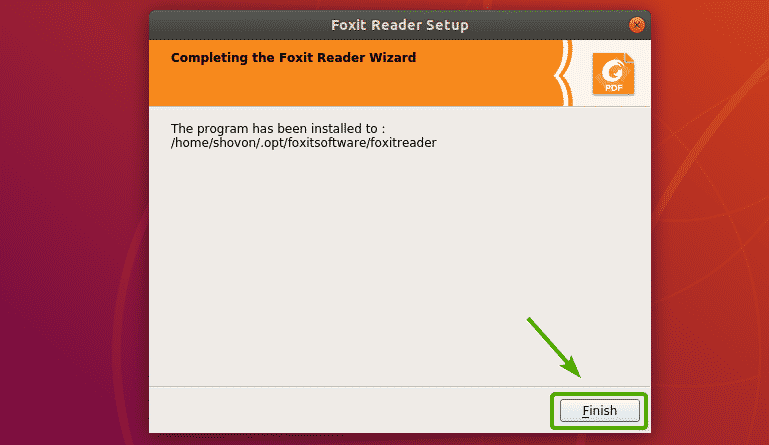
Once the installation is complete, click on Finish.
Starting Foxit Reader:
Now that Foxit Reader is installed, you should be able to find Foxit Reader in the Application Menu of Ubuntu. Just search for Foxit Reader and click on the Foxit Reader icon as marked in the screenshot below.
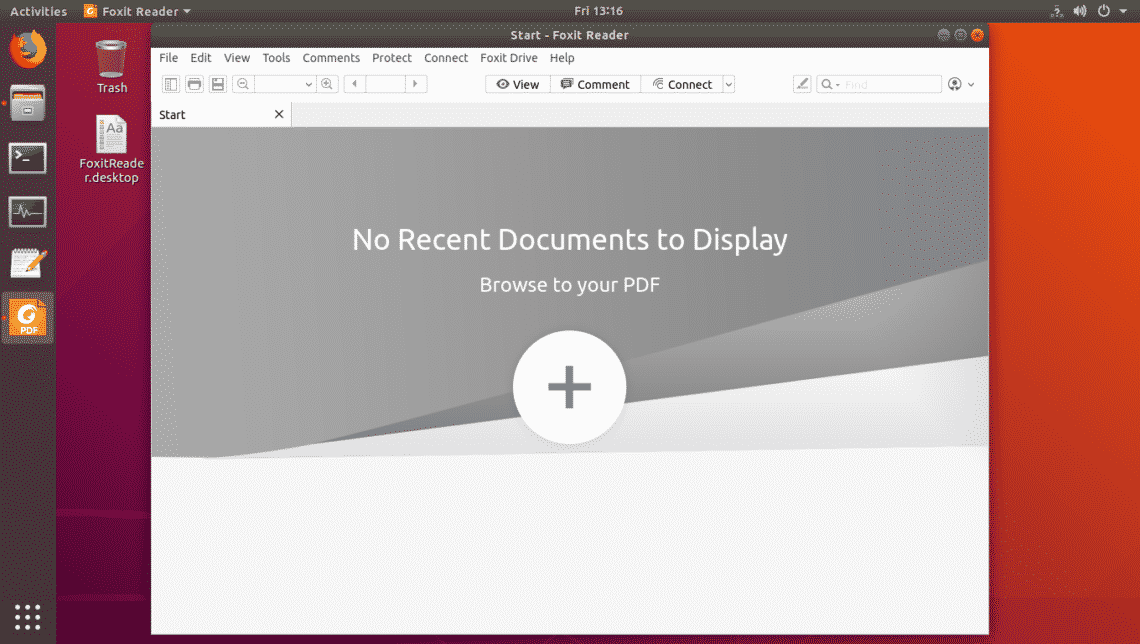
Foxit Reader should start.
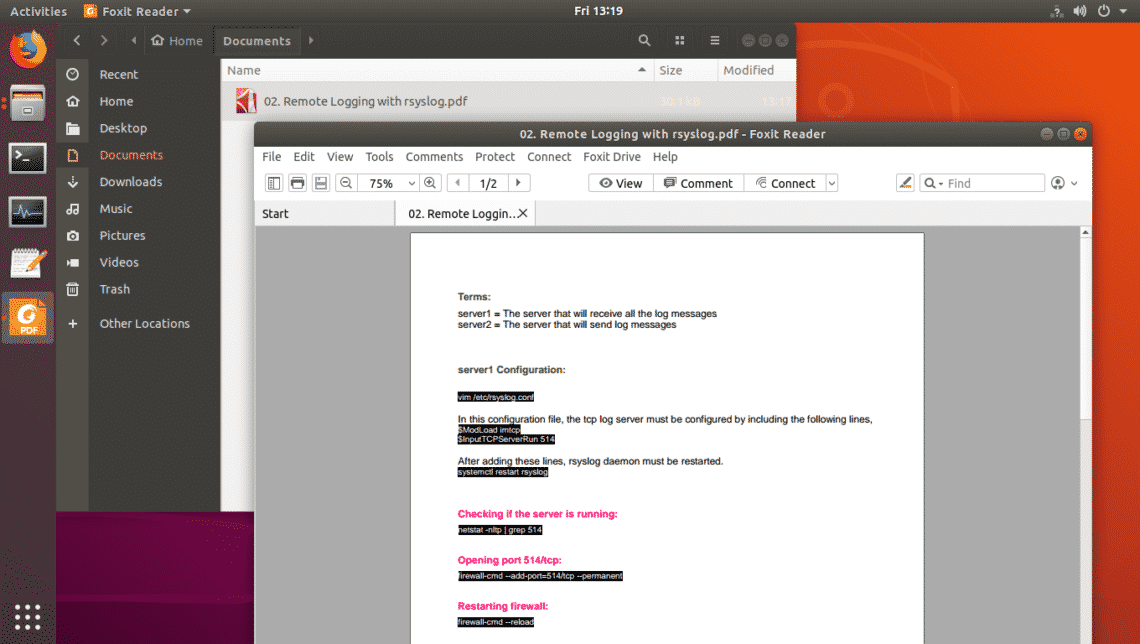
I opened a PDF document with Foxit Reader. As you can see, it works.
Setting Foxit Reader as The Default PDF Viewer:
If you want to set Foxit Reader as your default PDF viewer, this section is for you.
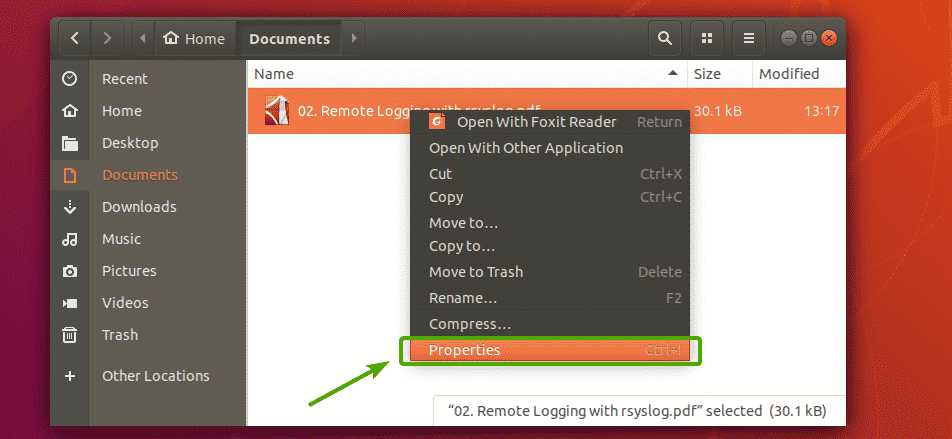
To set Foxit Reader as your default PDF viewer, right click (RMB) on any PDF file and click on Properties as marked in the screenshot below.
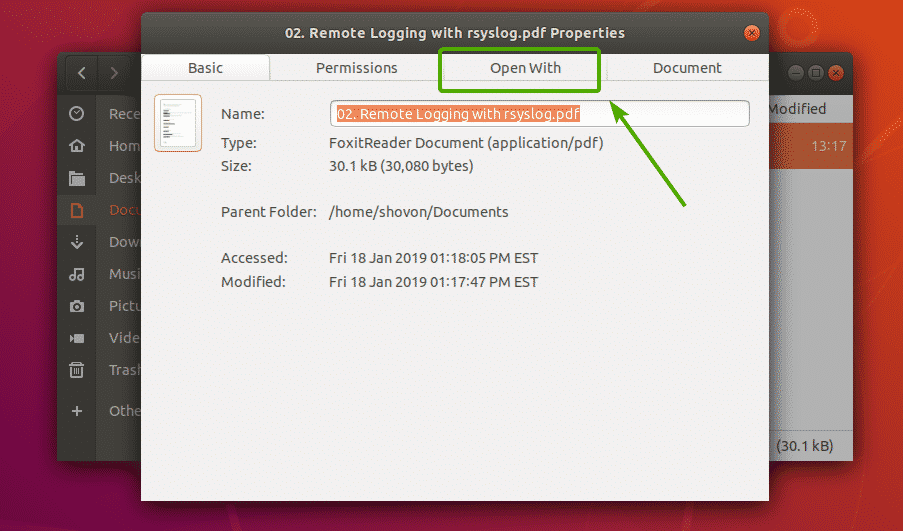
You should see the following window. Click on the Open With tab.
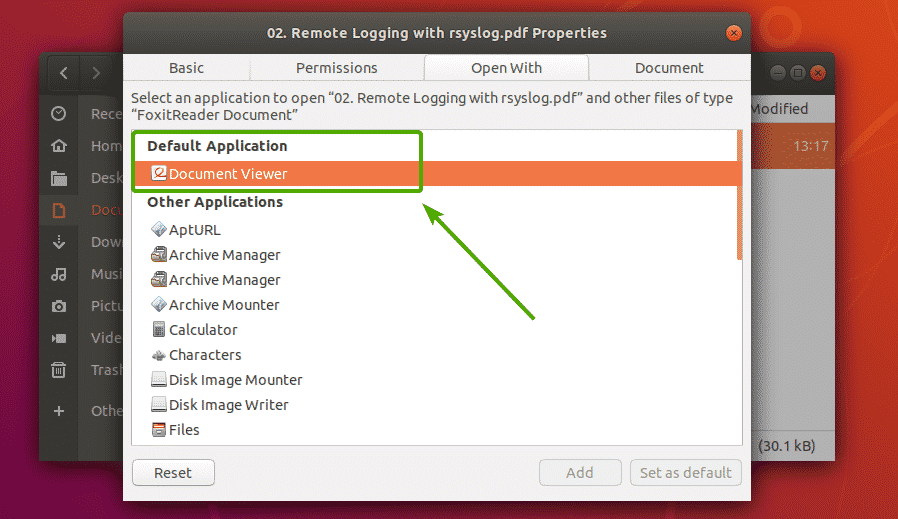
Now, you should see all the applications that is installed on your computer. As you can see, right now, Evince Document Viewer is set as my default PDF viewer.
Now, scroll down a little bit and find Foxit Reader. Once you find Foxit Reader in the list, select it and click on Set as default as marked in the screenshot below.
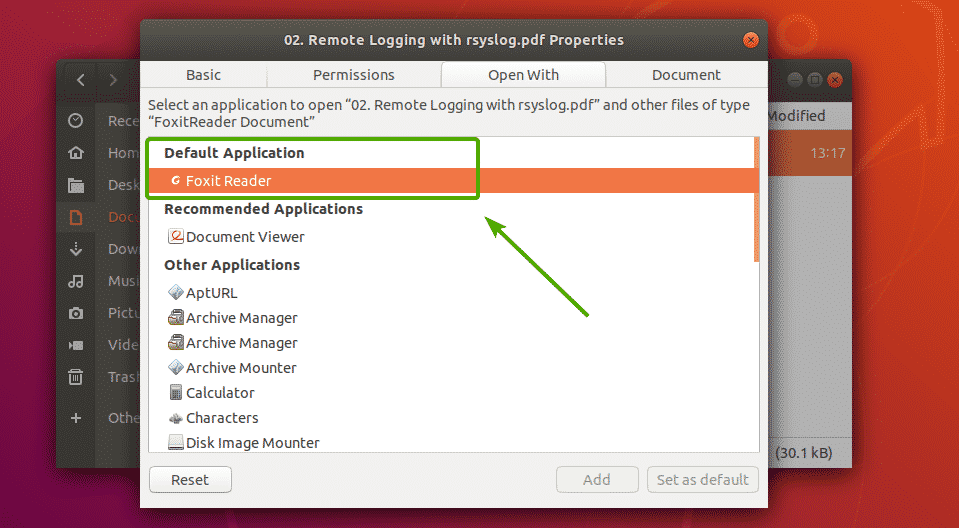
As you can see, Foxit Reader is set as the default application for all my PDF documents.
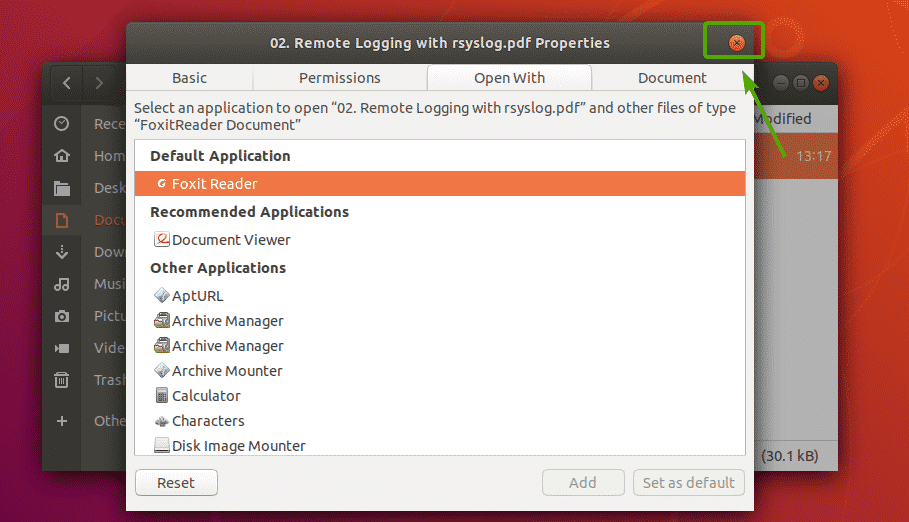
Now, close the window.
So, that’s how you install Foxit Reader on Ubuntu 18.04 LTS. Thanks for reading this article.


