In this article, I will show you how to install and use Etcher on Linux. I will be using Debian 9 Stretch for the demonstration. But this article should work on any other Debian based Linux distributions such as Ubuntu without any modification. With slight modification, it should work on other Linux distributions as well. So, let’s get started.
[adthrive-in-post-video-player video-id=”sC2UhauO” upload-date=”2023-02-09T12:55:21.000Z” name=”Install Etcher on Linux” description=”Install Etcher on Linux” player-type=”collapse” override-embed=”true”]
Downloading Etcher for Linux:
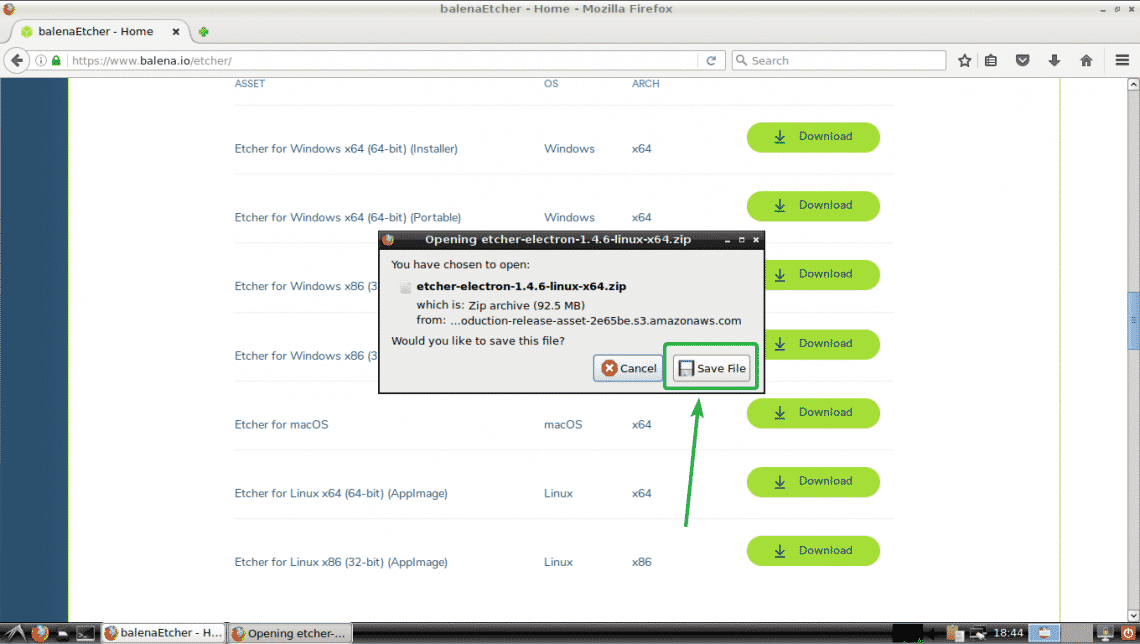
You can download Etcher from the official website of Etcher. First, go to the official website of Etcher at https://www.balena.io/etcher/ and you should see the following page. You can click on the download link as marked in the screenshot below to download Etcher for Linux but it may not work all the time. It did not work for me.
If that is the case for you as well, scroll down a little bit and click on the link as marked in the screenshot below.
Your browser should prompt you to save the file. Just, click on Save File.
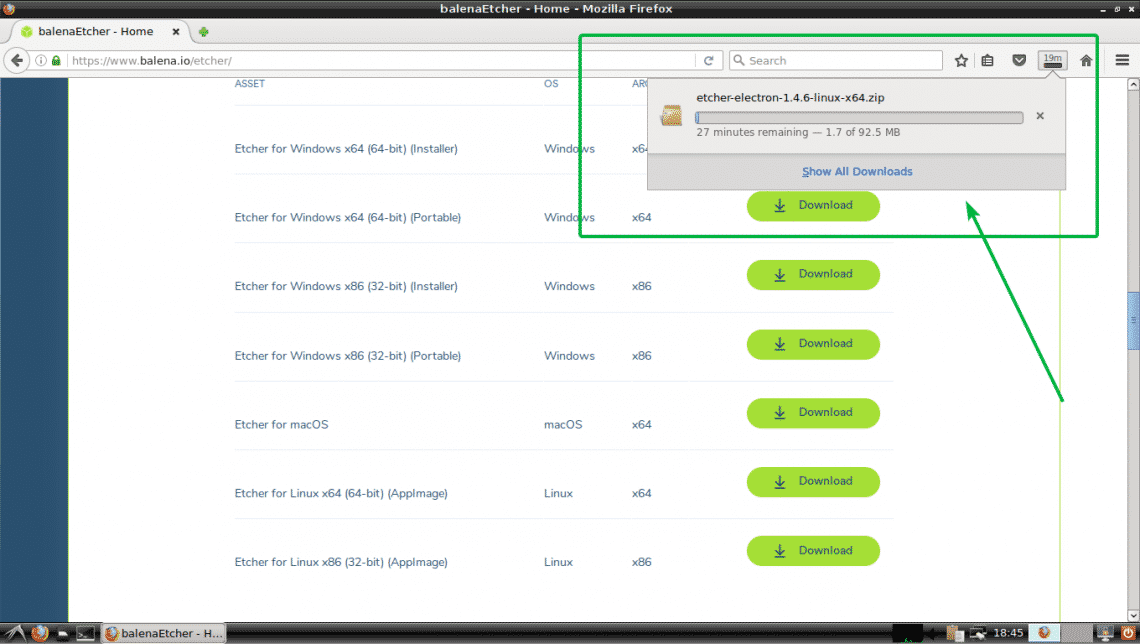
Your download should start as you can see in the screenshot below.
Installing Etcher on Linux:
Now that you have downloaded Etcher for Linux, you are ready to install Etcher on Linux. In order to run Etcher on Linux, you need to have zenity or Xdialog or kdialog package installed on your desired Linux distribution. On Ubuntu, Debian, Linux Mint and other Debian based Linux distributions, it is a lot easier to install zenity as zenity is available in the official package repository of these Linux distributions. As I am using Debian 9 Stretch for the demonstration, I will cover Debian based distributions here only.
First, update the package repository of your Ubuntu or Debian machine with the following command:
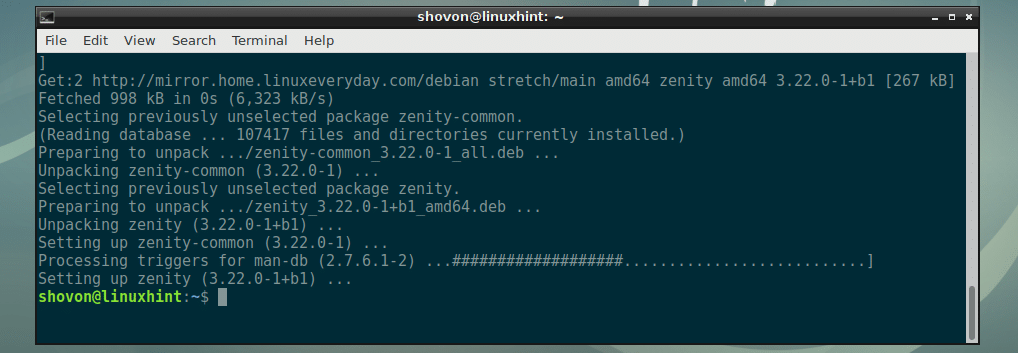
Now, install zenity with the following command:
Now, press y and then press <Enter> to continue.
zenity should be installed.
Now, navigate to the ~/Downloads directory where you downloaded Etcher with the following command:
As you can see, the Etcher zip archive file is here.
Now, unzip the file with the following command:
The zip file should be extracted and a new AppImage file should be generated as you can see in the screenshot below.
Now, move the AppImage file to the /opt directory with the following command:
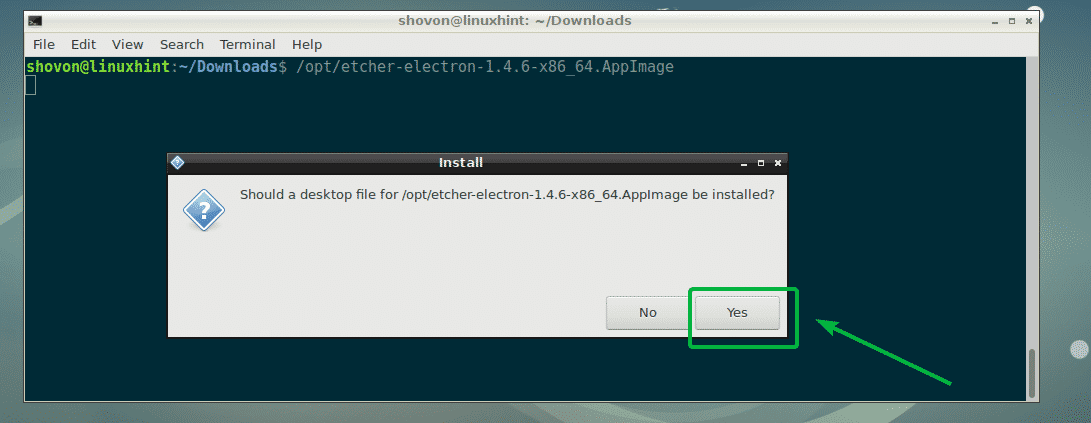
Now, run Etcher with the following command:
You should see the following dialog box. Just click on Yes.
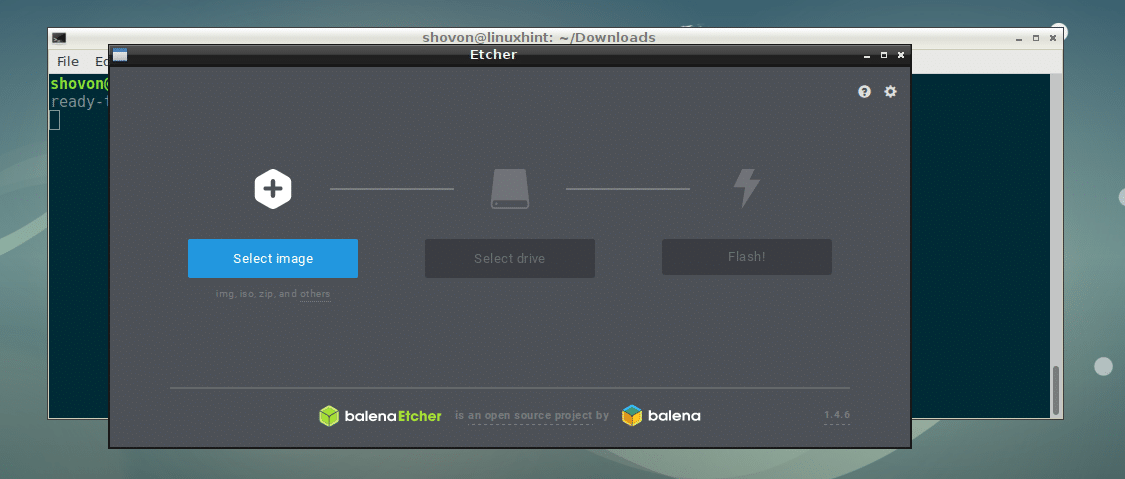
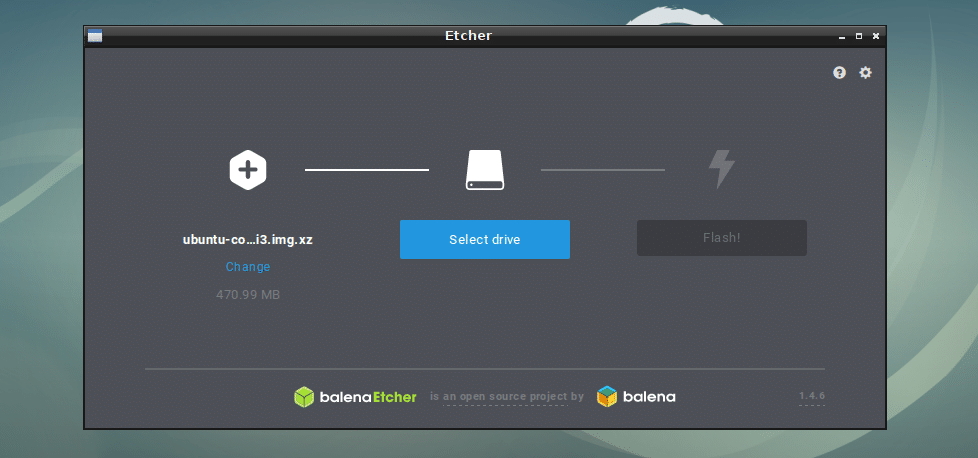
Etcher should start as you can see in the screenshot below.
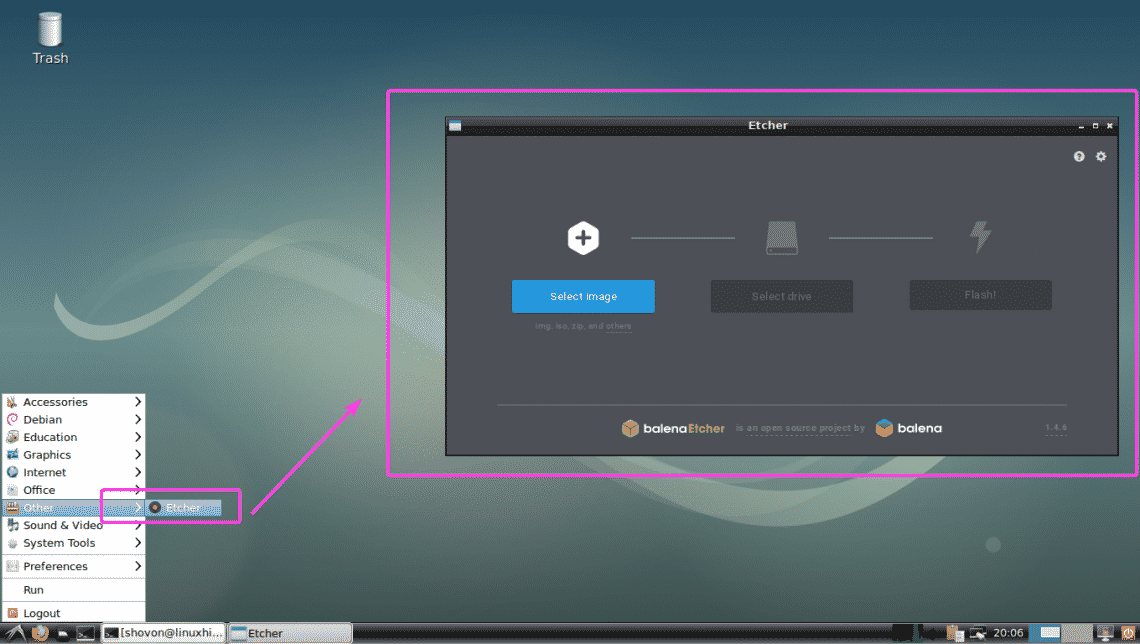
Now, you don’t have to start Etcher from the command line anymore. You can start Etcher from the Application Menu as you can see in the screenshot below.
Using Etcher on Linux:
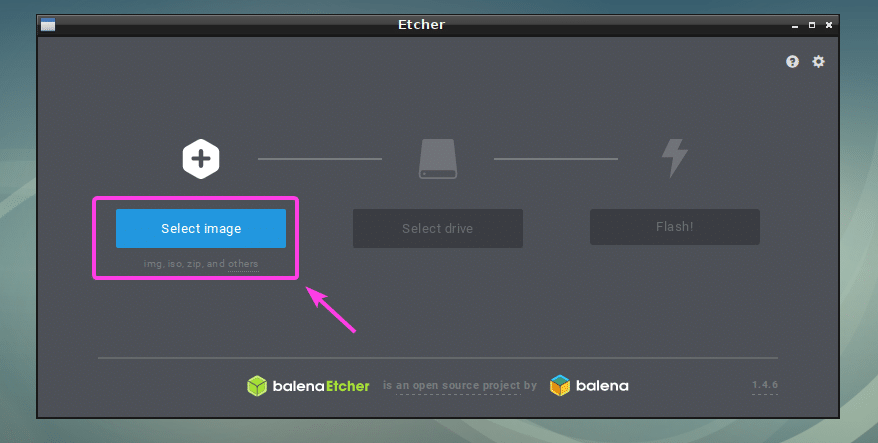
You can now flash microSD cards using Etcher for your Raspberry Pi. First, open Etcher and click on Select image.
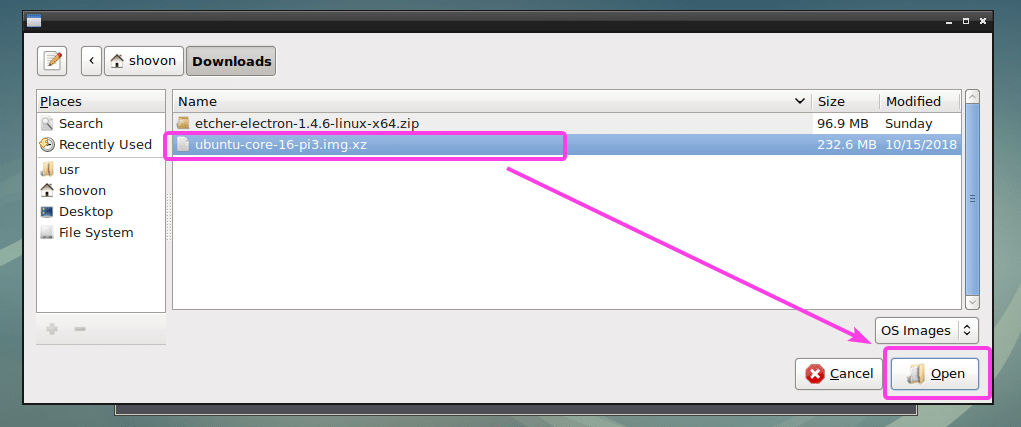
A file picker should be opened. Now, select the operating system image file that you want to flash your microSD card with and click on Open.
The image should be selected.
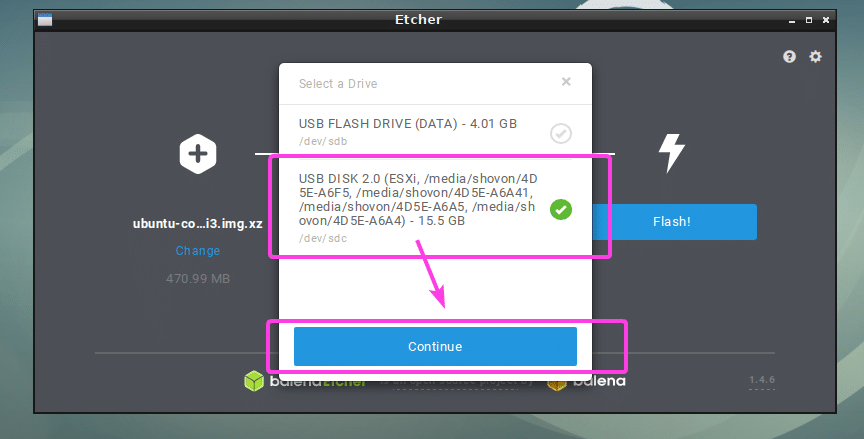
Now, insert the microSD card or USB storage device that you want to flash with Etcher. It may be selected by default. If you do have multiple USB storage devices or microSD card attached on your computer, and the right one is not selected by default, then you can click on Change as marked in the screenshot below to change it.
Now, select the one you want to flash using Etcher from the list and click on Continue.
NOTE: You can also flash multiple USB devices or microSD cards at the same time with Etcher. Just select the ones that you want to flash from the list and click on Continue.
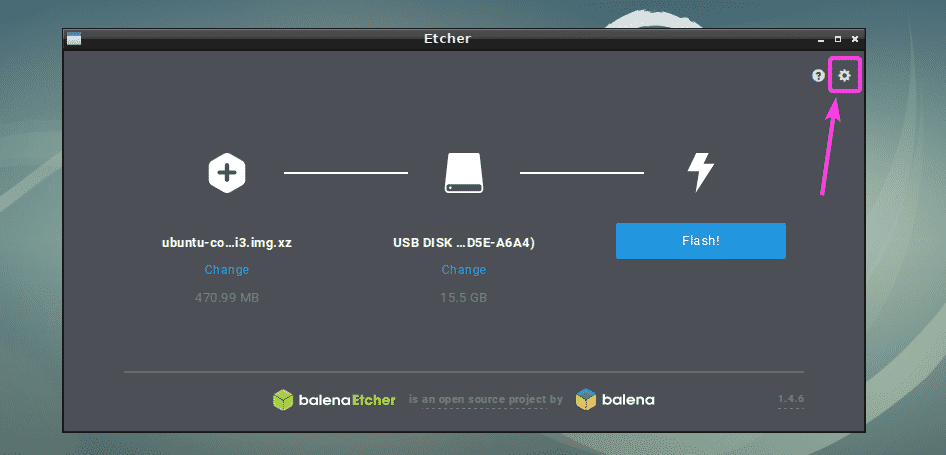
It should be selected as you can see in the screenshot below.
You can also change Etcher settings to control how Etcher will flash the microSD cards or USB storage devices as well. To do that, click on the gear icon as marked in the screenshot below.
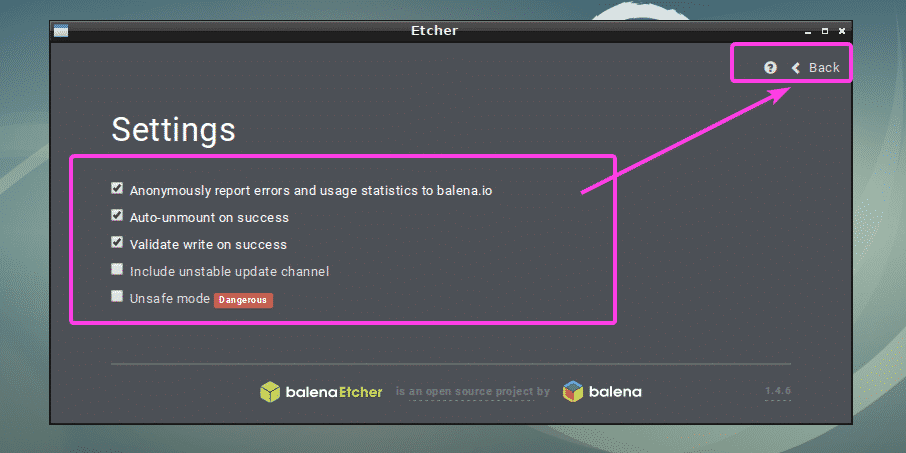
The Etcher settings panel is very clear and easy to use. All you have to do is either check or uncheck the things you want and click on the Back button. Normally you don’t have to do anything here. The default settings are good. But if you uncheck Validate write on success, it will save you a lot of time. Because this option will check if everything is written on the microSD cards or USB storage devices correctly. That puts a lot of stress on your microSD cards or USB devices and takes a lot of time to complete. Unless you have a faulty microSD card or USB storage device, unchecking this option would do you no harm. It’s up to you to decide what you want.
Finally, click on Flash!
Etcher should start flashing your microSD card or USB storage device.
Once the microSD card or the USB storage device is flashed, you should see the following window. You can now close Etcher and eject your microSD card or USB storage device and use it on your Raspberry Pi device.
So that’s how you install and use Etcher on Linux (Ubuntu/Debian specifically). Thanks for reading this article.


