In this article, I am going to show you how to install the latest version of Atom Text Editor on Debian 10 Buster. Thanks for reading this article.
Installing Atom Text Editor:
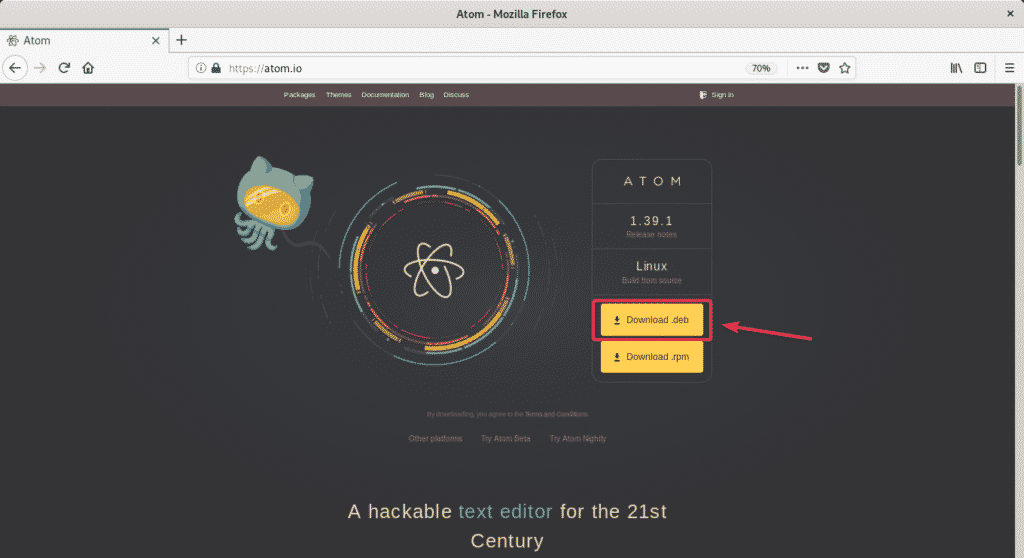
First, visit the official website of Atom from your favorite web browser. Now, click on the Download .deb button as marked in the screenshot below.
Now, your browser should prompt you to download the Atom DEB package file. Click on Save File as marked in the screenshot below.
The download should start. It will take a while to complete.
Once the download is complete, navigate to the ~/Downloads directory as follows:
As you can see, the Atom DEB package file is here.
Now, update the APT package repository cache with the following command:
Now, install the DEB package file using the APT package manager as follows:
Now, press Y and then press <Enter> to confirm the installation.
All the required dependency packages should be automatically downloaded and installed.
At this point, Atom should be installed.
Once Atom is installed, run the following command to check whether Atom is working correctly.
As you can see, I am running Atom 1.39.1. It is the latest version of Atom at the time of this writing.
Now, you can find and start Atom from the Application Menu of Debian 10.
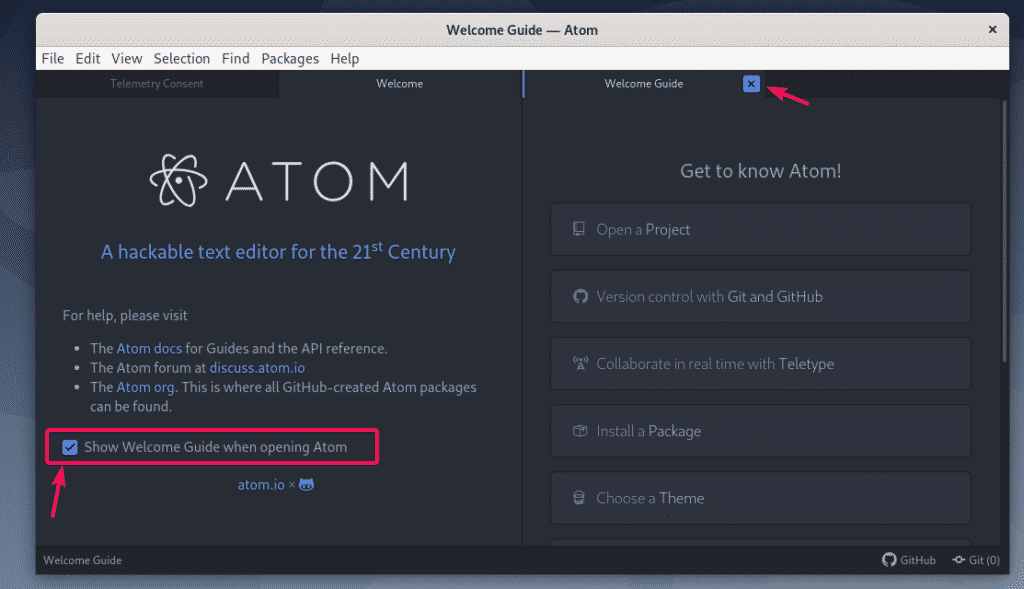
The first time you run Atom, it will look like this.
If you don’t want to see the Welcome window again, just uncheck the Show Welcome Guide when opening Atom checkbox and close all the opened tabs.
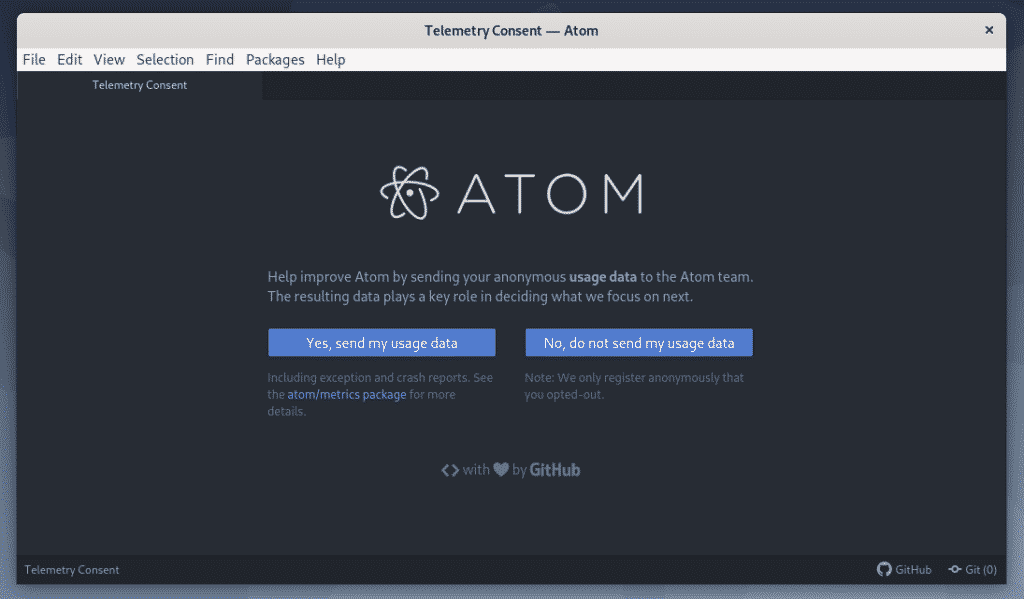
One the Telemetry Consent tab, click on one of these buttons depending on whether you want to send usage data to GitHub for improving Atom.
Creating New Files:
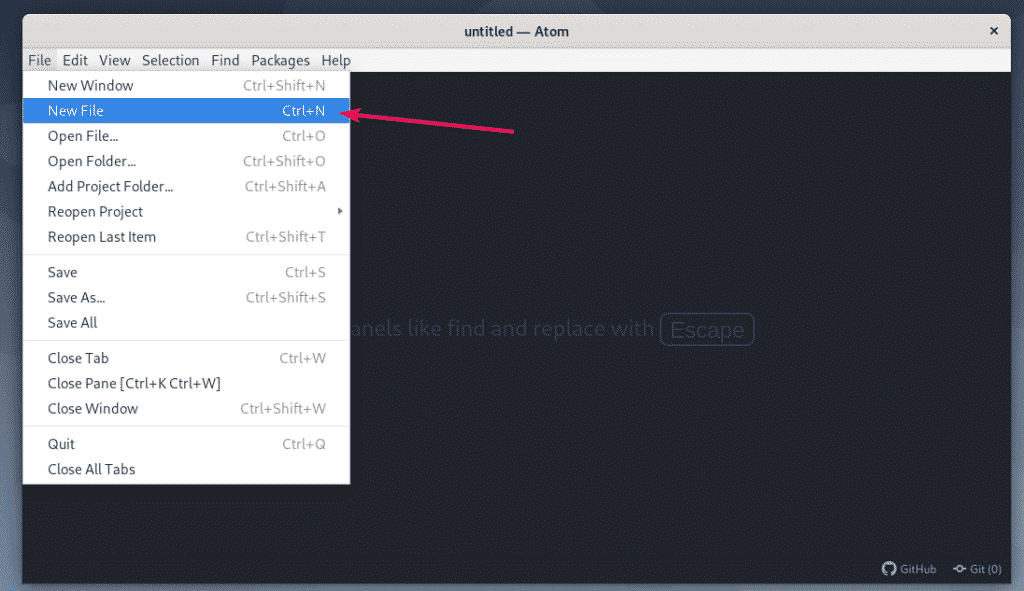
To create a new file on Atom, go to File > New File or press <Ctrl> + N.
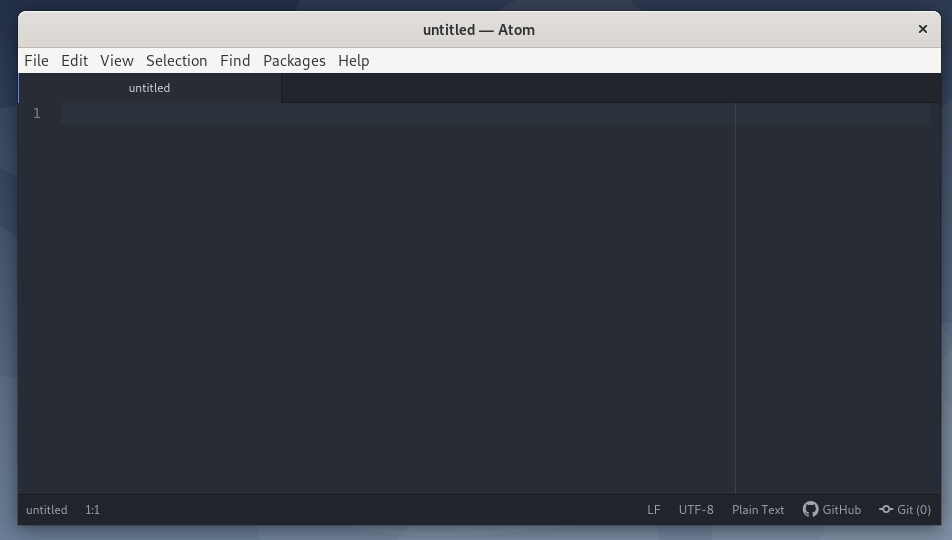
A new file should be created.
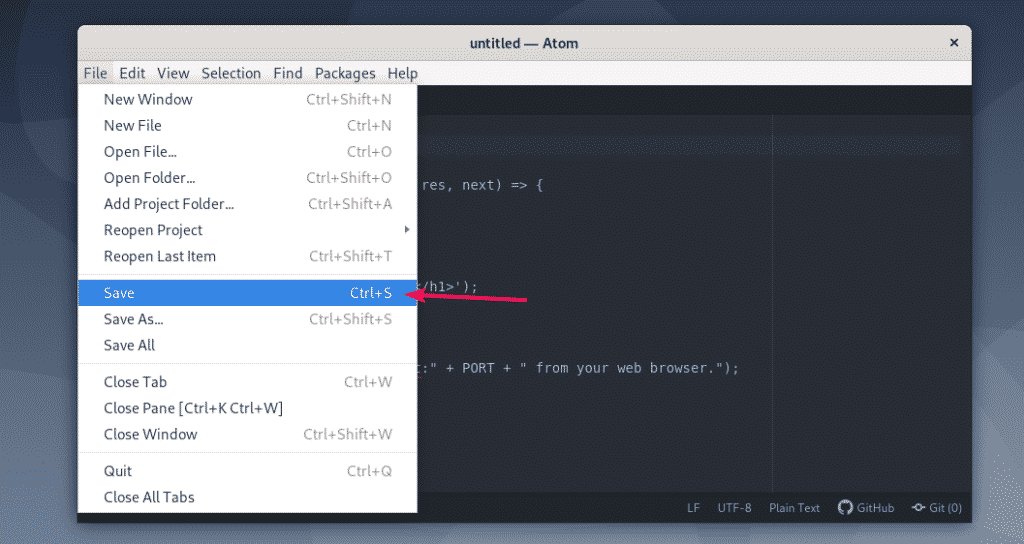
Now, to save the file, go to File > Save or press <Ctrl> + S.
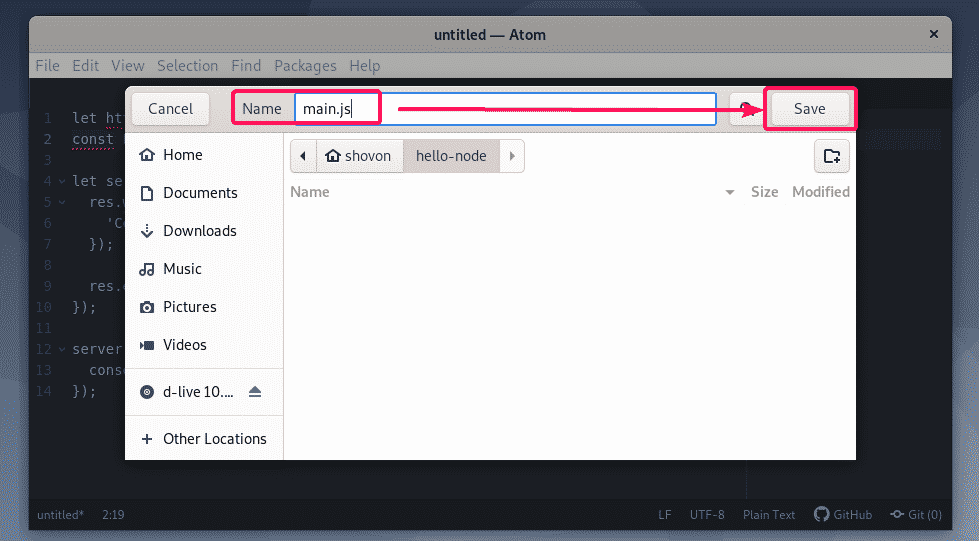
Now, select a directory where you want to save the file, give the file a name and click on Save.
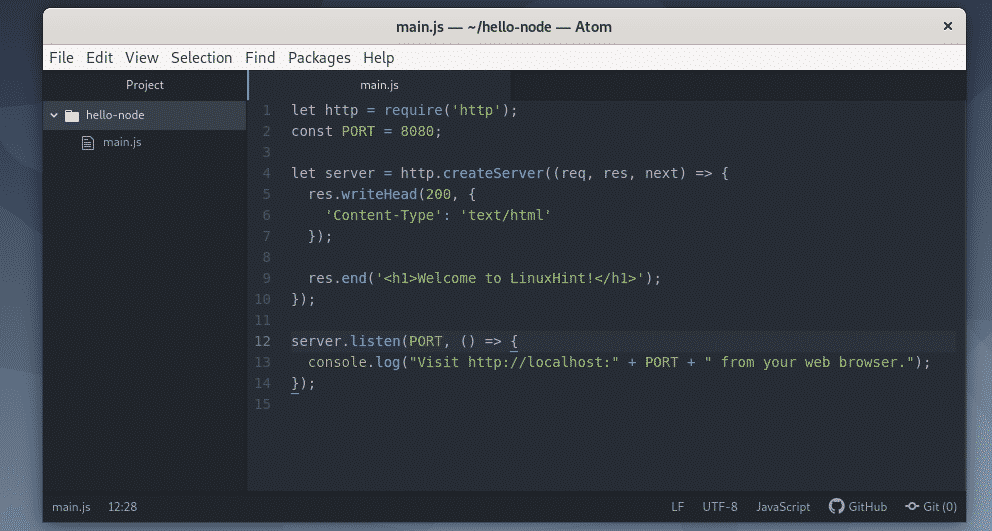
The file should be saved.
Opening Project:
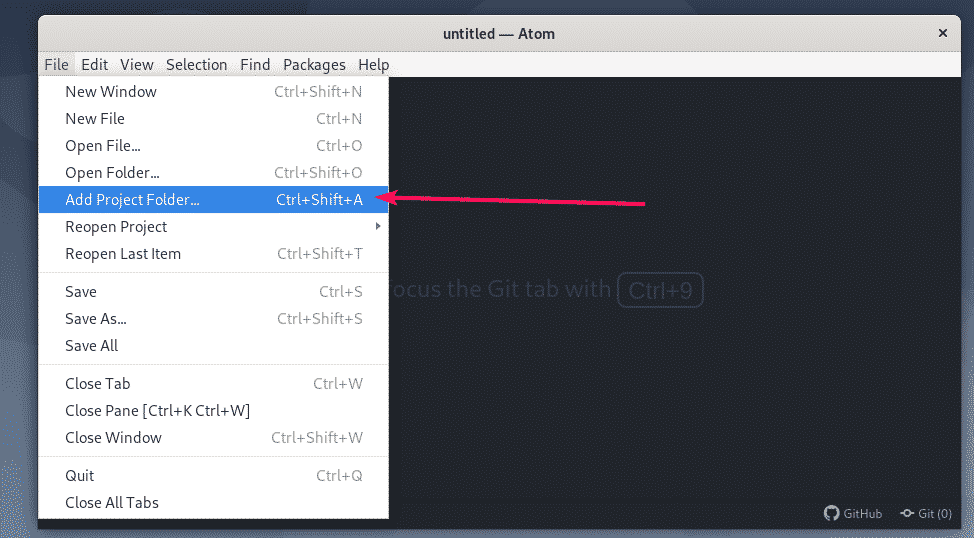
You can also open a directory/folder as a project with Atom. To open a directory/folder as a project, go to File > Add Project Folder… or press <Ctrl> + <Shift> + A.
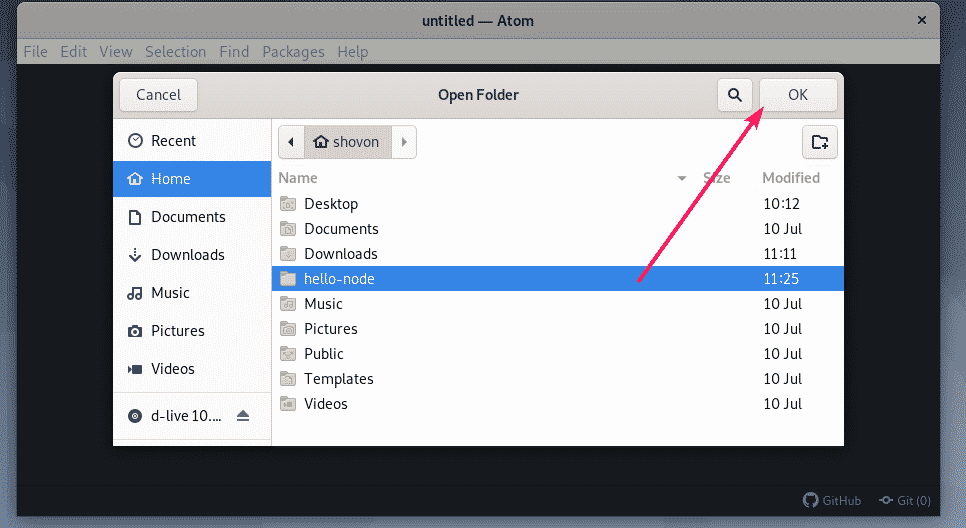
Now, select your project directory/folder and click on OK.
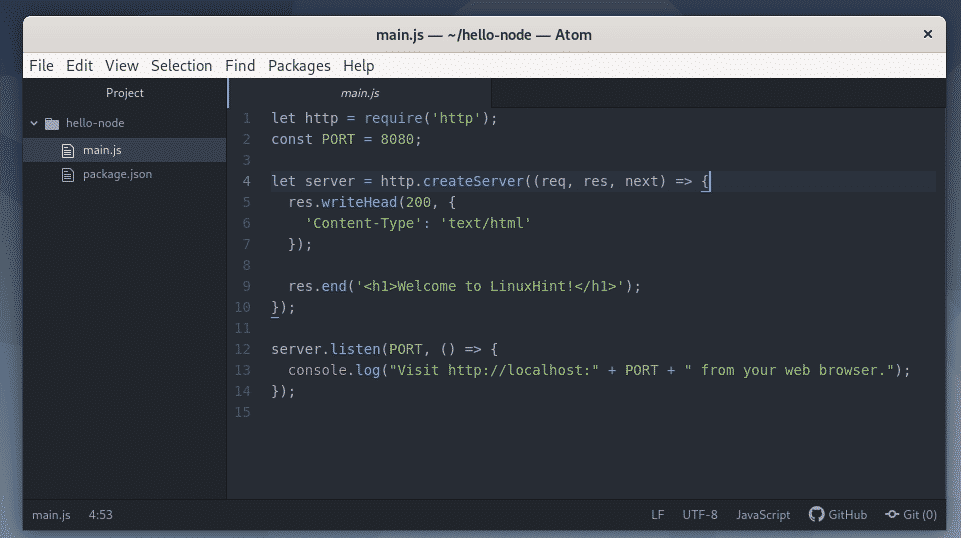
The directory/folder should be opened as an Atom project.
Using Atom Split View:
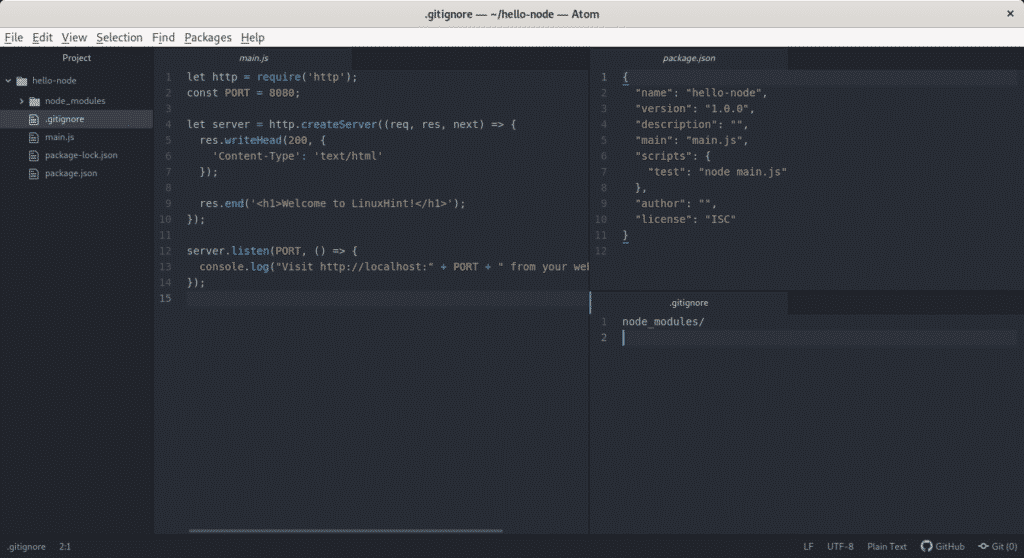
Atom split view feature is very useful. You can split an atom editor pane into as many sections as you need and view multiple source files in each of these split views.
You can split a pane horizontally and vertically just like you do on a tiling window manager like i3. To split a pane, go to View > Panes and select one of the marked options (Split Up, Split Down, Split Left, Split Right) to split a pane.
You can also use the shortcut <Ctrl> + K + <Arrow keys> to split the pane in your desired direction.
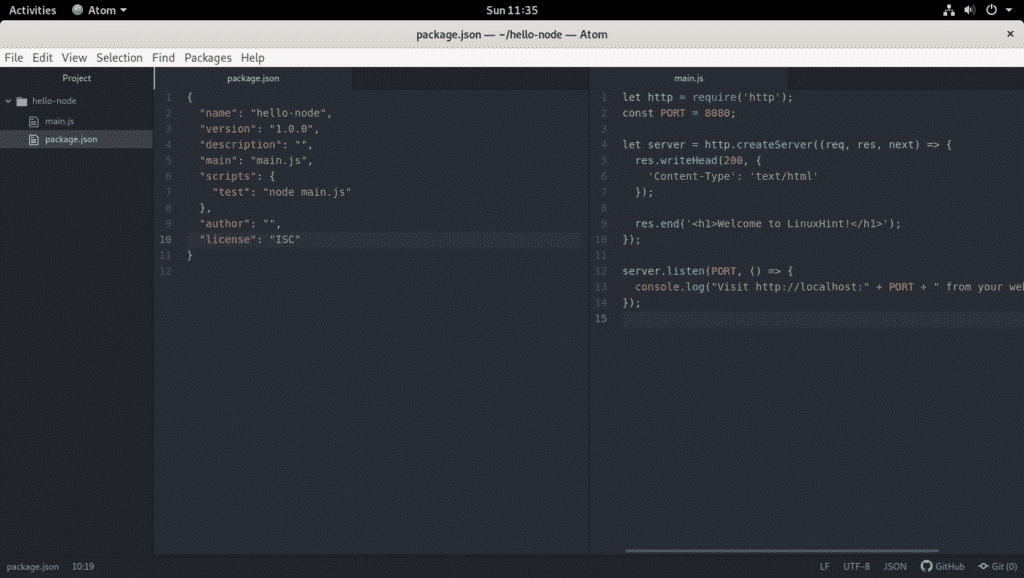
As you can see, I have split the pane using <Ctrl> + K + <Right Arrow Key> or Split Right. The pane is horizontally split into two sections. I’ve opened two different files from my project on these two panes. I can now work simultaneous on these two files.
I also selected the right pane and split it vertically using Split Down.
Changing Font Size and Font Family:
You can increase the font size using the shortcut <Ctrl> + <Mouse Scroll Up>. The same way you can decrease the font size using the shortcut <Ctrl> + <Mouse Scroll Down>.
You can also change the font family and font size from the Atom settings. You can access the atom settings from Edit > Preferences.
Now, go to the Editor section and you should be able to change the Font Family and Font Size from here.
Enable Word Wrap:
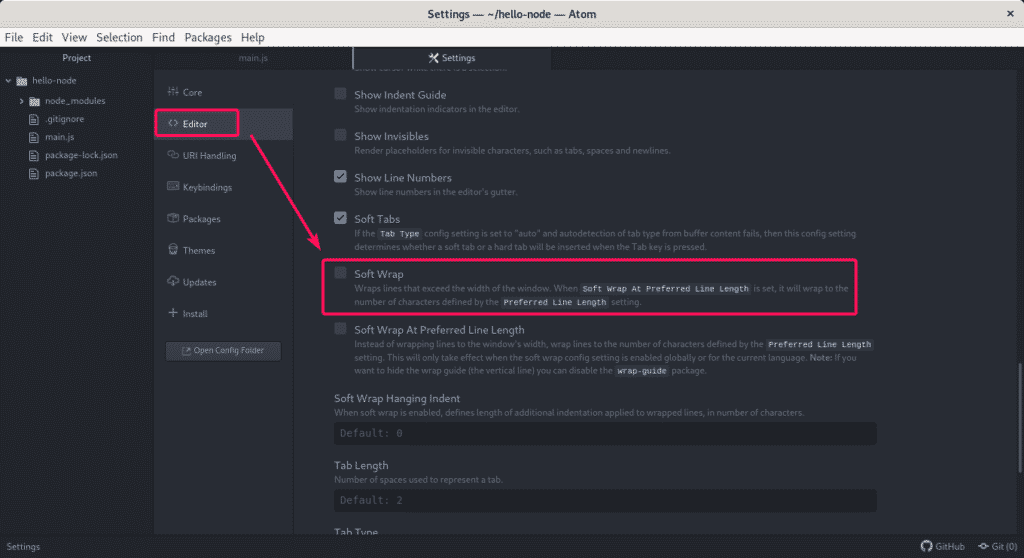
To enable word wrap, go to Edit > Preferences and then go to the Editor section. Now, find and check the Soft Wrap checkbox.
Installing Atom Packages:
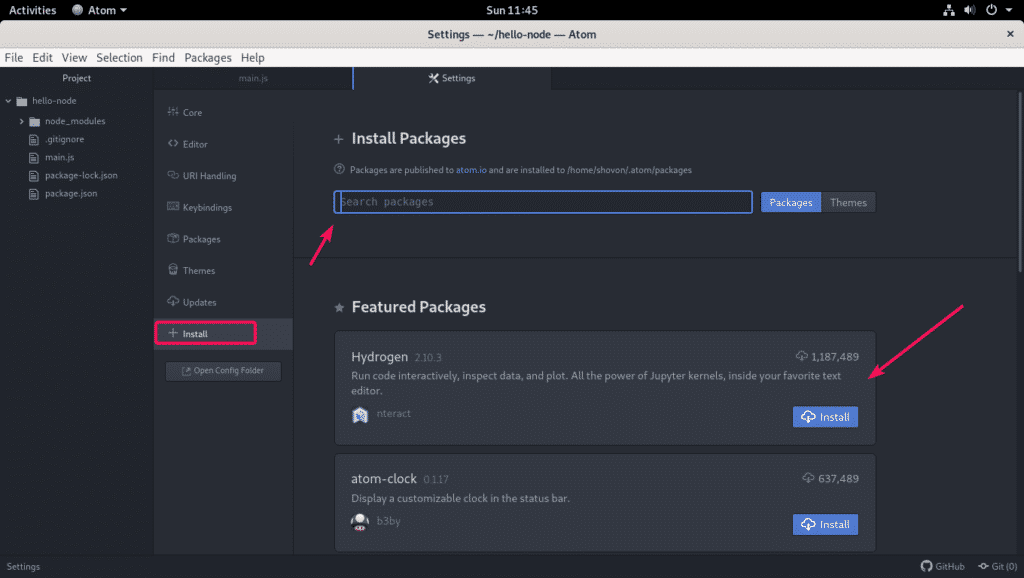
Atom has a lot of packages that you can install to extend the functionalities of Atom. To install a new package, go to Edit > Preferences and go to the Install section.
Here, Atom will recommend some packages based on the popularity. You can also search for a package.
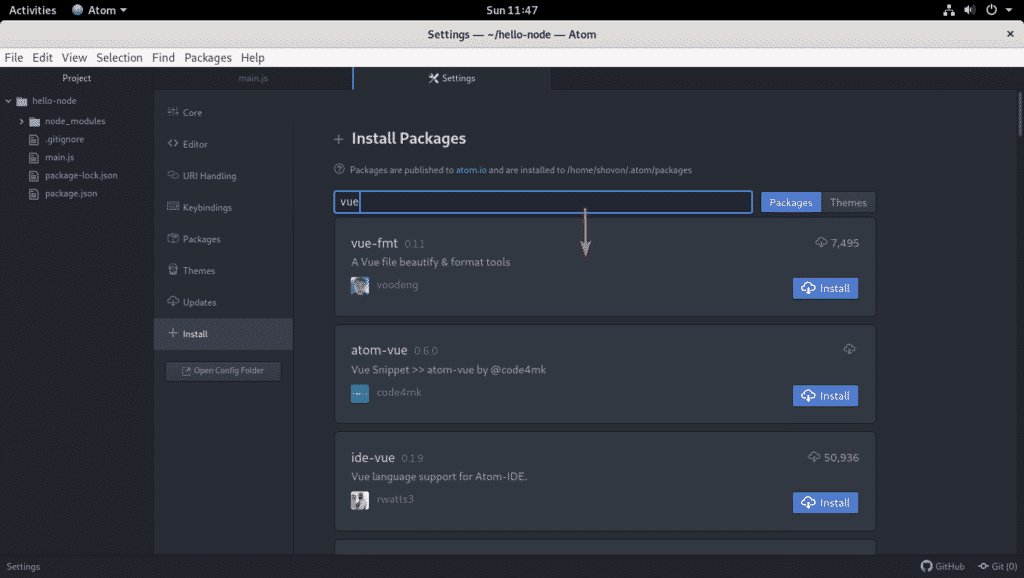
As you can see, I have searched for vue.js packages. The matched packages are listed below. To install a package, click on the Install button of the package from the list.
Changing Themes:
Atom comes with beautiful light and dark UI themes and syntax themes.
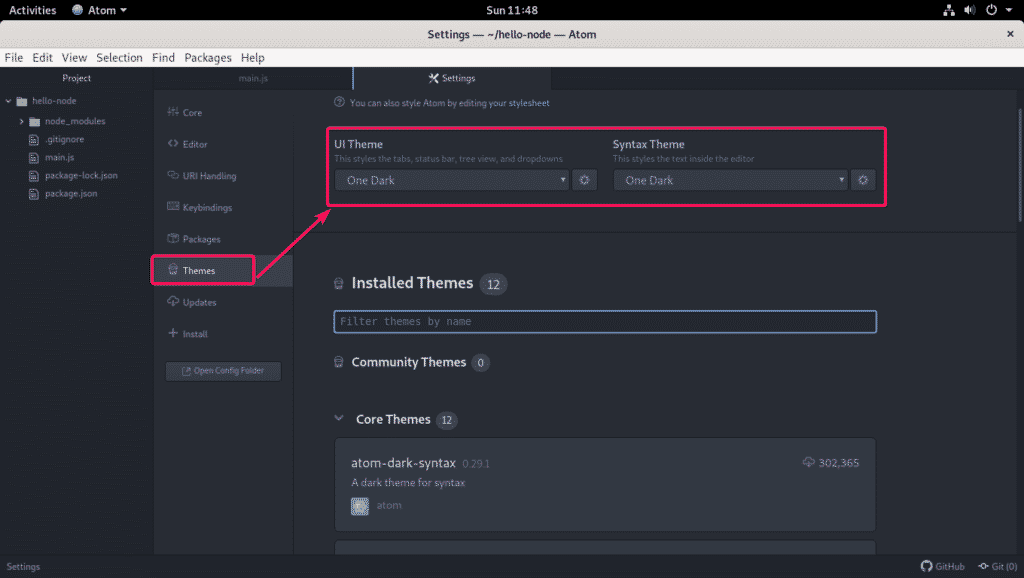
To change the UI theme and syntax theme, go to Edit > Preferences. Then, from the Themes section, change the UI Theme and Syntax Theme using the dropdown menu as marked in the screenshot below.
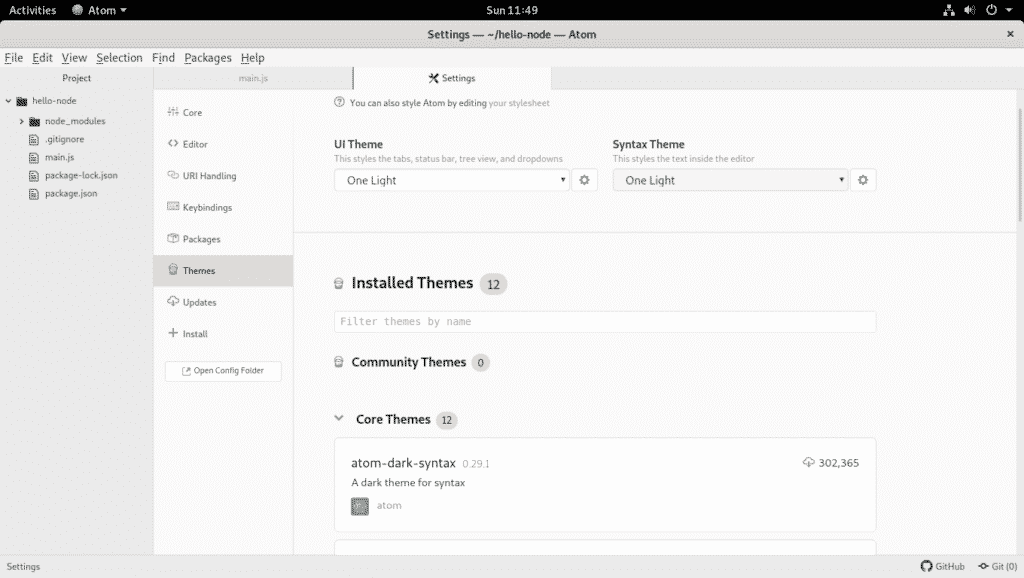
I changed the UI Theme to One Light and Syntax Theme to One Light.
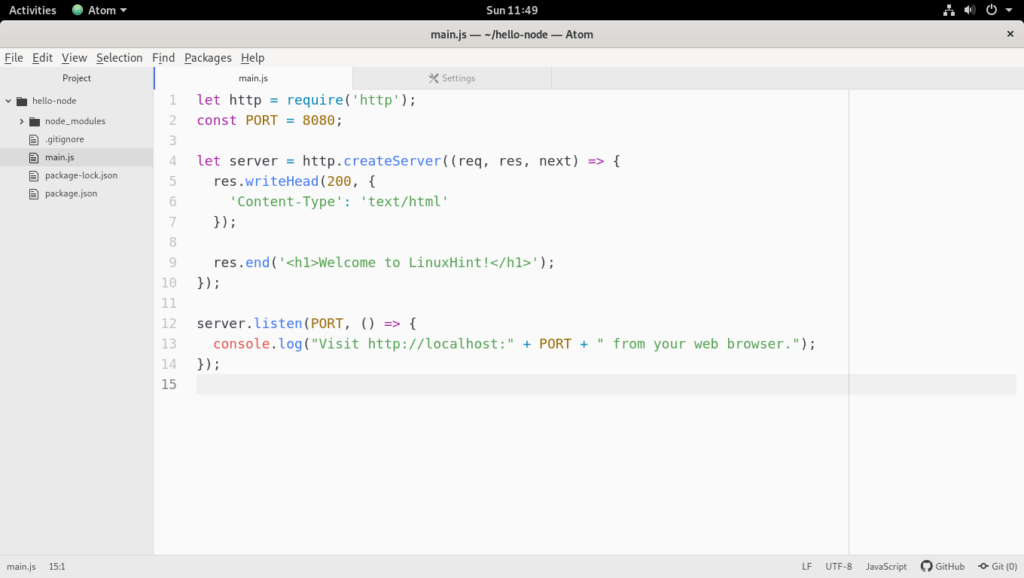
This is how Atom looks after the theme change.
So, that’s how you install Atom text editor on Debian 10. Thanks for reading this article.

