This article shows you how to install Anaconda on your Ubuntu 20.04 system.
Requirements
The requirements for installing Anaconda on Ubuntu 20.04 require that the user log in either as the root user. Access to the terminal or command-line, as well as the details of the latest version of Anaconda, are the basic requirements before installation. You can get the details of the latest version of Anaconda through the web source using the following link:
https://www.anaconda.com/distribution/
Installation Process
The entire process to install an anaconda is composed of 5 fundamental procedural steps.
Step 1: Update APT Package
Step 2: Downloading the Latest Version of Anaconda
Step 3: Verification of Data Integrity
Step 4: Installation of Packages
Step 5: Verification of Installed Anaconda Packages
Step 1: Update APT Package
The first and foremost rule of installing any program on Linux is updating the system packages. Update your existing system packages using the following command:
Next, download curl if it does not already exist on your Ubuntu system. Curl will assist in implementing the commands for the installation of Anaconda. Apply this command to get curl on your system.
Step 2: Download the Latest Version of Anaconda
You can utilize the curl tool in the system command terminal to download the Anaconda installer after switching to the tmp repository.
--output anaconda.sh
Keep in mind that the version 2020.02 that is mentioned in the above command is only compatible with Python 3.7. So, if you are operating the 2.7 version of Python, then use the link mentioned above to find the compatible version of Anaconda with your Python 2.7 version.
Step 3: Verification of Data Integrity
The following command will assist you in verifying the data integrity of your downloaded version of Anaconda.
Now, compare the code displayed on your output screen with the Hash code on the page with the Anaconda version. Both the codes should match, or else you are not using the compatible Anaconda version that is matching with your Python version, and the utility will not function properly in this case.
Step 4: Installation of Packages
To proceed with the installation process, you will be required to run the bash script.
Write other version number if you are using some other version of Anaconda. After successfully implementing the command, a license agreement will appear on your output screen. Press enter and type ‘yes’ to grant permission and continue the process. It is preferable to keep the default location. Once you enter the window, your output screen will show you a description of the finished installation. After agreeing to all the agreements, by pressing the Enter key, you can now activate your installer.
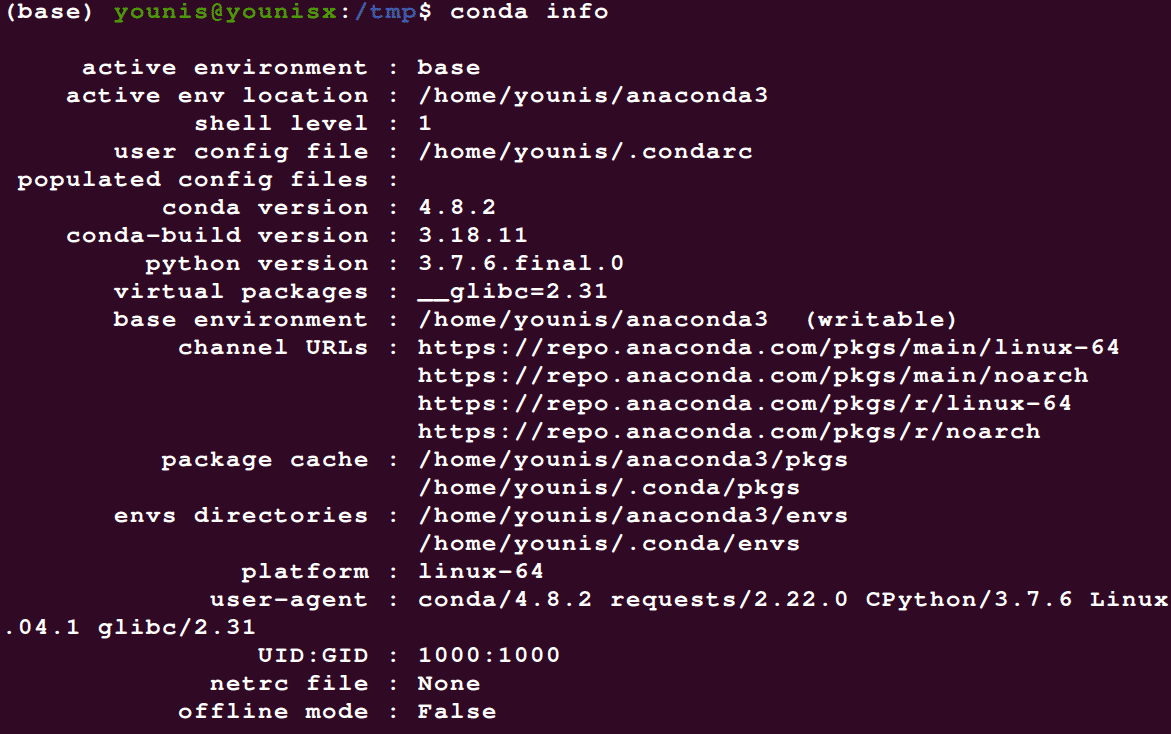
Step 5: Verification of Installed Anaconda Packages
To verify the installation of your package, use the conda command to display the verification information.
The output screen will provide you all the information regarding your installed Anaconda package.
Conclusion
This step-by-step process hopefully eased your Anaconda installation process in Ubuntu 20.04. Remember to make sure that you select the version of Anaconda that is congruous with your Python version. Also, remember the version when giving any command in your terminal system. This will ensure your ability to run Anaconda properly in Ubuntu 20.04.


