Vimix is one such theme that changes the look of your desktop into an aesthetically pleasing, flat design. Vimix themes come with different light and dark variants, so you may customize this theme according to your preferences.
There are two primary methods to get Vimix in Ubuntu and Mint distributions:
- Installing Vimix Using GUI (Ubuntu 20.10/Mint)
- Installing Vimix Using CLI (Ubuntu 20.10/Mint)
The same process can also be followed in Mint distributions.
Method 1: Installing Vimix using GUI (Ubuntu 20.10/Mint)
The first method for installing a Vimix theme is to simply download the theme from an online source, then place it in the .themes folder.
An additional tool, called the Gnome Tweak Tool, is required to set the Vimix theme as your desktop theme. You can get the Gnome Tweak Tool by running the following command:
Now, download the “Vimix” theme from any online source. There are multiple sources for this theme; the first source is found by visiting the following URL:
https://vinceliuice.github.io/theme-vimix.html
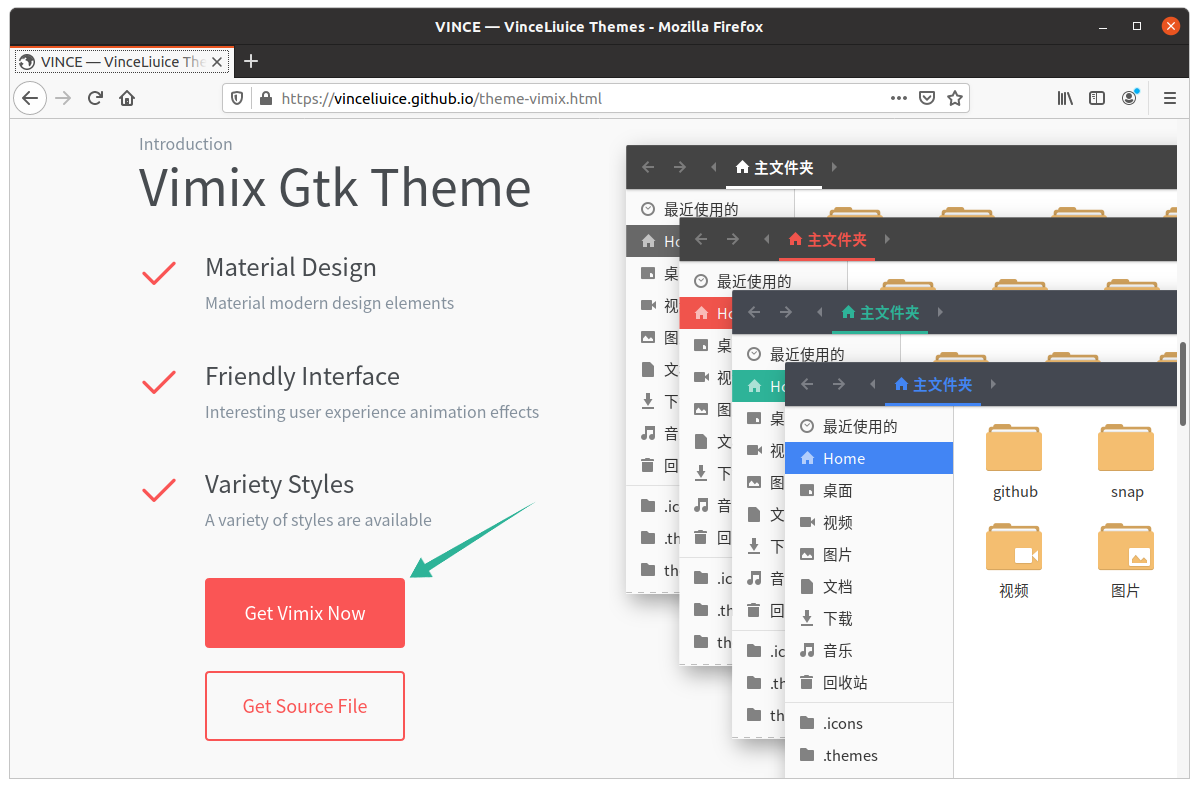
Once you reach the site, scroll to and click the Get Vimix Now button:
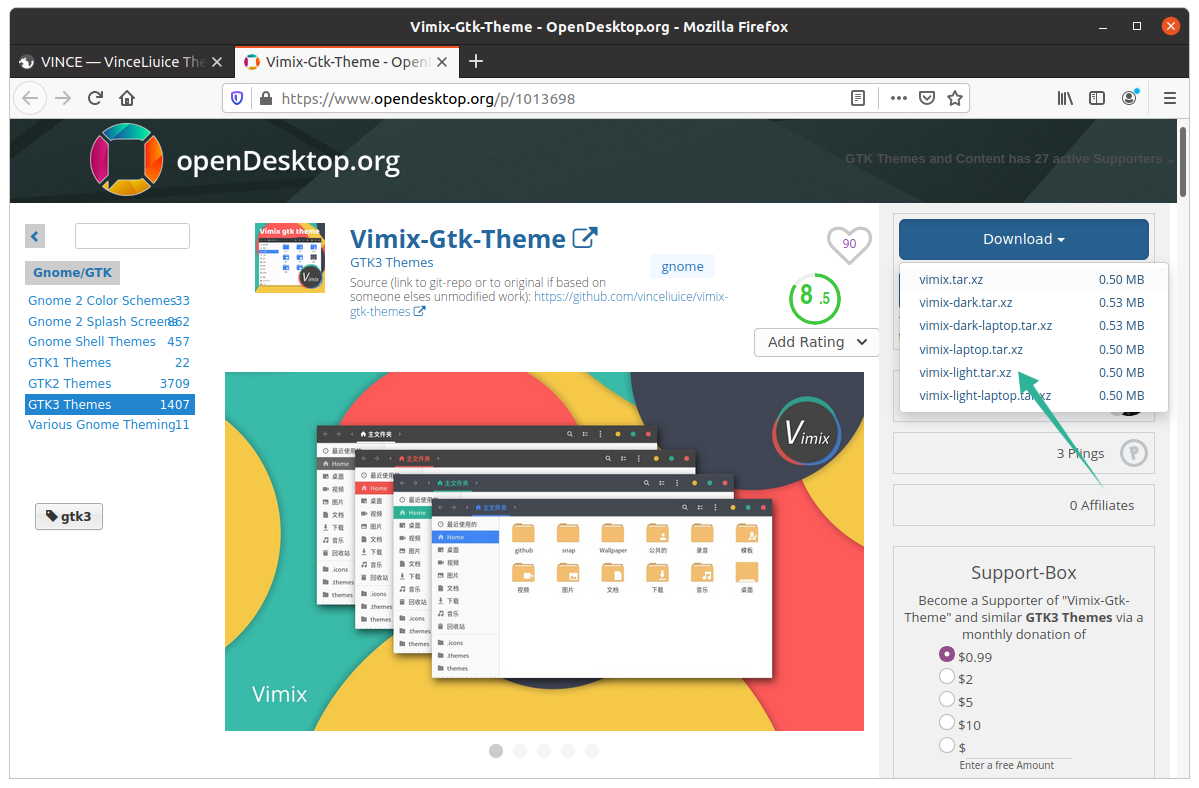
After clicking the button, another site will open in a new window. Click the Download menu button, and select and download the desired theme.
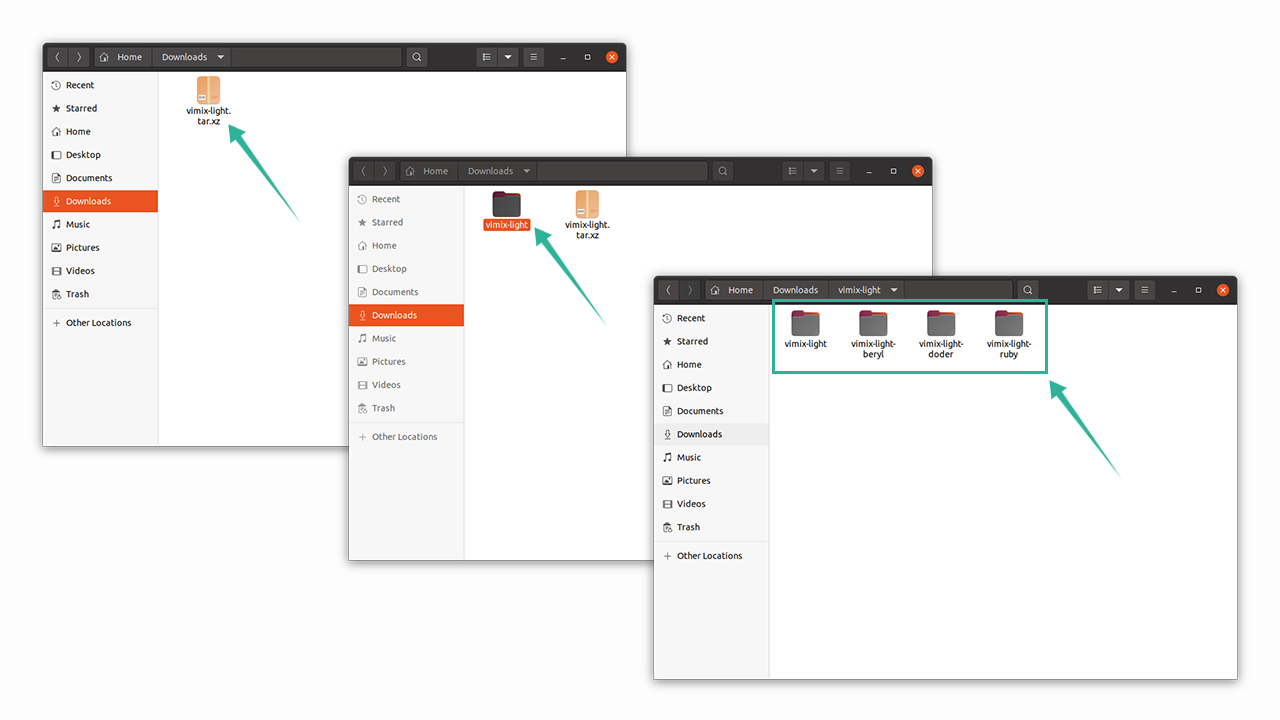
Extract the zipped folder, open it, and you will see that there are multiple theme variants available.
Copy any theme folder that you would like, then open the Home directory and press Ctrl+H to reveal the hidden folders.
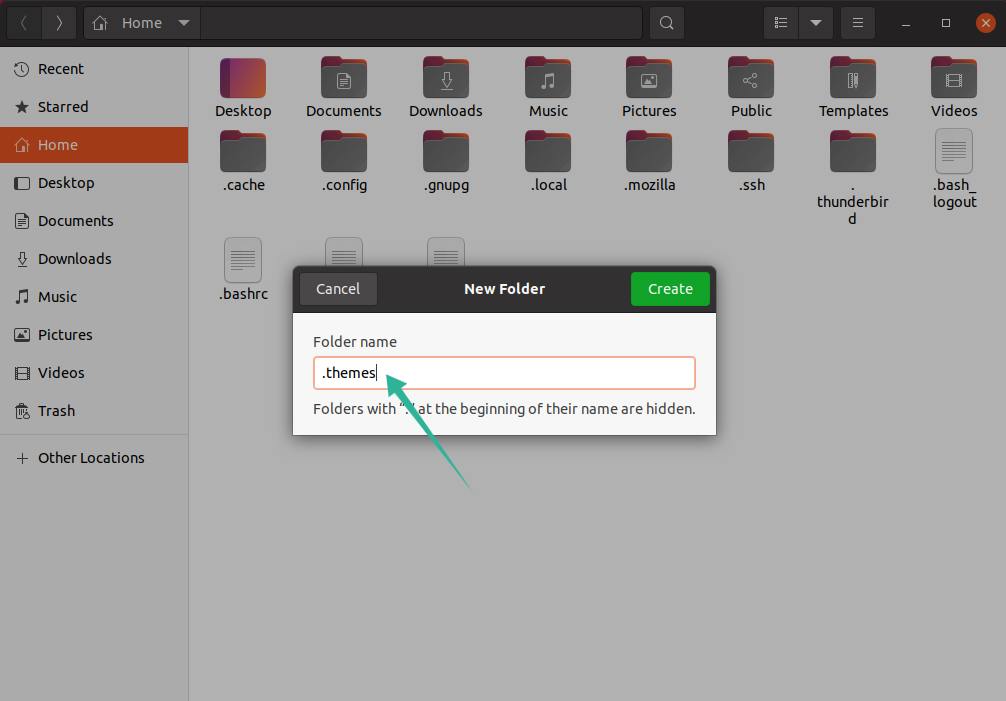
Paste the copied theme variant in the .themes folder. If you cannot find the folder, right-click, and create a new folder by the name of “.themes.”
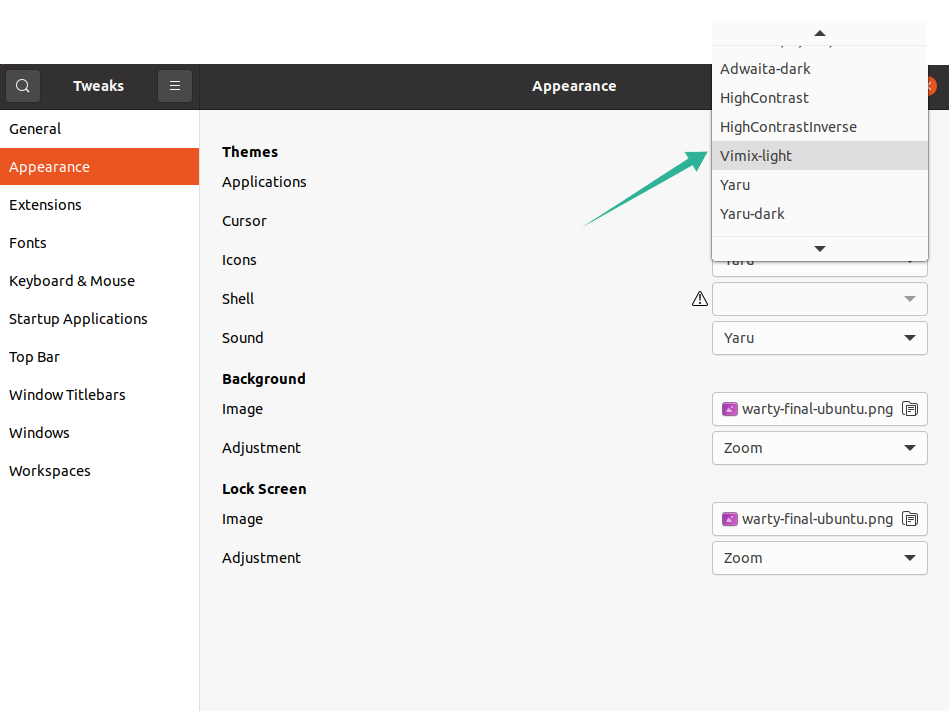
It is now time to open the Gnome Tweak Tool. In the Appearance tab, change the theme under the Applications selection, as shown in the image below:
Method 2: Installing Vimix Using CLI (Ubuntu 20.10/Mint):
The second approach downloads the Vimix theme onto your system using the terminal.
Issue the following command in the terminal:
The tar.gz file can be seen in the Home directory. Issue the following command to extract the tar file:
Now, change the directory to the extracted folder using the following command:
To install the Vimix theme, issue the following command, which will run the installer script:
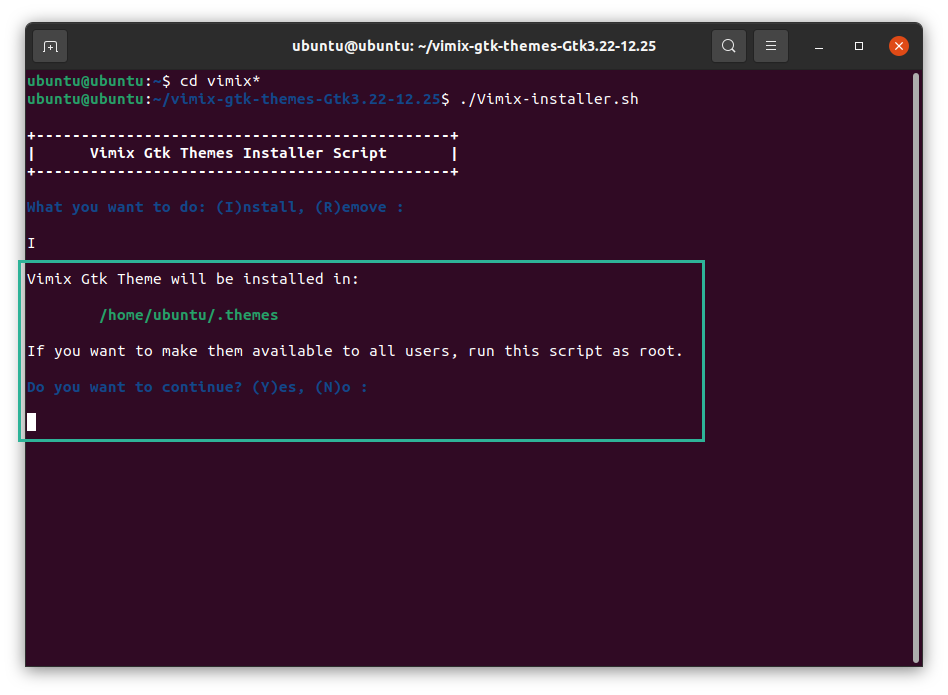
You will receive a prompt asking whether you want to install the Vimix themes or remove them. Type “I” for ”Install’ and “R” for “Remove.”
Another text prompt will appear, showing you the directory for the theme installation. Press “Y” and then “Enter” to continue the process.
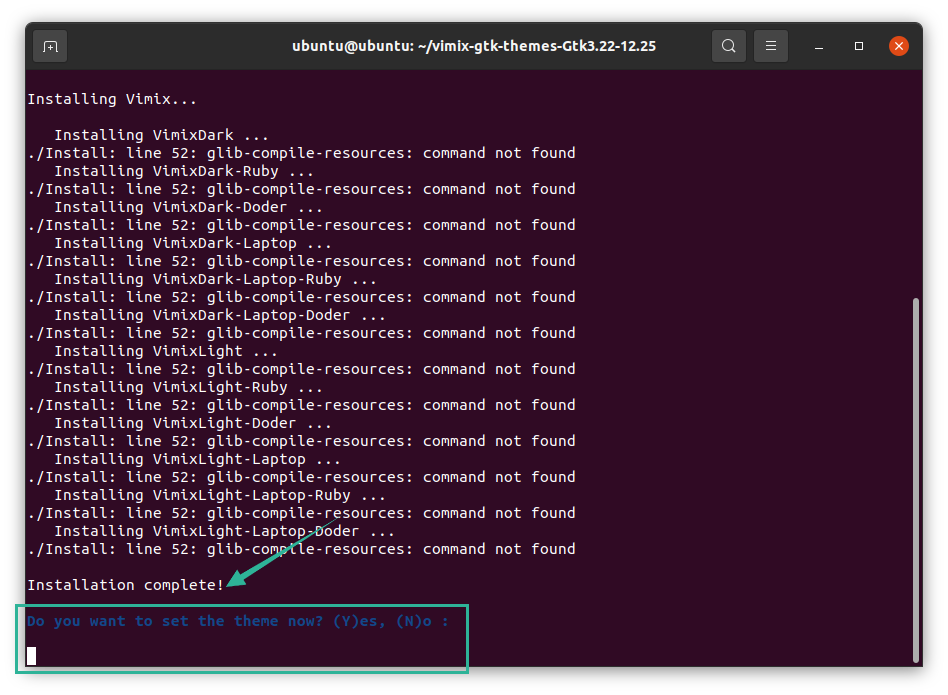
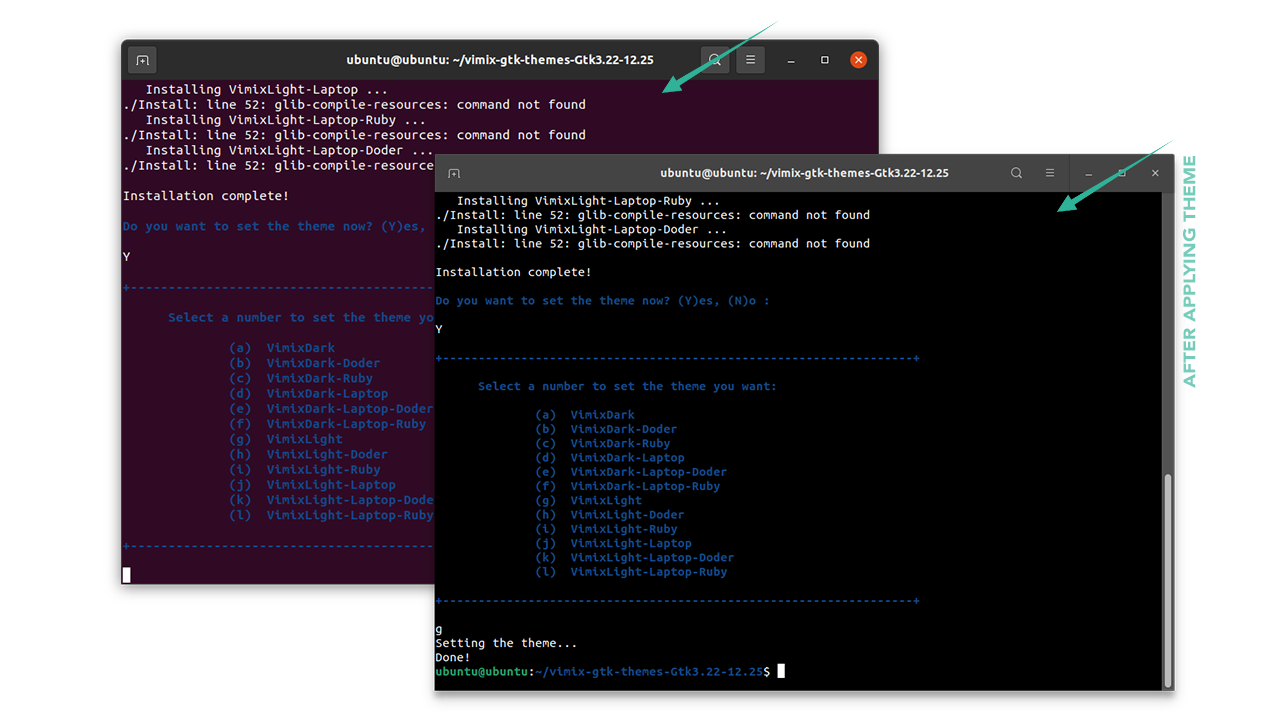
Shortly thereafter, you will be notified with an “Installation Complete” message. It can be set in the terminal if you press “Y,” or you can set it using the Gnome Tweak Tool. See the image below for more details:
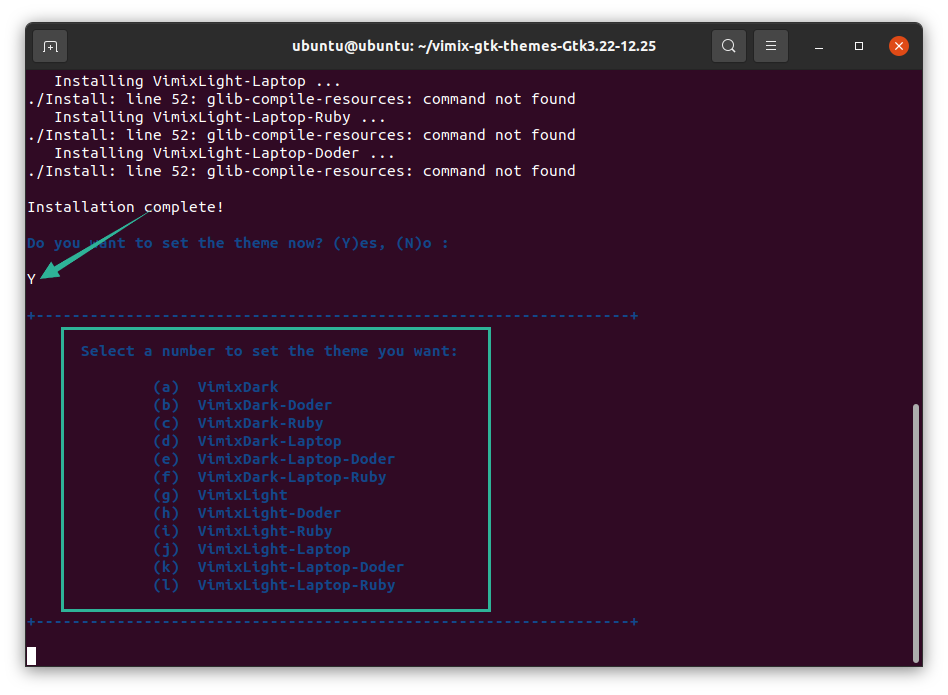
When you press “Y,” all variants will be browsed to choose from. Select whichever theme you would like, and press the “Enter” key.
I picked the “g” theme, and the entire interface of the terminal window has changed. Now, the “Vimix” theme has been set, as shown in the image below:
The theme can also be set using the Gnome Tweak Tool. Open the tool and select the desired theme to customize your desktop:
Uninstalling Vimix Themes
To remove or uninstall the Vimix theme(s) from your Linux device, use the following command:

