X11VNC is an easy and widely used VNC (Virtual Network Computing) remote desktop server program tool. This tool allows remote clients to make connections with the real-time X display i-e physical devices like monitor, keyboard, and mouse. X11VNC server program doesn’t create a new session (X Desktop) to interact with, however, it uses the existing ones.
This article will cover the installation process of X11VNC on the latest version of Ubuntu 22.04 and its setup.
How to install and use X11VNC on Ubuntu 22.04
Installation Process of X11VNC on Ubuntu 22.04
Setup X11VNC on Ubuntu 22.04
Conclusion
How to install and use X11VNC on Ubuntu
Installing the doesn’t take much time however, it requires full attention while configuring its setup. This guide will show the step-by-step procedure to install and configure the X11VNC setup on the latest version, Ubuntu 22.04.3.
Installation Process of X11VNC on Ubuntu
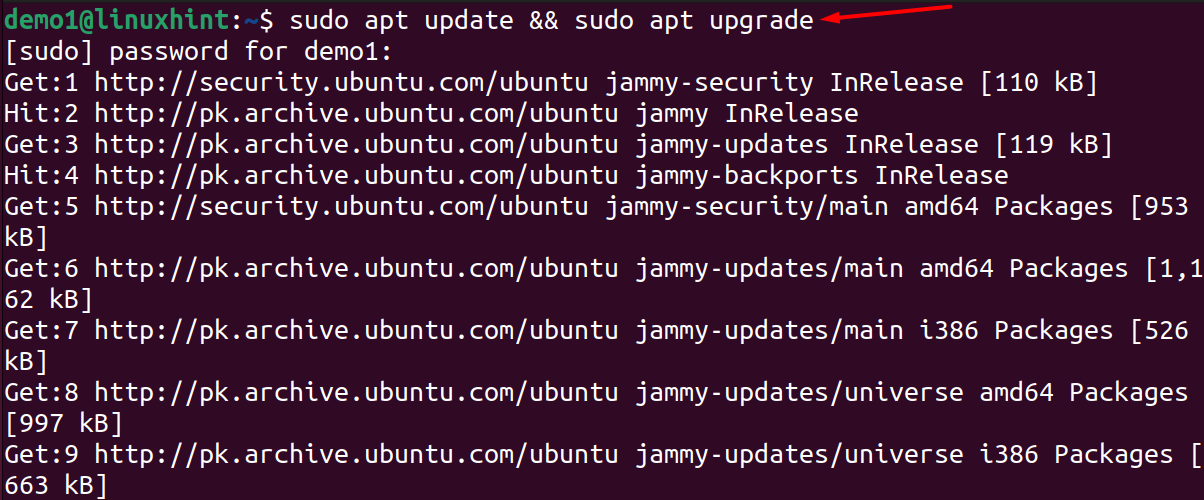
Before starting the installation process, upgrade all of the Ubuntu packages to get the latest version of the required X11VNC.
Step 1: Get the terminal and execute the given apt command to update the packages:
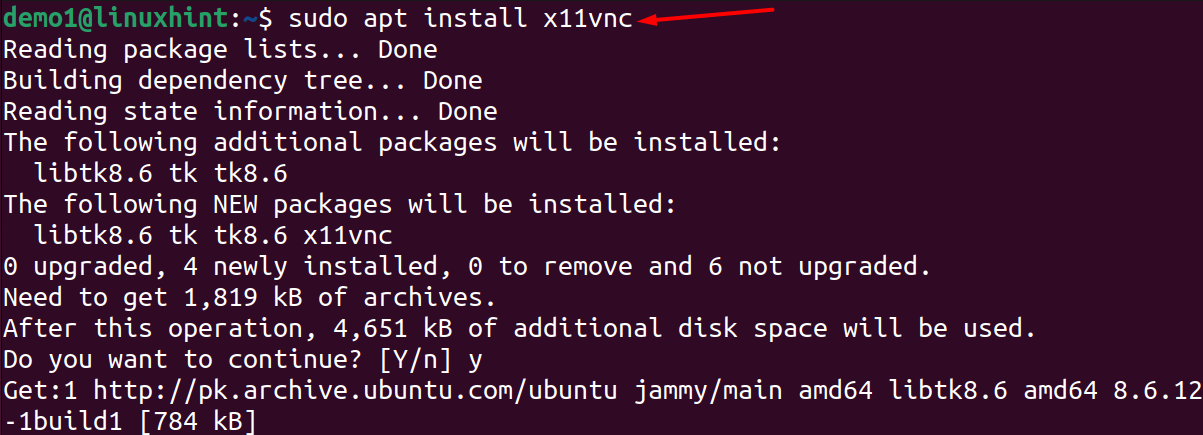
Step 2: After upgrading all the packages, execute the following command to install the X11VNC on the Ubuntu system:
Step 3: Run the mentioned command to check if the X11VNC is successfully installed on the Ubuntu system:

Setup X11VNC on Ubuntu 22.04
So, you have the X11VNC on your Ubuntu system; let’s move towards the configuration process.
Step 1: Set the password for the X11VNC server to prevent it from unauthorized access; you can do so using the given command:

By executing the above command, next, you need to type the password and confirm to save the password in the ~/.vnc/passwd file.
Enter the password first, verify it, and then type y when asked for the password in the .vnc/passwd file.
Step 2: To let the X11VNC server run on your system, the following command would be used:

-usepw parameter asks the server to use the x11vnc credential (password) and -display :0 is used to share the X11 server network. With the help of this command, the server would be ready to make connections among the VNC client’s systems.
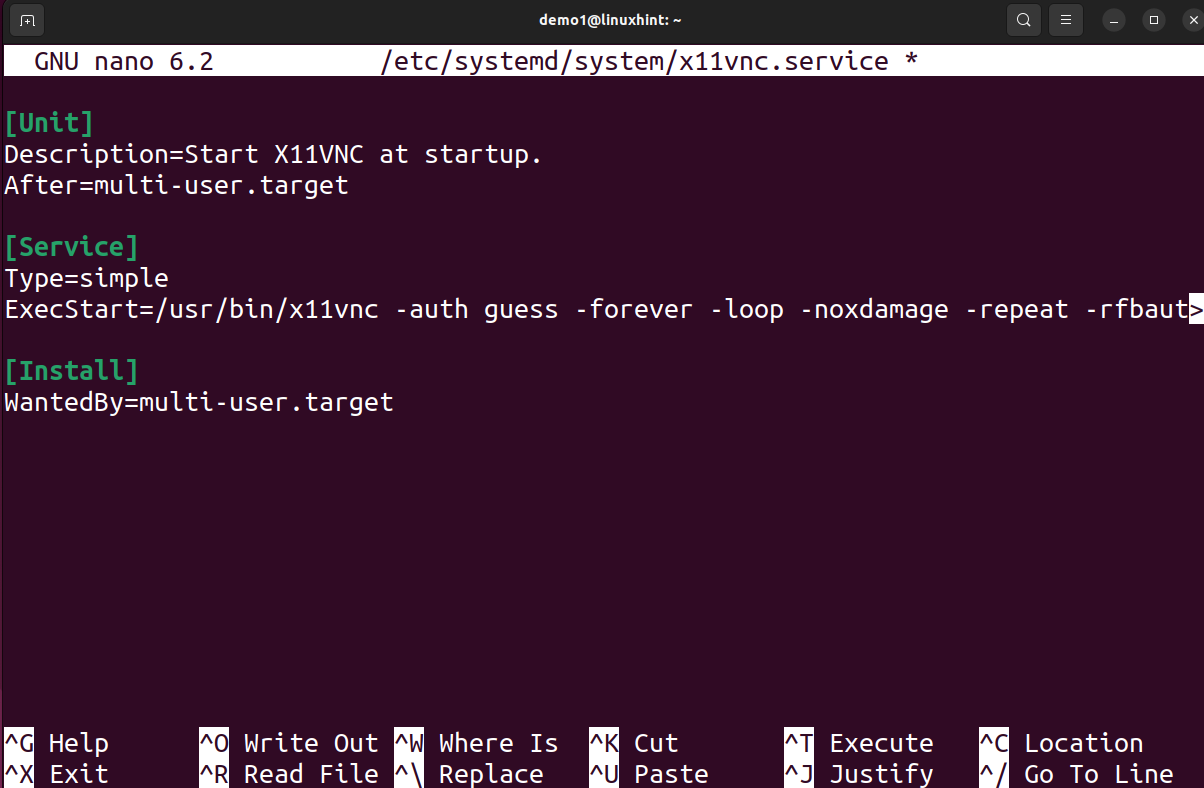
Step 3: Now, create the service configuration file that helps to automatically start the X11VNC server when the system boots up.
Open the nano editor by typing the given command, type the Ubuntu password, and hit Enter:

In the nano editor, copy the following lines carefully
Description-Start X11VNC at startup.
After=multi-user.target
[Service]
Type=Simple
ExecStart=/usr/bin/x11vnc -auth guess -forever -loop -noxdamage -repeat -rfbauth /home/username/.vnc/passwd -rfbport 5900-shared
[Install]
WantedBy=multi-user.target
Save the file by pressing Control + O and then press Enter:
Step 4: Once you have saved the file, run the given command to reload the systemd manager to update changes:

Step 5: In the next step, you’re required to enable the systemd X11VNC service with the help of mentioned command:

Step 6: Start the X11VNC service without rebooting the system with the help of mentioned below command:

To verify the X11VNC status, execute the command given below:
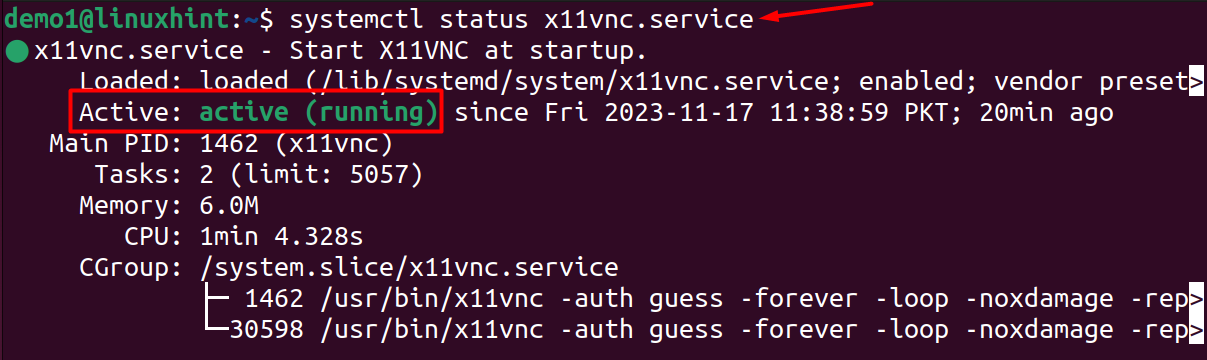
So, the X11NNC server has been configured in your Ubuntu system and it will start automatically whenever you boot up your system.
To share your system for remote screen access, get your IP address using the ifconfig command and share it with the client.
Conclusion
X11VNC server is one of the Virtual Network Computing server programs used to remotely access the real X display (monitor, keyboard, and mouse); users can log in to the remote desktop and control the connected device. This guide has shown the installation process of the X11VNC server on Ubuntu updated machine 22.04 and mentioned the step-by-step process to create an X11VNC setup.