curl is a command-line utility used on Windows, Linux, and Mac OS to transfer and receive data via various protocols, including HTTPS, SMP, FTP, SFTP, alt-svc, CA Extract, HSTS, SSL Certs, and SSL libs compared, and many more. All transfer-related functionality in curl is powered by libcurl, which is a client-side URL transfer library.
The instructions required for the installation of curl on Windows will be illustrated in this blog.
curl Installation on Windows
Follows the below-listed procedure to install curl on Windows.
Step 1: Download curl Installer File
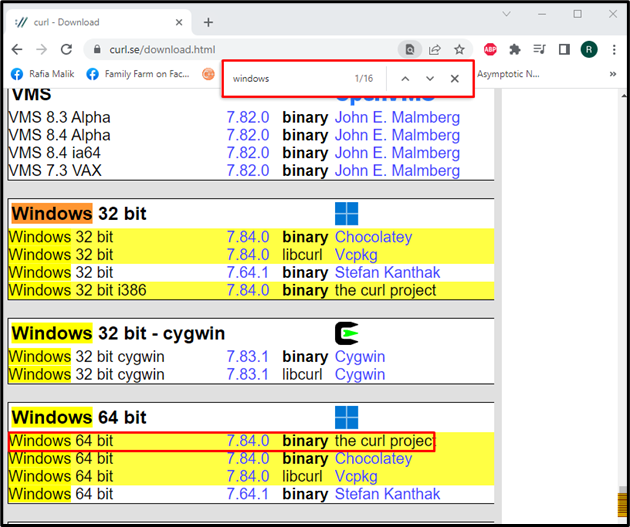
First, download the curl installer file for curl installation by visiting the below-provided link:

Press “CTRL+F” to view the search menu and type out “Windows” as shown in the highlighted bar. Then, download the curl installer file according to your system specifications. For instance, we have selected the “Windows 64 bit” binary setup file:
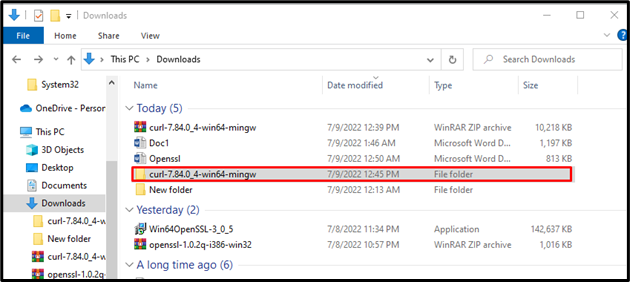
Within a few minutes, the “curl-7.84.0_4-win64-mingw.zip” setup file will be downloaded and saved in the “Downloads” folder:
Step 2: Create a “Curl” Folder
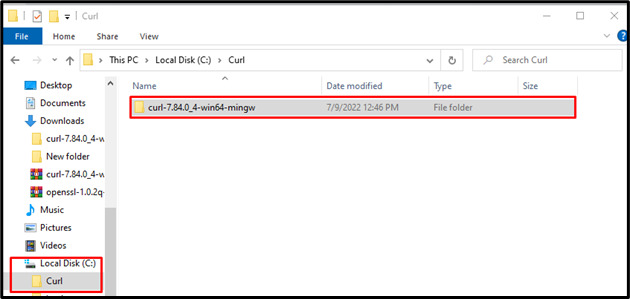
In the next step, create a new folder named “Curl” in the C drive:

Step 3: Paste Setup Folder Into “Curl” Folder
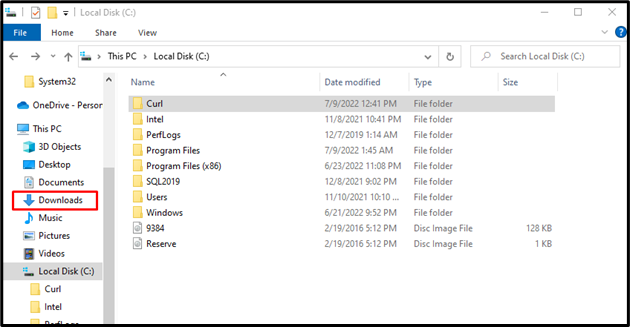
Go to the “Downloads” directory where the curl zipped folder is saved:
Before copying the curl setup folder, extract it first using right-click menu:

Select the extracted folder and press “CTRL+C” to copy it:
Then, move to the newly created “Curl” folder in the C drive, open it, and press “CTRL+V” to paste the copied setup folder:
Step 4: Find and Copy curl Setup Path
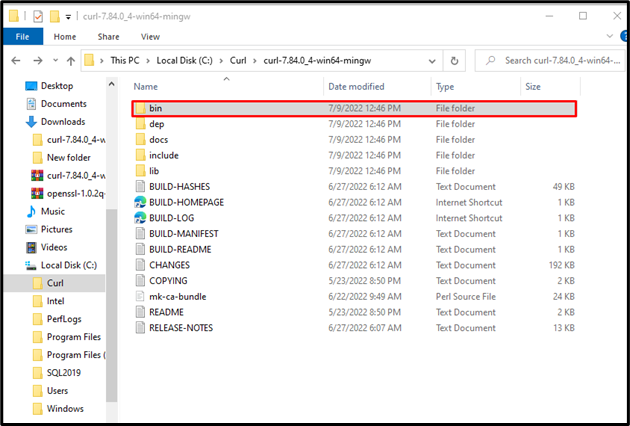
Open the curl setup folder and go to the “bin” folder to find the curl.exe file:
After finding the required curl.exe file, right-click on the folder path for copying it:

Step 5: Set Path in Environment Variables
After copying the curl setup file path, go to the “Startup” menu, search for “Environment Variables”, and open it from displayed results:

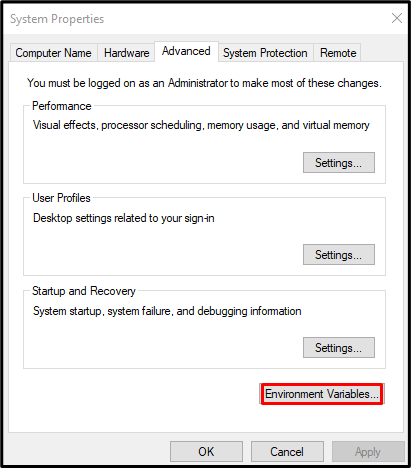
Upon doing so, the “System Properties” window will appear. Click on the “Environment Variables” button:
Select the “Path” from the “System variables” section and click on the “Edit” button:
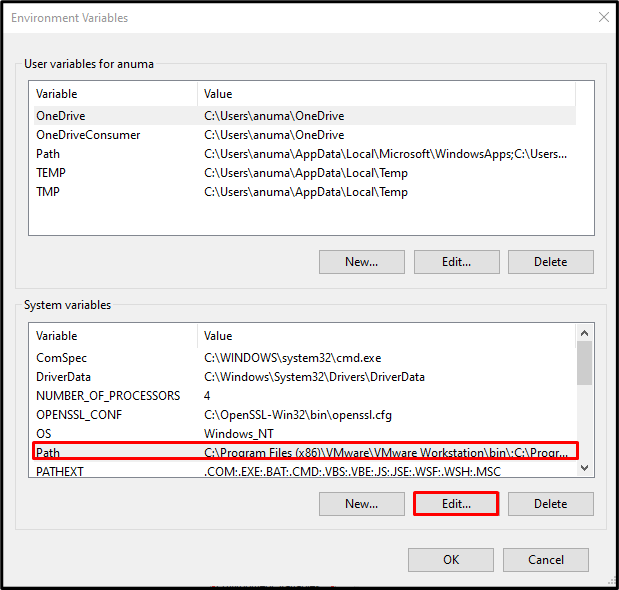
After that, click on the “New” button and paste the copied curl setup file path as shown in below highlighted output. Then, click on the “OK” button:
At this point, we have successfully installed and configured curl on our Windows system. Let’s verify curl installation by checking its version.
Step 6: Verify curl Installation
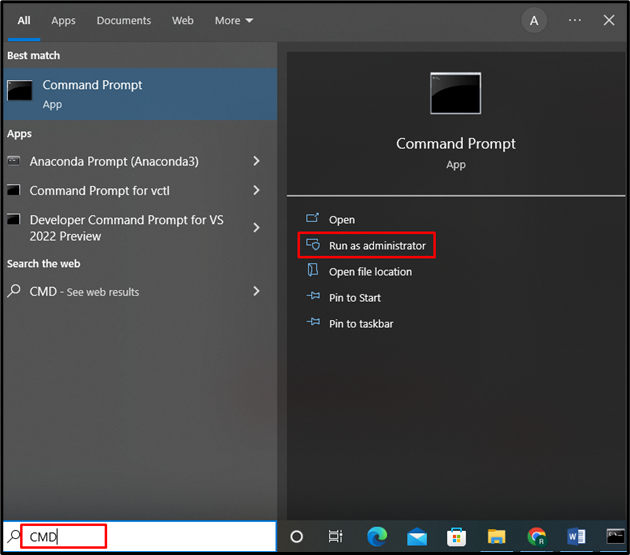
First, open up the command prompt using the “Startup” menu:
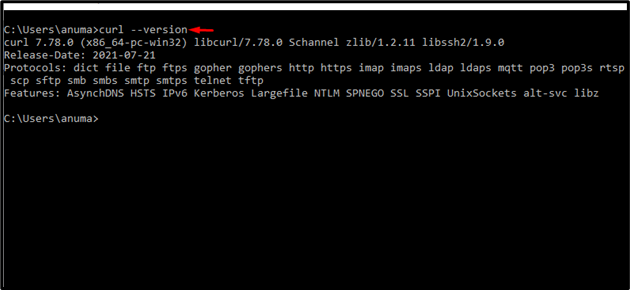
Type the below-provided command in the opened window to verify curl’s version:
As you can see, we have successfully installed curl version “7.78.0” on Windows.
curl Usage on Windows
On Windows, to use curl, check out the below-listed examples.
Example 1: Get URL Homepage
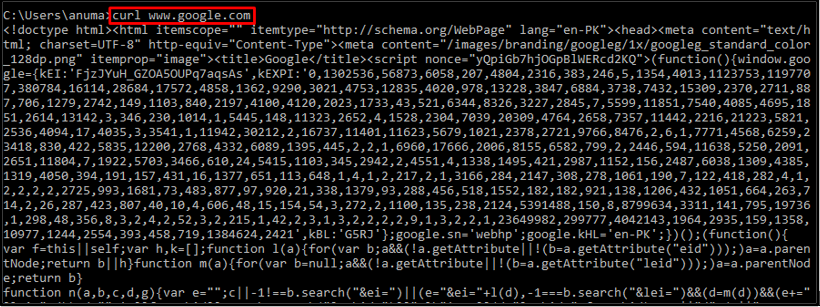
You can use the curl command along with the URL to get and print the Homepage of any website. For instance, the following curl command will get Google homepage:
Example 2: Get Header Information
To get the header information of any website, use the curl command with the “-i” option and provide the URL:
The given output displayed the header information of the Google website:
Example 3: Download Setup File
Want to download a setup file? Utilize the curl command and specify the URL of the required file:
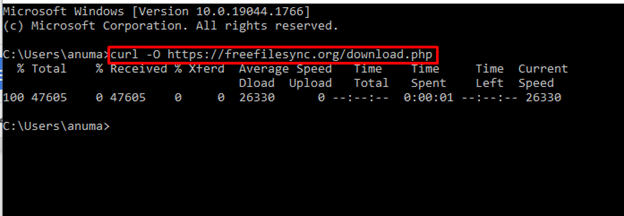
Example 4: Get Help
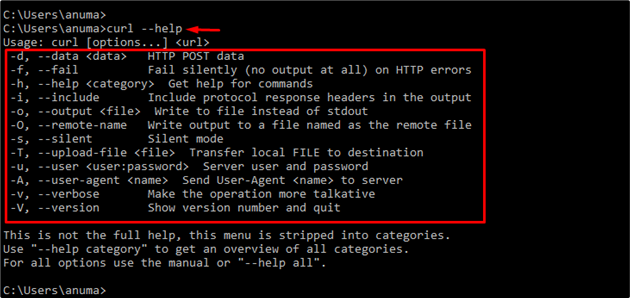
When a curl command is executed with the “–help” option, it prints out its manual on the command prompt:
We have demonstrated the methods to install and use curl on Windows.
Conclusion
To install the curl command-line utility on Windows, first, download the installer setup file. After that, make a new directory curl in the “C” drive and paste the setup into the newly created curl folder. Then, find and copy the setup path and set it in the Environment variables as discussed earlier. This blog has effectively elaborated the method to install and use curl on Windows.

