Getting started: Installing ADB, Fastboot, and getting your Android device ready
Before starting, you need to enable your phone Developer Options submenu. I have a Redmi 9 cell phone, but the steps are similar in most Android devices.
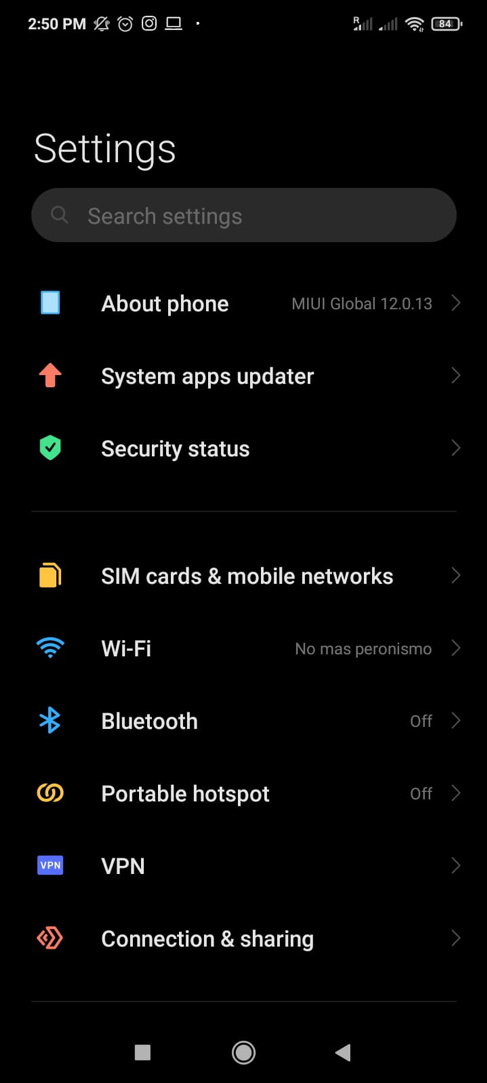
To start, on your phone, tap Settings and select About Phone; in the screenshot below, it is the first option; some Android devices have this option at the bottom of the Settings menu.
Tap MIUI Version several times until you see Developer Options are enabled.

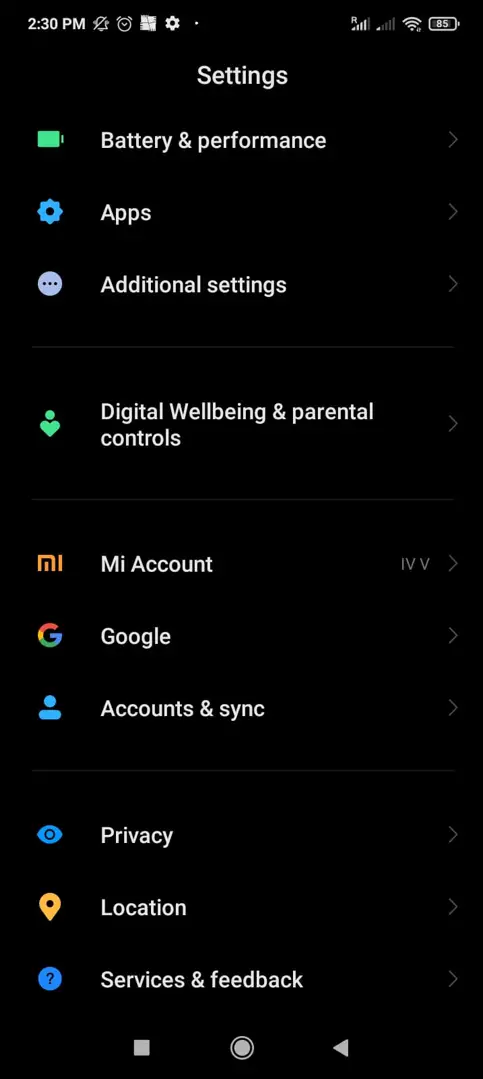
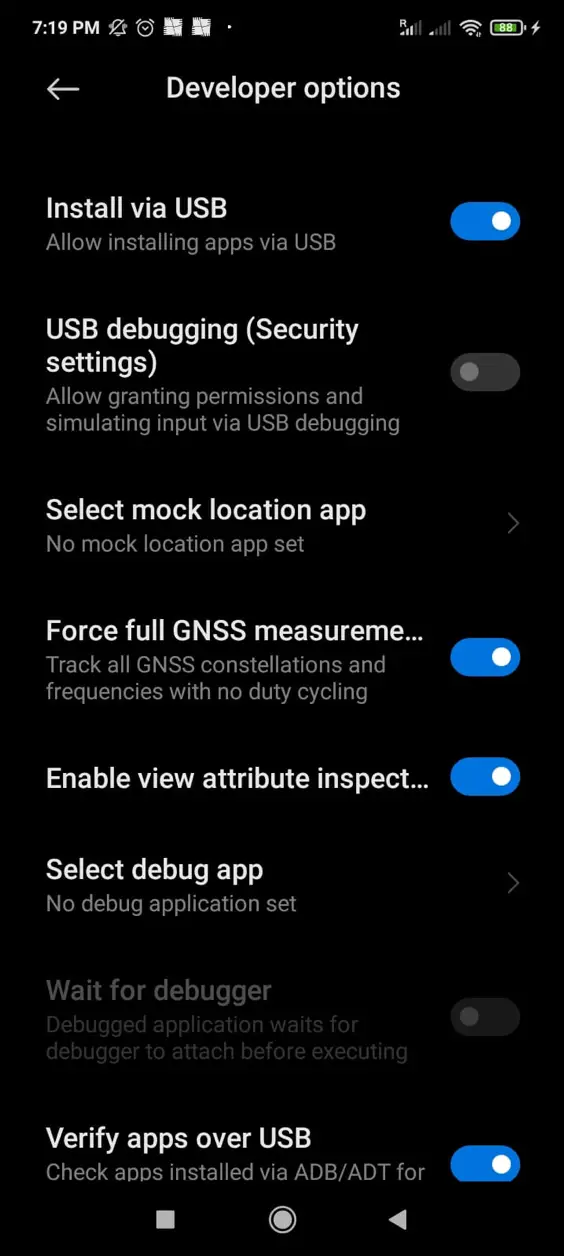
Go back to the Settings menu, scroll down to find, and tap Additional Settings.
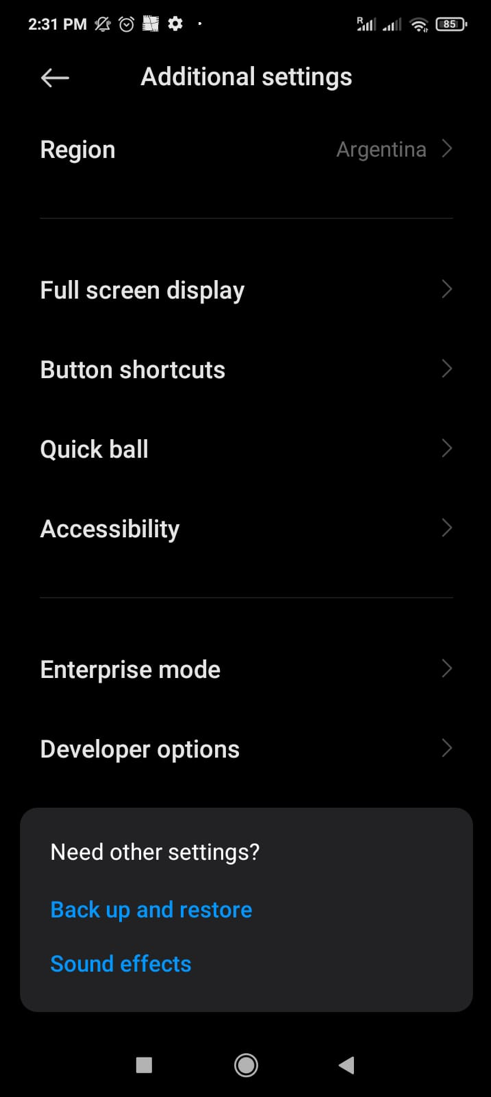
Would you please scroll down to find Developer options and tap it?
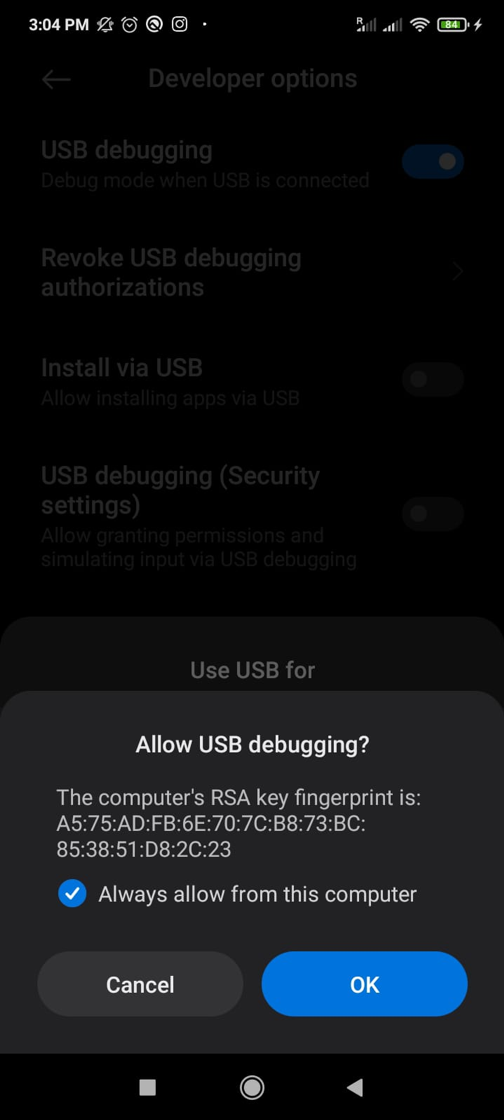
Enable USB Debugging as shown in the following screenshot.

Tap the confirmation box “I’m aware of possible risks, and assume all possible consequences voluntarily” and press OK.

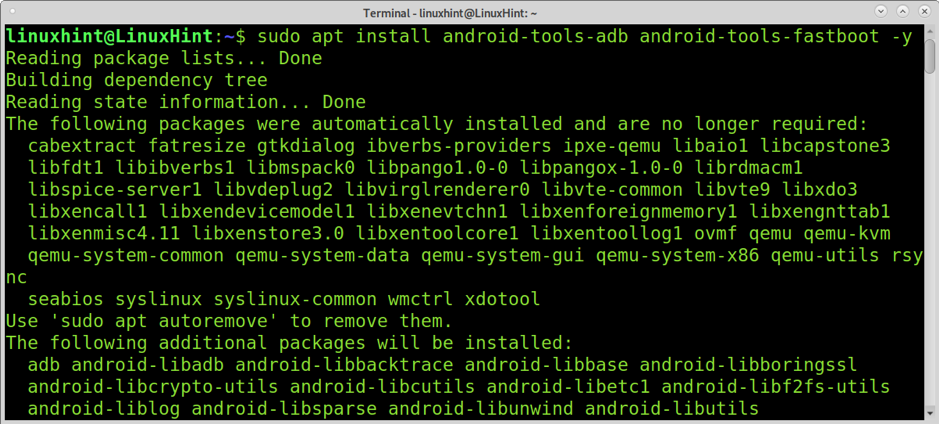
Now you can install ADB and Fastboot from your Ubuntu computer.
First, install Android Debug Bridge and Fastboot using the apt command as shown in the screenshot below.
To start the ADB server, run the following command.

Your phone device allows USB debugging when requested by tapping OK, as shown in the image below. In some cases, this prompt on the mobile appeared in the next step.
To see if your device was properly detected, you can run the following command.
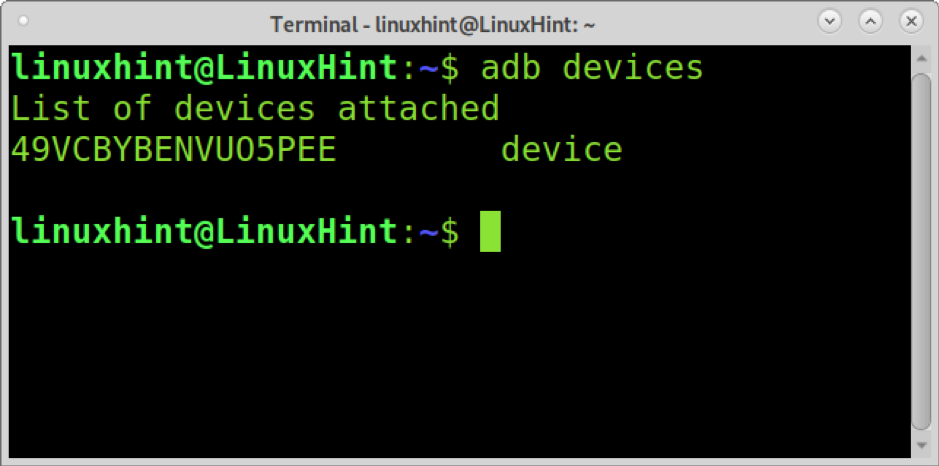
As you can see, the device was detected properly.
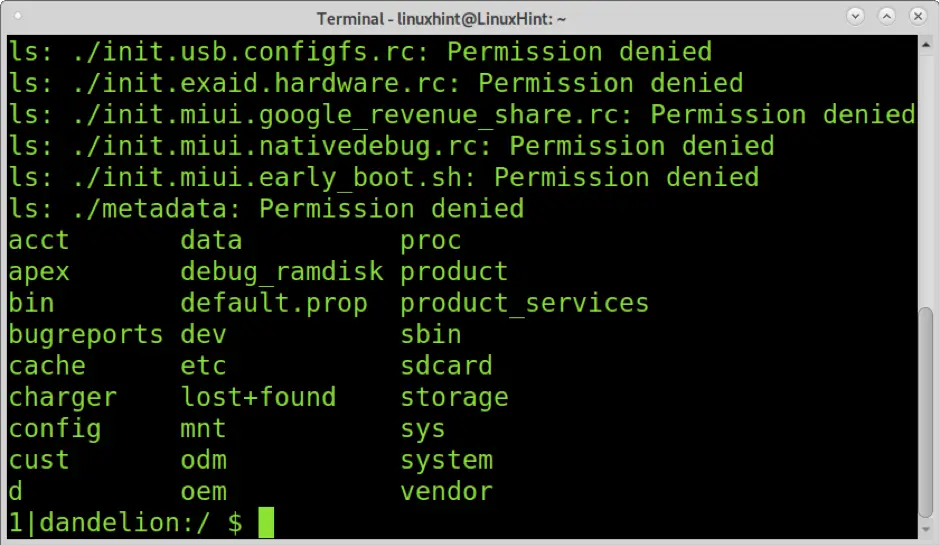
You can open a shell on your Android device by running the command below.

As you can see, the pwd command shows I’m in the system root directory. The ls command will list all files and directories inside. You can browse all directories using the same Linux syntax.
Transferring files from computer to mobile
The following command shows how to send files from your computer to your mobile device. To do it, you need to run adb with the push option followed by the file you want to copy to your phone and your phone’s path where the file will be stored.
The command below is used to copy the img.jpg file to /storage/sdcard0/Pictures/. You can learn file and directory paths by browsing the shell as explained previously (adb shell).

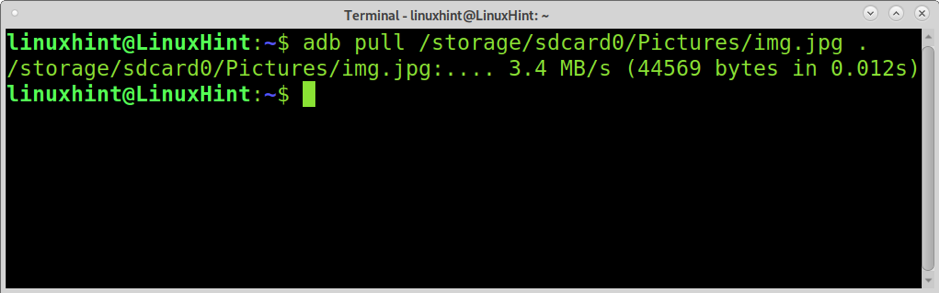
Transferring files from mobile to computer
You also can copy files from your mobile device by using the pull option as shown in the example below, in which the file img.jpg is copied into the computer’s current directory (.).
Installing APK packages
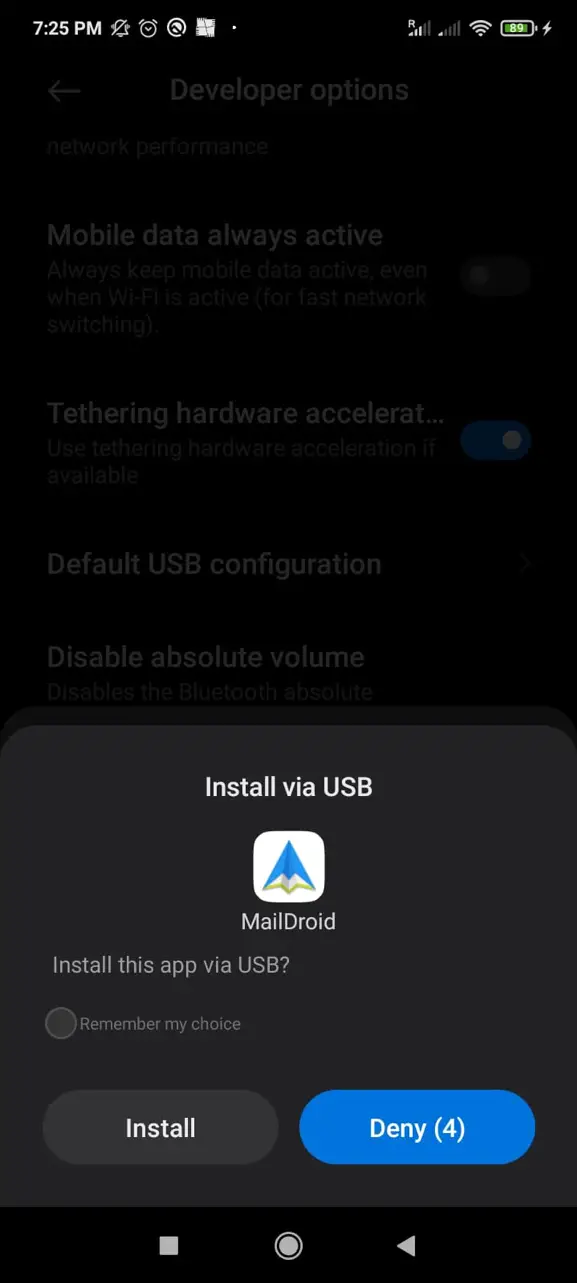
Adb also allows you to install applications on your mobile device. To do it, you need to enable the Install via USB located in the Developer Options submenu in your phone Settings, as shown in the image below.
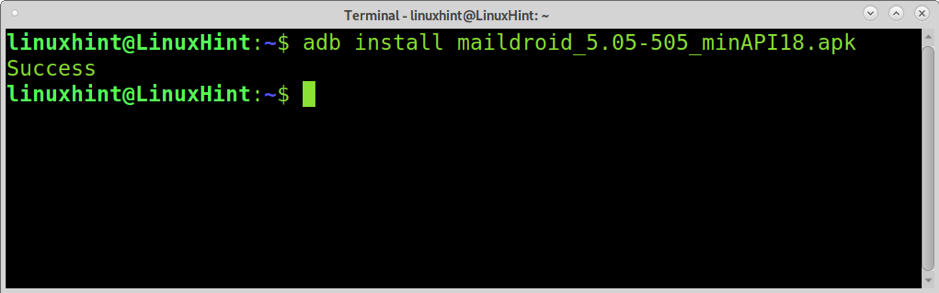
Once the Install via USB option was enabled, you can install any apk supported package by adding the install option followed by the apk package as shown below.
Your phone will request your confirmation, as shown in the screenshot below; tap Install to get the application installed.
If the application were properly installed, you would see the “Success” message shown in the following screenshot.
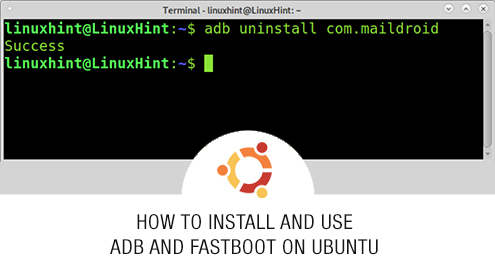
Uninstalling APK packages
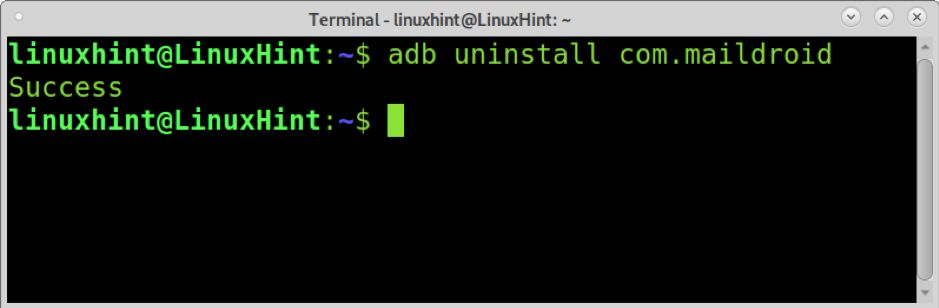
You also can uninstall applications from your mobile device using your computer. Instead of using the install option explained previously, you need to use the uninstall option.
Before uninstalling a package, you need to see its name; you can do it by opening a shell on your Android device and running the command of the example below (replace maildroid with the app name you want to find).
pm list packages | grep maildroid
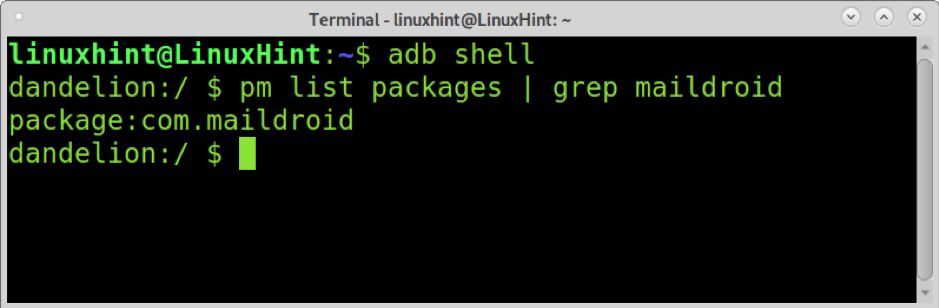
As you can see, the package name is com.maildroid. To remove it, run:
Additional commands
The following command can be used to change your phone resolution.
The command below allows you to edit your mobile’s dpi (dots density or Dots per inch).
Stock recovery doesn’t support flashing custom ROMs. The Fastboot command below can be used to install a custom recovery such as CWM or TWRP.
The command below allows you to fully wipe your mobile to install a custom ROM.
Conclusion
Both Adb and Fastboot allow users to operate their Android devices from the computer. Learning to use these applications is mandatory for anyone dealing with mobile devices. It is important to highlight that the applications explained in this tutorial are multi-platform, including Linux, MacOS, and Windows.
I hope this tutorial on Adb and Fastboot was useful. Keep following Linux Hint for more Linux tips and tutorials.