Therefore, if you wish to learn the installation procedure of Ubuntu 22.04 on VirtualBox then read the article till the end.
How to Install Ubuntu 22.04 on VirtualBox
Installing Ubuntu 22.04 on VirtualBox requires some steps which have been summed up in the following guide along with demonstrations by means of screenshots.
Step 1: Download ISO
The foremost requirement of installing Ubuntu 22.04 is to have an ISO file. For the purpose of downloading this file visit the official Ubuntu 22.04 LTS (Jammy Jellyfish) Daily Build page.
Each of the highlighted ISO files indicates the type of computer systems they are built for. Download the type that fits your computer.
Step 2: Install VirtualBox
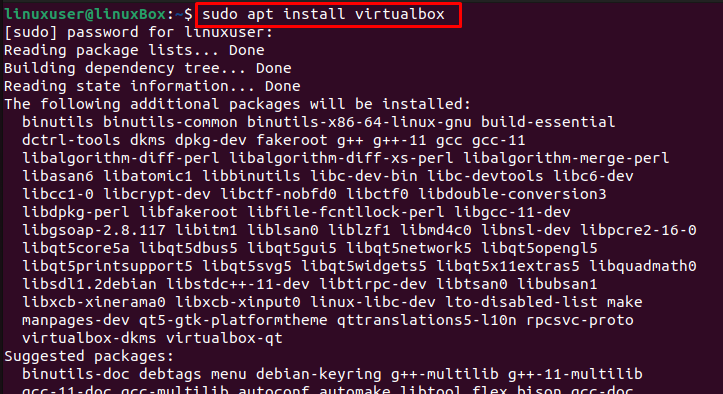
Another basic requirement for installing Ubuntu 22.04 on an existing operating system is to have a VirtualBox. Windows users can visit the official web page and download the setup from there, whereas Linux users have to use the following command to install VirtualBox on their system.
Step 3: Generate Virtual Machine
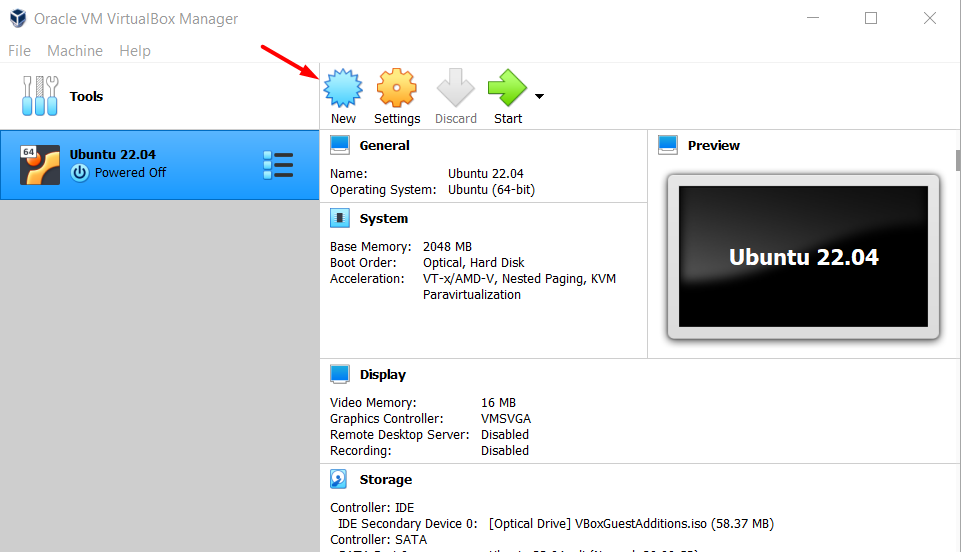
Now run the application. When you do that you would require to create a virtual machine.
1. Click on the ‘New’ button to generate a new virtual machine.
2. Write your machine name and set its type and version as indicated in the screenshot.
3. Set the RAM for the VM. You choose the RAM of your choice but for the machine to work in a better way we recommend assigning RAM of 4GB.
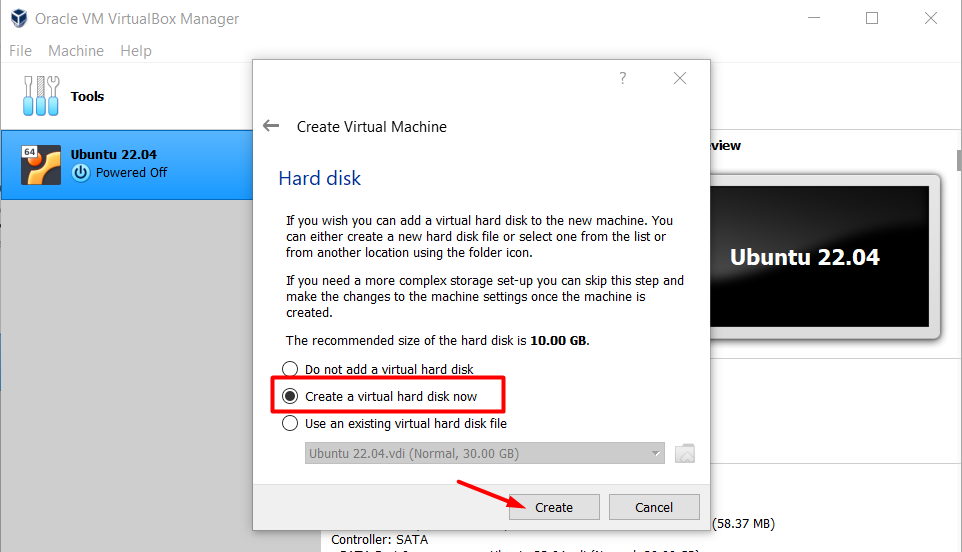
4. Now select the second option and click create.
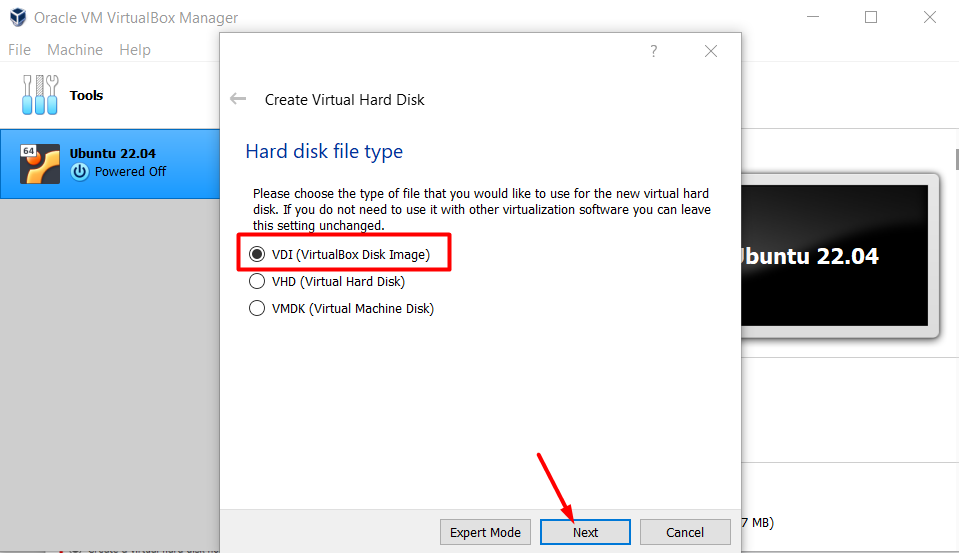
5. Select the by default option which is VDI, however if you wish to utilize Virtual Hard Disk then you can choose VHD option.
6. Now choose the ‘Dynamically allocated’ option which makes the hard disk to take up only the required amount of space.
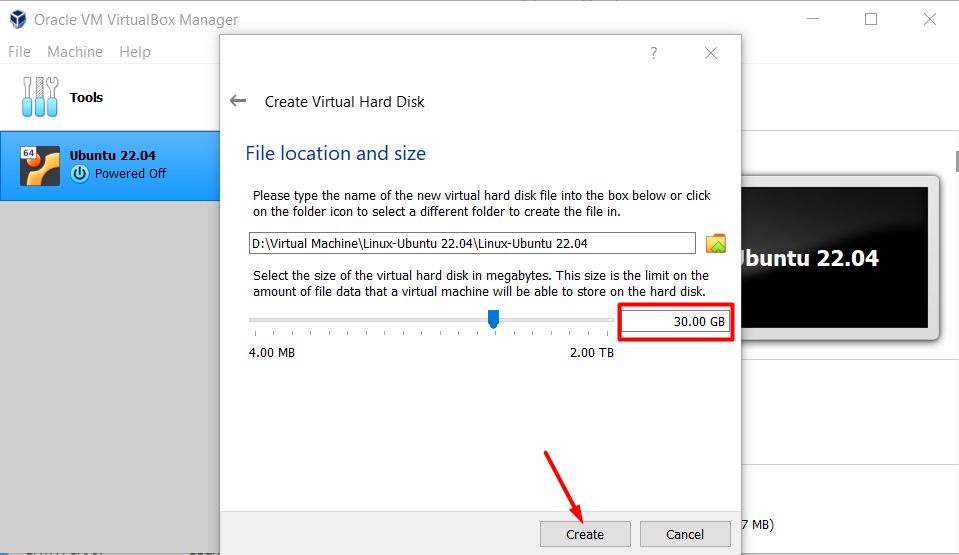
7. Now allocate space according to your requirements(e.g. 30GB) and create the virtual machine.
Step 4: Get the machine started
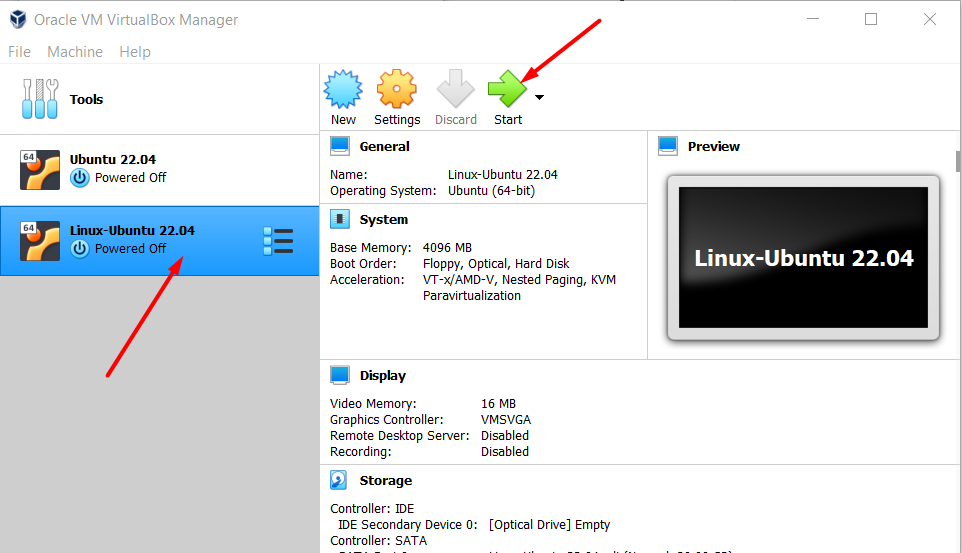
After performing the above steps your machine will be created and will appear on the sidebar menu. Now select that particular machine and press start.
Step 5: Include ISO in VirtualBox
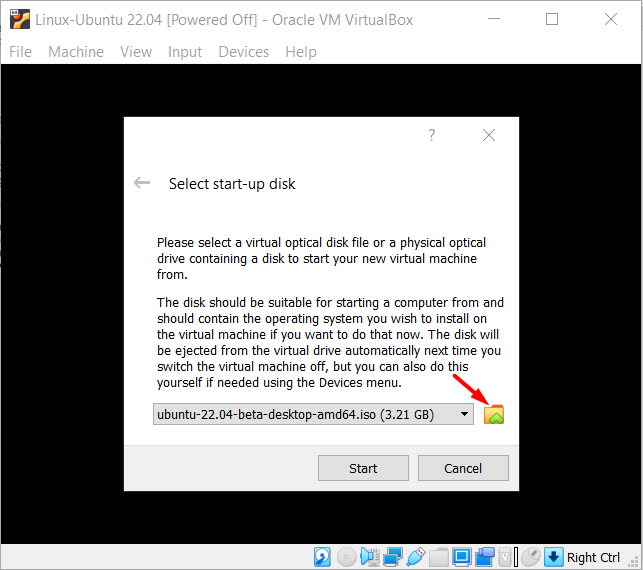
In order to boot the machine include the downloaded ISO file that will act as a startup disk.
A pop up will appear when you click the folder option. Now first click on the add button as indicated in the screenshot.
A window will open up and from there select the downloaded file.
Now finally select the ‘choose’ option.
Once the file is added, press the start button.
Step 6: Grub Menu
Once the machine is started, you will see the Grub menu, from there select the ‘Ubuntu’ option by pressing “Enter” to boot the machine.
Step 7: Install Ubuntu
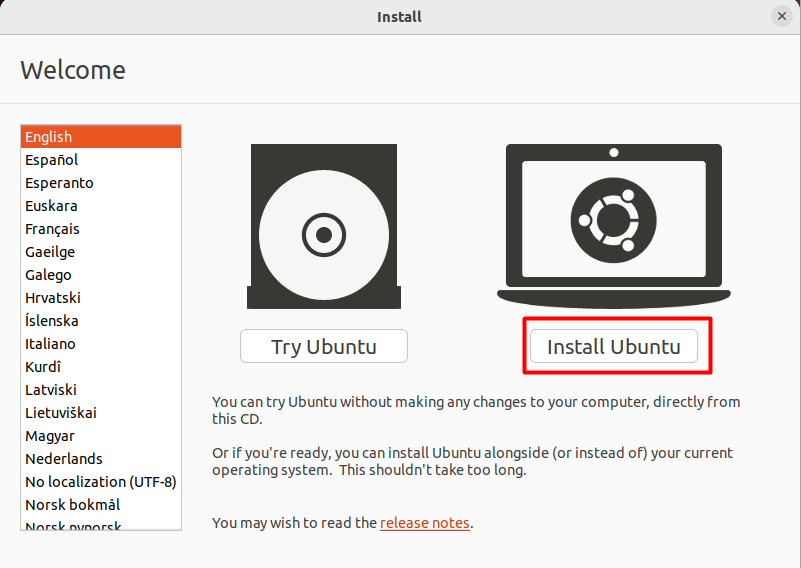
To install Ubuntu select the ‘Install Ubuntu’ option, whereas, if you just want to experience Ubuntu in a live environment then go for the ‘Try Ubuntu’ option.
Select the language you prefer. For instance, here we have selected the ‘English(US)’ option. Once the language is selected press the ‘continue’ option.
Step 8: Installation Options
Now when you come to this step you either have to select the ‘Normal Installation’ option or the ‘Minimal Installation’ option depending upon your requirements. Moreover, if you are a GPU user then also select the last option.
Step 9: Erase disk
For this step choose “Erase Disk and install Ubuntu” option(Don’t worry, it won’t delete any of your guest operating system’s data).
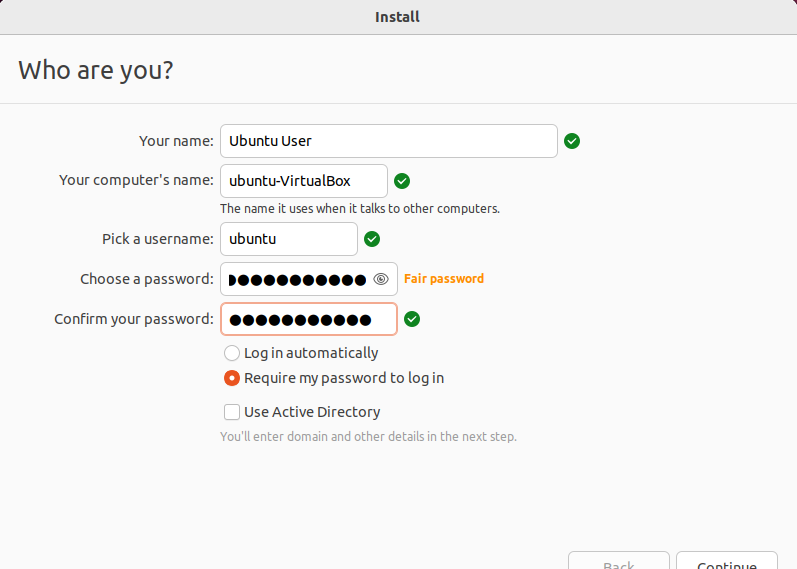
Step 10: Set User Account
Now set up your account.
Once you continue, the system will start to install Ubuntu 22.04 and finish in a while and you will be asked to restart your system.
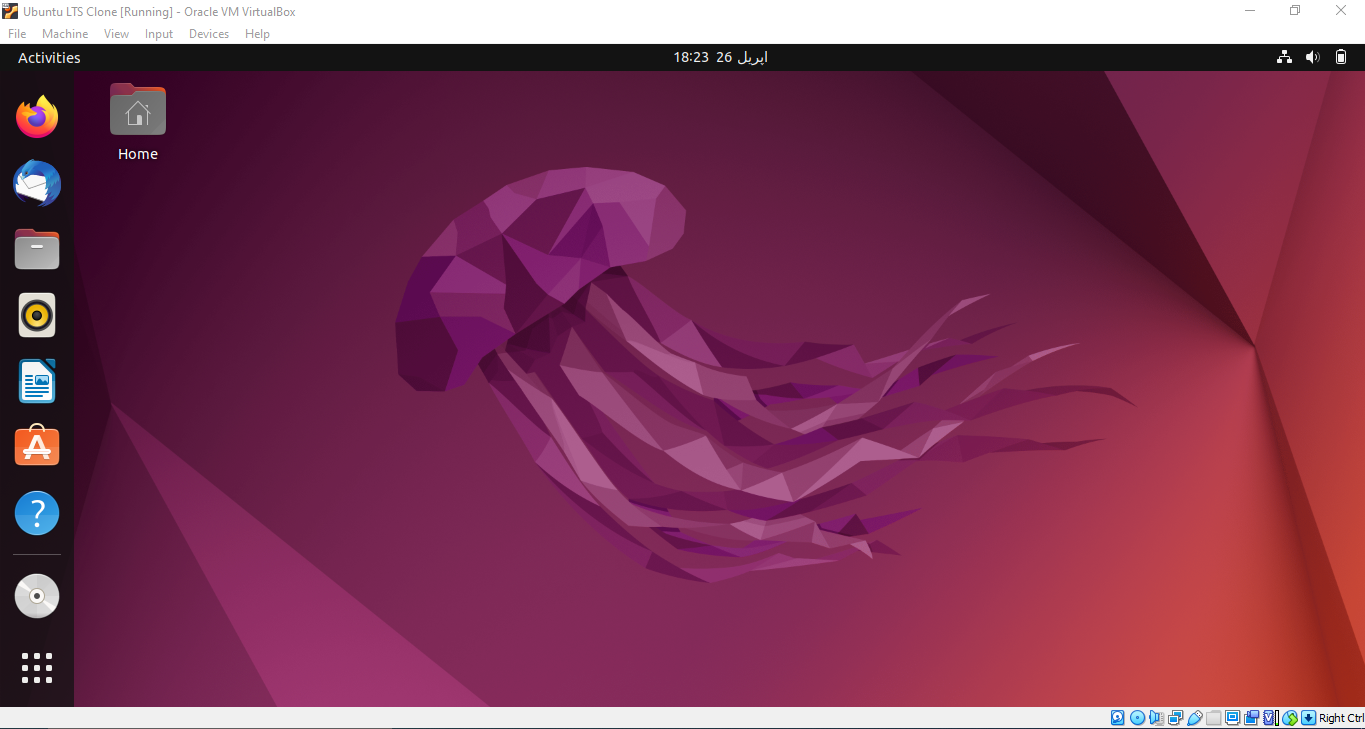
After successful restart of the system, you wil have the fresh new look of the Ubuntu 22.04 on your Virtual Box.
Following these steps, you can successfully install Ubuntu 22.04 on your VirtualBox.
Conclusion
Installing Ubuntu 22.04 on VirtualBox requires downloading the ISO file and creating a virtual machine on the VirtualBox. Once done you are now supposed to start the machine and include the downloaded ISO file in it. After this, you need to install Ubuntu and set up various installation options. Lastly, install the guest additions using certain commands and you are good to go.


