TeamViewer is a tool that allows you to access any device remotely, whether it is a desktop, laptop, or cellphone device. TeamViewer allows you to control, manage, and modify the files of devices that are not physically around you. This tool can even help you to connect with servers and IoT devices from anywhere over a secure network.
TeamViewer is a multi-platform tool that can be installed on Linux distributions. This article shows you how to install TeamViewer on your Ubuntu device.
Installing TeamViewer in Ubuntu 20.10
Installing TeamViewer in Ubuntu 20.10 is a trouble-free process. First, it is required to have the Debian package installer to install TeamViewer. Gdebi is the most endorsed Debian package installer application available today, and it is a lightweight and resource-effective installer. To download Gdebi, issue the following command:
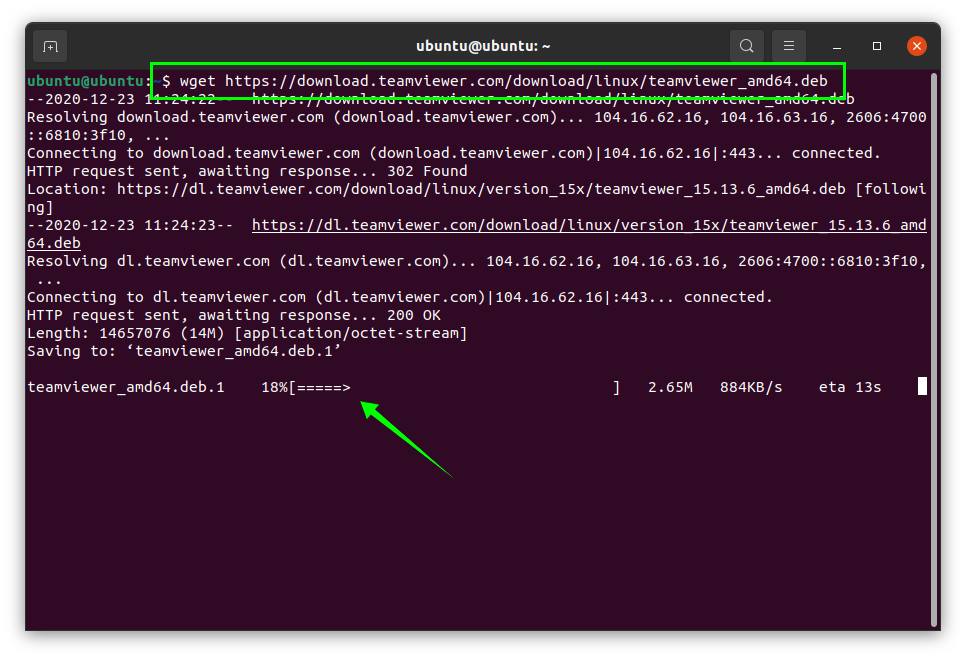
After installing Gdebi, it is now time to download the TeamViewer package. Issue the following command in the terminal to download TeamViewer onto your system:
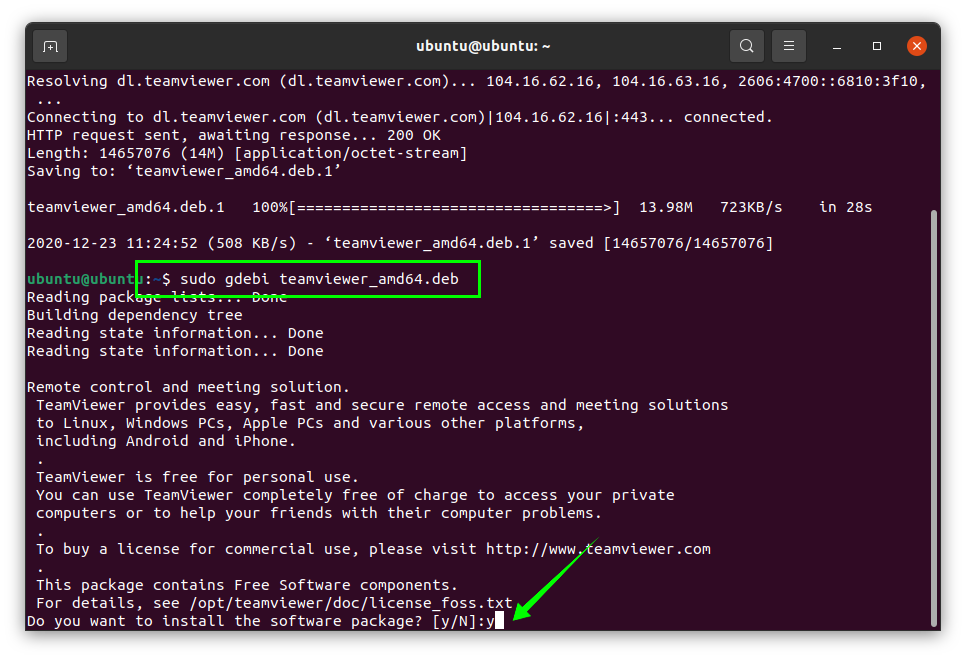
Then, execute the following terminal command to install the Gdebi package:
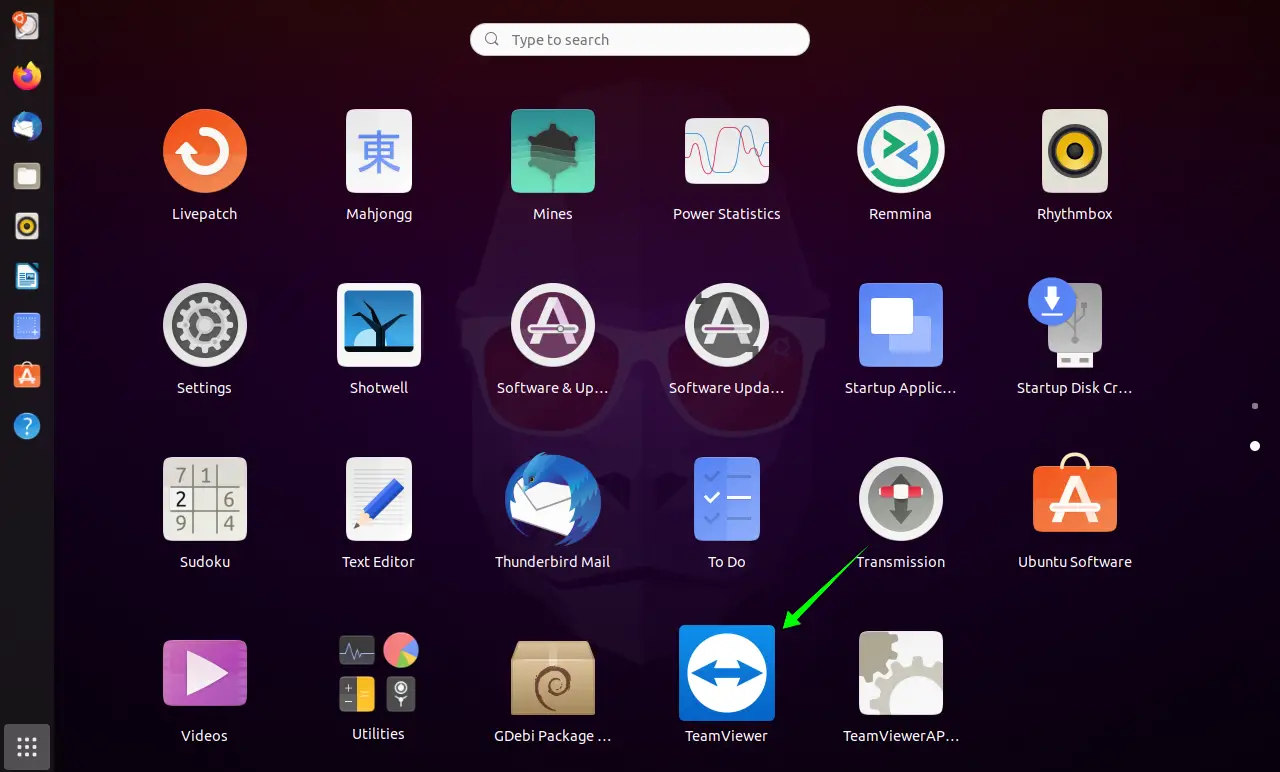
Press Y/y to continue the installation. The TeamViewer package can now be seen in the Applications list, as shown in the image below:
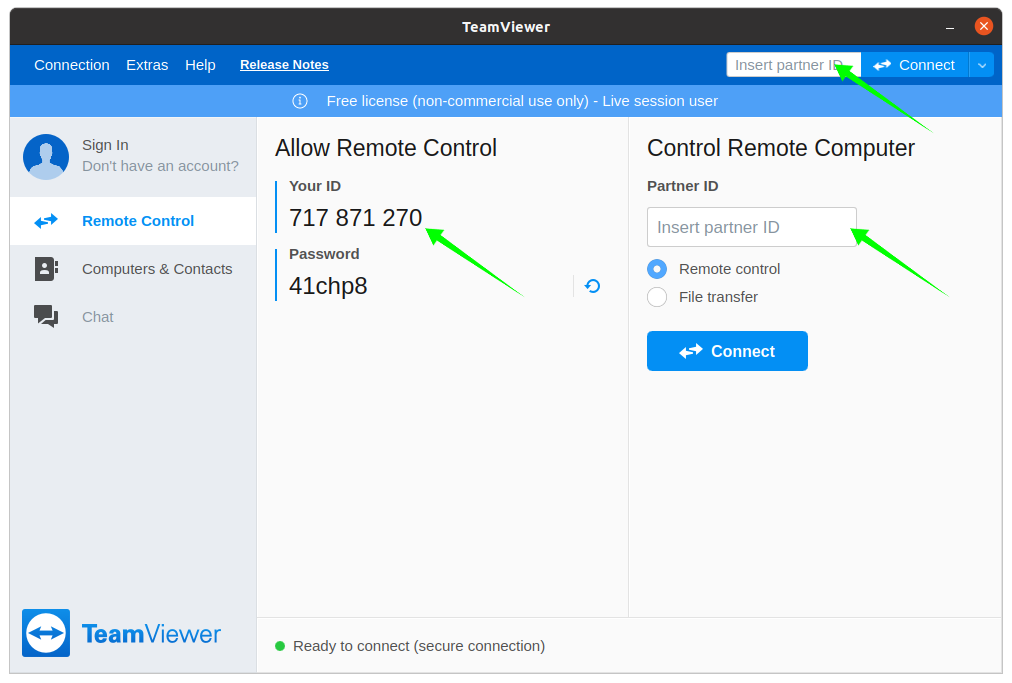
Open the TeamViewer application by clicking on it, and the following window will appear:
This application window includes various options within it, such as Sign In, Computers & Contacts, and Chat. You can give TeamViewer access to your device by sharing your dynamic ID (Your ID) and Password. Similarly, remote devices can be accessed by putting in the Partner ID. TeamViewer will ask for the partner password, as well as for the connection. The partner could be anyone whose device you wish to access.
Uninstalling TeamViewer from Ubuntu 20.10
To uninstall Teamviewer, issue the command given below:


