
The Shutter is a Linux-based program for screenshots that is open-source and full of features. Screenshots of a window, desktop, menus, or any specific area can be taken with ease. Apart from that, there is a fully-featured editor to edit the captured screenshots. The editor’s most notable features are adding text, highlighting areas, putting in arrows, cropping the image, and adding different effects.
Moreover, Shutter allows to share images through FTP and comes with multiple plugins to enhance productivity and change the appearance.
Let’s check how to install Shutter on the latest Ubuntu:
How to install Shutter on Ubuntu 20.04 (LTS) and 20.10 using GUI:
The first and straightforward approach of installing feature-rich screenshot takers is using Ubuntu’s software center. Firstly, open software center:
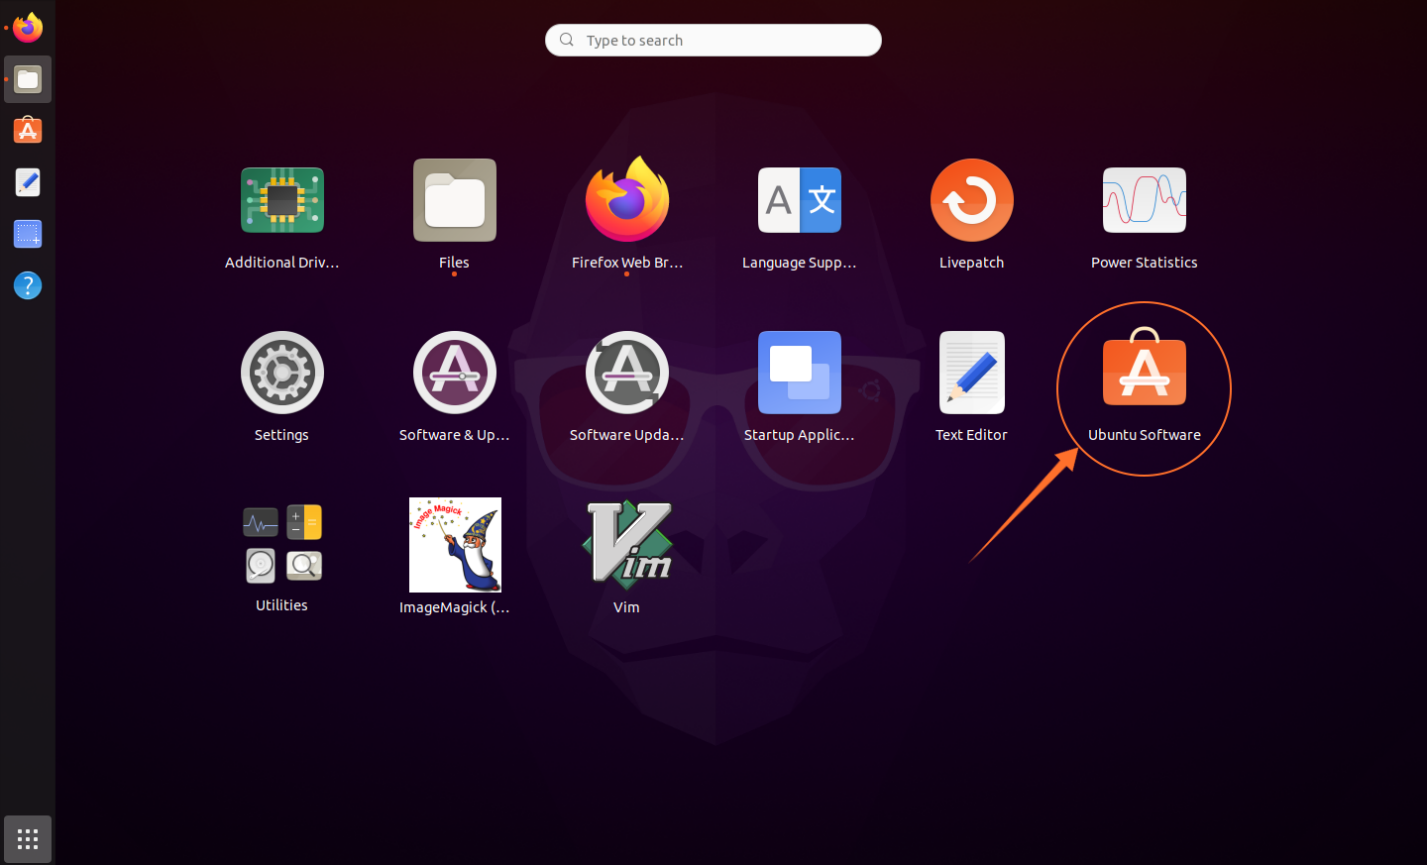
Search “Shutter”:
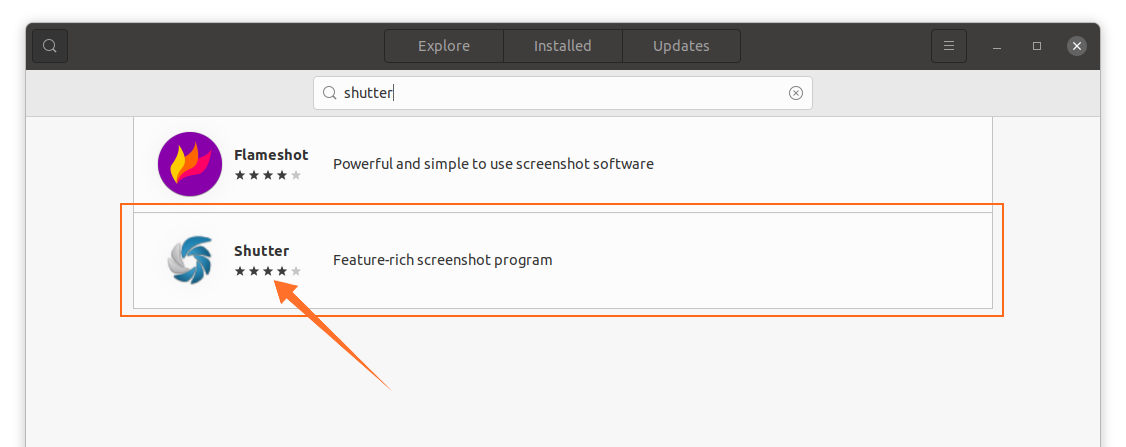
Open it and click on the “Install” button to download and install it:

Once the installation is finished, the app can be viewed in applications:
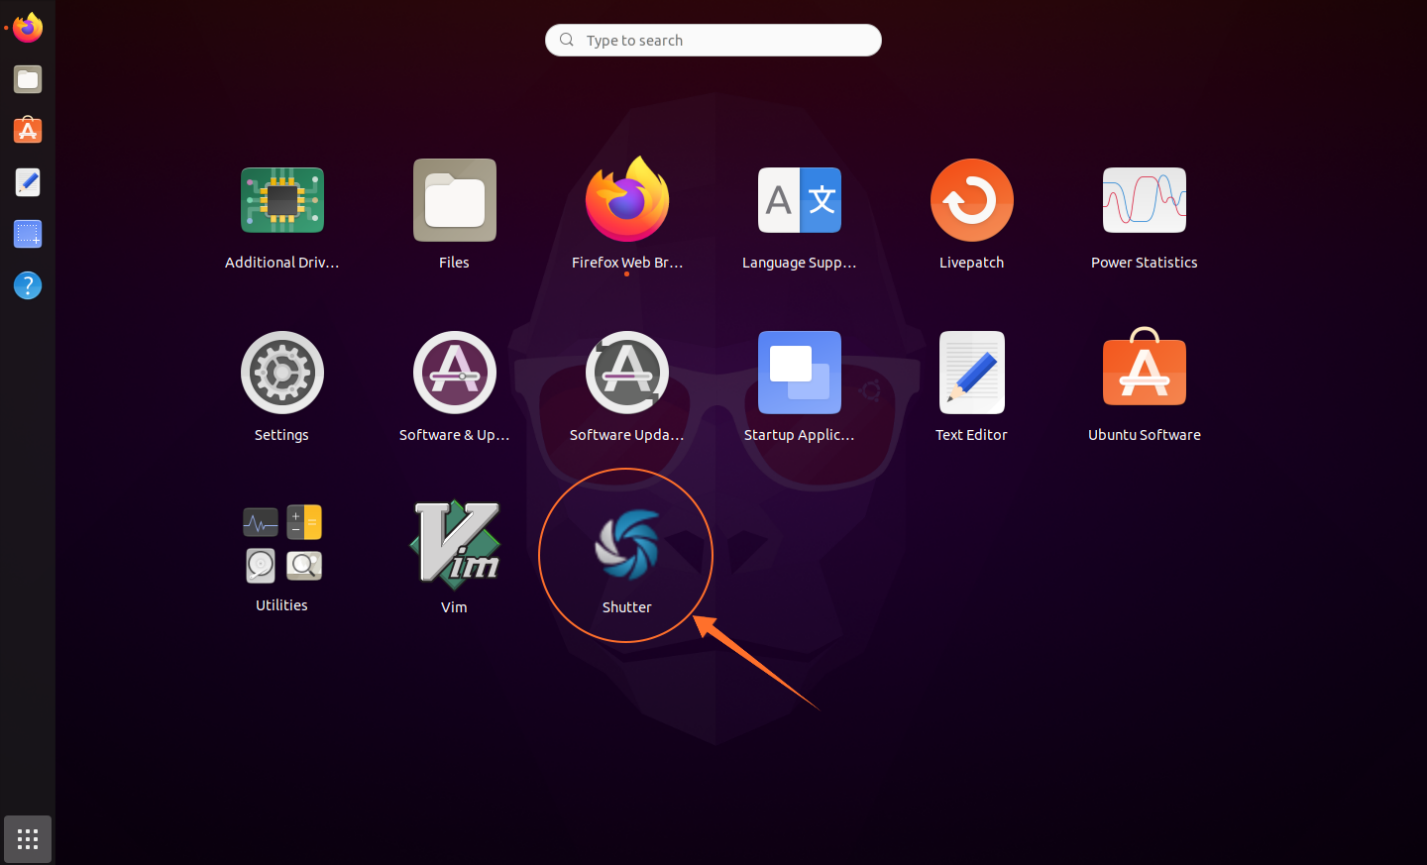
Open it:
How to install Shutter on Ubuntu 20.04 (LTS) and 20.10 using the terminal
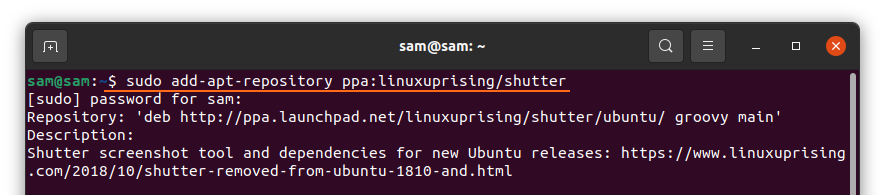
The second approach of getting Shutter on Ubuntu is using the terminal. Open terminal and type the following command to enable repository:
To update the packages list, use:
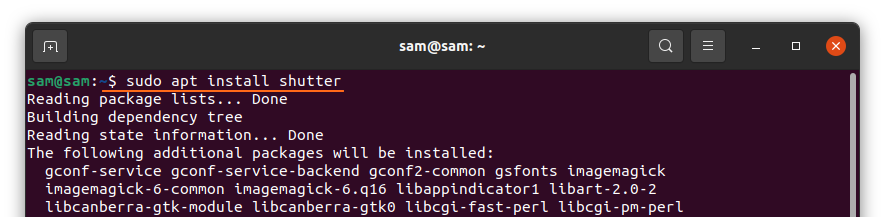
Now to install Shutter:
How to use Shutter:
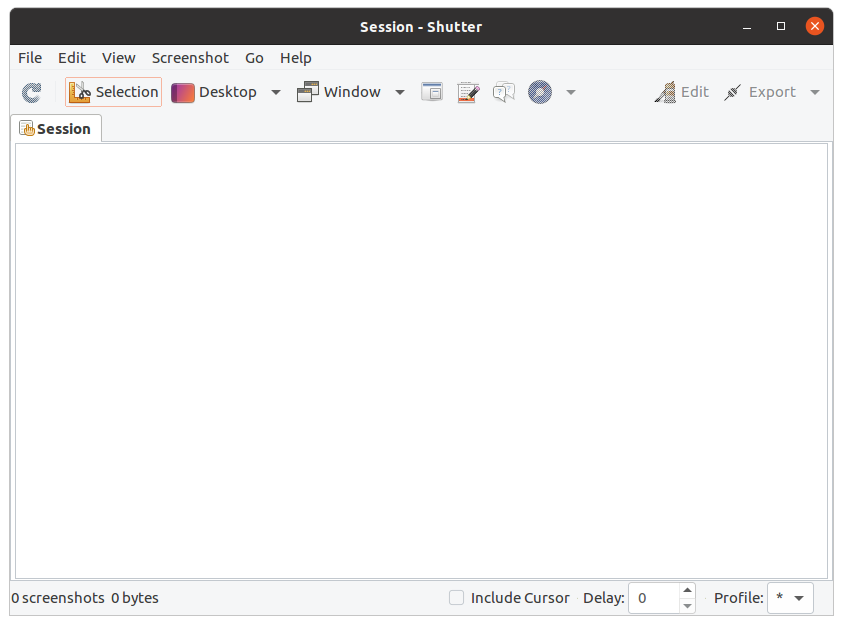
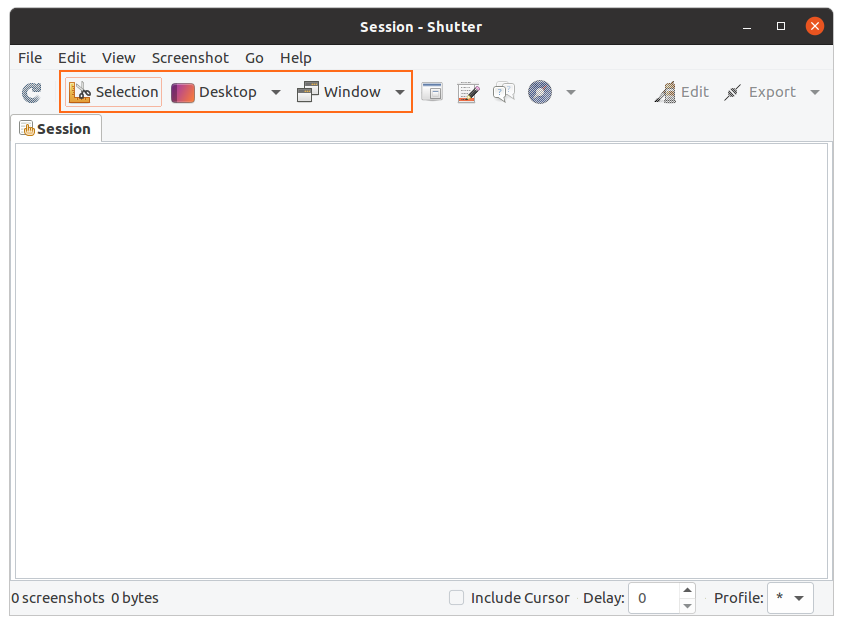
Once the installation is done, open Shutter. There are various options. To take a screenshot of a window, desktop, and any particular area, click on the specific button:
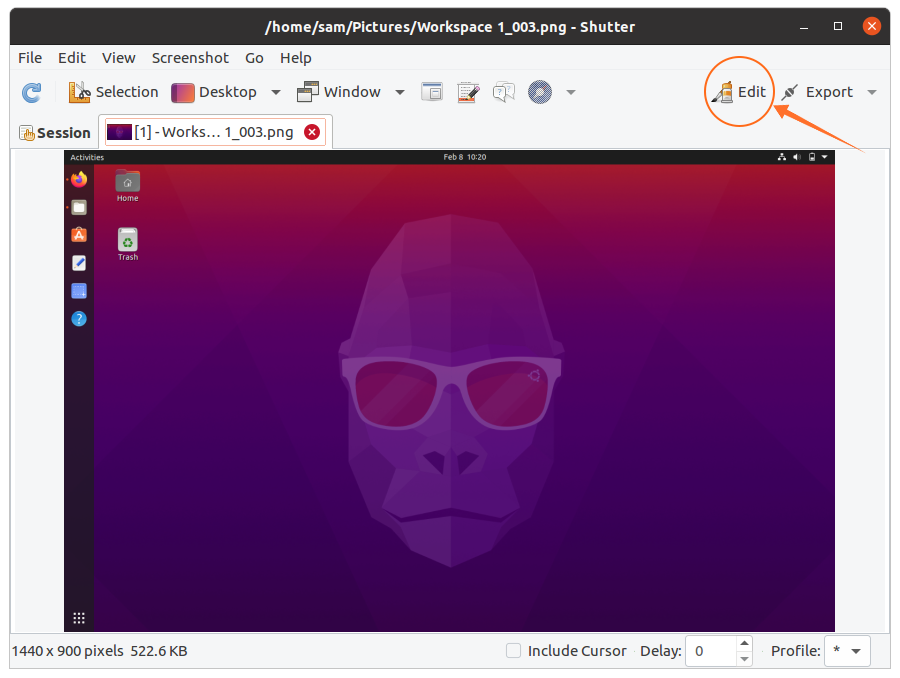
To edit it, click on “Edit” to modify the captured screenshots:
Here you can add text, highlight a particular line and even freely draw anything:
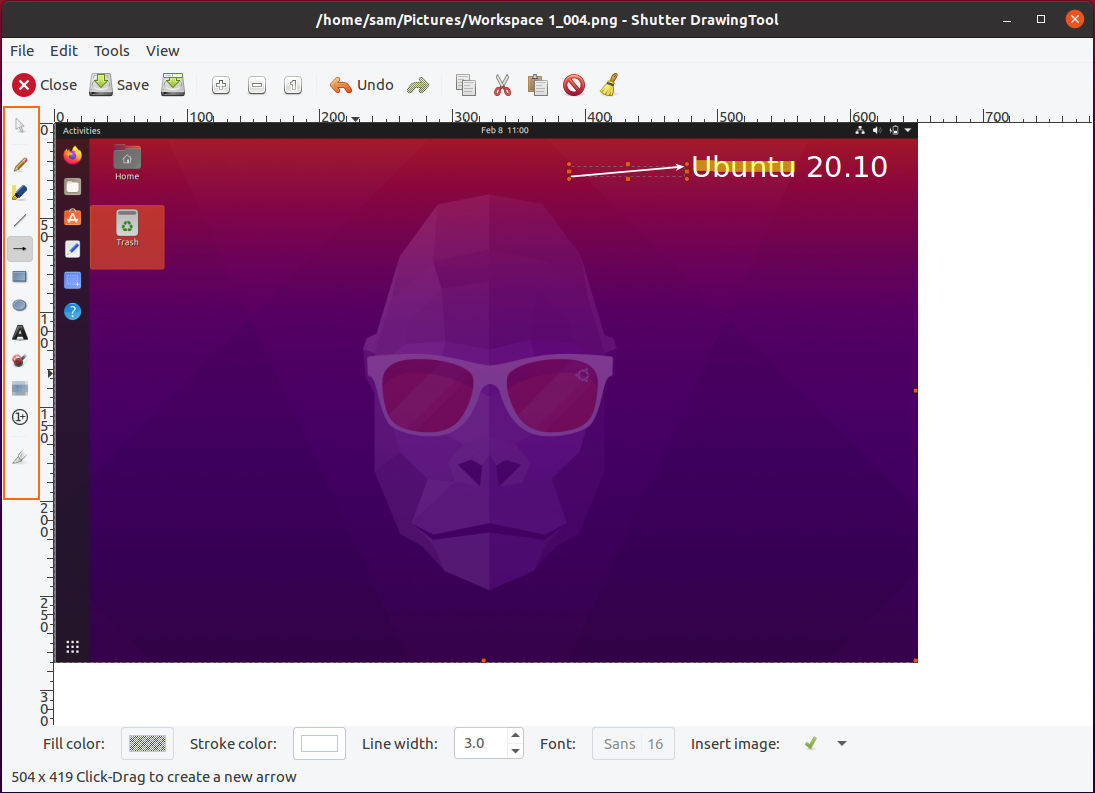
After editing, click on the “Save” button. Now click on “Export” to upload or share image:
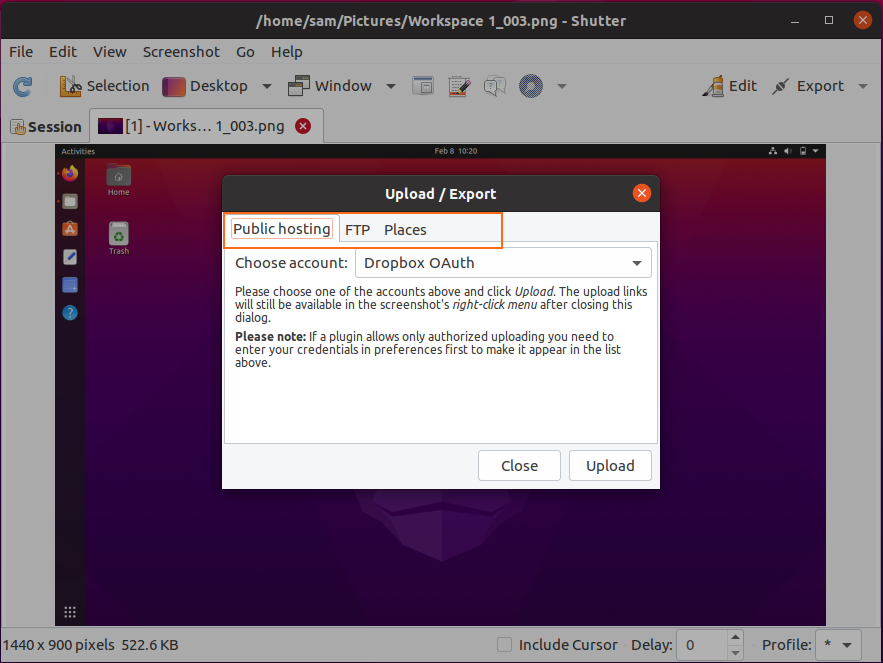
There are various export menu options; screenshots can be uploaded to dropbox, FTP, or saved in local drive.
How to uninstall Shutter from Ubuntu 20.04 (LTS) and 20.10:
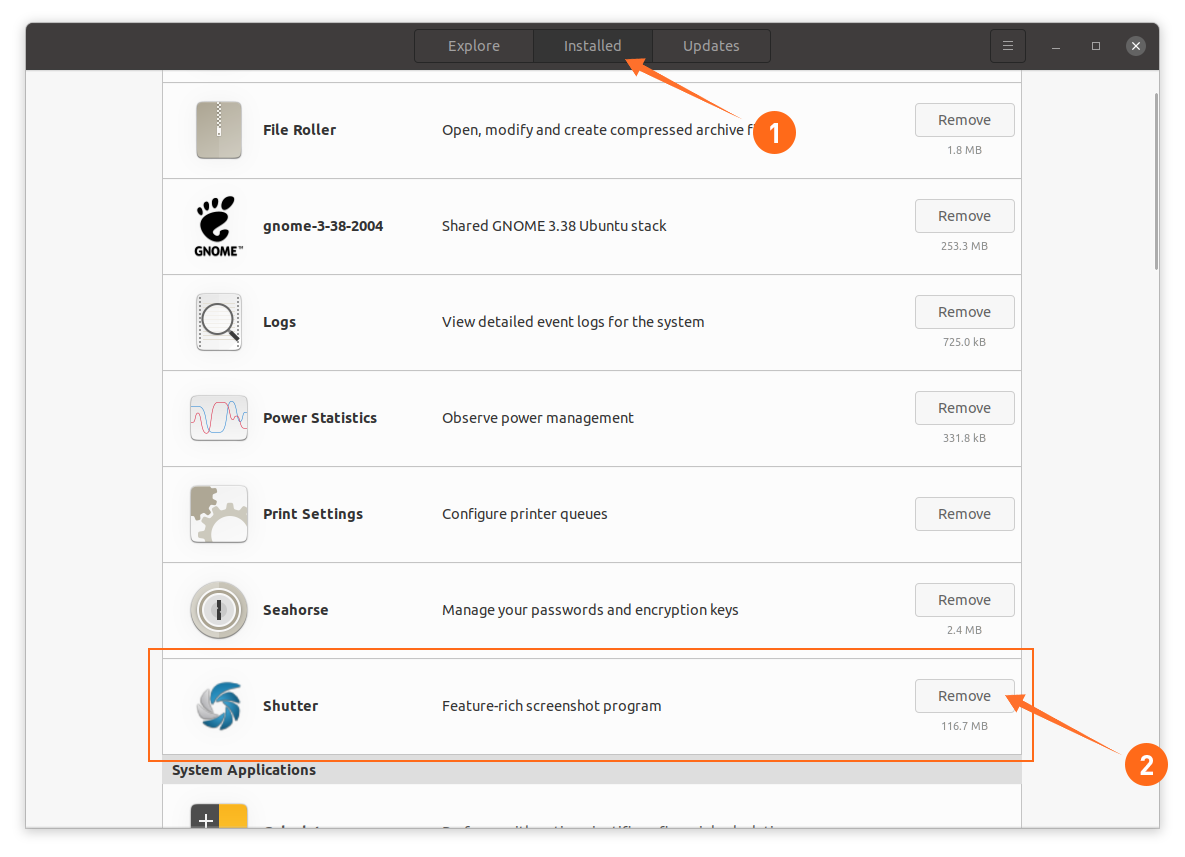
If the Shutter tool is installed using GUI, then to delete it, launch software center, find “shutter” in the installed applications, and remove it as shown in the image below:
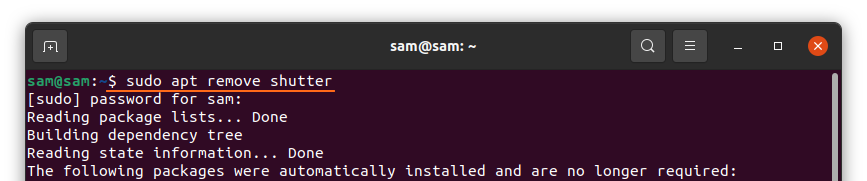
If it is installed using the terminal, then to remove it, use the below-mentioned command:
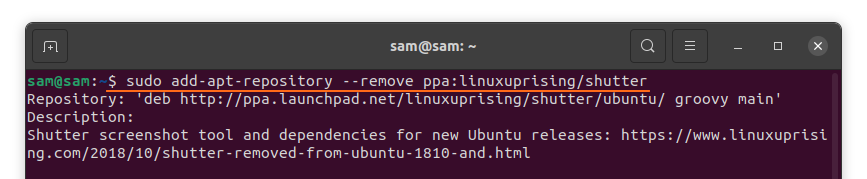
To remove the repository, use:
Conclusion:
One of the most useful attributes of Shutter is its own screenshot editor that comes with features like adding text, arrows to point something and highlight a specific area. This post-installed the Shutter tool on Ubuntu using various approaches and then learned how to uninstall it along with its repository. Ubuntu has its own screenshot-taking program, but it lacks a lot of features that Shutter offers.