Network or system administrators have to properly look after the network, as they are supposed to provide an uninterrupted service within a network or system. For this, they must undergo several network checks to continuously monitor the network performance; several diagnostic tools allow network administrators to check the connectivity over the network, such as ping. However, another command is used for network diagnostics that is “traceroute” in Linux and macOS, while the same command is named “tracert” on windows OS. Traceroute command maps the route data from the source to the destination; the traceroute command is used to trace the paths that data packets take from their source point to destination point. In this detailed guide, we will explore the use of the traceroute command in Ubuntu with several examples.
How to install traceroute on Ubuntu
If you have not installed the traceroute, it will report an error upon execution. So, you must have to install it before applying the command: to install traceroute; execute the following command:
The syntax of the traceroute command is mentioned below:
How to use traceroute
Once it is installed, you can use it in Ubuntu; before getting into details; let’s look at the basic use of traceroute:
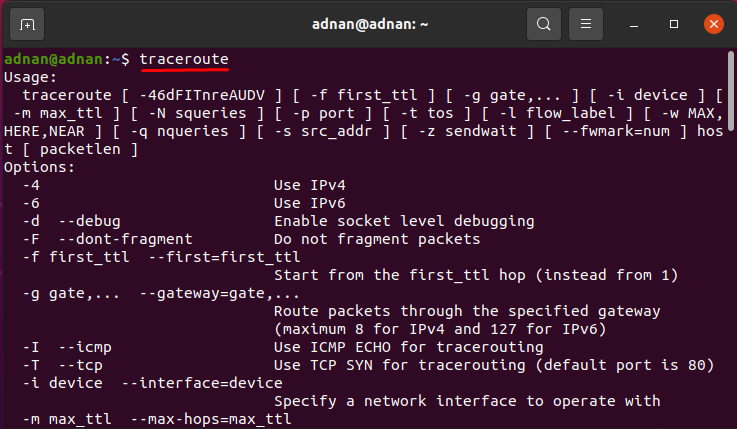
You can use the following command to get the complete usage of traceroute:
Moreover, the following command will show the tracerouting for youtube.com
Or
There are few important notions that we can get from the output; there are few values on the first line of the output that is described below in bullets:
- The IP address of the destination
- Number of Hops: it is a numeric value and shows how much time the traceroute will try to reach the destination (the default value is 30)
- Number of Probes you are sending per Hop or number of packets per Hop (default value is 3)
- The last major point is about the size of packets you are sending. (its default value is 60bytes)
These all values can be set according to your requirement:
The traceroute command supports a list of options that can be inserted for various purposes; have a look at them:
How to set number of probes using traceroute command
You can set the number of Probes that are being passed: by default, 16 probes are passed simultaneously; you can adjust them using the “-N” option: the command given below will set the number to 10:
How to limit the number of Hops using traceroute command
By default, there are 30 Hops; but you can set your own value by using the “-m” option: for instance, the command below will check the website for only 4Hops to reach the destination. You can observe the tracerouting is executed only until 4Hops.
How to limit probes using traceroute command
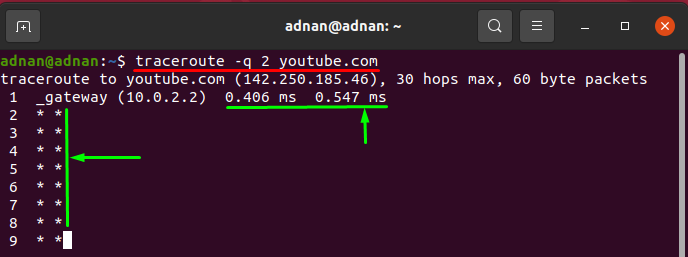
You can set a number of probes using the “-q” flag with traceroute, by default, three probes are displayed at every Hop: this option can be adopted when you want quick responses:
The command below will limit the number of probes to 2:
How to adjust Hop response rate using traceroute command
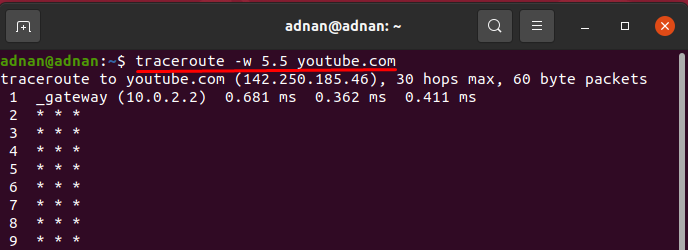
With the help of the “-w” option, you can increase the number of seconds that each Hop must wait to show the result. It gets only float values, so you have to pass a floating number (6.0, 6.5); and it is foreseen that increasing the number of Hop times will show a better response: the command given below will set the wait time of 5.5ms for each Hop:
How to adjust the size of the packet using the traceroute command
You can adjust the size of packets being sent per Hop; the default size is 60byte; the following command will resize packets to 50bytes.
How to set number of Hops using traceroute command -f option
The “-f” option of the traceroute command will print the result from the Hop number that you specify; you can choose the number of Hops from where the result will be displayed: for instance, the example shown below will start printing the result from the 10th Hop.
How to adjust pause time between probes using traceroute command
You can set pause time between probes; the default time is 0ms, but you can change it using the (-z) traceroute switch; the command given below will print Hops one by one with the time gap of 1ms:
Conclusion
Various network diagnostics tools are available such as traceroute and ping in Ubuntu. In networking, it is the duty of network admins to take care of the network; traceroute is one of the key tools for system or network admins. This guide provides a brief explanation of the traceroute command; with the help of the traceroute command, one can determine the delays in responses of network paths and look for routing loops (if present) in the network.


