Install Oracle JDK 9 on Ubuntu 17.10
JDK or Java Development Kit is used to develop Java applications. It is used by Java developers all over the world. There are two implementations of JDK. One is developed by the open source community, which is called OpenJDK. The other one is developed by Oracle, which is called just JDK. The OpenJDK is completely free of charge, and you’re free to do whatever you want with the source code. Basically it’s more open in nature. The JDK provided by Oracle is licensed to Oracle and has some proprietary components. It’s also free, but it’s not as open in nature as OpenJDK.
In this article, I will show you how to install Oracle JDK 9 on Ubuntu 17.10 Artful Aardvark. Let’s get started.
Downloading Oracle JDK 9
Oracle provides a compressed tar file and rpm file of Oracle JDK 9 for Linux. On CentOS/RHEL or any other RPM based Linux distributions, you can easily install Oracle JDK 9 using the rpm package file. But on other distributions such as Ubuntu, Debian, Slackware etc., you should use the compressed tar file. Since I am using Ubuntu 17.10 in this article, I will also use the compressed tar file.
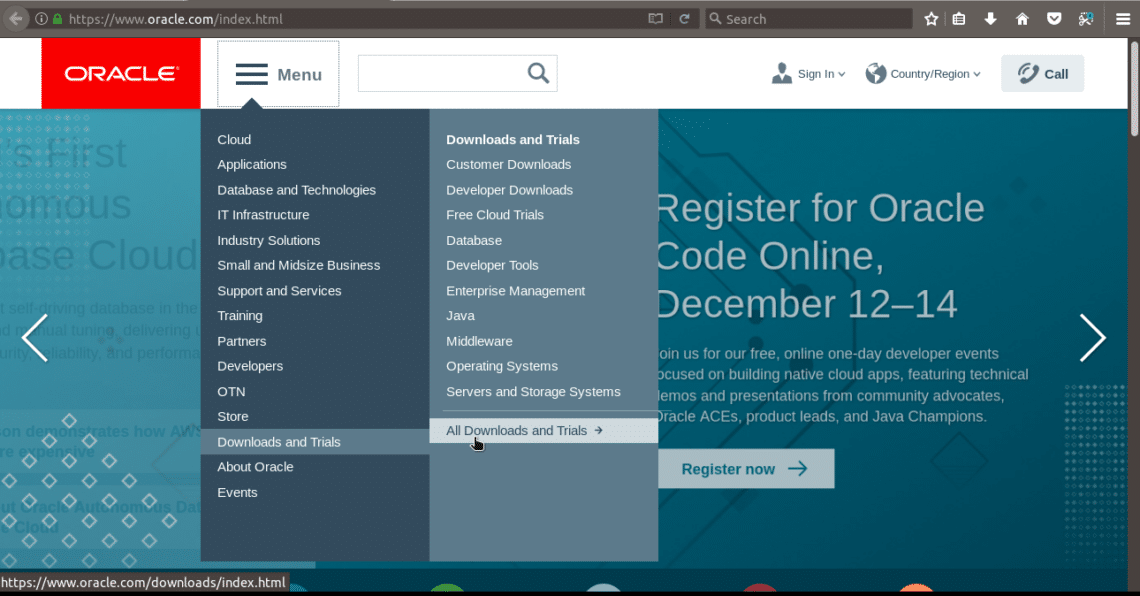
To download Oracle JDK 9, go to https://www.oracle.com from any web browser and click on the “Menu” and then hover over “Downloads and Trials” and then click on “All Downloads and Trials” as shown in the screenshot below:
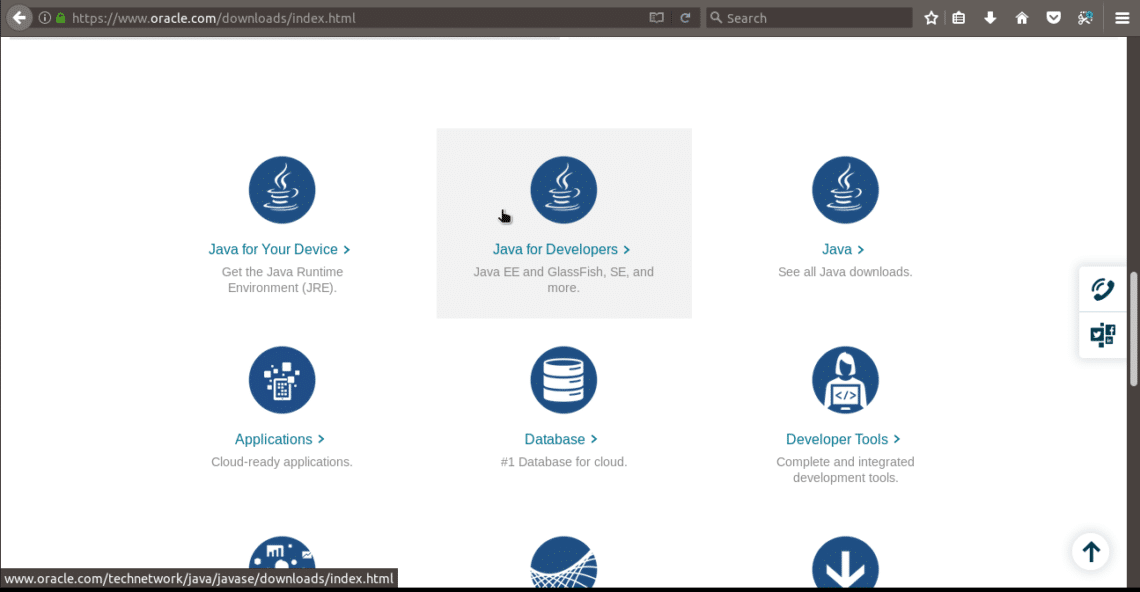
You should see the following window. Scroll down a little bit and Click on “Java for Developers”.
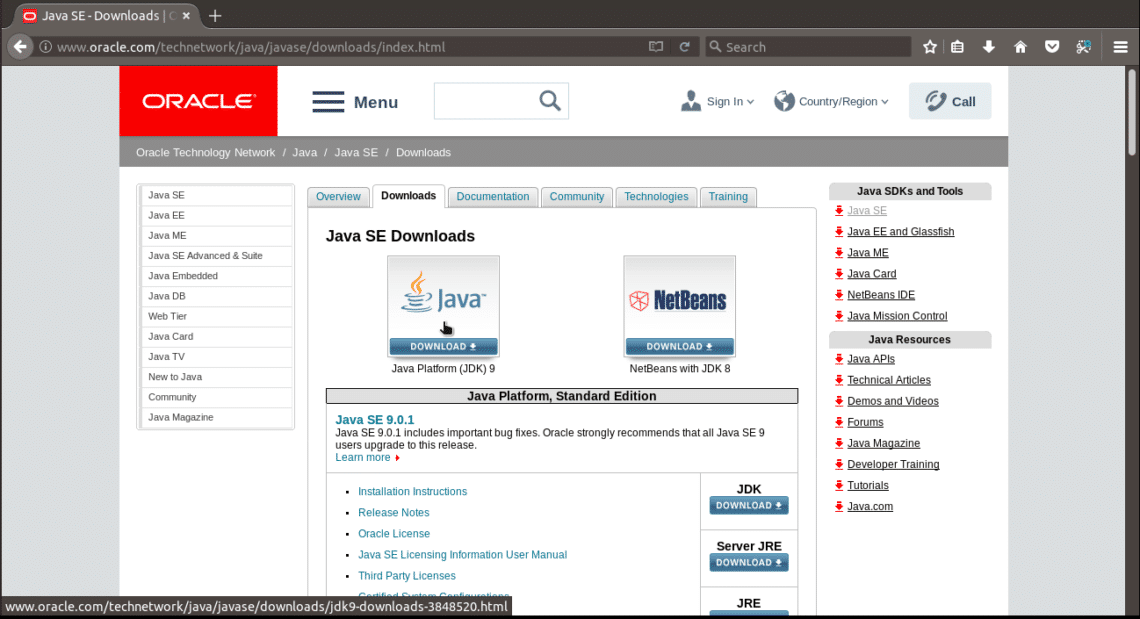
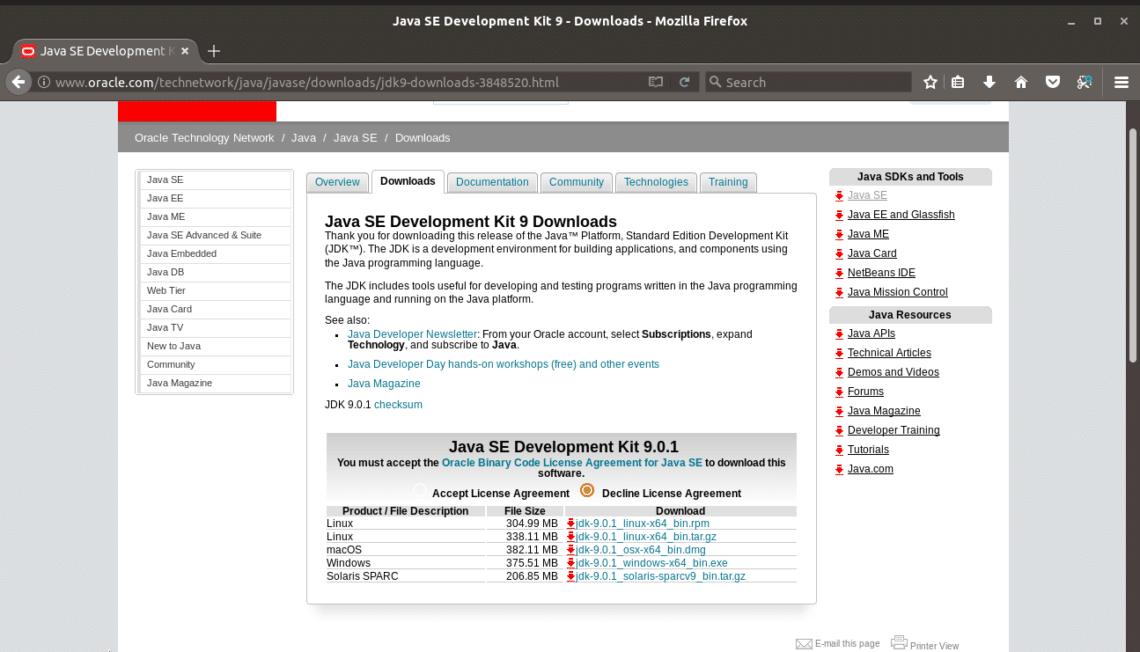
Then click on “Java Platform (JDK) 9” icon and shown in the screenshot:
You should see the following window. First you have to accept the license agreement. Then you will be able to download Oracle JDK 9 for Linux.
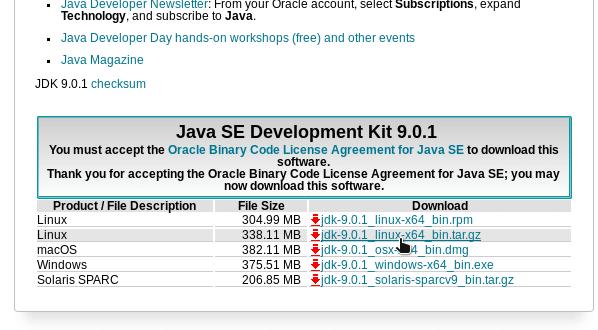
Click on “Accept License Agreement” as shown in the screenshot.
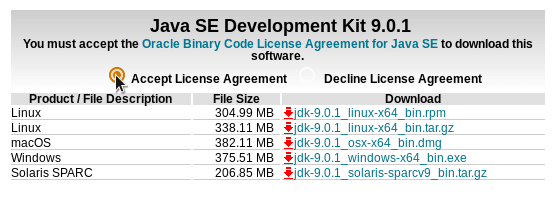
Once you accept the license agreement, click on the file that says “Linux” in the “Product / File Description” and file name ends with tar.gz as shown in the screenshot.
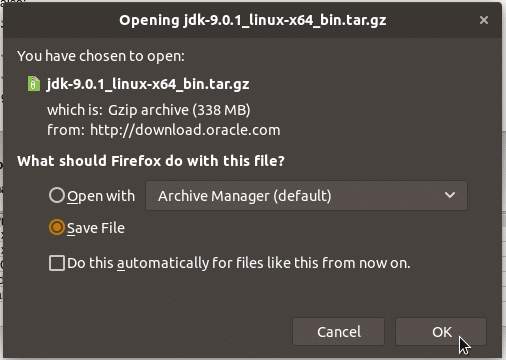
Now save the file. It’s a pretty big file, and may take a while to download.
Installing Oracle JDK 9
Once the download is complete, open a Terminal (Ctrl+Alt+T on Ubuntu) and go to the directory where the file is downloaded with the following command:

Now run the following command to extract the file on /opt directory. Note that, /opt is the directory where I am installing Oracle JDK.

You can see that the file was extracted on /opt
Note the name of the directory which is in my case ‘jdk-9.0.1’

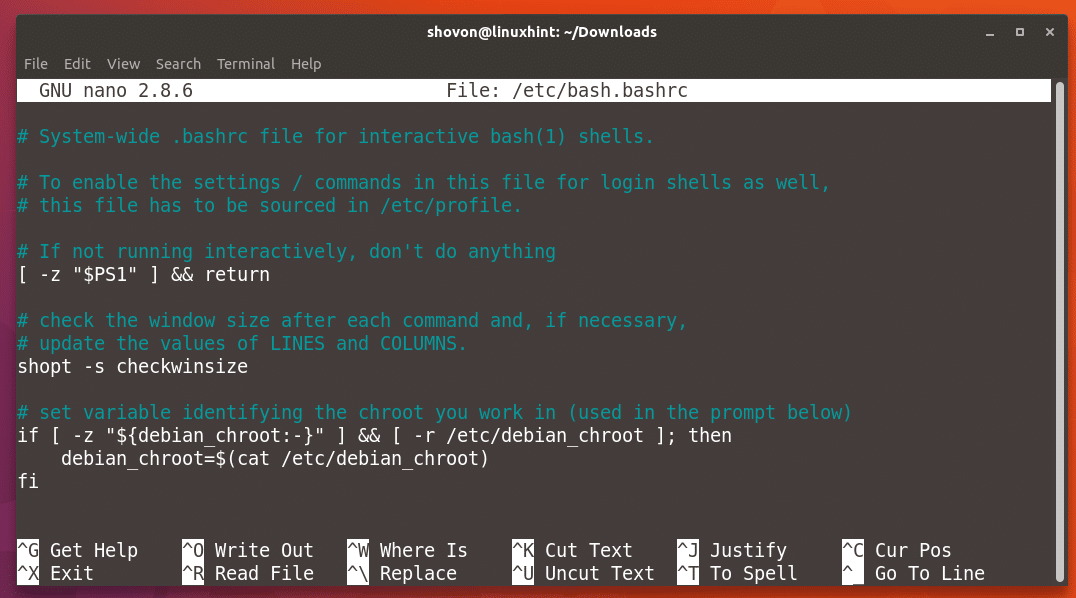
Now we have to add Oracle JDK 9 to our path. To do this, edit /etc/bash.bashrc file with the following command:

You should see something like this.
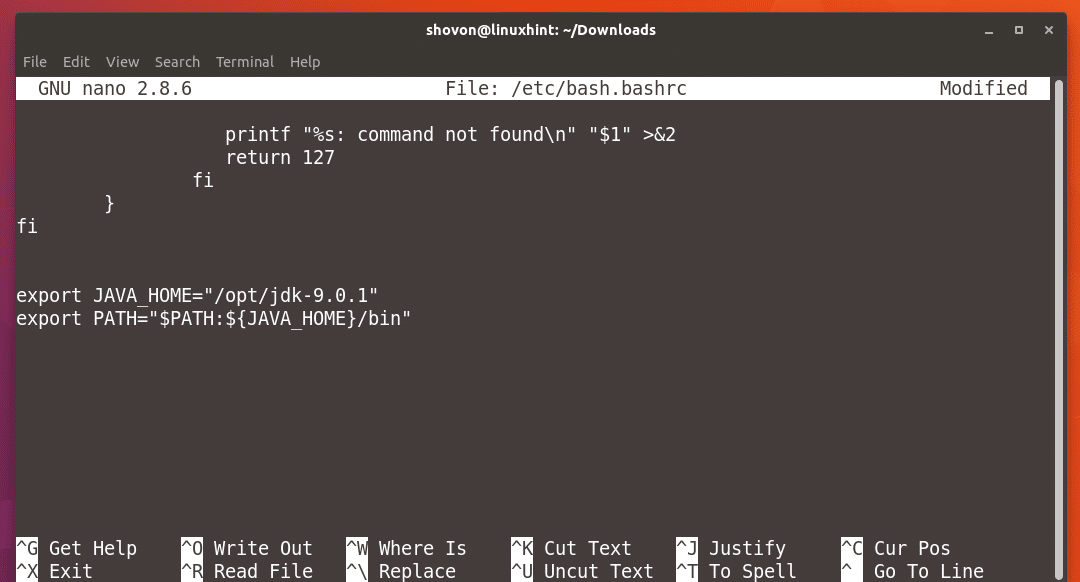
At the end of the file, add these two lines and save the file by pressing Ctrl+X and then press ‘y’ and <Enter>.
export PATH=$PATH:${JAVA_HOME}/bin
Now restart your computer with the following command:

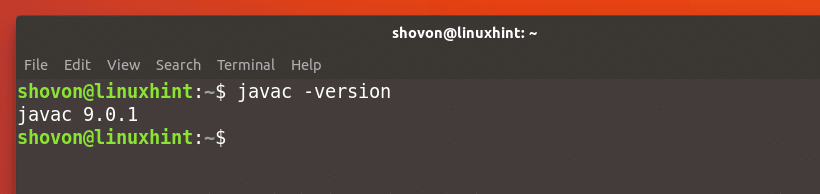
Once your computer boots, you can run the following commands to test whether Oracle JDK 9 is in the PATH:
$ javac -version
You can see that java was found in the correct directory.

The version of java compiler is also 9.
I will just write a simple program and show you that it compiles successfully on JDK 9.
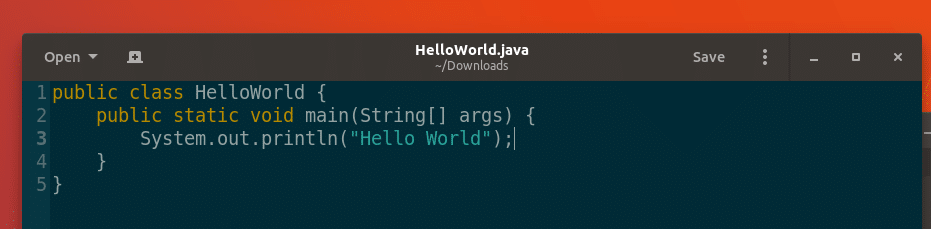
You can see that, the program was compiled and ran correctly.

So, that’s how you install Oracle JDK 9 on Ubuntu 17.10 Artful Aardvark. Thanks for reading this article.