
To accomplish the purpose of developing and running Java programs, JDK is equipped with a variety of tools such as Java Runtime Environment, Java loader, Java archiver, compiler, and much more. As JDK is platform-independent and have key importance in Java programming, we have compiled this guide to get Oracle Java 16 JDK on Ubuntu.
How to install Oracle Java 16 JDK on Ubuntu
Let’s perform the installation using the Debian package by following the steps provided below.
Step 1: First, you must download Java-16-JDK by visiting the official website of Oracle. The link is provided below:

After clicking the package name, the following license agreement page would appear.
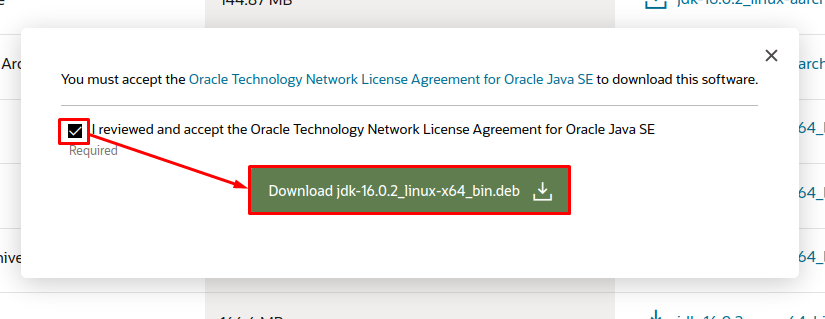
The downloading requires an account of Oracle. You have to create and sign-in to it.

Note: Oracle has changed its terms and conditions and you would be asked to sign-in/sign-up to get the .deb package of the Java 16 JDK.
Step 2: After downloading it, you can install it by using the terminal. To do so, you are required to change the present working directory to where you have downloaded the file. In our case, it is in the “Downloads” directory:

Now use the following command to start the installation of the downloaded file.
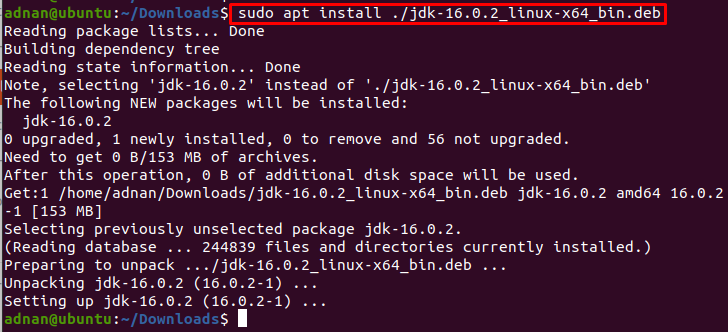
Apart from this, you can carry out the installation of the .deb package in the following manner as well.

The above commands would install the Oracle JDK on your Ubuntu. However, the system cannot recognize it until you set the environment variables.
For instance, we have tried to get the version of java, but the command returned an error.

How to set environment variables for JDK on Ubuntu
After installation, it is required to add the necessary environment variables. To do so, open the “.bashrc” file as follows:
Add the following lines to the “.bashrc” file
$ export PATH=$JAVA_HOME/bin:$PATH
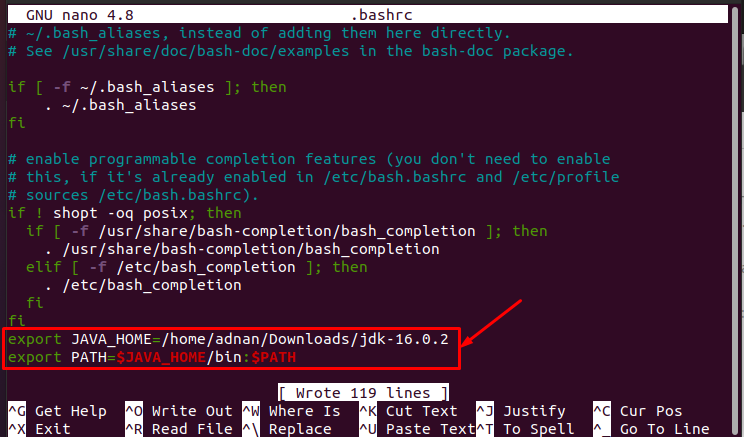
Press “CTRL+S” and “CTRL+X” to save and exit from the file.
Now, load the “.bashrc” file via the command provided here.
![]()
Now, you will get the version of Java after providing the following command.

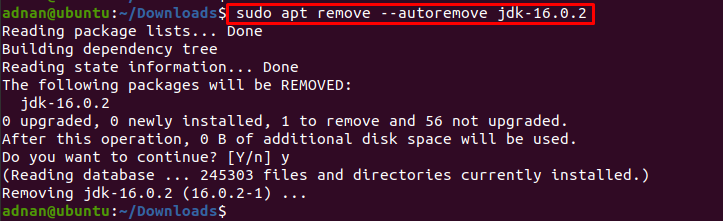
How to remove Oracle Java 16 JDK on Ubuntu
To remove the Java 16JDK from your Ubuntu system, the following command would remove the Oracle Java 16 JDK from Ubuntu.
Apart from this, you can make use of the dpkg command to remove the Oracle Java 16 JDK as well by using the command below.

Conclusion
The Oracle Java 16 JDK can be installed on Ubuntu by using the Debian package of the JDK. This article provides an installation guide of Oracle Java 16 JDK on Ubuntu. JDK comprises various tools that assist the development and testing of Java-based applications. Here, you would have learned the installation of Oracle Java 16 JDK and setting up the environment variables for Oracle Java 16 JDK on Ubuntu. Additionally, we have also demonstrated various ways to remove Oracle Java 16 JDK from Ubuntu.