Vim and Emacs are two of the most powerful command-line editors for Ubuntu, but they have a steep learning curve. Taking a look at the learning resources can overwhelm new users. For such users, there is nano. It is an easy-to-use command-line editor for Linux. So how do you get your hands on a nano text editor? Let’s see how you can install it on Ubuntu 22.04.
Checking if already installed
Like many distributions, nano comes pre-installed with Ubuntu if you opt to download and install updates during the operating system installation. You can run this command to see if nano is already installed on your Ubuntu 22.04.

If you see out similar to the screenshot above, it means that you have nano installed on your machine. If it’s not installed, you will see the following:

Now let’s get started with the nano installation.
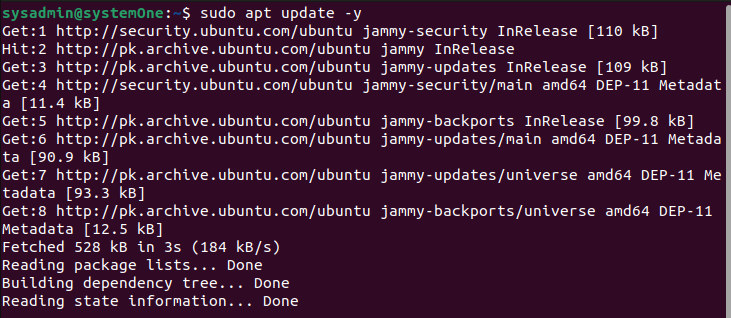
Updating the apt repositories
Running the following will resolve any dependency conflicts and ensure that the installation runs smoothly.
Once this is done, you can use “apt” to start the installation.
Installing Nano
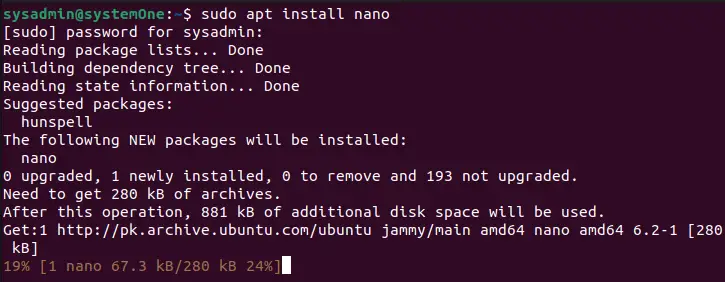
Run this in your terminal to get started with the installation.
When the prompt returns, your installation has been completed.
Launching Nano
Once the installation has been completed you can simply launch nano by typing the name in the terminal.
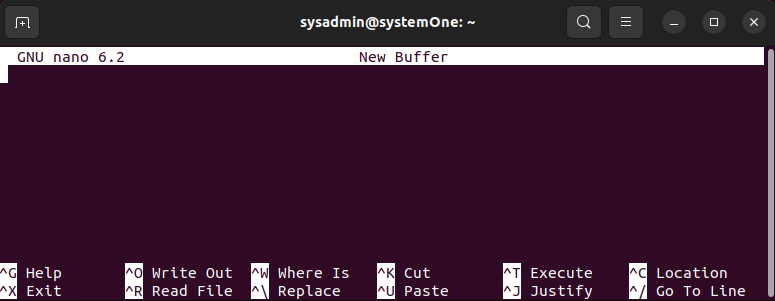
Pressing “Return” on this will launch a nano and open a new file.
You’ll see a handful of useful shortcuts at the bottom of the terminal window. As it’s been around for longer than many of the computing conventions, you’ll see that the shortcuts for copy and paste are very different. Now, this window shows us a new file. We can simply go ahead and start editing the file.
Open a file
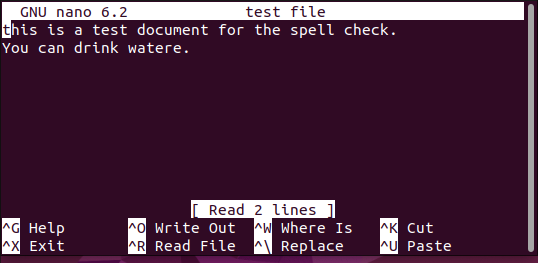
When you want to open a file, you can start up the terminal in the directory containing your file or navigate to your desired directory and use the nano command to open up your file using the nano editor. As we named the file “test file”, we can open the file using this:
Pressing return with this command will open up the file in nano editor.
Editing the files
Unlike vi and vim, nano doesn’t feature any modes. It means that you can simply open up any file and start editing it right away.
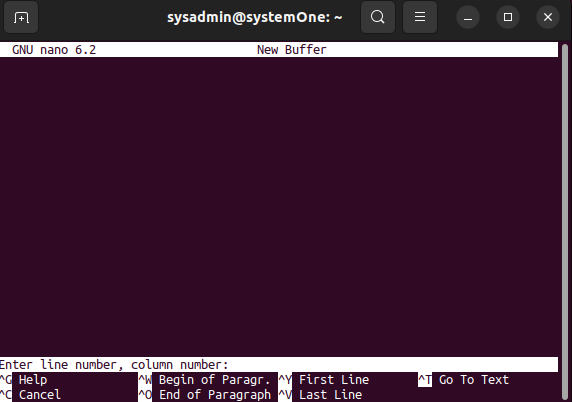
You can press the “Ctrl+_” to navigate the cursor to a specific character number or line. You’ll see the options at the bottom changed and you get a prompt asking you to “Enter line number, column number”.
Copying, cutting, and pasting within the files
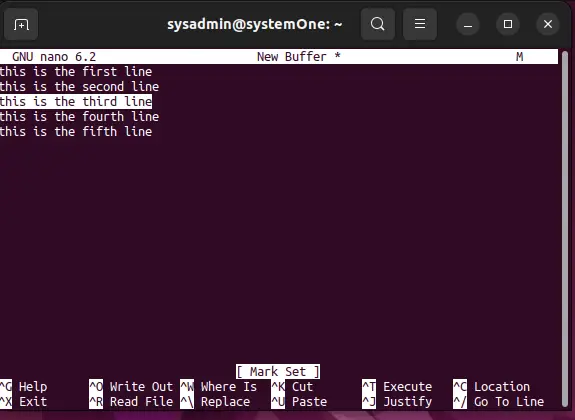
To perform any of the heading functions, you need to select some text. Move your cursor to the start of your desired text and press “Alt+a”. This will add a selection mark to the start. Now, navigate to the end of the text using the arrow keys. Let’s copy the third line:
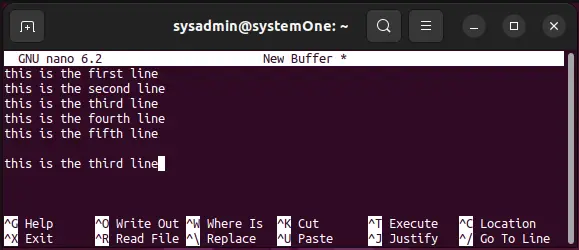
Now, press “Alt+6” to copy the text, doing so will remove the selection. Move your cursor to the location where you want to copy the text and press “Ctrl+U” to paste the text there.
Similarly, you can use the “Ctrl+K” and “Ctrl+U” combinations to cut and paste your desired content.
Running a spellcheck
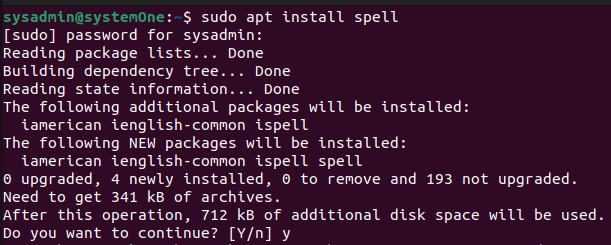
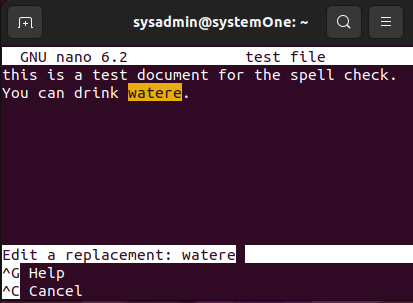
Unlike Microsoft Word, you don’t get everything bundled with the base installation. If you want to spell-check your document, you’ll need to install the package for it. Run this to install the spell-checking package:
Once this is completed, you can simply open any text document and press “Ctrl+T” to initiate a command session and, then press “Ctrl+S” to spellcheck your document.
More information
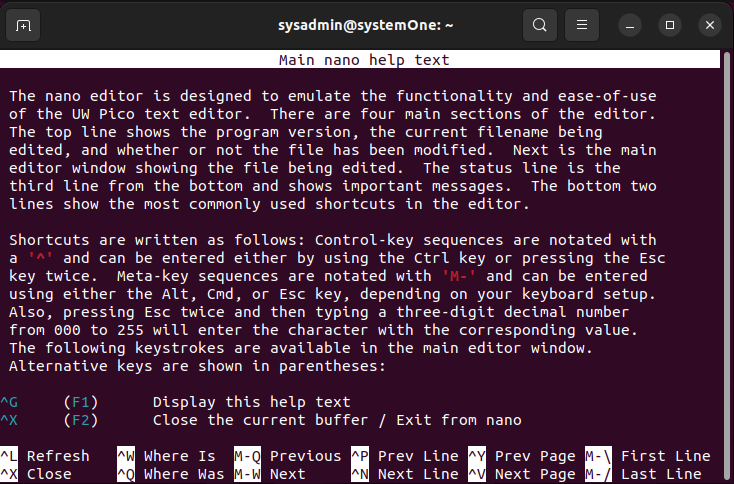
If you want to learn more about nano on Ubuntu 22.04, you can press “Ctrl+G” to access the help section.
Using the shortcuts at the bottom, you can navigate through it and learn more about how can you employ the plethora of features and functions to get better at it.
Uninstalling Nano
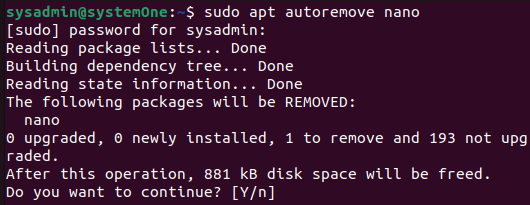
If you feel like you are done with nano and want to remove it from your Ubuntu 22.04, you can use this to remove nano:
This will trigger the uninstallation process and remove nano along with the dependencies.
Conclusion
If you followed the tutorial through and through, you now know how to install nano, how to navigate through the basics of nano and how can you uninstall it. If you run into any issues installing or uninstalling it, feel free to drop a comment below and I will help you out.

