This write-up will give you the details about the mentioned query.
How to Install and Import PowerShell Active Directory Module?
Installing and importing the PowerShell Active Directory Module has three major steps. Let’s get into them one by one, starting with installing RSAT, followed by enabling and installing the AD module.
Section 1: Install RSAT
The RSAT is a Windows Server component used for the remote management of computers and also the running of the operating system. To install it on your Windows, look at the provided instructions.
Step 1: Move to Settings and Launch Apps
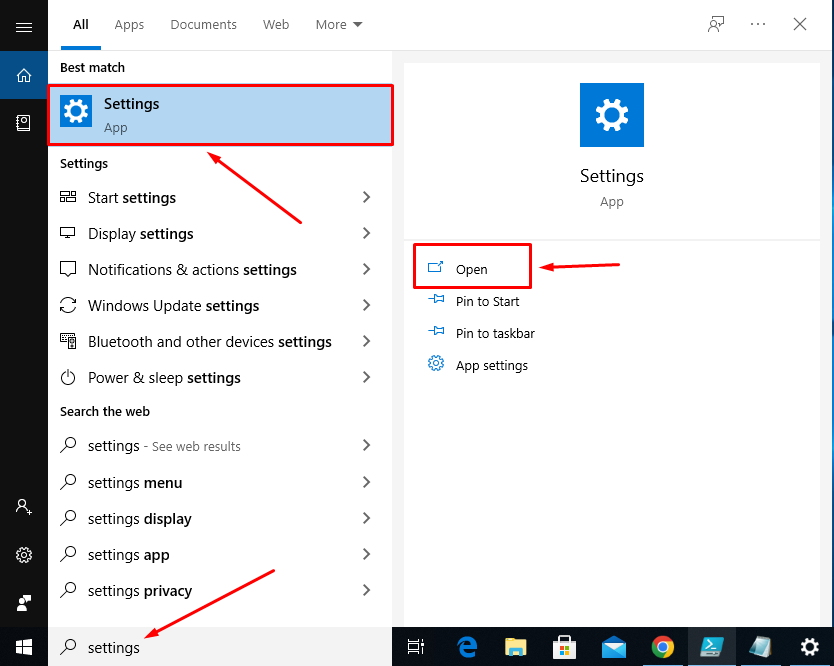
From the Windows search bar, open Settings:
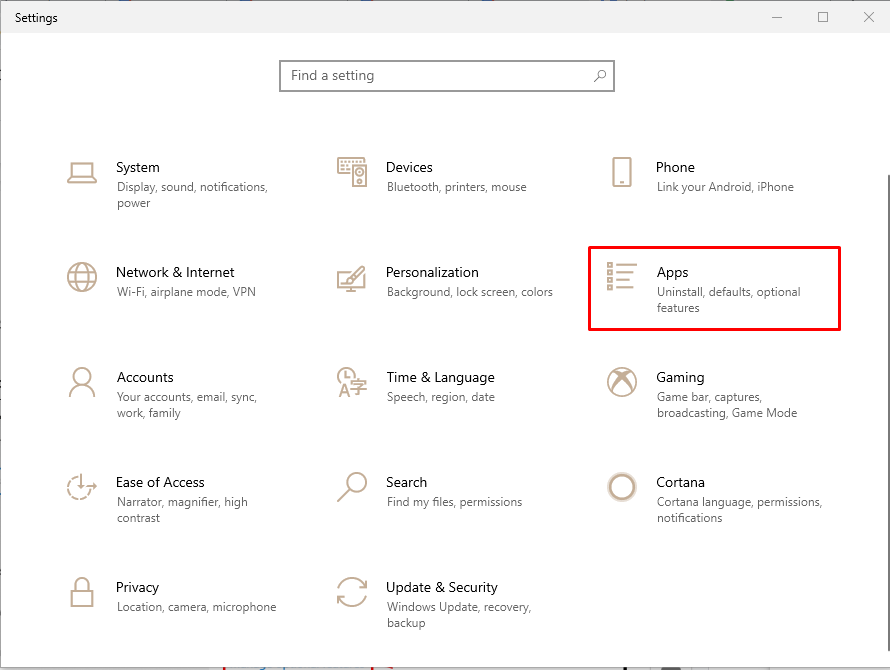
Inside the Settings window, open “Apps”:
Step 2: Open “Manage optional features”
On the right windows pane, click on “Manage optional features” to open it:
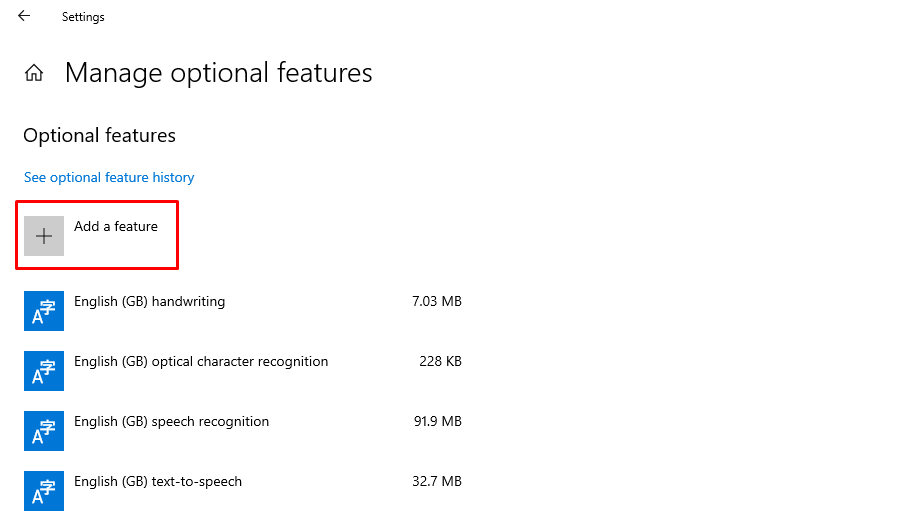
Step 3: Add a feature
Click on “Add a feature” as shown below:
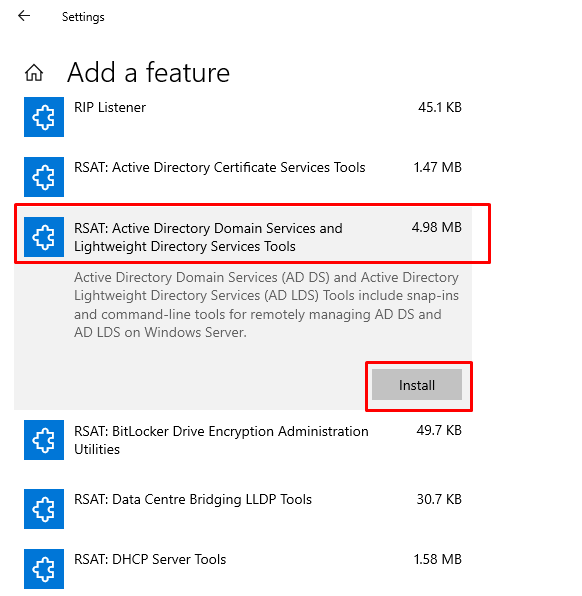
Step 4: Search and Install RSAT
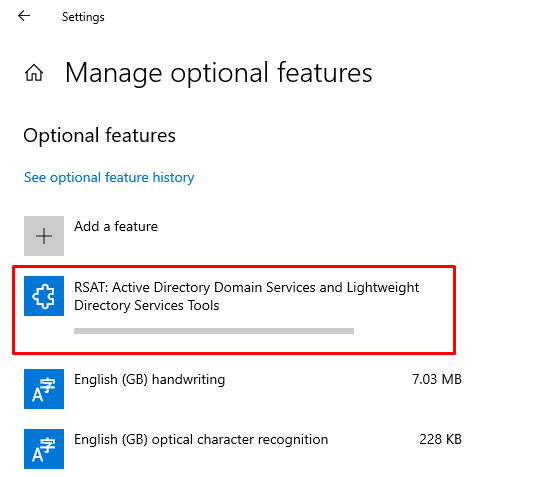
Look for “RSAT: Active Domain ………..” and click on the “Install” button:
As a result, the RSAT installation will be started instantly:
Section 2: Enable the Active Directory Module
After installing “RSAT”, the AD services can be found on your system. To enable the PowerShell AD module, perform the following steps.
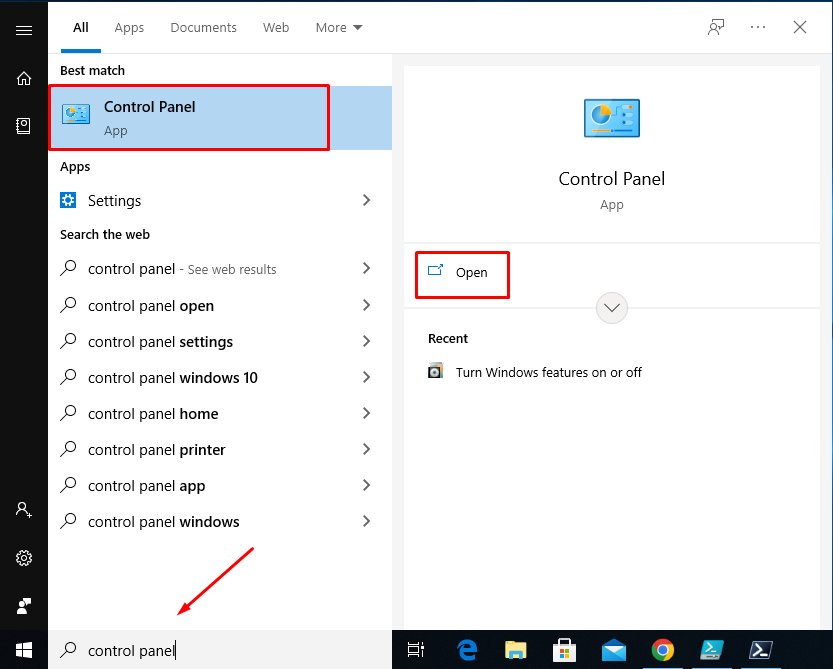
Step 1: Open Control Panel
Now, open the Control Panel from the Windows Start menu:
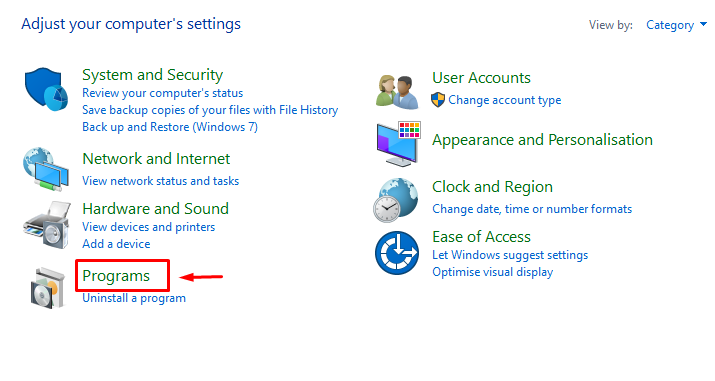
Step 2: Launch Programs
Open “Programs” from the “Control Panel” menu:
Step 3: Navigate to “Turn Windows features on or off”
Open “Turn Windows feature on or off” placed under the “Programs and Features” section:
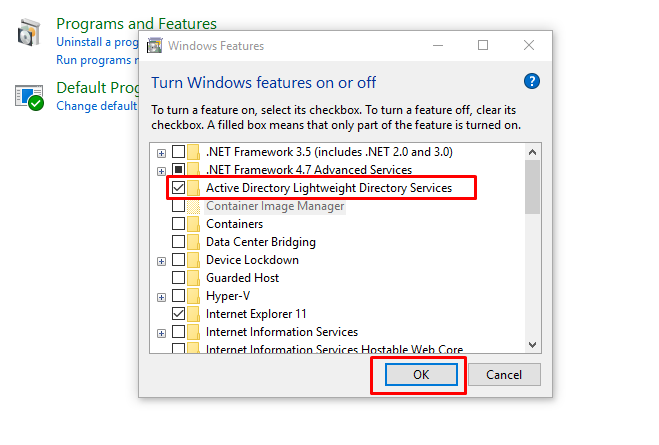
Step 4: Activate the AD services
Mark the check box “Active Directory Lightweight Directory Services” and click “OK” to enable it:
You have successfully enabled the “Active Directory Lightweight Directory Services”.
Section 3: Import PowerShell Active (AD) Module
Now, you are all set to import the Active Directory module. To do so, open the PowerShell with administrator privileges and use the “Import-Module” command to import the AD module (named ActiveDirectory):
To verify the import is successful, run the “Get-Module” cmdlet with the “-Name” parameter as shown below:
It is observed that the AD module has been imported.
Conclusion
To install and import the Active Directory module, first, install the “RSAT” and then enable it from the control panel. Lastly, import the active directory module using the PowerShell “Import-Module” cmdlet. This tutorial has demonstrated all the aspects of installing the Active Directory (AD) module.

